Labels

Tuesday, 23 July 2013

Wargames Head Quarters ~ The die is cast...

Hi All,

Well I have gone and done it, I've set the wheels in motion, I have now launched my Kickstarter to launch my dream and set up a Wargames Holiday Centre "WARGAMES HEAD QUARTERS"...

http://www.kickstarter.com/projects/2005581317/wargames-head-quarters-a-holiday-centre-for-table?ref=search

I have already put some of my money into this project and plan to plough in all the remainder of our savings to fulfil this business project, this is it, no more working for other people, its down to me and me alone!!!

The plan is good, I just have to get the remainder of the finances in place and away we go, hence the Kickstarter project, so if you or you know of anyone who wants to support me in this please support the project but more importantly please let others know of my Kickstarter set up...

I am also looking for collections of figures, terrain etc., for sale, hire etc., and would not be adverse to any comments, advice or help in any form or type, please just let me know, comment or email me, no idea is a bad idea...

~~~~~O~~~~~

Now this has been a dream of mine for a number of years, as it probably has been for many gamers and will be for future war gamers, but since being made redundant in April and with a great amount of encouragement and support from my better half and family, I am well into the process of putting together a business for a new War Gaming Centre the "Wargames Head Quarters" down here in Torquay, Sunny Devon, a war games holiday centre in all intents and purposes, but I will not be calling it that due to the name already being used elsewhere in the country.

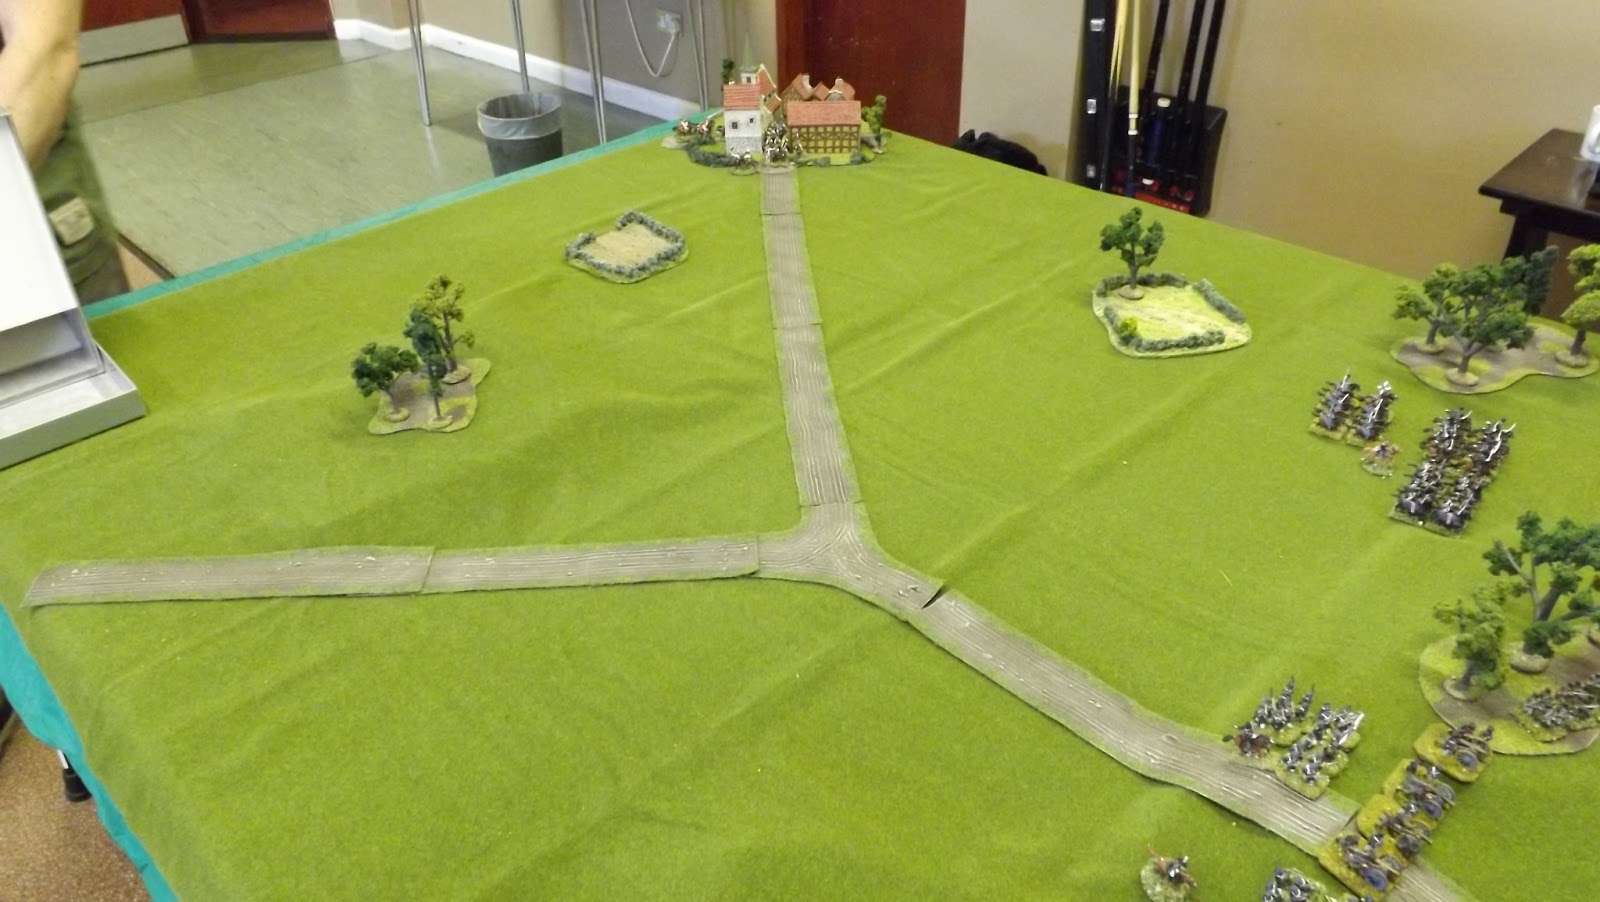
The plan is to have a minimum of a 18' x 12' gaming area, this will be the minimum, table space is massively bigger than this at the moment, I have to re-gig the layout though, planning for larger, to facilitate 10 to 20 players a time, maybe more, and to have workshops for terrain building and painting service, a storage area, a soft furnished relaxation and briefing area, an office area, and a front of house sales room.The terrain will be of a durable, flexible nature to represent the battlefields of the Napoleonic campaigns, starting with Waterloo, Gettysburg and ACW battles, Normandy/France, the Sudan, and Zulu Natal...
Project room with tables installed yet to be converted for terrain and wargames use each table area ie between the blue posts is 7'x4', so there will be a minimum of 21'x 14' playable area... with much more scope for expanding if required...
Project room view 2 tables are yet to be cut down and terrained for use, but you can see the idea...
Project room area where the proposed soft furnished briefing room and board/smaller games room will be situated...

Very early stage pictures of the property that I am proposing to rent, it requires some TLC, but its sound and the framework is there in place ready to roll...

 Bookings are planned to start the first weekend in February 2014 and run through until 1st weekend of November, there will be 40 full weekends planned, Friday PM through to Sunday PM, and 20 full weeks Monday AM through to Friday PM available, depending on bookings and club requests we may increase the full weeks to meet demand and or specific club or group requests.

I have found an ideal building for this, and plan to get started as soon as possible.

I will update as and when progress is made with pictures and information.

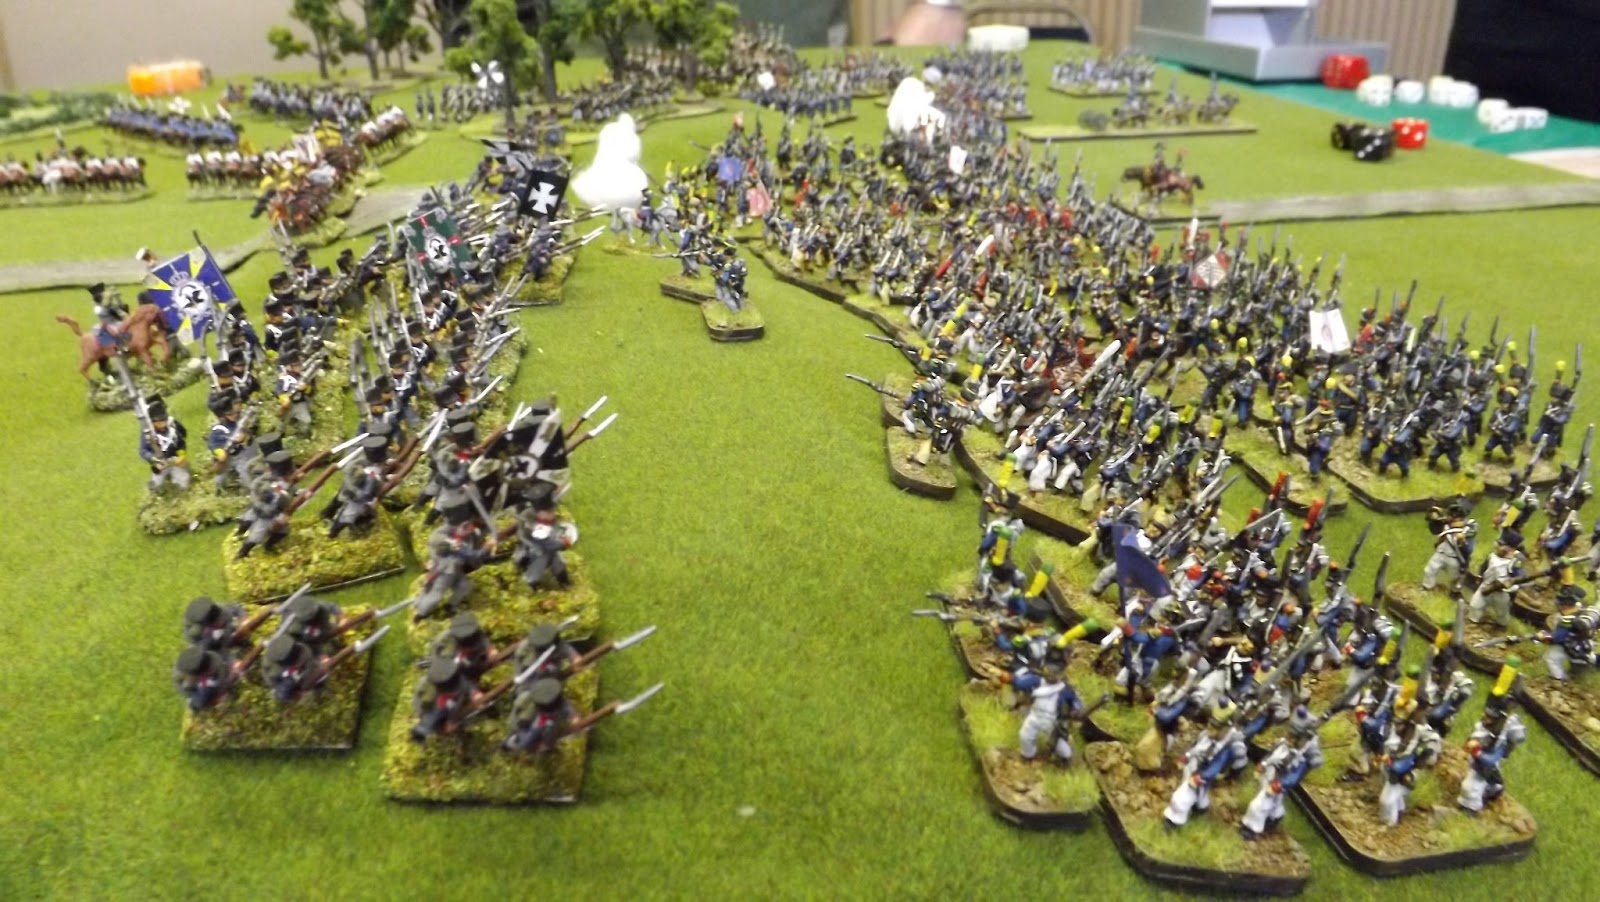
The periods I am planning to cover will be Napoleonic 28mm primarily then American Civil War 28mm, Sudan 28mm, and World War Two planned 15mm for bigger battles and flanking manoeuvres etc., & then into Zulu 28mm, ., and 28mm WW2 gaming for the close in actions, Wild West 28mm, Ancients & Medieval 28mm and, eventually to cover most periods and battles once set up and successful.
Allied Napoleonic Divisions collected so far, much much more on the way...
French Infantry so far...
French Cavalry so far...
Saxon Allied Corp...
Lassalle with the Chassuers...
ACW Union Corps so far... much much more on the way...
Rebel forces building up...
ACW Rebs on the march...
Sudan Brish force building up nicely... lots more egyptians required...
Sudan Dervish forces start to mass for the Mhadi and Osman Dinga... More required...

Allied 15mm tank formation building nicely...

Allied 15mm support elements start up force...

Allied 15mm infantry and some German Armour...

More Allied tanks and US Para force start up...

I am in the process of purchasing many more figures, collections and terrain to facilitate this plan to be ready to roll officially in February 2014, hopefully we can open earlier depending on the level of support reached, we may open late 2013 October/November...

If groups wish to come together, and want to play a particular period or battle we can arrange and accommodate where feasible.

Again if you or you know of anyone who wants to support me in this please support the project but more importantly please let others know of my Kickstarter set up...

All the best...

Nathan

Sunday, 14 July 2013

Battle of Exeburg Hill 1813 - Napoleon at War

This weekend gave us the opportunity to get mine and Chas's Napoleonic collections out on the table to fight a scenario from Charles Grant's "Scenario's for Wargamers". The rules used were Napoleon at War.

Our scenario, named the Battle of Exeburg Hill, is a variation of Reinforcements in Defence No 15, which in our game had a Prussian rearguard on the main hill feature, about to be assaulted by a French main force. The reinforcements were the Austrians marching down the road from Exeburg to support their hard pressed Allies and prevent the hill from falling into French hands and thus undermining their overall defence in the area.


The scenario finds a Prussian rearguard defending the hill outside of Exeburg against a French force that has moved into position overnight to attack immediately at first light in an attempt to overwhelm the defenders before the Austrians can aid them.

The Prussian defenders get a look at what's coming their way!
The road to Exeburg was looking a long way away.
The first Austrian brigade set to march, Cuirassiers.
The Prussian Cavalry, whose job was to keep the road to Exeburg open
 With the forces set up the French began advancing with their infantry towards the hill, swinging the cavalry out on their right flank to attempt to force their Prussian opposites back and thus impede the Austrian relief force.

Sound the Pas de Charge, "En Avant", "Vive L'Empereur"
Hold the Line
The French heavy cavalry brigade, three regiments of dragoons
 The French and Prussian guns played on the opposite lines as the infantry closed. As the first volleys rolled out from the Prussian lines the French Voltiguers screened the columns in their approach.

The French close in on the hill as the artillery open fire
With the Austrians approaching, would the Prussians hold?
 Meanwhile the cavalry battle on the flank of the hill went backwards and forwards as regiments rotated in and out of the combat as each side struggled to gain the ascendancy. Where were the Austrians when you need them.

The French cavalry move to push the Prussians aside and close the road
The Austrians led off with their cavalry and by turn 4 they were starting to deploy behind the Prussian lines.

The Austrian cavalry rode hard to support the Prussian line
The cavalry were closely followed by the infantry
The battle on the hill reached a climax by turn 6 with Prussian and French units recoiling from the combats. Still the Prussians held. Suddenly a gap appeared in the lines on the road to Exeburg.

The French and Prussians come to grips
With a gap in the Prussian lines the French prepared to exploit the advantage. However the fighting had taken its toll on the lead columns and the Austrian commander confidently sounded the charge and the Uhlans thundered up the hill preparing to tear into the French masses.

Climax in the centre as battered French infantry fend off Austrian Uhlans

Now it was the turn of the French to brace themselves for what seemed like an unstoppable attack. However the lead French battalion was made of sterner stuff than many of the French command. They coolly unleashed a volley at the Austrian horsemen and awaited their fate. The Austrian unit then failed its saving roll twice (an over-strength unit) thus loosing a base to the musketry, and then failed its "Elan" test thus failing to charge home and fell back behind the ridge.

The Prussians resisted the first French wave, now braced themselves for the second
As the infantry battle was waging the two sides cavalry were going toe to toe. The French were getting the upper hand on the Prussians and forcing the Austrians to divert their cavalry away from the hill to stop the flank collapsing. However as the two sides threw in their battle cavalry with dragoons taking on cuirassiers the Austrian infantry started to arrive in force.

The cavalry battle on the flank became a seesaw affair with neither side able to get the upper hand
The French tried one more gambit to break the stalemate by bringing up the horse guns to support their cavalry. This forced the allied cavalry to trade space to avoid this fire but with the Austrian infantry now in place it was now a case of too little too late.

The game ended with 10 Allied units occupying the hill against 8 French, thus ensuring they retained control and giving a marginal but none the less complete victory to the allies in what was a very hard fought contest.

As the Austrians arrived in strength the battle came to a close
Many thanks to Chas, Vince, Ian and Steve M for a very entertaining days wargaming on a very hot day outside. Like most parts of the UK at the moment we are enjoying a summer heatwave and, with the doors and windows wide open, our venue became quite warm towards the end of the afternoon requiring much needed refreshments in the pub afterwards.

Sunday, 9 June 2013

Pegasus Bridge - Battlegroup Overlord

This week saw the sixty ninth anniversary of the attack on what became known as the Pegasus Bridge. The bridge over the Orne River/Canal system close to Caen, inland from Sword Beach, was a critical objective to secure the left flank of the Allied landings and provide an outlet for later Allied offensives.


This scenario was based on an adaption of Richard Clarke's scenario published in the Too Fat Lardies 2006 Summer Special for "I Aint Been Shot Mum". We have started to play the Battlegroup Overlord rule set and so I adjusted Richard's set up to work with these rules together with a few additions of my own. If you are interested in my adaptions, I will post a description of the game plan on  JJ's Blog .

IABSM scenario adjusted for Battlegroup Overlord

Our game began with the historical start point with Major Howard's lead glider crashed into the wire and the other platoons set to follow on turns two and three.

After the initial shock of crashing into the wire Howard's platoon made off towards the bridge with the engineers in the vanguard tasked with checking it for demolition charges.

Major Howard and the lead platoon disembark from the first glider
As the lead groups closed in, the defences remained eerily silent. Would the night be suddenly lit up with enemy tracer fire?

Unknown to the Para's commander, the Germans would not open fire until the Paras came within four inches of them, simulating the lack of preparedness displayed by the German garrison.

All quiet at the bridge
Once in the perimeter, move, move, move!
The German sentries were on guard at either end of the bridge unaware of the enemy close at hand.

German sentries on guard
As Howard's lead platoon closed in on the bridge, two and three platoons were right behind them ready to consolidate the position.

The other platoons start to arrive from off table
Suddenly as the lead groups approached the bridge ramp, one of the German sentries opened fire killing the lead man.

Suddenly the guards on the bridge open fire
Running back across the bridge for support from his comrade, he yelled "Alarm" as the other man loosed off two quick shots at the approaching figures looming out of the dark.

As the firing increases the guards call "Alarm"
Speed is of the essence
Suddenly, in response to the German fire, a fusillade of rifle and bren gun fire ripped through the air and both sentries dropped.

With the sentries eliminated the engineers check for explosives
The firing had not gone unnoticed by the German HMG section manning the pillbox who sleepily peered out from their vision slit as their comrades grabbed helmets and rifles. They only had seconds to see British Falschirmjagers retreating back down the communication trench having just placed charges on the bunker entrance. The MG42 let rip, killing four men in the group, just as the charge exploded silencing the bunker in flame and smoke.

1st section places demolition charges on the bunker not without taking casualties
The explosion alerted the remainder of the garrison who, seeing the bunker eliminated and British troops swarming into their positions on the opposite bank, fell back on the Platoon HQ and the buildings outside of the perimeter.

The garrison under pressure falls back from the bridge into the nearby houses
The German troops, having overcome their initial shock, opened up a furious volley of machine gun and rifle fire as the Paras attempted to cross the bridge. The first two sections that attempted to run this fire were shredded in it, with all the men killed or wounded.

Howard called a halt to these foolhardy rushes and concentrated his men to return the fire with interest, pinning and killing half the remaining Germans. As the German fire slackened the first British sections were able to gain the opposite bank and enter the empty positions.

The Paras rush forward to occupy the perimeter and mop up
With the Germans engaged at close range the end came quickly and those of the defenders still standing slipped away into the darkness.

The defence goes firm
Now that the bridge garrison was neutralised, Major Howard set about reorganising the perimeter defences and setting up his HQ to radio back the success of the mission to the fire support ships off shore.

As the 21st Panzer Division was known to be close at hand it was important to establish potential ambush sites with the PIATs.

Major Howard sets up his HQ and starts to signal "Ham & Jam"
Suddenly the clanking and squeaking of tracks could be heard in the darkness as German armoured recon units cautiously approached the bridge intent on linking up with the defenders.

Tanks! Tanks!
As the lead tank closed on the first house it fired its main gun to ward off any potential attackers. The Paras held their fire and their nerve.

The "high-water mark " of the 21st Panzer Division
Then the order to fire was given and a volley of six PIAT bombs was launched at close range.
At these ranges the PIAT crews, on spotting their targets, could fire two shots each, requiring two or more on a d6. It was then that the British commander rolled six ones, one after another!! What are the odds of that?

The Panzers start to burn
The lead German half track crew couldn't believe their luck as their SdKfz 250 mounted
the bridge and prepared to open fire with its machine gun. With something close to desperation, the Para commander ordered his men into close assault before the German Panzer men could take advantage of their good fortune.

The Gammon bombs proved much more effective than the PIATs and three of the four German vehicles were soon on fire with both tanks knocked out. One of the tanks falling victim to a flank shot from the one remaining round available to the Paras manning the German pedestal gun on the opposite bank.

Gammon bombs come in handy
Then suddenly it was all over
No quarter asked, none given
As the remaining German half track reversed up the road back into the darkness, the first elements of Brigadier Pine Coffin's Parachute Brigade marched up to Major Howard's HQ, indicating the first of the reinforcements had arrived.

Is that bagpipes I can hear?
And so ended  our anniversary game of Pegasus Bridge, much like its historical predecessor with a win to the Ox and Bucks Light Infantry, Air Landing Brigade, but after a doughty fight by the German garrison.

Thanks to Ian, Jack and Charlie for a great game with some highly entertaining die rolling!
Thanks also to the Battlegroup Overlord rule set giving a very enjoyable flowing game that really helped capture the events of sixty nine years ago.