Labels

Sunday, 12 November 2017

Devon Wargames Group - Club Banner


Yesterday was Armistice Day which coincided with our monthly club gathering so at the eleventh hour of the eleventh day the Devon Wargames Group observed a minute silence in memory of the fallen of two World Wars and since.

The day was also special in that the club has been growing quite rapidly in recent months and with new members has seen an increase in the games being run which saw four games put on yesterday which was really great and added to the 'hubble-bubble' of the banter and conversation of happy wargamers doing what we do best.

Finally there was a task set last year at the club's Annual General Meeting to produce a club banner to be displayed at the events we attend and put on games and this was a matter that was not completed in time for this year's review of last year's minutes.


The situation was remedied within a month of this year's AGM and Devon Wargames Group can now present its new banner, which was on display at yesterday's meeting.

Friday, 10 November 2017

Target for Tonight - Rules Availability

Following the numerous enquires here and on other forums about the availability of these rules following the game reports posted here in September and October, I have some good news.

My investigations finally paid off and thanks to various parties I have managed to contact Mr Thomas ,the author, who has kindly got back to me to let me know that a free PDF of the rules will be shortly available from John Curry's, 'History of Wargaming' site.


Thank you for your patience and I hope you enjoy Target for Tonight.

JJ

Friday, 3 November 2017

15mm Russians v Ottomans 1768-1774


Rules used: Koenig Krieg v3
Figures: mainly Old Glory with a few By Fire and Sword
Armies: 1000 points each

My wargaming projects normally run over a two year cycle and this year I was supposed to finish off my two new 15mm 7YW armies of Russians and Ottoman Turks and also get my 20mm Sikh wars stuff onto the table. Well one out of two isn’t bad, the Sikhs I am afraid suffered from that perennial military problem of project creep and has had to be rescheduled.
On the plus side at least I don’t have to draw up and present a recovery plan.

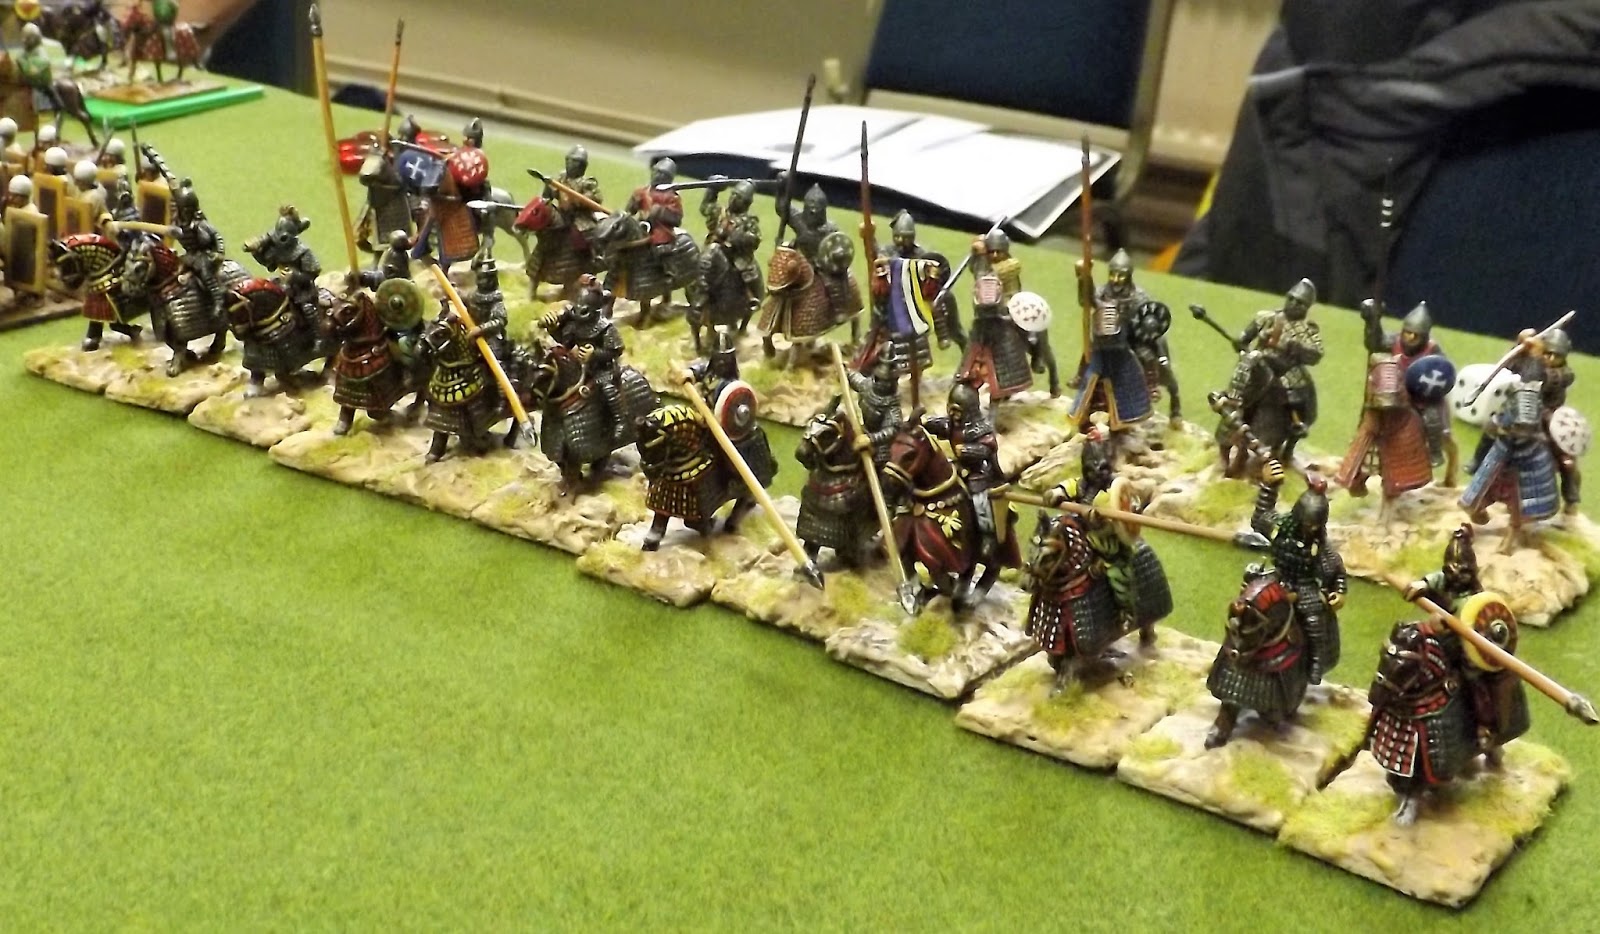
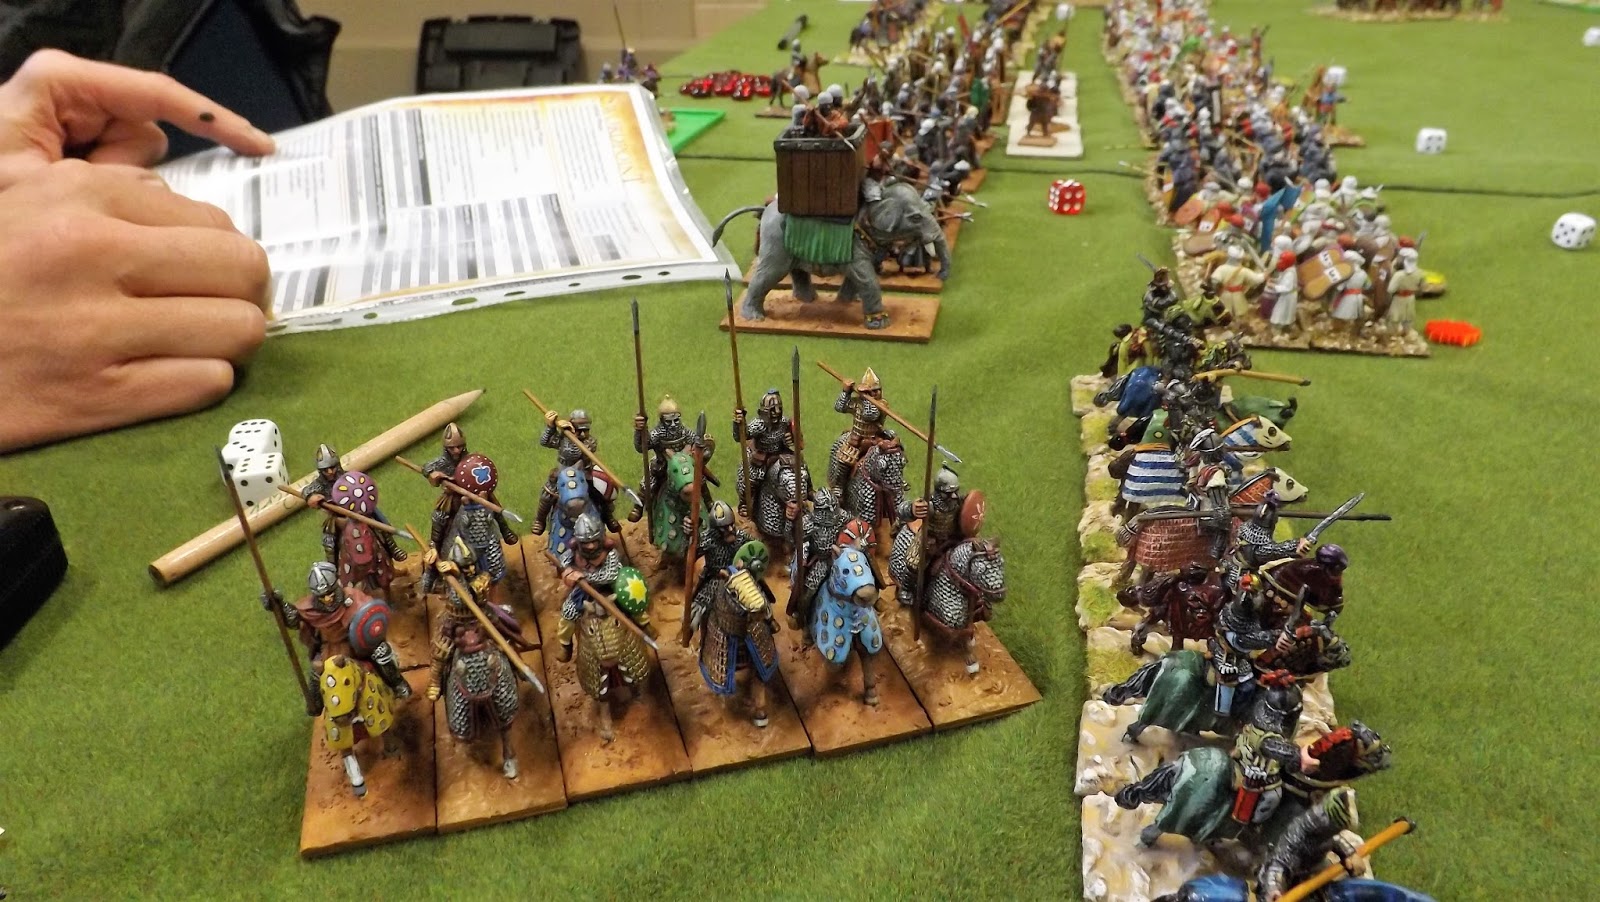
So first time on the table for the new boys and these armies have a few toys we haven’t seen before such as skirmishing light cavalry , light infantry and people with knobbly sticks and really not a lot else , didn't anyone tell them that its never wise to bring a knife to a gun fight .


Decision Time : are those  Tarters or Cossacks?
Onto the game and so I set the scene:

As far as wars go this one hadn't been too bad thought Pasha By, the Governor of the small Bulgarian town of Ohmygodski. True the overall war wasn’t going very well but there was no way that any blame could be attached to him and he had so far managed to avoid being in any real danger .
Fortunately the Russians had spent all of the winter across the other side of the Danube and by all accounts had been ravaged by the plague; with no signs of any movement in the near future then hopefully it would all slowly drift towards a peace treaty and he could go home and tell of his great exploits and maybe even a promotion.
Yes, things had turned out much better than he had hoped as he lazily reached for his sherbet and stretched out his legs onto Nathan, his favourite vibrating footstool.
  Just then an aide disturbed his tranquillity accompanied by a man heavily covered in dust,
 “A thousand pardons effendi but Imperial cavalry have just arrived and their leader Mustapha Leak insists on speaking to you”
 “ My compliments Governor but I have orders from the Grand Vizier , the Russians are across the river , they have split into 3 columns and are attempting to encircle our forces , one of these columns is coming this way and you are instructed to hold them at all costs “
 “But how? My forces are inadequate for such a task, they are only local units and militias, I cannot possibly hope to stop the Russians”
 “ Don’t worry  Pasha , I have brought additional forces to assist you , along with my Siphais which I will leave you , there will shortly arrive some Janissary's and other regular infantry , the Grand Vizier has even spared you some artillery from the reserve , I suggest you start making preparations immediately , Good Luck” 
“Oh, and Governor, I need not remind you how failure is rewarded “ 
Suddenly it didn’t look such a good day after all.

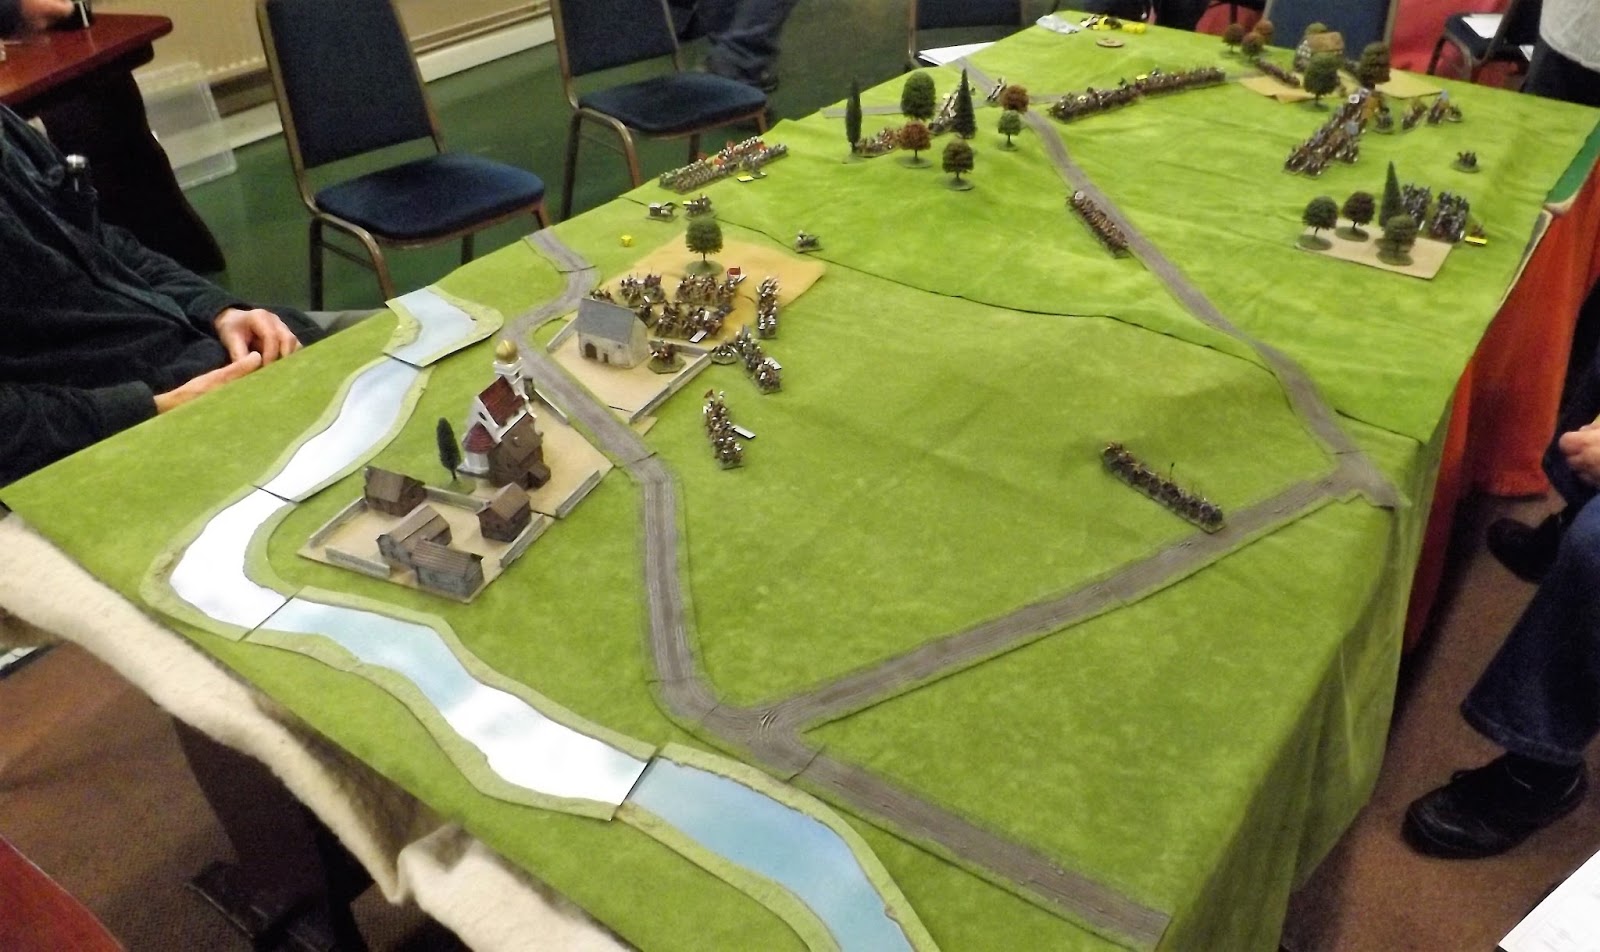
The Objective of the game was for the Russians to leave by one of the three roads and for the Ottomans to stop them.


With the bulk of the Ottomans Tarter allies hurriedly returning to the Crimea to try and stop a second Russian army from annexing it, this left them completely out scouted so the Turks  had to set up all of their forces on the table first.  Azzars and Feudal troops garrisoned the Town and the cavalry were placed out on the left flank with Janissary's blocking the crossroads. The remaining Brigade of Sekhan infantry along with some guns were stationed in-between so as to be able to react quickly. The dice roll for the Grand Viziers artillery turned out to be another Light piece and so disappointingly I had to put all the siege guns back in the box.

The Sekhan Infantry Brigade


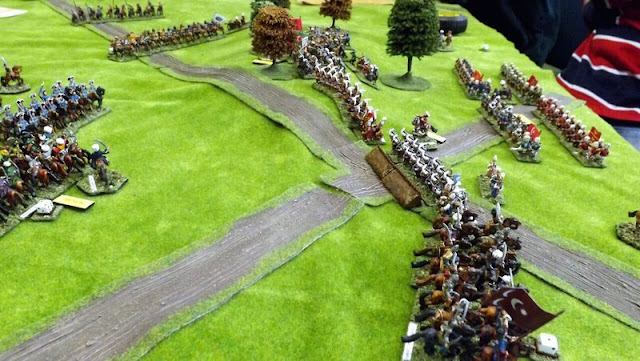
The Russians had to concentrate and so they chose to attack towards the crossroads, their infantry massed for a big push flanked on their left by Dragoons and by swarms of Cossacks to the right.

The Russians massed on the right flank
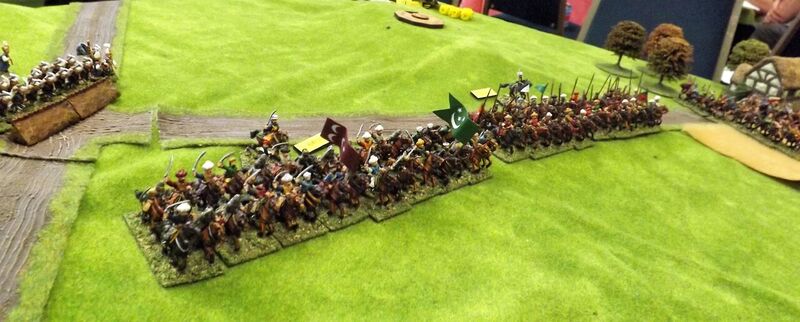
Seeing the Russian infantry block heading towards the crossroads, the Ottomans had to somehow slow them down enough so that reinforcements could be hurriedly sent across to help the Janissary's, this job was given to the Provincial and Imperial Siphais who bravely dashed out towards the advancing green and red masses.


The Jannissary's looking a bit isolated, fortunately soup is on the way.
Like most wargaming rules KK allows you to make double moves as long as you are a set distance away from the enemy and the advance of the Ottoman Cavalry soon reduced the Russians to their normal movement.  Over on the extreme Russian right, the Cossacks had rapidly moved around the farmstead and on though its woods and were trying to flank the Ottoman cavalry. This didn’t go that well , Koenig Krieg’s key point is initiative , you roll off each turn against your opponent to decide who moves a brigade until everyone has taken an action , the same applies for units in combat . The key is in deciding if you or your opponent should make a move when you win the roll , do you wait and see what they are doing or do you need to jump in.

Provincial and Imperial Sipahi's try to slow down the Russian advance
Let me give you some examples : Your cavalry has a lovely open flank to charge , as you won the dice roll you send them in however your opponent hasn’t activated that brigade yet, when it’s their turn they could move away or turn around to face . If you pass the turn over then maybe he still doesn’t move this brigade and picks another or he might turn them around and charge you . Melee is a separate phase and after everyone has moved or fired then all those units still in close contact get new activation markers . Here the initiative is even more crucial , if for example you force your opponent to activate a unit then they must either pass , or charge . Infantry & guns can fire defensively if they have an activation marker so you can fire as they come in, if they decide to pass and so pick up their activation market then you can charge in without being shot at if you still have your marker.  Who has the initiative and when to use it is the main point you have to grasp when playing Koenig Krieg.

I don't think they have seen us
Back to our game, the Cossacks had the initiative and decided to try and sneak around the Ottoman cavalry, unfortunately they still their activation marker and in their turn they moved into close contact range. Things looked grim for the Cossacks, however they could still use their special ability of evading as long as they won the initiative and moved first. They didn’t, despite the Russians having a +1 advantage on all initiative rolls ( better General) and so the Imperial Sipahi charged in, it was a slaughter of biblical effect, not handicapped by the mounds of dead Cossacks the Sipahi risked exploiting ( passing the mandatory ‘‘cavalry go Loopy roll’ ) and hit the line behind with the same effect , risking again going un-controlled they used their 2nd exploitation to run down a unit of dismounted Cossack light infantry as well.

Azzars and Feudal infantry leave the town


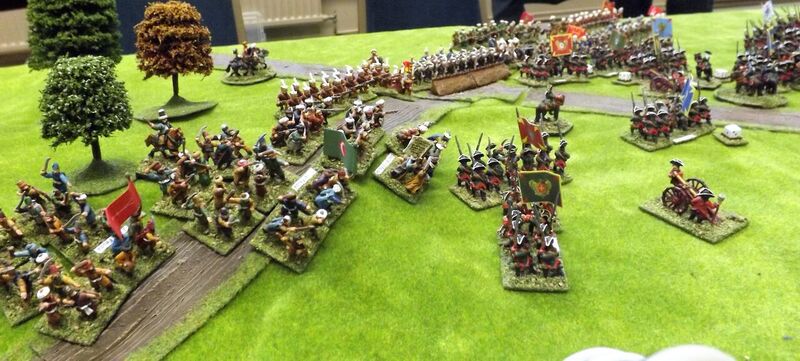
Elsewhere Ottoman Infantry poured out of the town and columns of dubious infantry rushed as quickly as possible towards the key crossroads. The Russian infantry plodded on with their battalion guns now starting to fire on the annoying cavalry to their front hoping to make them retreat . In this era infantry can face off cavalry as long as they are not too badly beaten up so they kept going ever forward. Eventually the Ottoman cavalry had no choice and they charged ; to the great shame of the Imperial Siphai they failed their morale (casualties had reduce an automatic pass down to 1-5) and stopped dead , next turn wasn’t a lot better as although they managed to pass the morale roll this time they now failed to break in past the bayonets ( with lance , 3-6 ) and fell back. The Russian infantry continued to blast away emptying more saddles but using up more time , Both Siphai squadrons did eventually get into melee but now reduced in strength and totally surrounded they went down fighting , the Provincial cavalry being somewhat less brave ( morale of 4 as opposed to 6 ) retired back onto the Ottoman left wing .


Charging ? No problem, you need anything but a 6
Job done the Provincial Siphai wisely head to the flanks

Reinforcements had now got to the crossroads and started to line up in support of the Janissary's plus the first units of Feudal troops were just appearing on the crest of a small hill and were looking down on the advancing Russian infantry.

Who needs guns when you have pointy sticks
The Russians moved on and the Bashi Bazooks charged down the hill to be met by a volley of defensive fire from the nearest Russian regiment, undeterred they pressed on and an inconclusive melee took place. Ottoman artillery now started to play on the Russian infantry with balls bouncing through multiple targets trying to weaken the imminent attack on the Ottoman troops holding the crossroads


The Russians were now finally in position to launch their infantry in a mass attack to sweep away the Ottomans blocking the crossroads, who would get the initiative?

Sorry guys its time to go home
It didn’t matter as we had run out of time, The AGM had gone on far longer than normal and we had lost almost an hour of play.

Who won? Well the Russians are still on the board so I guess it’s the Ottomans but I would have liked to seen what happened when all those infantry attacked .

This was a tricky game for the players as only one of them had played the rules before and we also had some new troop types on the table that we  didn’t really know the right way to use properly so didn’t get the full benefit.
You do however get a lot of Ottomans for your points so I can see them being a bit of a nuisance as long as their army morale holds up . Also if I had bigger armies then an extra Russian Brigade appearing on the far road leading to the village later in the game might have caused some mischief.


Thanks to all those who took part and allowed me to try out my new toys.

Koenig Krieg v4 with campaign rules and a WSS supplement is due out soonish and will be available from North Star in the UK

So whilst I am waiting for them to be released I better think about what do next, should I expand these armies by 250 or 500 points or do I instead get the British Household Cavalry for my allied army? Or maybe an Austrian army perhaps, they could fight the Ottomans. Hmm , what to do.

This has been a Mr Steve production


Saturday, 28 October 2017

Battle of Qadisyyah 636 AD - Swordpoint


With the deployment of a large Sassanid army to modern day Iraq, the Sassanid empire forced the nascent Islamic state back to the Arabian desert. Having reinforced and reorganised in the desert, Caliph Umar ordered Saad to take his army back into Iraq to bring the Sassanids to battle. Shahenshah Yazdegerd lll, the Sassanid king, commanded his military leader Rostam to move into the south of the country and block the Arabs near modern day Kufa. With more than 50,000 Sassanids facing around 30,000 veteran Arabs, the scene was set for the battle of Qadisyyah.


Our re-enactment pitted Chas as Saad, ably assisted by Steve M & Steve H, against Andy C as the child king Yazdegerd lll and myself as Rostam. The battle was played to Swordpoint rules in 28mm.


The Arabs used a "stratagem" to force the Sassanids to deploy first. There were no great surprises in our dispositions, with our centre being made up of militia and levy infantry, with a mix of spear and bows, supported by a unit of elephants. On either flank, cataphract cavalry (upgraded Azatan nobles) and Azatan clibinari horse supported the infantry, with horse archers on both flanks and another elephant unit supporting the left flank cataphracts.


The Arabs deployed their religious volunteer infantry in the centre, supported by tribal foot, with heavy cavalry and tribal light cavalry on the flanks.


As the Arabs advanced in the centre, they found that every man and his dog on the Sassanid side bent bow and shot. The Arab horse suffered early losses and the Sassanids started to gain "momentum" tokens. These tokens allow useful "pluses" to melee combat results and initiative rolls.


Both side's skirmish infantry were forced to retreat by weight of fire, as the mass of Arab infantry ground towards the stationary Sassanid line.


With the Arab centre getting too close for comfort, Andy ordered the first line of Sassanid heavy horse to charge the infantry opposite them. Meanwhile the horse archers on either flank evaded the charge of the Arab heavy cavalry, whilst peppering their pursuers, thanks to their "Parthian shot" ability.


In melee, the Sassanid cataphract and clibinari proved as tough as they looked, despite the Arab throwing spears and the Arabs were forced back. The Arab infantry now charged the Sassanid levy and militia foot and their supporting unit of elephants. A titanic struggle developed with the elephants proving too much for their attackers. The levy held the Arabs further along the line, largely due to the use of "momentum tokens" to influence the combat result.


The charge and evade game of cat and mouse continued between the Arab horse and Sassanid horse archers. One horse archer unit did not run fast enough and was driven from the field in the ensuing melee.


In the centre the Arab foot were still being forced back, but the Sassanid elephant unit was taking hits from the fire of Arab skirmishers. Seeing no sense in being shot at, the elephants charged an Arab religious volunteer infantry unit. The sight of a herd of pachyderms bearing down on them, made the Arabs remember an important appointment elsewhere and they broke.


The Arabs had a quick conflab and decided that the day was lost.


A good fight, to an interesting set of rules, that were on their first outing at our club. I particularly liked the way the momentum tokens worked. They can be gained from 'beasting' units with shooting, successful charges, breaking units etc and allow (limited) additions to combat results or initiative rolls. This leads to some difficult command decisions, as you never have enough tokens to satisfy all the competing demands. In our game a unit of horse archers were sacrificed to allow a +3 added to the combat result in the Sassanid levies combat. This was a crucial melee, despite the quality of the participants!


One of the few games where I have seen the same number of elephant units finish the battle, as started it! That said, elephants are very brittle and vulnerable to missile fire (as they were historically).

Many thanks to all the participants for their contributions and for playing the game in a good-humoured fashion. "Swordpoint" is certainly a set of rules I shall purchase, as I want to see how they work with my Norman and Saxon armies.

Vince

Saturday, 21 October 2017

Eighty Years War Skirmish in the Low Countries - Donnybrook


Last club meeting I brought along my figures and terrain to play a scenario set during the Dutch Revolt. For those of you not in the know, the Low countries, as they were known, were part of the Spanish Empire due to a complicated mess of marriages and inheritances. During the mid 1560's however, the reformation, differences in the way the provinces were to be governed (and in particular the division of new bishoprics imposed from Spain) and desire for freedom of worship, caused a bubbling pot of resentment to boil over into open revolt. The resulting wars carried on for 80 years and the latter part being contemporaneous with the 30 years war. My figures concentrate on the earlier stages of the conflict, from about 1568 till roughly the mid 1580's.

Onto the fun bit. An advance force of Dutch rebels had managed to gain control of a small village with an important river crossing. The Spanish garrison had been forced off in surprise and had gone to alert the local commander, who was at the time overseeing the investment of nearby Leiden. The Spanish dispatched a force consisting of three companies of shot, two squadrons of Horse arquebusier and a group of volunteer gentlemen armed with swords and bucklers.


The Dutch on the other hand had sent for reinforcements and a company of pike and another of shot, escorted by two squadrons of Reiters were on their way to support the two companies of shot and the veteran halberdiers hiding in the town.


The rebels had built barricades on the bridge and at the ford next to the mill in order to try to slow the advance of the Spanish.


We used Donnybrook for rules which gives a nice bloody game. If you haven't seen these before they are form Clarence Harrison and Barry Hilton who are also responsible for Beneath the Lilly Banners and run the League of Augsburg blog and forum. They are a card driven set of skirmish rules with each of the troop quality types given a different dice (d6,d8,d10) to use for all their actions.


The Spanish made a general advance towards the river to try and to get into range, apart from the gentleman swordsmen who seemed to have forgotten to gain their order from their colonel. The rebels revealed a cannon and fired it ineffectively at one of the Spanish companies. The crew then promptly decided they had done enough for the day and marched off home. The Horse on the left wing shot at the rebel arquebusiers and caused a fair amount of injury.  The Spanish Musketeers used their longer range and their professional attitude to devastate the Rieter squadron that appeared and then destroyed a company of arquebus as they tried to move back into the town for cover. The other Reiter squadron waded across the deep river and charged the Spanish horse who had been thinned out by some of the rebel shot. The Spanish came off decidedly worse.


The rebel shot in the centre of town piled into the house nearest the bridge to try and gains some cover from the devastating fire of the Spanish shot but found the flimsy houses were no good at stopping Spanish lead. The Dutch reinforcements reached the edge of the town and one of the pike groups marched straight in to a sticky bog in-between two of the houses (Lord knows what caused that!) and spent a inordinate amount of time skulking out of range of the Spanish.


The Spanish musketeers climbed into the mill in order to give themselves an elevated firing position and the two groups of Dutch shot on the other side of the river felt the sting and their numbers quickly dwindled. Meanwhile a company of arqubusiers were attempting to dismantle the barricades at the bridge while the gentleman of the company were attempting to show the peasants how it was done by dismantling the one at the ford. Round about then the Spanish commander decided that, despite the successes across the battlefield, the Spanish couldn't possibly win and immediately ran for home, not even stopping to look back.


The right of the Spanish line was looking strong but the horse on the left had been destroyed and the centre was having a hard time crossing the bridge as they were charged again and gain by the remnants of the Rieters (one heroic officer) and the halberdiers and them finally the pikemen. Despite a unit of reinforcements coming onto the field to aid the rebels, things were looking bad for them.
The gentleman had come across the ford and were heading for the centre of the village to finish off any resistance and the few remnants of the rebel force were struggling to hold back the tide at the bridge.


The heroic rebels had given a good account of themselves but it there was little they could do in the face of the greatest army in the world and, despite giving the Spanish a bloody nose, they were destroyed without mercy by the might of the soldiers of the Tercios.


The game certainly gave me something to think about. The Dutch are in desperate need of some musketeers and the Spanish will require some pike (not that they needed them). I also want to try out the Sharply Buffed rules that were published in the Lardies summer special as they are designed exactly for this period. I hope Jason and his son had as much time playing the game as I did running it. Next time I hope to get more players at the table so we can have more arguing..sorry..strategic discussions.


Sunday, 15 October 2017

Target for Tonight - "The Big City"

A No.57 Squadron Lancaster mid-upper gunner in his turret, February 1943. CH8795
Last month one of the games featured was a set of WWII Bomber Command rules entitled "Target for Tonight" (TfT) published by D.W Thomas back in 2000.
https://devonwargames.blogspot.co.uk/2017/09/target-for-tonight.html

I was a little surprised at the interest generated in this, now somewhat old set of rules, and the inability of finding anyone in a position to supply them.

I am at the present reaching out to people I know in the hobby to see if anyone can shed any light on Mr Thomas and his rules and as part of the effort to create a bit of attention to them in that regard I got together with the chaps at the DWG to run a second game using them.

The new mission map

I should say that I haven't played these rules for a number of years prior to these two recent games and looking back through my files on previous run-throughs it strikes me that TfT are showing their age in that the basic concepts and structure are sound and provide a compelling narrative game with a lot of period detail that help set a game in a particular stage of Bomber Command's campaign .

That said the rules seem to me to be unfinished in many respects with a rather clunky mission planning process requiring plenty of flicking back and forth between pages and list of potential events that can affect aircraft as they progress from take-off to hopefully a safe landing via the route to and from the target, that are not intuitive from the first read through.

Slightly modified target maps as used in the previous game 

The game organiser really needs to do quite a bit of prep work for each mission that really needs setting up as part of the rules to allow a speedier process of mission organising that not only includes target plan as seen above but a quick plan for the route as seen below to allow a speedy set up of the tiles.

Thus I present my map based on the map used in Ian Dury's game "Enemy Coast Ahead", suitably adapted to show the various targets colour coded by zone but also nearby targets should aircraft be forced to divert to somewhere nearby.

In addition on re-reading, the rules reveal gaps that Dury's rules covered off quite well, with his use of cards to not only generate events similar to TfT but act as a record of fuel consumed during the flight adding another potential issue of concern to flight crews. Other gaps included ditching in the North Sea and bailing out over occupied Europe and Germany with the potential of escape and evasion for surviving crew members.

Route planner diagrams to speed up the game set up
I mention these aspects because on playing this game, recreating a deep raid to Berlin, and a follow up shorter, in and out raid on Kiel, the players involved discussed the idea of running a squadron campaign running missions across the period from late 1942 to the end of the war which would need to include that kind of added detail.

These aspects were just part of the improvements we felt needed to be considered. Others included moderating the somewhat over deadly aspects of the events and their likelihood of occurring with the events generating die roll changing from a D10 to a D20 which seemed to give a much more representative risk profile and seemed better to mimic Dury's card generated risks.


The D20 was played on our Berlin game but even then we considered the events occurrence better modified, the crew responses to them needed yet further modification with the use of a D8 rather than a D10 to give a better profile in that area.

In addition to these slight modifications we added the fuel element by using micro dice, placed by the models on the route to record fuel points used on the flight with hazards such as being chased by night-fighters, dodging flak, losing the route or having to go around again on the bomb drop adding to fuel consumption and possibly posing the issue of when to abort a mission to be able to get back.

Finally a few other modifications considered were
  • To run a squadron attack of say up to sixteen aircraft we needed multiple plane stat cards laminated for repeat use, with players able to manage up to eight aircraft on one card. 
  • The addition of the other bombers used by main force including Wellington and the Short Sterling with the added hazards using those types brought to any mission particularly in the latter stages of their deployment.
  • Addition of potential German intruders over Bomber Command airfields.
  • Mosquito and Beaufighter intercepts of German night fighters.

New plane data record cards

So on with a summary of our game, staging a raid during the Bomber Command Campaign against Berlin which got going on 23rd/24th August 1943 with the first attack by 727 aircraft and which saw a loss of 56 planes, the largest single loss in one night in the war to that date.

Our mission was shown to be taking place in February 1944, the month that saw the heaviest attack on the "Big City", as Berlin became known in RAF parlance, during the whole war with 561 Lancasters and 315 Halifaxes supported by 16 Mosquitos, 891 aircraft in all, delivering 2,643 tons of bombs and losing 43 aircraft (26 Lancasters and 17 Halifaxes) of 4.8% of the total force involved.

Our force of 4 Lancasters and two, novice crew, Halifaxes took off without incident and headed out over the North Sea as seen in the picture below.

The flight to Berlin and back was a true test of endurance for bomber crews and the number of sectors involved with the addition of three flak zones leading up to the target followed by the equally hazardous return journey hopping the channel with all those potential night-fighter intercepts lining the route give a vivid impression of the challenge facing our player-crews, now with the added concern of those little red micro dice recording fuel consumption.


The flight out to the coast and over the North Sea was relatively uneventful except one of the Lancasters flight engineers mis-managed their fuel flow causing engine failure from iced up carburettors and sending the aircraft into an uncontrolled descent until the pilot managed to rescue the situation only to leave the aircraft at a dangerously low altitude likely to draw the attention of the Nachtjagd.

In addition the icy conditions caused one of the Halifax crews to mismanage their anti-icing procedures which left one of the "Halibags" with ice covered wings and at low altitude in a similar situation, but with both crews pressing on with the mission.


As the six aircraft made their way successfully to the first flak zone it seemed the D20 modification was working well and the players were congratulating themselves on a job well done all be it with night-fighters drawn away by that spoof raid on Frankfurt and the fun of watching a couple of aircraft including a novice Halifax crew needlessly burn up fuel evading an unseen night-fighter with a false alarm on the MONICA beacon sounding in the pilots headset; all this while narrowly avoiding a mid-air colliding with another bomber in the stream whilst taking this avoiding action.


You see as game-meister you can have so much fun with players, watching the forehead sweat beads appear as they desperately try to put space between their bomber and that night-fighter model and make sure they offer the best deflection angle in the process.

Is this for real or just a false alarm! A Halibag in trouble

Even as the D10's roll to resolve damage from hits they don't know what's happened until the umpire acts as their tail gunner announcing the all clear and an sheepish call of "he must have broke off skip".

Perhaps black and white  is more appropriate for that period feel
 As I said everyone was congratulating themselves on making it unscathed into the flak zone with all the aircraft experiencing the buffeting flak when Bob decides to roll a 20, oh dear, how sad, never mind!

Lining up for a deflection shot or will the bomber turn before the fighter opens fire into empty night sky?

The resulting 20 meant that Q -Queenie was struck in the fuselage by a flak shell probably delivered from one of the mighty flak towers surrounding Berlin.

Oh well at least it was a fuselage hit, all the engines are intact, the bomb bay is untouched and so on we go, better just get the crew to sound off and check for casualties.

Wow we've all made it to the flak zone - at least we don't have to worry so much about night fighters here!
 " Rear gunner here skip, making my way forward, Jonny in the mid upper's had it, so has Dusty and Jim with Dennis severely wounded and his maps and stuff all over the place, plus we have a large hole amidships. I am getting forward to take over the bomb sight."


So Berlin was starting live up to its reputation and as the six aircraft lined up for the target in the third flak zone O-Orange took a flak hit right in the bomb-bay causing a massive explosion in the night sky with several crews reporting later that the Germans were using star-shells on the way in.

The bomb run was no less eventful with low cloud and searchlights creating the so called "Ground grass screen" known as Mattscheibe to the Germans, where the cloud masked the target causing in this case a misplacement of the Target Indicators two rows back on the target map and also allowed the search light batteries to shine their light onto the cloud base, silhouetting the bombers to Wild Sau night-fighters operating above it.

S-Sugar was subsequently strafed by a FW190 using the newly fitted radar for single seat fighters which took out the Lancaster's port inner engine and possibly causing the bomber to drop short of the TI's.

A Lancaster on the run in over Berlin

The three remaining aircraft unloaded on the TI's with the reports showing hits on the SS Reich Ministry buildings, an SS Barracks and the Flak Park, but with the city hospital also hit (note the Berlin industrial target map has a few additions peculiar to Berlin). The effects of the low cloud base meant that none of the industrial targets were touched in the attack.

The return flight saw the loss of a further two aircraft to night-fighters and C-Charlie on final approach, catching fire and exploding in mid-air as a hung up photo flash exploded pre-landing.

The D20 modification worked really well on this the hardest of missions and with the change as outlined to crew capability rolls it was felt that the risk profile would improve still further. In addition the fuel dice added yet more tension as players watched nervously the results from various manoeuvres carried out during the flight.

On the second quicker mission to Kiel, six aircraft set out with one lost to a night-fighter and five safely returned but with only one of the four managing to bomb the U-boat factory, with the others all bombing short due to jittery bomb aiming.

Still stuff to do with this game but one we all felt has great potential once the issues are ironed out.

Thank you to Bob, Ian, Jack and Charlie for a fun afternoon with lots of drama in the night skies over Germany.