Saturday, 20 July 2019
Target for Tonight, Chain of Command, Hammerin' Iron and Hail Caesar
Lot's of games were played at this month's July meeting of the club with a first report to be found over at JJ's Wargames where the Target for Tonight game reports are being gathered as part of the work to build the mini-campaign each game is part of, simulating the first month in the 'Battle of Berlin'.
JJ's WargamesTarget for Tonight - Op 3 Berlin
In addition to that we played Chain of Command with Colin's lovely collection of 1920's Punitive Actions in Afghanistan collection all in lovely 28mm.
Vince got some ACW naval action up and running with the Peter Pig rules 'Hammerin' Iron'.
And Mr Steve went all ancient on us with a game of Hail Caesar and his Romans vs Pontics set to.
So our first report is over on JJ's Wargames with others to follow later.
Labels:
ACW,
Hail Caesar,
Sharp Practice II,
Target for Tonight
Sunday, 9 June 2019
Battle of Barrosa 1811 - Over the Hills Second Edition
![]() |
Sergeant Masterson of the 87th Foot capturing the Eagle of the 8me Ligne at Barrosa |
A few weeks ago I received my eagerly awaited copy of Over the Hills (OTH) Second Edition Napoleonic Rules from Stand to Games and have been planning to get a game set up to see what was new and to reacquaint myself with what is a very good set of Napoleonic rules.
Having read through the new version, I was very happy to see that the fundamental features of the rules, built as they are around the concept of fatigue affecting units, formations and armies, gradually leading to one side unable to continue the battle, have been retained, but now with a better laid out book with adjustments and additions that we found added to the original set without losing what was really good first time around.
So much so that we found ourselves quickly picking up the rules again using our own home produced QRS which we were able to make notes upon where we detected some slight changes or where I intend to add in some of the additions such as testing to rally a broken brigade, which came up in our game.
Looking back I see that this is the third rendition of the Battle of Barrosa we have played at the club, see the links below, with the previous game in 2017 using the first edition of OTH.
http://devonwargames.blogspot.com/2017/03/battle-of-barrosa-1811-over-hills.html
https://devonwargames.blogspot.com/2015/03/battle-of-barossa-5th-march-1811.html
I remember that that game was one of our first using the rules and we made some key errors in play whilst getting our heads around them, plus I soon realised after further reading that the set up and layout of the game was wrong in some key areas, which I set out to re-write in a new version of the scenario as part of a Kickstarter collection for the release of the new rules and my Peninsular Scenario book written for OTH.
https://jjwargames.blogspot.com/2019/01/oer-hills-is-published.html
It was really nice to get the Peninsular War collection back out on the table again since we finished play testing the scenarios for O'er the Hills back in February last year and with a group of players very much involved in the creation of those games, ready to get back into a first love, Napoleonics.
The table below shows the position of the two armies on first contact, with the British about to be set up into lines ready to meet the French who are surprised to find the Anglo-Spanish troops advancing to meet them.
Troops deployed and the Battle of Barrosa is about to begin |
Part of the adjustments to this scenario is that both armies are stating the game on 'Attack' orders, that is moving forward to closely engage the enemy and that the two parts of the Barrosa battlefield are distinct, being separated by the woodland running across the table.
![]() |
The initial set up for the new Barrosa scenario |
The terrain and rapid deployment by Sir Thomas Graham meant that some of his troops became confused moving through the trees to get into position ready to attack seeing two companies of British guards separated from their parent battalion and fighting on the opposite flank.
In addition, recognising the threat posed by the French rapidly closing in on the rear of the allied column, Graham felt compelled to slow the French advance by throwing out a couple of 'speed bumps' on each flank in the form of the two composite light battalions seen ahead of their parent brigades; who set off ahead of their supports to tackle the French divisions unsupported whilst the line infantry prepared to come up in their support.
The view from the French right with Wheatley's brigade debouching from the tree line |
The playing of the orders process in OTH really enables the peculiarities of a given battle to be modelled in the scenario of it and so playing the role of Graham, I decided to follow his battle plan and press on with the allied attack, whilst Steve M playing the role of Victor hastily stopped the advance of his troops now occupying the hill whilst pressing forward on his other flank.
One other slight alteration we decided to make was to combine the six companies from three different parent battalions that fought on the British left flank into a composite battalion, and to allocate the weak French artillery to one of the French infantry brigades they were supporting.
The British brigade under Dilkes, dress their lines after their rapid deployment as Browne's Light Battlaion sets off ahead to confront the French under Ruffin occupying Barrosa Hill |
Thus with the table set up we pressed on with our game with the Anglo-Spanish assuming the role of Side A in the sequence of play, but only being able to move forward their light battalions in the first turn and to fire their deployed artillery.
Likewise to simulate the surprise of the French finding the Anglo Spanish debouching from the tree line in readiness to attack them only the French guns were able to fire in the opening turn.
Surprised to find themselves under attack, Ruffin's guns open fire on the Anglo-Spanish troops |
One of the first decisions I had to make as commander of the Anglo-Spanish troops was whether to support my attack by Dikes' brigade with the Anglo-Spanish cavalry, looking to occupy their French opposition in the form of the two squadrons of the 1me Dragoons.
Throwing caution to the wind Samford Whittingham joined the KGL hussars as they cantered along the coast road to be met by their heavier French opponents, with the Spanish dragoons held back in support.
Likewise on the opposite flank, the opposing artillery opens fire |
In this first combat between the two armies, valour got the better part of discretion as Whittingham was cut down in the ensuing three rounds of combat as the KGL fought toe to toe with their French opposition.
The result saw the rout of the allied cavalry brigade but left the French brigade likewise teetering on a similar outcome should they engage any other allied troops with just 2FS remaining on their brigade card.
The two batteries of British nine pounder guns soon started to dominate their side of the table with multiple hits from roll through roundshot. |
Ruffin and Victor decided to move over to defence whilst occupying Barrosa Hill. |
It was however on the opposite flank that the battle started to take an early turn as the British artillery supported by the damaging sniping of the riflemen in Barnard's Light Battalion started to take a toll on Leval's two brigades as the mounting casualties wore down their divisional fatigue scores.
With the Anglo Spanish cavalry routed the Spanish infantry cautiously advance on the battered French dragoons |
Soon the opposing lines were closing and the first volleys of infantry fire replaced the early sounds of cannons as the guns pulled off ready to support the British right flank as the 87th and 28th Foot prepared to administer the coup de grace on Leval's recoiling French.
The French guns are destroyed and the two French brigades are teetering on breaking as they try to hold back the advance of the 87th Foot |
However Leval's division was a veteran force composed of men who had fought the British at Talavera two years previously and so their brigade commanders were well placed to test to keep their brigades in the fight as their FS hit zero.
The first brigade to test easily passed and the combat entered a second round of struggle, only to see the next brigade fail its test and break, quickly followed by the other, as their lead battalions took further hits causing them to rout.
The line of Guardsmen start to move up in support of Browne's Light Bobs as events unfold on the opposite flank |
As the British Guards close on the hill, Victor receives news that Leval's Division on his right flank are broken and in full retreat |
With the French right flank in tatters and the British guns being redeployed to support the attack of Dilkes' brigade on Barrosa Hill, Victor called for a general retreat as he looked to cover the rear of his broken forces and with the allied cavalry unable to interfere with the pull back.
The Spanish are emboldened to press forward with the arrival of British Guards to their left |
Overseen by Sir Thomas Graham, Dilkes' brigade prepare to assault the hill as the French start to break contact |
Over the Hills played really well and it was great to find that we were getting back into the sequence of play and remembering the rules really quickly which I think is a sign of a good set, as well as producing a game that closely mimicked the actual battle.
I have come away with a few errors identified in the scenario brief which I can now rectify with an update, and with notes made to our QRS to allow me to update it with the few changes we identified in the second edition rules.
I am about to set off on a three week holiday exploring the Peninsular War battlefields and this game has really fired the imagination in preparation for my trip.
Thanks to Steve M, David and Jack for a really enjoyable game.
JJ
Labels:
15mm,
Devon Wargames Group,
JJ's Wargames,
Napoleonics,
Over the Hills
Tuesday, 28 May 2019
The Burning of Waller Farm, FIW - Rebels & Patriots
Having agreed to put on another game of R & P at the club, as the day approached, thoughts turned
to a scenario. And while I had a few ideas, what should land on my doormat, but edition 102 of
Wargames, Soldiers & Strategy and inside, was an R & P mini campaign based on the war of 1812.
There were three small scenarios, two of which involved variations on attacking a farm or plantation, which lent themselves to my collection of FIW figures. Therefore my scenario was loosely based on the ‘Burning of Waller farm’ 28 Aug 1814.
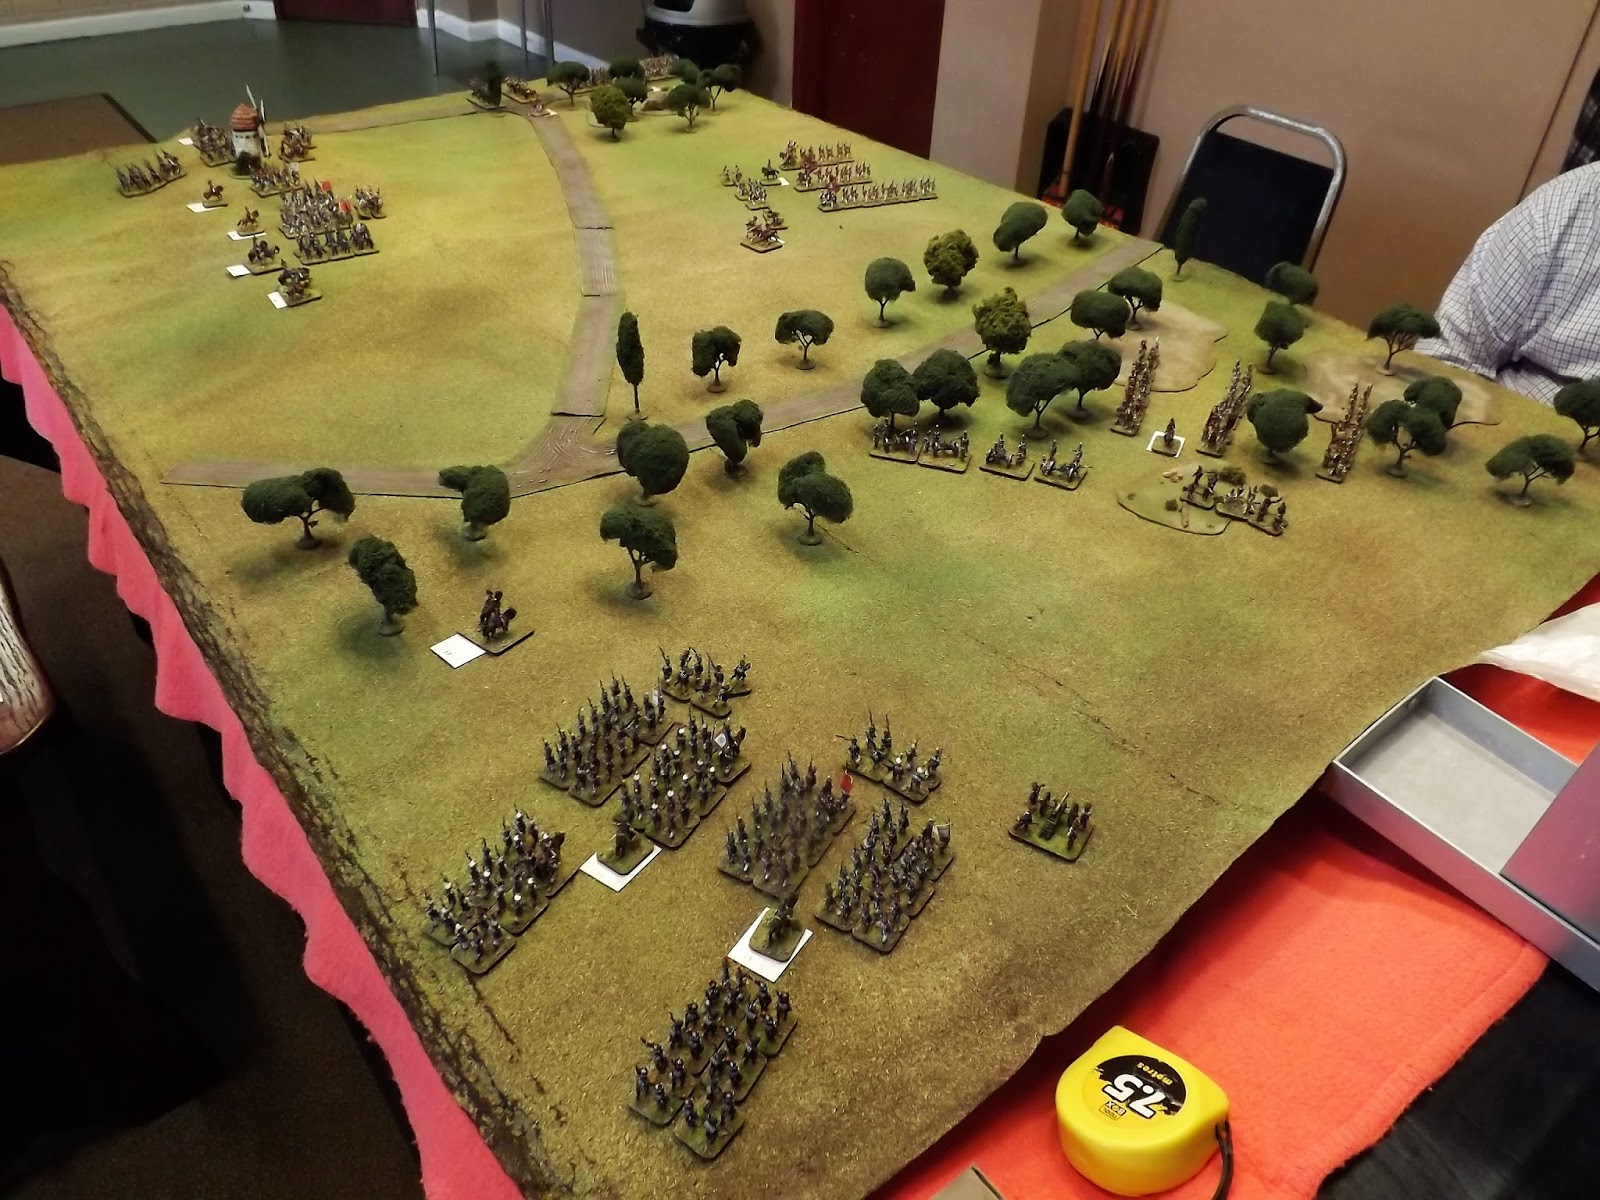
Our last couple of turn outs at the club have been quite large, so my thought turned to putting together forces that would lend itself to at least two a side, with the option to include a third if necessary, with yours truly as umpire. As it turned out (isn’t it always the case!) turn out was low and I ended up playing. Not a bad thing by any means, but it did mean that I wasn’t following things across the table as I should, so this report will be a bit one table sided! The other fallout for planning for larger numbers, was that I put together 2 x 30 companies per side, to be played on a 6 x 4 table. As you will
see from the pictures, this was a bit to much and led to a crowded table. But with plenty of ‘toys’ to
move and shoot with, it didn’t seem to bother the guys!
![]() |
The rosters for the game are available on PDF and can be sent on by contacting the club on the email contact in the side bar. |
Each force was based on a regular and irregular company per side, and I do like to include all the little ‘tweaks’ – so there were green, timid, veteran and aggressive troops, good shots amongst the
skirmishers and bad shot and aggressive Indians. I also included 1 gun per side.
The objectives were for the British to burn the two barns (yes they look like houses, but they were
barns for this scenario!), the hay bales and destroy the crops. The French aim was to prevent this
Chas & Vince took the French/Canadian, while Colin and me had the British/Loyalist. We did roll for
officer ‘traits’, but I didn’t note them down!
Colin took the British regulars, who I said could deploy straight on, while the Loyalist/Indians had to
dice for each unit to come on. On the French side, Chas had the Canadian/Indians opposite Colin,
leaving Vince with the regulars (also coming straight on) opposite me. Some of my Indian & militia
troops didn’t fancy the fight early on and had a couple of turns rest!
Vince and his French advanced, as my first troops approached the fence. We started to get into long
range musket territory, with the first casualties starting to occur. But with a minus for long range and
light cover, no devastating effect.
On the other side of the table, Colin appeared to be making slower progress, but Chas seemed to be
swarming forward!
A unit of my skirmishers crossed the fence and got to the first hay bale, next turn, up that went in
smoke. Suddenly, across the table, Colin rolled double 1 (bad!) on his action test! This or a double 6
(good!), then leads to a roll on another table. In this case, it was another 1, ‘Friendly fire!’ ‘The unit
you have just tried to active opens fire at the closet friendly unit to its front and within range….roll to
hit as normal, but the target counts as in cover (whether it is or not)’. This could be painful! Luckily
for me it wasn’t, no casualties on twelve dice!
Colin now had one of his units at the first barn, that also went up in smoke! As did another hay bale
on my side. Colin managed to get his Highlanders (shock infantry) into action against some French
light infantry, and after an inconclusive first round, saw the French off.
Casualties were starting to mount on both sides now, with various units taking disruptions and
having to fall back. This was all down to musket fire, with the British artillery yet to get into action
and the French gun being largely ineffective.
Chas rolled a double 6 for one of his activations, and then another 6; ‘Reinforcements!’ An extra 4
point unit. I did have to check, but that only happens once a game, per company, no matter how
many times you roll 6, after a double 6. Sorry Chas!
The second barn, and the crop field were now alight, and with multiple units now routed off the
field, it was declared a British/Loyalist victory.
I am liking these rules and will aim to continue to play more games. The guys seemed to enjoy it,
although we agreed it is more of a ‘game’ as opposed to ‘simulation’, but who cares when you have
the ‘toys’ on the table, you’re having fun, and have the usual disagreements about line of sight!!
Thanks to Chas, Vince & Colin for an enjoyable game
As noted earlier, on a 6 x 4 table, 2 x 30-point companies per side are a bit much. I have played with
2 x 24 pointers and this seemed to work better.
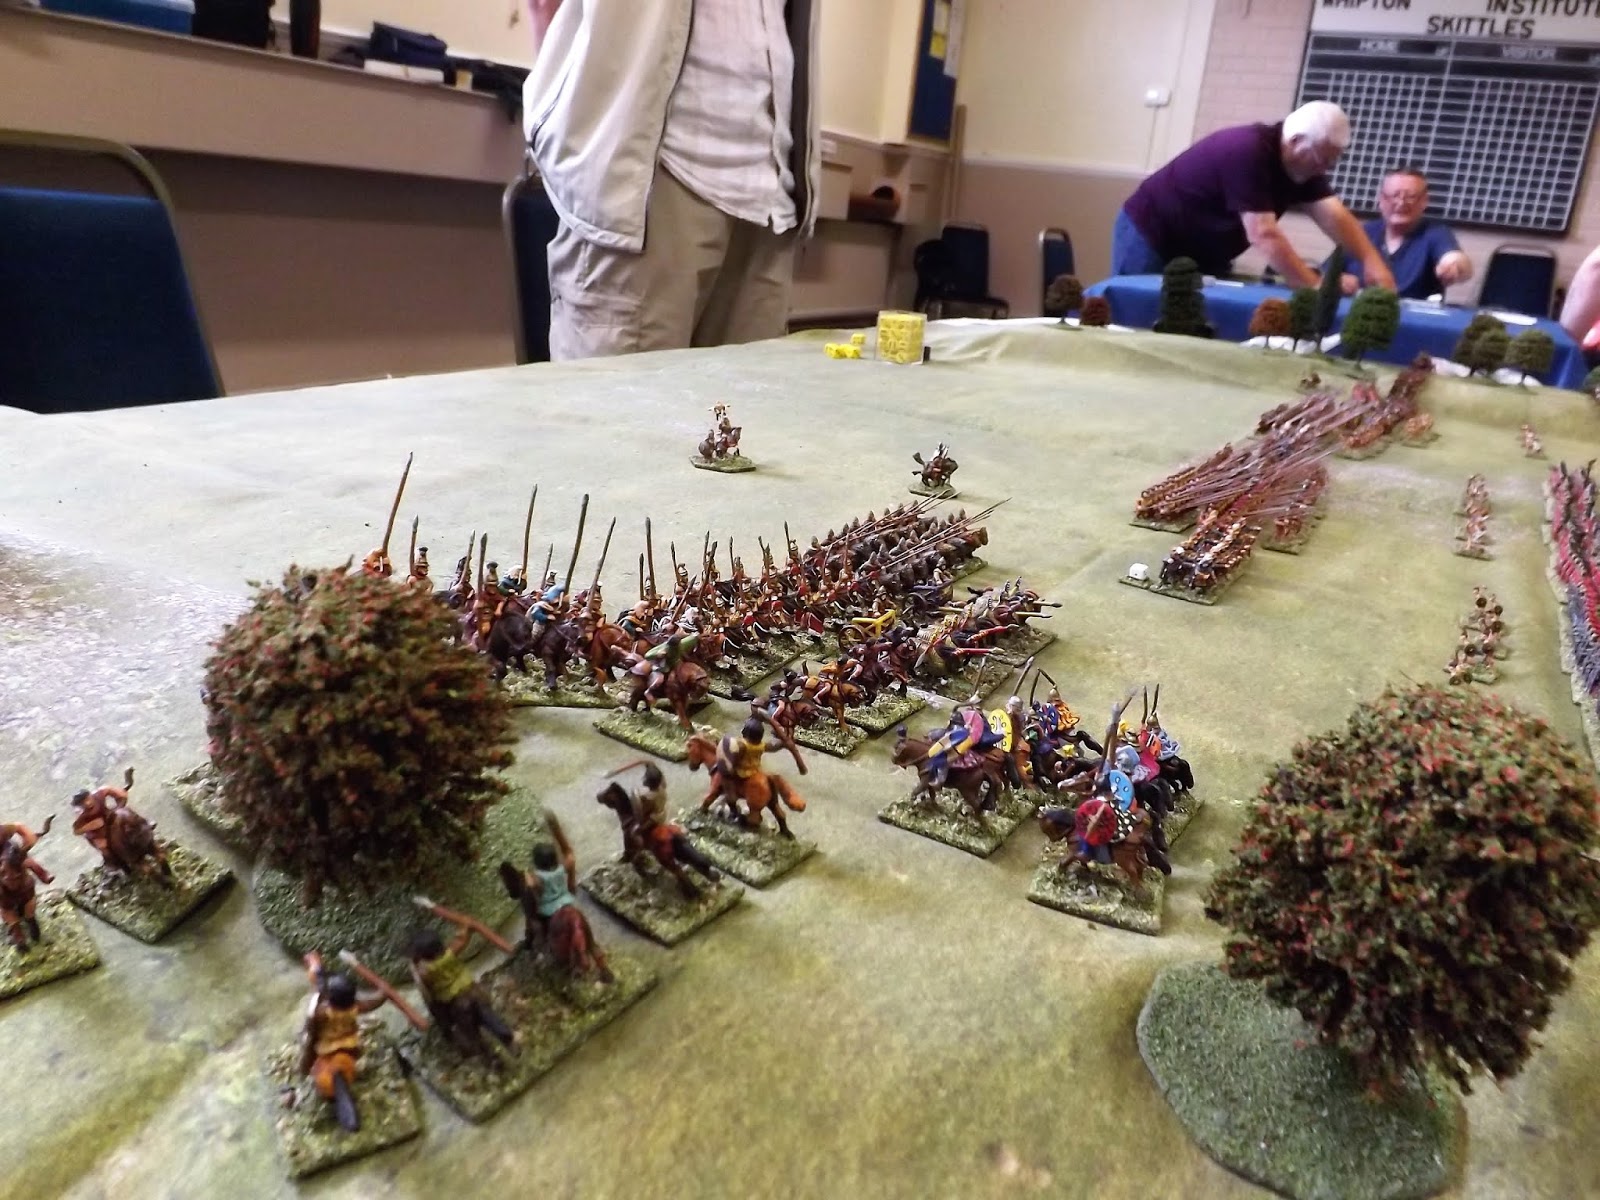
But for real inspiration, look at the game put on at Partizan using R & P! Its huge!!
![]() |
The Battle of Assaye, using Rebels & Patriots, as staged by the Boondock Sayntes at this year's Partizan - more pictures in the link below |
One day maybe…….
My figures are a mixture of Galloping Major, 1st Corps, North Star & Foundry, buildings by 4Ground
This was a Steve M game
Saturday, 4 May 2019
Samnites v Romans - Hail Caesar
Our third game at club last month was a 15mm Hail Caesar game put on by Nick and Steve L and involved a strong Roman force reinforced by Campanian allies taking on a Samnite army supported by Gauls.
Both armies were split into four roughly equal infantry divisions with sufficient cavalry to make another two if the players wished to break them off.
The Romans set up with most of their heavier cavalry on the far left of the table with the Campanian allies off to their right, two bodies of Romans held the middle with the intention of taking the central position containing a ruined temple and a small village.
Out on the right facing the Gallic wing of the enemy army was the last of the Roman infantry along with what remained of the cavalry.
The Samnites held the centre with their heavier infantry and placed the rest of their infantry either side, the Samnite cavalry faced off the Roman cavalry out on the wing. The Gaul’s were given the left hand side for their mixed force of warbands, chariots and cavalry.
The Roman cavalry and Campanians had a bit of a problem, they were facing two Samnite infantry blocks and a strong force of cavalry so whilst the Romans held back their cavalry south of the nearby woods and guarded the edge of the table, the Campanian long spear phalanxes along with supporting infantry slowly advanced whilst trying to maintain contact with the forces either side.
In the ensuing combat the phalanxes held the initial Samnite rush with their heavier armour helping to slightly nullify the pilum coming their way but casualties quickly mounted on both sides for those who were not so well equipped.
Over time both sides were tiring with most units seeing red dice indicating shaken status replacing the normal white ones however only the larger Campanian units could absorb so many hits and their weaker supports started to leave the table along with some of the Samnites.
To their left with the enemy coming around and over the wooded hill and threatening their allies flanks the Roman cavalry had to now get engaged and try and hold them for as long as they could.
Overall they had the upper hand and the Samnite cavalry was pushed back all along the line however the supporting infantry ignored all this and closed in on the open Campanian flank. With no help available it wasn’t looking good if you weren’t a Roman with access to a horse.
In the centre the heavy Samnite foot had occupied the buildings and ruined temple, here they faced two divisions of Romans advancing in their traditional three lines of Hastati, Principes and Triarii. Try as they might the Romans couldn’t dislodge the defending Samnites and sluggish movement through the village and dogged resistance from the rest of the Samnite infantry prevented them from turning in on the Temple from the flanks.
The two sides slugged it out without conclusion so let’s move on to something more interesting.
On the Roman right a solitary Roman infantry division had the problem of hordes of ‘hairy Gaul’s racing towards them along with a substantial mounted force.
The supporting Roman cavalry consisted mostly of lighter troops and using the traditional tactics of darting in and then evading as necessary managed to slow up the Gallic chariots and cavalry for some time, eventually of course they had to commit and after a valiant struggle they and their single unit of mediums were broken but not before causing their enemy to take significant damage and putting them out of the game for several turns whilst they reorganised.
As the cavalry melee was reaching its dénouement, the Gallic warbands and the Roman infantry finally met each other on the top of a nearby hill.
The Romans lost, badly. Their smaller units could support each other whilst the large warbands got in each others way and generally had to fight singularly but when you only take four hits to be shaken and the enemy have nine attack rolls then it isn’t going to be easy especially at this time only the Hastati have Pilum and the Triari are the only ones with Heavy armour.
The Romans hung around for two or three turns but there were just too many Gaul’s and all of them were in much larger units and so after lopping off sufficient heads to take back as presents for the wife and kids they went looking for more action. This happened to be the Romans still trying to clear the village and temple.
The Romans now with both flanks collapsed and the Samnites showing no sign of being forced out of the Temple ordered a general retreat, which wasn’t going to be easy but as no one plays retreats it was therefore deemed to be pub time.
This period of Roman history is quite interesting as they do not have the overwhelming advantages found later on; there is only limited use of the Pilum and only gradual improvements in armour. You also have a large variety of different opponents to take on and who, when they are not fighting the Romans, fight amongst themselves and this expansion of Rome into central and southern Italy would make an excellent campaign.
We followed the Hail Caesar rules more or less as written with only minor changes, we allowed a single direct move ahead after failing a movement order for the unit or group concerned so as to speed things up, for the same reason we allowed the Gaul’s to move through the woods without penalty otherwise it’s a long way to come for the day and not do any actual fighting for the player concerned.
Figures are mainly Xyston with some Forged in Battle
Buildings: Forged in Battle
Terrain Mat: Tiny Wargames
Rules: Hail Caesar by Warlord games
This has been a Mr Steve Production
Subscribe to:
Posts (Atom)