Labels

Saturday, 7 December 2019

Battle of Saguntum (75 BC) 15mm - Hail Caesar


This battle was part of the long running civil war fought between those who supported Marius and those who supported Sulla, both men at various times were in power in Rome and although both were now dead their supporters scattered around the Empire fought on.

Hispania at the time of the Sertorian war

Sertorius was on the Marian side and had been sent to Spain as it’s pro-consul, here he gained control of the two provinces that Rome held which were mainly along the coast and fostered good relations with the Spanish in the Interior. With the Sullan side now in charge in Rome they sent various forces to try and oust Sertorius from Spain but met with little success as he defeated all that were sent against him. Eventually Pompey got himself posted to try his luck but nothing changed as in a series of battles he fared no better than any of the others.

If you want to know more about the eight year Sertorian war then see the link below:

https://en.wikipedia.org/wiki/Sertorian_War

Bust of Sertorius

Sertorius was one of Rome’s better generals and virtually unknown in comparison to Pompey, Julius Caesar, Scipio etc. I can recommend the following book on his life if you want to dig down deeper, written by Phillip Matyszak who is one of my favourite history writers which helps of course.

Amazon.co.uk - Sertorius Struggle for Spain - Philip Matyszak

The Battle of Saguntum was his last major battle as afterwards he reverted back to a guerrilla style of war and fearing that the conflict would never end, he was assassinated by some of his generals.

Trying to re-create the battle isn’t easy as there is very little to go on, I did find someone else’s AAR from which I pinched the terrain from and there was a series of scenarios for the whole war written up on the GMT site from their Great battles of History /Caesar game which gave me a few hints but didn’t help me as much as I hoped. We are told that both forces were reasonably equal with Pompey having around ten legions of various strength plus assorted allies and auxiliaries. Sertorius was down to the last of his roman legions that had arrived in Spain with other Marian supporters over the eight years and of course loads of Spanish.

Map of Sertorian Wars from GMT Games

Using my Marian Roman and Spanish Hail Caesar armies as a core I then fleshed out both sides with what I thought looked appropriate and came up with two armies at about 750 points each and so making it be one of the bigger games we had put on at the club, falling just short of our re-fight of Paraitkene back in 2015.


The forces used in my game are as below and are described in Hail Caesar terms.


Onto the game:
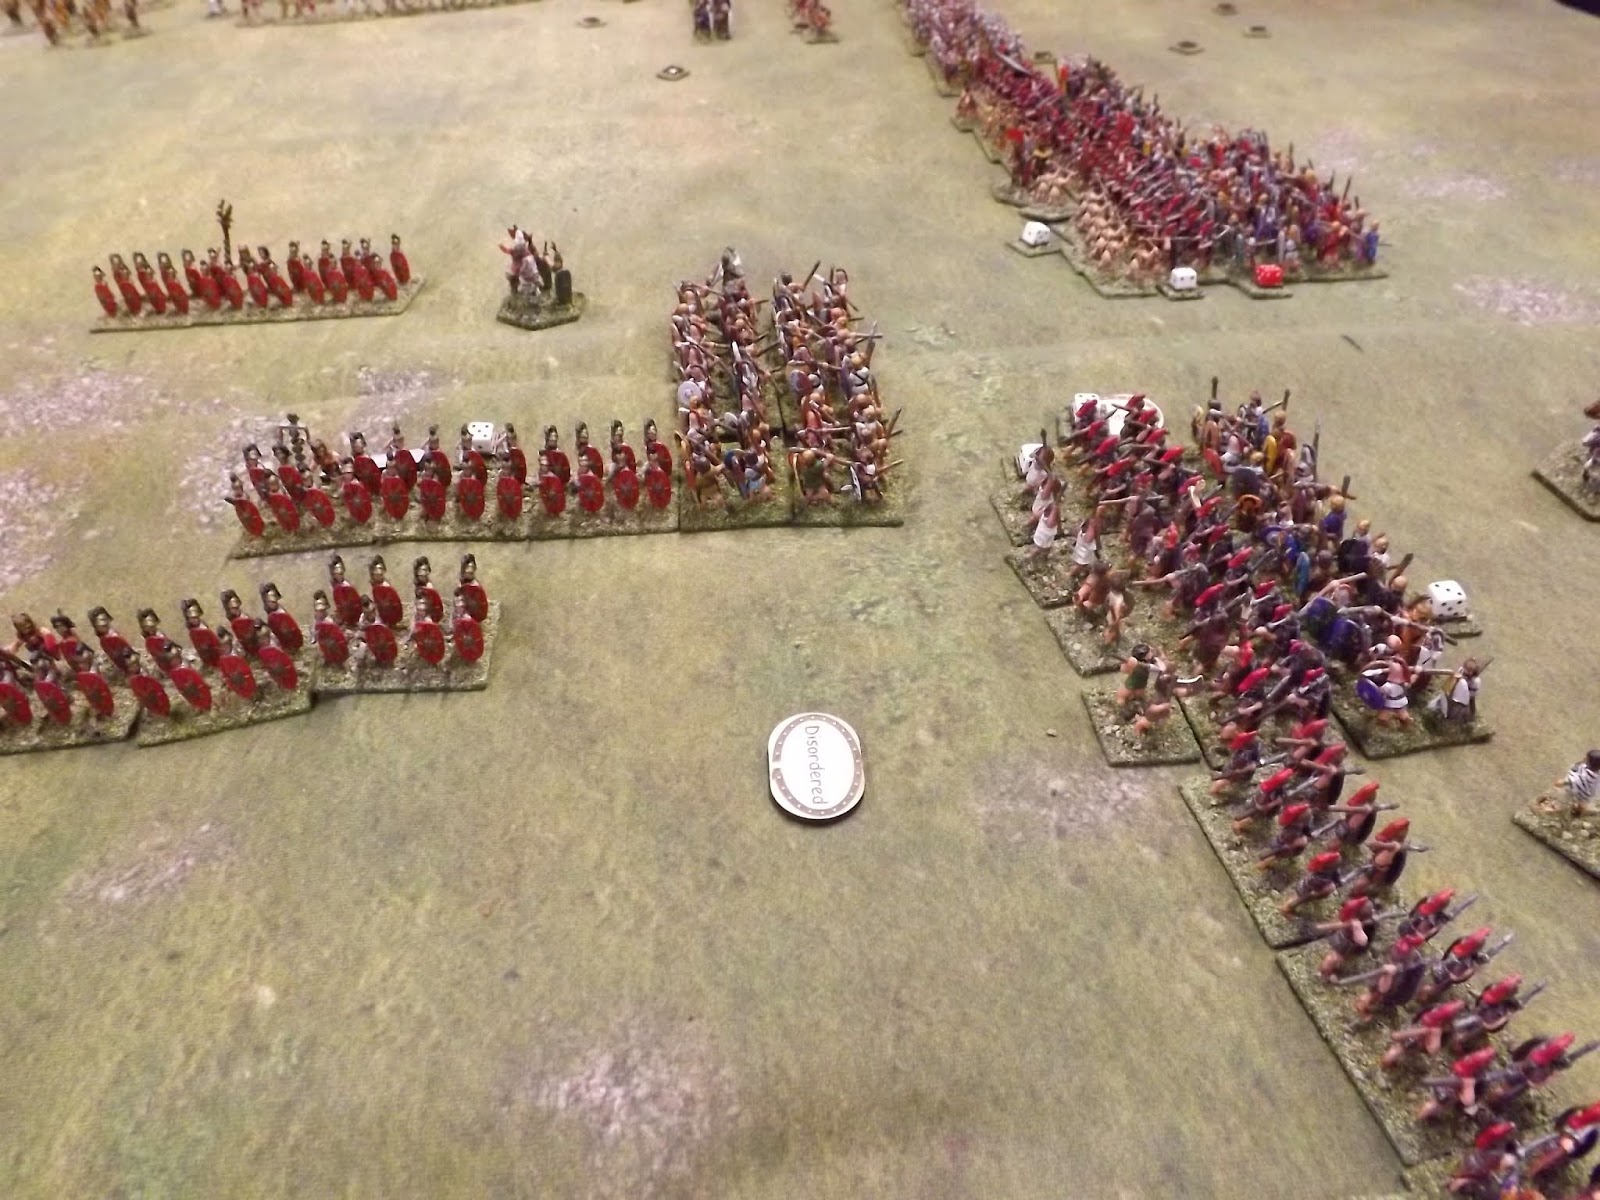
The Romans set up with a centre composed entirely of Legionary’s, their right had most of their cavalry and the left against the river had a few Romans along with all the allied infantry and some cavalry. Facing them the Spanish held their centre with scutarii, a lot of scutarii, their left wing consisted of all the cavalry and their right against the river had the three Roman legions, any remaining scutarii plus the Celtiberians.


It was on the wings of the battle where it was decided; both sides cavalry skirmished briefly using their light cavalry out in front to buy time for their heavier colleagues to get nicely lined up. Despite being evenly matched the Romans got by far the worst of the fighting and this division was utterly broken after 5-6 rounds of fighting, the decision by the Romans to post some of their cavalry out on the left wing where they didn’t take part in anything useful now looked an error although having some untouched cavalry is always handy to cover a rout.


The Spanish cavalry were still in a good enough state to start threatening the Roman centre which despite vigorous encouragement from the umpire (which I can confirm stayed within UN guidelines) was still hanging back from actually trying to hurt anyone, apparently pinning their faith instead on a hard hitting poster campaign and possibly a robust chat around a drum circle.


Maybe seeing what was happening out on their left flank was influencing there decision.

Taking the advice of the now rapidly fleeing Roman cavalry commander to close up ranks with their legionaries, a particular favourite despicable tactic of said commander, they allowed the Celtiberians to charge in and whilst they held their ground for a while, their Spanish allies facing what remained of Sertorius’ roman infantry quickly collapsed. There was some imbalance of forces on this flank and the Sertorians did take some losses but the Roman left was getting chewed up the same as their right had been, just a bit more slowly. Some honour was maintained by what viable forces remained as they gradually fell back onto the centre preventing a second envelopment taking place.


The Roman centre meanwhile after being assured that they would definitely smash through the imposing massed ranks of Scutarii facing them moved in and got down to doing what Romans do best, killing people with less armour than themselves, only in this case it didn’t quite happen that way. Sertorius’ Spanish infantry played the unexpected tactic of not dying, instead, in an event that never happens when I fight against Romans, it was the Romans who failed their armour saves and then accompanied by some very childish noises from those watching, failed their morale rolls as well.


All in all it was suddenly becoming a good day to be Spanish, not a term often heard throughout history. With cavalry coming one way and victorious scutarii coming the other, someone’s flank was going to get hit and those Romans who had been peeled away to fend off the cavalry soon found themselves in a very sticky situation as their friends to the front stopped being of any help unless the Spanish tripped over their dead bodies.


Outnumbered and with enemies closing in from all sides, the Romans desperately fought on until the new members who were taking part in today’s game had it explained to them about the club rule where you calculated the ratio of pub time versus no chance of you escaping the mess you are in.


The real battle according to the Romans was more or less a draw with Sertorius losing the last of his Roman troops and both sides taking roughly even losses, Pompey despite his greatness got the run around in all the battles he fought against Sertorius, then again, he didn’t do that well against many others when you think about it. Fame after all is chiseled in stone by those with either have a good PR team or are the winners.


Thanks to all who took part and whose names I couldn’t be bothered to write down but probably included several Steve’s.

Rules used: Hail Caesar by Warlord Games

Figures: mainly Ancient and Modern, a few Magister Militum, War and Empire and wherever Steve Huntsman’s stuff was from

Cloth and river: Tiny Wargames

This has been a Mr Steve production

Saturday, 30 November 2019

Battle of Vorskla River 1399 -Swordpoint


With the overthrow of the "Golden Horde's" Khan, Tokhtamysh, by local rivals supported by Timur, there was an opportunity for the Grand Duchy of Lithuania to gain territory in Tatar territory. Tokhtamysh was more than happy to sign a treaty transferring Ruthenian lands to Lithuania, in exchange for military support to regain his serenity over the Horde.


Grand Duke Vytautas of Lithuania signed treaties with the Teutonic Order, Poles, Moldavians and others, which were sufficiently lucrative to attract those nations to join his expedition.

Following two successful campaigns reaching the Crimea, Vytautus obtained approval from the Pope for a "Crusade Against the Tatars". In 1399 the crusade encountered the Golden Horde's army near Poltava in present day Ukraine.


The stage was set for the Battle of Poltava. A truce was agreed with Khan Temur Qutlugh, to allow both sides to prepare for battle. The Horde were secretly waiting for reinforcements and Vytautas wanted to prepare a wagon fort to break up charging horsemen and drive them onto his guns. Consequently neither side sought to break the truce.


Not liking what he saw, Temur feigned a retreat by his army. Seeing this Vytautas ordered most of his troops out of the fort in pursuit. When the Lithuanians were sufficiently far from the fort, Temur's army turned to face them and a flanking force appeared behind them. Caught in the open, allied casualties were heavy and Vytautas only just escaped with his life.

We started our game at the point where the Horde had turned to face the Allied army. The game was played in 28mm to Swordpoint rules. Myself and Andy C took the Allied army, whilst Chas, John & Steve M played the Golden Horde.


The Horde army consisted of a large number of steppe horse archers, supported by three units of noble cavalry. Deployed as both light and skirmish cavalry, the horse archers benefited from many units with Superior Shots, Parthian Shots and Nomad Horse special rules. The Nobles were heavily armoured veterans, who were also Superior Shots.


The Allied army employed Teutonic and Polish knights, as well as Lithuanian Boyars, supported by turcopoles, mounted and dismounted crossbows and spear armed foot, and a light bombard. Needless to say the knights were a force to be reckoned with.

Before the game start, the Horde used their special ability to advance their skirmish horse on our flank and in front of our main line.


Thanks to Andy's die rolling we won the initiative and sought to prevent our flank being turned, by deploying our own Tatars and Lithuanian horse to the flank.


Firing broke out along both lines and soon saddles on both sides were being emptied. On our right we had the better of the contest, with Andy consistently winning the initiative and driving the Tatars back. On my flank things did not look so rosy, as Steve advanced and I was soon waving goodbye to some of my mounted crossbows.


Seeking to bring the enemy to battle we advanced across our line, rotating out any units discouraged by enemy shooting and trying to stop the horse archers concentrating fire on isolated units, by forming line of battle.

In the centre, our knights kept charging and forcing the horde to evade, relying on their armour to save them from the worst of Parthian shots coming their way.


Eventually our centre drew the Horde's noble horse to battle and the true struggle started. Getting the better of the situation, we forced them back, but my flank was suffering from skirmish fire and I had to bring up my crossbow armed infantry to take the strain.


With knights rampaging forward in our centre and Andy sweeping up his flank, the pressure was off my flank and the Horde headed for the hills.


A good game, played in good spirit by both sides. The excellent Swordpoint rules handled things smoothly, once our aged brains had come to terms with their intricacies again.

The Horde suffered, but would have done better had Andy not won every single initiative roll. I can see why he was put in charge.

Vince

Saturday, 23 November 2019

American Civil War - Regimental Fire & Fury


The Scenario


The Confederate army is in full retreat southwards. They have identified a position where they would prefer to meet the Union forces in battle.


To enable that to happen they must hold an area which includes a village on a crossroads and a dominating hill, for as long as possible. To this end there were two short divisions sent as a delaying force and they deployed their lead regiments in the village and on the hill.


The area was lightly wooded and the ground broken. Visibility was restricted by these woods, and because it was early morning, there was also still mist about.


The hill counted as favourable ground for the defenders and the climb as rough ground. Units in the village area counted as defending favourable ground for firing and charging.


The Union advance guard, with some of their best units were advancing to take the strategically important cross roads and dominating hill. They must achieve this as quickly as possible so as not to delay the advance of the main force only a few hours behind.


This was a twelve move game or 30% loss on either side. The Unions had 112 stands against the Rebels 90. The Union had eight guns against six.

The Game

Due to a lack of visibility, 8” for the first two moves then 12”, cards were laid face down for each of the units. These cards showed the unit and in what formation it was moving. Fire and Fury (F&F) do not have a mechanism for this but it all seemed to work.


Union troops advanced through the woods towards the hill and up the road towards the village. Meanwhile the rebels were trying to get their reinforcements into position.


First fire was to the Rebels as a Union gun deployed a little too close to the village and the Rebel infantry gave them a blast. The laser range finder was obviously not calibrated correctly. The mist now lifted and the mayhem started.


On the Union Right the troops assembled themselves into attack columns and eyed the Rebels in the village. On the left they shook themselves into line and faced off against the Rebels on the hill.


The Rebel right flank on the hill opened fire as the Union troops advanced and there was a more or less equal exchange of casualties. Meanwhile in the village the Rebels waited for the Union columns.


Three columns pushed forward towards the village then from close range the rebels opened fire. The centre column was checked but the two flank columns hit and after some good dice throwing managed to push the Rebels from the first part of the village.

The Rebels then managed to put a couple of regiments on the flank and gave them a blast. Casualties ramped up on both sides. The rebel right turned into an attritional exchange of fire as the Union troops advanced their way up the hill.


In the village the Union troops were reinforced and proceeded to move through. There was hellish fighting with each side losing stands at a prodigious rate. Both sides were moving very close to the 30% casualty rate. On the hill the Union troops pushed forward. The exchange of stands continued each move.

Eventually the Rebels were pushed out of the village.

Unfortunately for the Rebels it was all a bit too much and they reached the 30% mark slightly ahead of the Union and so were forced from the field.

The game was designed as a Union victory but I tried to make it as even as possible. The Union had more and better troops but the Confederates and the advantage of ground. As it worked out I didn’t do too badly. Although the Confederates lost, the Unions were only six stands away from loss themselves.


Thanks to Ken and Steve, our bearded Confederates and Simon and David our clean shaven Unions.

Figures by AB and Blue Moon. My thanks to Nick and Mr Steve for their efforts in painting them for me.

Battle Mat by Tiny Wargames. Buildings by Empires at war. The trees are a mix of Ebay buys and from Buffers Model Railways. The hill was formed by my coat, I had left the real ones at home. Roads and rivers from Fat Frank.

Saturday, 16 November 2019

Battle of Britain - Bag the Hun

Decisive Blow - Anthony Saunders

Following a reintroduction to Bag the Hun at last months Clotted Lard  I decided to put on a game after some interest was voiced by a couple of folks. So I dug out my collection of planes, printed off some aircraft sheets and set up a game for up to seven players. It was just as well that I did as the spaces were quickly filled by willing volunteers.


The scenario had a group of Ju88 bombers being escorted by two staffels of Me109s and one of Me110s, twelve escorts altogether. Against these were ranged some of the RAFs finest(or not as it turned out) in four sections each with three Spitfires.


Schwarm 1 turned out to be the cream of the Luftwaffe with a top ace and a junior ace, balanced out with two sprogs as wingmen in Me109s. Schwarms 2 and 3 had a mix of pilots, each had two veterans, one regular and a sprog.

The RAF had a lot less quality, one top ace (Lee "Wooden Trellis" Wilkins) was blue leader, the other pilots consisted of nine regulars and two sprogs.


The game began with the Me110s acting as close escort for the Junkers while the 109's all sat up high waiting to descend on the RAF. The Spitfires were climbing up to engage and were a bit spread out around the table. After a couple of turns of manoeuvring and jockeying for position things quickly broke down into a general dog fight and formations were soon a thing of the past.


Despite their best efforts the plucky RAF pilots were no match for the German aces and Spitfires soon began to fall from the sky. Some nifty moves and lucky cards meant the German junior ace kept on getting shots in and most of them had a telling effect. Blue leader, blue 2, yellow leader and red 3 all fell to his deadly Oerlikon cannons. An Me110 shot down "Trellis" Wilkins, he did survive though after being thrown clear of his exploding Spitfire and floating down under his parachute to fight another day.


As the day came to an end the final score was totted up and it was a grim day for the RAF. Eight Spitfires were shot down, three more crash landed and the last one returned home with a badly damaged engine.


In return the RAF claimed a single Me109 and two Junkers shot down, plus one Me110 and three more Junkers damaged. Highlight for the Germans was when Blue sections Spitfires all blew up, every single one of them!

The junior ace was top dog with four Spitfires with the other kills being spread out among four other planes.


My thanks to "Dead Eye" Bob, "I want a fire card" Christopher and "Low on fuel" Mel for ably commanding the Luftwaffe.

Commiserations to Ian, Jon, Lee and Jamie for their demise at the hands of "ze Germans"!