Labels

Saturday, 7 March 2020

The Magutsabad Incidents - Chain of Command on the North West Frontier


We return to the North West Frontier of India and to the Village of Magutsabad. The hill tribes have been rather excitebale of late and have been raiding villages and outposts outside of tribal territory.  An Imperial force consisting of Highlanders and Sikhs with support from Armoured cars, has been tasked with securing the village in order to use it as a forward operating base for pushing on into tribal territory. Little does the commanding officer know that a large force of tribesmen are at that very moment heading to that very village to plunder it.


We actually got to play this scenario twice with very differnt outcomes and very different games. We used Chain of Commmand from the TooFatLardies along with rules adaptations from the Abyssinia war rules that were published a few years back (an unofficial supplement but with some interesting rules and army lists).


Game 1


After the Patrol phase, the Tribesmen are allowed to move one of their deployment points up to  twelve inches. This put one of the British (I know they aren't British but it's easier than typing Imperialist!) deployment points under immediate threat from a Warband, forcing some of the Sikh's to deploy in the open in attempt to defend it alongside a second section who deployed into cover in the rocks. This didn't go well for the brave Sikh's who were massacred by shooting from other Tribesmen in the rocks and lost not only a whole section but officer deployed with them. Things were already looking shaky.


One of the Lewis Gun Sections form the Highlanders platoon deployed onto the roofs of the buildings in the village and started to lay down some supporting fire into the Tribesman harassing the remaining Sikhs.


Meanwhile life continued in the town while the two sides traded large amounts of firepower at each other. The British deployed a mountain gun to try and thin down the numbers of fighters hiding in the rocks but it seemed to have little effect on the rampaging tribesmen.


Suddenly with a huge roar, the Tribesmen rushed across the open ground towards the road and didn't stop until they had charged the crew of the mountain gun and chopped them to little bits. (The Tribesmen players had had a run of phases and an end of turn meaning that they were able to advance almost unopposed. The commanding officer of the Sikh's was killed dropping their morale to zero and meaning that two of the Sikh sections weren't even deployed!)


Emboldened by the success on the other side of the town, Tribesmen ran towards the other end of the road to seal the British escape route.


Panic ensued in the Village as the Highlanders, with their Flank turned, tried to form some kind of defence.


And also tried to deal with the possible incursion into the village of Tribesmen from the West as well as the North.


In the meantime a Maxim gun was playing merry hell with the Highlanders on the building roofs and cavalry could be seen moving in the valley, getting ready to pounce.


And all the time, tribesmen were appearing in the hills, firing at the increasingly desperate Highlanders.


Finally, after having been pinned by firing from the roofs, the Warband that had defeated the Sikh's and the Mountain gun crew charged down the already wounded British officer who fought form the back of the Crossley Truck with such ferocity that the Tribesmen fled in despair. There was little to be done however and with a final look at the Tribesmen crawling through the hills, the Highlanders called it a day.

Game 2


In a slight reversal of fortunes, the British managed to deploy in a way that put one of the Tribesmens deployment points in immediate danger.


Seeing an opportunity, the Sikh's deployed rapidly and sent a section up the hill to ensure that it was as empty as it seemed to be.


On a neighbouring hill a section of Highlanders deployed to give the Sikhs some support.


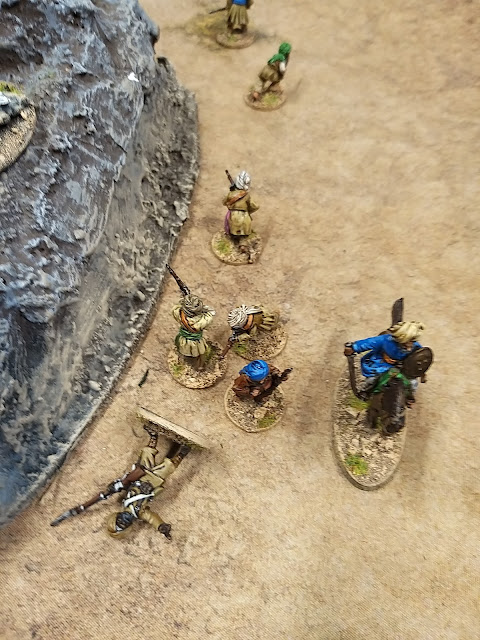
Suddenly the hill was full of angry Tribesmen who had been hiding deep in a cave and behind rocks. The Sikh's opened up with everything they had but there seemed to be more Tribesmen that bullets.


The entire Sikh platoon deployed in front of the hill and used disciplined fire to try and thin the numbers of tribesmen crawling over the rocks towards them.


To try and support the beleaguered Sikhs, the armoured cars deployed on the road only to realise that Tribesmen were already in the village and that an ancient brass gun was aiming down the street straight towards them. The gun spouted smoke and flame and the projectile smacked into the front of the lead armoured car, killing the driver and leaving it disabled.


Meanwhile the Sikh's were struggling to hold on with more and more tribesmen attacking them from all angles. They had lost on section already and the other three were suffering from large amounts of shock.


The Highlanders on the neighbouring hill were under pressure from Tribesmen charging up the hill towards them.


Suddenly the Sikh's were charged by Tribal Cavalry.....


but despite being heavily outnumbered and completely doomed, the Sikh's gave an incredibly good account of themselves, killing nearly all the Horsemen and


Although the Sikh's had been knocked out of the game, their stalwart action had caused a serious dent in the enemy's morale and removed many of the Tribesmen form His Majesty's land.


This left the Tribesman in a precarious position as far as their morale was concerned and still needing to remove the Highlanders from the hills outside the town. A last determined charge left them defeated on the bayonets of the brave Scotsmen and with that they melted back into the hills.

Additional pictures from the games


Two very different games using the same scenario. The shear number of tribesmen makes it a real struggle for the British forces but firepower and sensible deployment makes a massive difference. Thanks to everyone that played in the first game David, Nathan, Vince, Peter and Neil, and in the second game I actually got to push some toys around myself! Cheers Chaps!

Saturday, 29 February 2020

The Affair at Yeldakh – 10th July 1918


The Russian Civil War is an attractive period to wargame for those interested in the First World War and its immediate aftermath.

Battles are not trench bound slogs for a few yards of mud and blood; instead there is the sweep of the battlefield, new weaponry and some exotic troops too. The scenario selected for our club meeting comes from “The Miniature Adventures of Dunsterforce 1918” by Robert Giglio.

The scenario book and guide from Partizan Press

You can further read the Adventures of Duster Force here:
https://www.yumpu.com/en/document/read/13288409/the-adventures-of-dunsterforce

The Ottoman Turks and their Aziri allies are marching towards Baku and its oil reserves, by the Caspian Sea. Britain has sent a small force under General Dunsterville, to assist in the defence of Baku, where the Bolsheviks have a fractious hold over the city.


Not all Russian troops have gone over to the Bolsheviks and a powerful force of Cossacks and Armenians, under Colonel Bicherkov, is still prosecuting the war against the Ottoman Turks. If these Cossacks can make it to Baku, the likelihood of defending the city would be greatly improved.


Some British armoured cars and support units have been sent to help the Cossacks, but little else can be done unless the Cossacks can make it to Baku. Both the Cossack and Ottoman forces need to cross the River Kura to continue their march towards Baku.


There is only one suitable bridge north of the town of Yeldakh, so both armies are racing to seize the bridge which is defended by a force of entrenched Bolsheviks, who do not favour either side very much – all the ingredients for an exciting wargame.


The terrain is open with some woodland and ditches and a single farm building. Both armies start where their route-march road enters the table heading towards the bridge. Both have the option to hold back two units to arrive anywhere along their own table edge later in the game, depending on a D6 roll.


The Turks take this option, but the Cossacks do not. The Cossacks start by pushing their armoured cars and cavalry down the road as fast as possible, to secure the bridge. The Turks adopt a different strategy by advancing their Aziri contingent directly towards the Cassock line of march and using their pre-planned artillery barrages to hit areas where they anticipated Cossack and Bolshevik units might be.


The Bolshevik bridge defenders soon realise that today will not be just another quite one and start to consider their options. The scenario requires the two Bolsheviks infantry units to roll a D6 each turn, to determine what they might do; go on strike, defend the bridge valiantly or remember there is political rally to attend back in Yeldakh?


With a squadron of British armoured cars stationed between the Bolsheviks and the Turks, the Bolsheviks are resolute defenders. But soon the Turkish infantry supported by their Maxim guns, are advancing determinedly towards the bridge. Another unit of Turkish infantry, supported by a Maxim gun, suddenly appear much closer to the Bolsheviks than expected (these are the two Turkish units held off-table). A serious tussle for the approach to the bridge begins.


The Cossack cavalry arrive at the bridge, half cross-over towards Baku and the other half charge and scatter the first wave of advancing Turkish infantry. The Turks meanwhile, have concentrated their Maxim guns on the British armoured cars, slowly accumulating enough damage to drive them off. At this moment the most hotly engaged Bolshevik unit decides to reconsider its options and goes on strike.


If the Bolsheviks hoped that by not shooting, the Turks would reciprocate they are mistaken. The Turks attack the trench line killing several Bolsheviks and getting into the earthworks. With ever more units reaching the approach to the bridge, the fighting became more furious.


Now it is the turn of the mounted Turkish lancers to charge a unit of Cossack infantry advancing rapidly down the road towards the bridge. The outcome is predictably poor for the infantry, but now isolated from their own supporting troops the Turkish lancers are cut down by a Bolshevik Maxim gun.


At this moment the on-striking and hard-pressed Bolshevik unit remembers the political rally in Yeldakh and headed off to town, leaving their defences to the Turks, who quickly reinforced the newly-won position. The Bolshevik Commissar realises that "all Russians are in it together" and orders the remaining Bolsheviks to retake the lost position, but his comrades were not convinced and
go one strike!


By now the Cossack baggage train and its Persian handlers is on the road heading slowly towards the bridge. For the Aziri infantry the prospect of loot is just too much. The Aziris leap to their feet heading towards the baggage, regardless of determined Armenian rifle fire, supported by Cossack Maxim and light artillery guns. At this stage Col. Bicherakov, in consultation with his Armenian counterpart, Col. Srvandztyan, concludes that any further attempt to get their forces over the bridge is futile and a fighting withdrawal is ordered.


That evening Col. Bicherakov met up with British Lt-Col. Clutterbuck and asked him to write to General Dunsterville, firmly laying the blame on the Bolshevik Commissar Petrov.


The Turkish – Aziri forces continued their advance to Baku under the able command of Colonel Mursel Bey and Lt. Col Rustamov Pasha.

Thanks to Lawrence and Paul for commanding the Turks and Aziris so successfully and commiserations to Chas and Steve “the hat” who did their very best with a force of Cossack, Bolsheviks, Armenians, Persians and British.

Stephen Huntsman