Labels

Saturday, 22 June 2024

The Eightieth Anniversary of D-Day Commemorative Game - 02 Hundred Hours.


Editors Note: Continuing with our 80th D-Day Anniversary theme for this month's club meeting, some of the chaps got together to run a clandestine attack on a German D-Day gun battery with overtones of the attack on the Merville Battery on the eve of the landings.


If you missed the first AAR in this series of games you can pick it up in the link above.

In addition, if you would like to read about the other D-Day inspired game run at the club this month then I attach a link to Nathan's, 'Stumpy's Wargaming Blog' where you can read his AAR on his 'A Walk in the Park, Le Mesnil Patry' game using Rapid Fire Reloaded, link below.


JJ

Scenario: 0200hrs, 5th June 1944. The Normandy coast. 


A German gun battery threatens the landing ships due to arrive later that day. The battery is patrolled constantly, with dog handlers and sentries roaming all over the site.

Main objective: Destroy 2x 88mm guns with dynamite.
Secondary objective: Destroy 2x munitions dumps to prevent supplies being sent to reinforce other positions on the coast.


British paratroopers chose to attack the site from three different directions (each a corner of the table), the ‘characters’ carrying dynamite entering nearest each gun emplacement and other men (troopers) acting as diversions and support.


Maintaining stealth for as long as possible, the officer crept down a slope and despatched three sentries in succession without raising the alarm level unduly. He was able to plant the dynamite on the more exposed gun and retreat towards the nearest munitions pile before it went off. Supported by a trooper with a silenced pistol, they removed two sets of guards who had come to investigate…


On the opposite corner, the Sergeant was leading his group stealthily across a field to attack the second gun in the bunker.


Without complete detection, he placed a charge.


To his surprise it went off before he could make his escape and he was in line with the bunker aperture as it went off. The main objective had been achieved.


Fortunately he escaped serious injury, and was able to continue into the compound towards the munitions piles.

By now of course the element of surprise had been lost.


The German officer led the counter attack through the trench works, taking shots at targets of opportunity on the adjacent hill as the third team of paratroopers tried to suppress German reaction to the explosions.


Despite his better aim, the German officer’s pistol failed to deter the troopers on the hill, and they were able to eliminate a pair of sentries and a dog handler to relieve the pressure on the sergeant who was going for the munitions.

Keen to achieve the secondary objective also, so as to give their comrades the best chance possible for a successful beach landing later that day, the British men fought to the bitter end.


Despite a well marshalled response by the site’s guards, the attack was a pyrrhic victory with both objectives achieved in the end, despite almost total losses of men on both sides.

This game was really good fun to watch as the two sides tried to outmanoeuvre each other.


My thanks to Mark, Matt, Lawrence, Rob and Paul for playing out an entertaining game in good spirits.

Saturday, 15 June 2024

The Eightieth Anniversary of D-Day Commemorative Game - Chain of Command.


Editors Note:
The significance of the 6th of June 1944 cannot be overemphasised in its importance as the beginning of the final chapter of the Second World War in Europe and its immeasurable contribution to the Allied powers victory over the Axis powers as a whole, leading in the wake of their defeat to the establishment of a new democratic World order that faces significant challenges today as the generation that landed on the beaches of Normandy grow fewer every year.

Our county here in the south-west of England was in the cockpit of the invasion of Europe in 1944 with the US 28th and 4th Infantry Divisions training here and sailing from its ports and harbours and with the 101st Airborne flying from its airfields on the eve of D-Day, and with US troops training for landing on Utah Beach in April 1944 off Slapton Sands suffering more casualties (749 killed and 200 wounded) during Exercise Tiger at the Battle of Lyme Bay than they would lose on D-Day itself. 

Historical wargaming has a very unique capability of vividly retelling the story of the sacrifice made by 'The Greatest Generation' and allows those of us involved in the hobby, and in this instance the Devon Wargames Group, to pay our own tribute to their sacrifice with deep respectful gratitude that, whilst enjoying the games we play, everyone gets to walk away from the table, hopefully with a deeper appreciation of their efforts that freed the world of tyranny.

JJ

SCENARIO
The Allies have left the Normandy beaches behind them and are now pressing South and East to liberate more of occupied France. An American force is approaching a village which their scouts inform them contains a not insignificant German force comprising infantry and armour. 


The village itself covers the western side of the board. To the East are fields and woods. A road runs North to South through the centre and separates the village from the woods and fields to the East. Any armour on either side must enter within six inches of this road. The Americans close in on the village, their infantry sections are supported by an armoured platoon.


ACTION
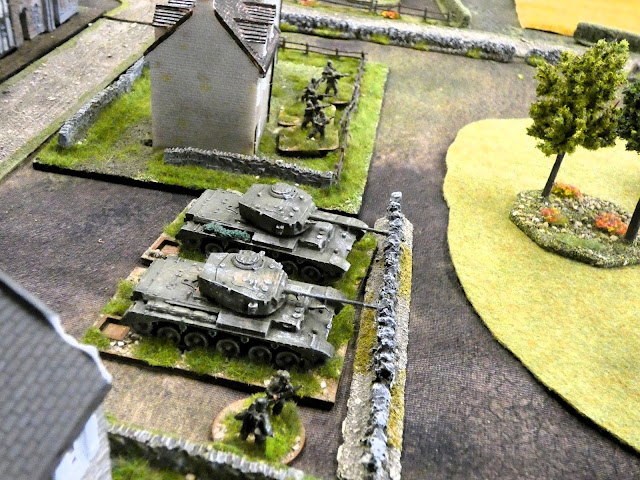
The Americans' initial approach is tentative. They manage to set up a mortar concealed in a farm yard in front of the village. An infantry section advances down their far left flank, concealed by woods and an M5 Stuart tank positions itself on the road at the north side. The Germans quickly react calling for armour support and two Stug IIIGs appear together with a Pzkpfw 35H with 32cm rockets attached to its sides. 


The Stugs open fire on the Stuart tank and successfully knock it out. At this point one of the German players rolls four sixes. Not only does this mean it is the end of the turn and he will also be able to start the next phase, but it requires a dice roll on the random events table. The result is torrential rain which reduces visibility to just 18". Far from ideal for the German defenders who want to throw everything they have at the advancing Americans as they close in.


The Germans use this opportunity to run a section out from the village to take position behind a stone wall surrounding a field on their right flank. A PaK 40 gun is set up on the crossroads where the village street meets the north south road. The Americans continue to probe and a scout team separates from the section on the Eastern side and moves up through the woods. The Germans set up their command halftrack in woods on their base line near the Eastern end of the village and two Marder IIIs position themselves to the East of these woods. Perhaps wisely, the German side decides to spend a COC dice to end the turn. As a result the torrential rain ceases and visibility immediately improves.


The Americans have brought more armour in the form of two M4 Shermans and another Stuart into the fray. They also use a COC dice to move a friendly jump off point on the Eastern edge (their left flank) 18" towards the enemy positions. It is concealed behind woods and from this they launch two more rifle sections to support the one earlier deployed. These units emerge from the woods to target the German section positioned behind the stone wall. 


As they break cover, they are hit by rifle and LMG fire from the German section they were hoping to dislodge. In addition to this a tripod mounted HMG in on the first floor of a building overlooking the woods also opens fire. All three American rifle sections start to take casualties and shock also begins to accumulate.

While this action has been taking place on the Eastern side, German and Allied armour has been engaged in a long range slugfest with the Americans losing two Shermans. The Marders are unscathed, but the two Stugs have taken some damage and shock and one is forced to pull back. The Germans now take this opportunity to fire all the rockets from the Pzkpfw 35 H and all watch in wonder as they all end up evrywhere except where they were aimed. Fortunately there was no live stock in the fields where they land.


At this point in the game with most of the American armour completely out of action or with engine damage, and the infantry assault on their left flank being robustly repulsed, it looked like the Germans would carry the day and retain control of the village. However, the Americans were not yet beaten. As their infantry units are forced back into the woods, two LMG teams are deployed from the jump-off point behind the woods together with a Bazooka team. 


From the cover of the woods the LMGs target the German infantry behind the stone wall and inflict casualties and shock. At the same time the American mortar team in the farmyard successfully targets the German tripod HMG in the building causing a casualty and some shock. The Bazooka team target the nearest Marder and hit its more vulnerable side armour. Instead of using the Marder's mounted LMG to return fire, both Marders continue in their long range duel with two newly arrived Shermans on the North edge of the board.


When the German section behind the wall is forced to retreat due to excess shock, the two American LMG teams are able to turn their attention on the tripod HMG in the building. Eventually the HMG team breaks together with a section with a senior leader who were in the same building. Meanwhile the Bazooka team, having knocked out the first Marder start to target the second one beside it. Again hitting it in its weaker side armour.


It was now clear that with most of their armour knocked out or incapacitated and with two infantry sections breaking (including a Senior Leader), the German position was no longer tenable and a victory was awarded to the Americans.

A big thank you to Jason for planning the game and letting us use his wonderful models, buildings and terrain. He got the scenario beautifully balanced and was an excellent and very patient co-umpire.

Mike

Friday, 31 May 2024

Maurice - Scenarios for Wargamers, Reinforcements in Defence


The game Maurice, written by the talented game designer Sam Mustafa, is a bit of a favourite among a few of us at club who have enjoyed the wonderful level of 'friction' this game generates through its combination of card play and die rolls that can combine to produce those moments when best laid plans can come unstuck and the commander on the spot has to come up with another plan to deal with the situation as it is rather than the one he wanted - just like the real thing!

Every wargamer should have a copy of Charles S. Grant's
Scenarios for Wargamers on the bookshelf as it has often provided
quick inspiration for throwing the table cloth down
and getting some figures on the table


So feeling in the need to scratch the itch, not having played the game for a few years, with other rules and genres taking precedence, Steve M dug his AWI Polly Oliver 15mm collection out, married with Scenario No. 15 from Charles Stewart Grant's 'Scenarios for Wargamers' and we sat down to play.

View from the American lines with Continental infantry ready to march in support of the forward line of militia and guns.

The scenario is as on the table, with American militia holding the forward ridge, with Continentals primed to march up and join them in the defence, but with a serious British assault force of line infantry supported by an array of elites, including guards, light infantry and grenadiers hoping to overcome the militia before their supports can come up to their assistance.

The British in march columns and guns limbered with American militia and guns on the wooded hill to their front and riflemen out on the American left flank in the little wood

I took command of His Majesty's army and arrayed my troops in march columns with the guns limbered in an attempt to get up to the defences as quickly as possible, hoping not to encounter any unfortunate terrain obstacle on the way, usually decided by the revealing of a card letting the unfortunate opposition commander know that that was what he had just stumbled into or as the regimental sergeant-major would declare 'Oh dear, how sad, never mind!'.

Grenadiers, Guards and Light Infantry support the 'Hatmen' to their left. I foolishly left another three of these units off table in reserve - 'Oh dear, how sad, never mind!'

In the game wash-up, my decision to limber my guns was a faulty one, as to attack with artillery is usually problematic, in that artillery moving, deploying and firing, takes time and cards to command and with limited amounts of both when attempting to manoeuvre infantry rapidly and press an attack, also requiring time and cards, the latter force takes precedence and I would have been better served simply deploying my guns and firing as and when the opportunity presented. I told you we hadn't played for a while!

The card play in Maurice determines the flow of play and can impact the outcome of actions such as firing, rallying and melee, and can be played for the events (bottom half of card) that can be directly advantageous to the player or disadvantageous to the opponent and activation points (number in pink box - top left) with points used to command units in groups, based on type and formation, and with more points required the further away they are from the commander. The Army Morale starts at a predetermined number on the dice and is reduced by the loss of units to indicate when an army has had enough.

This scenario is a classic to play with Maurice, bringing in that time pressure for the attackers and causing all sorts of challenges to overcome in that the usual pauses in an attack where the time is taken to redress the ranks and replenish a hand of cards burnt up simply manoeuvring forward and dealing with skirmishers thrown forward as the proverbial 'speed bump' is not a luxury to be had.
 
Militia and guns await the 'bloody-backs'.

Thus when the red-coat columns arrived before the militia hill-top line, having driven off a unit of riflemen in woods on their right flank but having incurred fatigue casualties on the way, the two forward battalions were compelled to charge into the American line through necessity to get on with it in the forlorn hope, as it turned out, of getting a quick win, with the Continentals already on the march in their support.


Forced to retire back down the slope, and looking to stretch the American defences whilst also weakening their Army Morale and will to resist, the British grenadier battalion supported by a light battalion carried on with their pursuit of the American riflemen, managing through a bit of fortunate card play, to prevent their falling back beyond a patch of rough terrain and pinning them with their backs to blocking rocky outcrops on the American left flank.

The British columns close in and have formed in depth to concentrate their attack on a specific point on the American line, hopefully leaving their other units somewhat redundant, and making up for my not having brought all my elites with me. Note the Grenadiers on the extreme right attempting to turn the riflemen out of their handy little wood.

With the repulse of the first British attack the battle went into a slight pause as the British attempted to rally off hits as did the militia, whilst bringing in other units to shoot to attempt to undo the rallying successes.

Steady! - Hold your fire until you can see the whites of their eyes. Someone get some fresh round-shot for those guns.

Try as they might neither side could gain much of an advantage in the rallying phases and so as the British commander I decided to cut my losses, so to speak, now that the Continentals were up in support of their militia who were still solidly ensconced on the hill and try to bring on a battle of attrition using my superior army morale to overcome that of the Americans.

A not unusual British tactic, but one that cost them dear in Pyrrhic victories, commanding the battlefield but only at the high cost in casualties.


So in went the redcoats along the front of my attack with the two lead battalions who had made the first attempt on the hill, still carrying fatigue charging up the hill with another two in support, whilst the Grenadiers closed in on the US riflemen.

The result was what I predicted with some success seeing the riflemen obliterated by the Hatmen volley fire and with them in the open with no cover giving me a bonus of two points knocked off the American morale from a poor die roll for the Americans of a '6' as they rolled for their Army Morale response.

Yankee Doodle Dandy on the march 

However the cost for this decision was the loss of my two line battalions, that left the militia teetering on dispersal but with me loosing points off my Army Morale and forcing the next stage of the attack that saw the fresh supports charge in on the next attack phase to capitalise on the damage inflicted before any further rally attempts could make things good.

'Why us Sarje? - Because we're ere laddie'

This time with a combination of timing and decisive card play to influence the combat the British attack was more successful taking out the two obdurate militia battalions and taking a whole die from the the three composing the American morale record card whilst unhinging the American defence on the hill.

The British press their attack

That was where we ended play, with lots to chat about in the pub afterwards and with me reflecting on some poor command decisions which ended up with half of my elite battalions off table because I chose to keep them there in reserve but with little opportunity to bring them forward as the cards in my hand to do so were in constant use doing other more important and pressing things.

That is where Maurice really captures the pressure of command that some other games don't quite match, giving the player commander a range of demands on his command capability to do things or not as the situation demands whilst adding the flavour of disposing of cards to enable activations that have on them additional event characteristics that would be very nice to keep in hand for when a certain situation inevitably arises.  

The American riflemen are driven off, not without a few casualties if the fatigue dice are an indicator.

Thank you to Steve M for reacquainting us with his AWI 15mm collection and to Vince, having returned to club after picking up some bargains at the Exeter Legionary Show Bring and Buy for donning his militia colonel's blue coat and commanding the rebels. 

God Save the King.
JJ

Saturday, 25 May 2024

O Group - Spring 1946. Soviet Invasion of The West, Part Two.


The invasion continues. 
(Editors Note - The link below is to Steve's previous AAR for his Soviet Invasion 1946 setup, posted back in March this year.)

Devon Wargames Group - O Group. Spring 1946. Soviet Invasion of The West AAR

The British have incorporated the better Fallschirmjäger units into the Airborne division although, currently there are insufficient uniforms, so they are fighting in their original ones.

Rumour has it that someone has got to de Gaulle and has suggested that a new unit of 
French Foreign Legion be formed from German Units held in captivity. What will he do? 
Procrastinate as usual and then blame everyone else for his failings? We will see.

The West are once again on the defensive. All along the front the allies are being pushed back. 
SHAEF is being run by Air Marshall Tedder whilst the Western Governments can’t agree on a New Supreme Commander. Montgomery, Patton? The egos have it or not. More later.


More villages, more choke points. Hold them boys. Trouble is there are hordes of the buggers all wanting a share of what is in the west. They’ve been promised the earth, all they have to do is give their lives or get shot by their own side. NKVD units follow behind, after all they have to have nice clean uniforms for all the pretty ladies (or gentlemen) that are left behind their lines.


Both sides are without reserves this time and the allies are scraping up whatever equipment they can get their hands on. Meanwhile the Soviets have just put IS3’s in the line for the first time.

The Game.
The game was set up so that the west was defending a village. At their disposal they had two companies of British Infantry, a company of German Fallschirmjager, a 17Pdr ATG, two 6Pdr, one recently repaired Tiger 2 and two Comets. They also had two rounds of off board artillery.


The Soviet forces arrayed against them were three companies of infantry, two T34/85’s, two IS2 and two IS3.


During the deployment phase the allies lost one platoon of infantry but were able to have two ambushes. The 17Pdr and one of the 6Pdr’s were allocated.


This will be a shortish AAR as things happened which caused great discussion after the game in a flurry of emails. Comments or rule corrections that any reader sees will be greatly appreciated.

The game started in the usual way with Combat Patrols being arrayed by both sides. The allies had their paras on the right with the British infantry in the centre and left.


As the Soviets advanced their CP’s the allied commander deployed on his own CP’s and shot them away. Whilst this appeared the correct action at the time it did leave him open.

Having shown his hand to the Soviets, the Soviet commander deployed his super weapons. I have, as the game organiser have to take a little bit of criticism here as I should have realised the immense fire power being unleashed.


As a platoon of two IS3’s advanced in one area and two IS’s advanced in another they dominated the battlefield. The Allies did deploy their Tiger 2 in the centre and caused some inconvenience to the IS3’s but they simply manoeuvred behind a BUA and found another target.


The Comets deployed on the allied right in support of the paras and did threaten the Soviets to the point where they had serious concerns.

However the centre and allied left was where the action was. Now comes our issues and the discussions continue. Chas opened up with IS2’s and 3’s. Now these are big-gunned tanks with six HE dice each. So if they don’t move and they fire at a BUA they have 11 dice. With a Company Command Order that is 22 in a PHASE. If they have react fire to a movement that is 33 dice in a turn on the same unit in a TURN. As a Heavy Artillery mission is only 8 dice the fire laid down is immense.


That was our issue. The outcome was that the allies were blown away and only inflicted one casualty. There were a lot of suppressions but non converted. As Ian put it later “I should not have put all my sweeties on display in one go”.

We are looking at alternative ways that AFV HE is used.

I enjoyed umpiring these guys, they knew the rules. Because of a local show participance was sparse. Our players were Ian and Chas. These are guys I game with often.

This series of games will continue in due course. I hope you will keep a look out in the future.

Steve L

The figures and vehicles came from all over the place, I can’t remember where now. Building by Hovels and a company which is no longer in being. Trees, mainly from Buffers of Axminster and the walls and hedges from eBay. Roads by Fat Frank. The BUA’s I made from bits and bobs I had lying around. I made them generic so they can be used for other eras.