Saturday 24 June 2023

O-Group in the Desert III - Beda Fomm 1941

Beda Fomm - Brian Sanders

My third foray into the desert again saw three out of the four players with limited/to no knowledge 
of  O-Group. Putting on three games in the first half of the year is a bit of a first for me, but there’s no better way to get to know the rules.

Map illustrating the retreat of Italian forces along the coast route in the Western Desert and the inland route of the Empire blocking force that would cut off their retreat at Beda Fomm

This time I used the desert scenario from the author, Dave Brown, based on the battle of Beda Fomm in 1941, published in the latest Lardy Magazine. 

https://toofatlardies.co.uk/product/lard-magazine-2022/

This pitted a large, retreating Italian force from their 10th Army, trying to force its way through a smaller, British blocking force, called Combeforce, named after its commander Lt Col John Combe.


The map was mistakenly left out of the magazine article and subsequently published on the Lardy Forum and reproduced here should you wish to give the scenario a go.

Stephen & Tom took the attacking Italians, leaving Colin and brand new wargamer Ben with the defending British.


The British battalion is ‘worn’, having only two companies available. This does mean they take no further casualties from any 1’s rolled during the attacker’s initial dice roll (p18 in the rulebook). 

They are supported by two sections of 2-pdr anti-tank guns and A13 & A10 tanks.


The Italians have one regular company of three platoons and two 2nd line companies of two platoons
each, with two tank platoons on table and a further two arriving on turns 4 & 6.


In this scenario the Italians must either get the British to take three FURBARS or capture and hold the BUA at the end of turn 12. The game is extended to 14 turns if the British take their reserves.

The limited ammunition rule is used in this scenario, requiring a roll of 8 to achieve a ‘zeroed in’ result for the mortars.


The British gain a minimum of two ambush sections from their deployment roll, regardless of dice rolls.

All reserves arrive automatically on the turn stated.


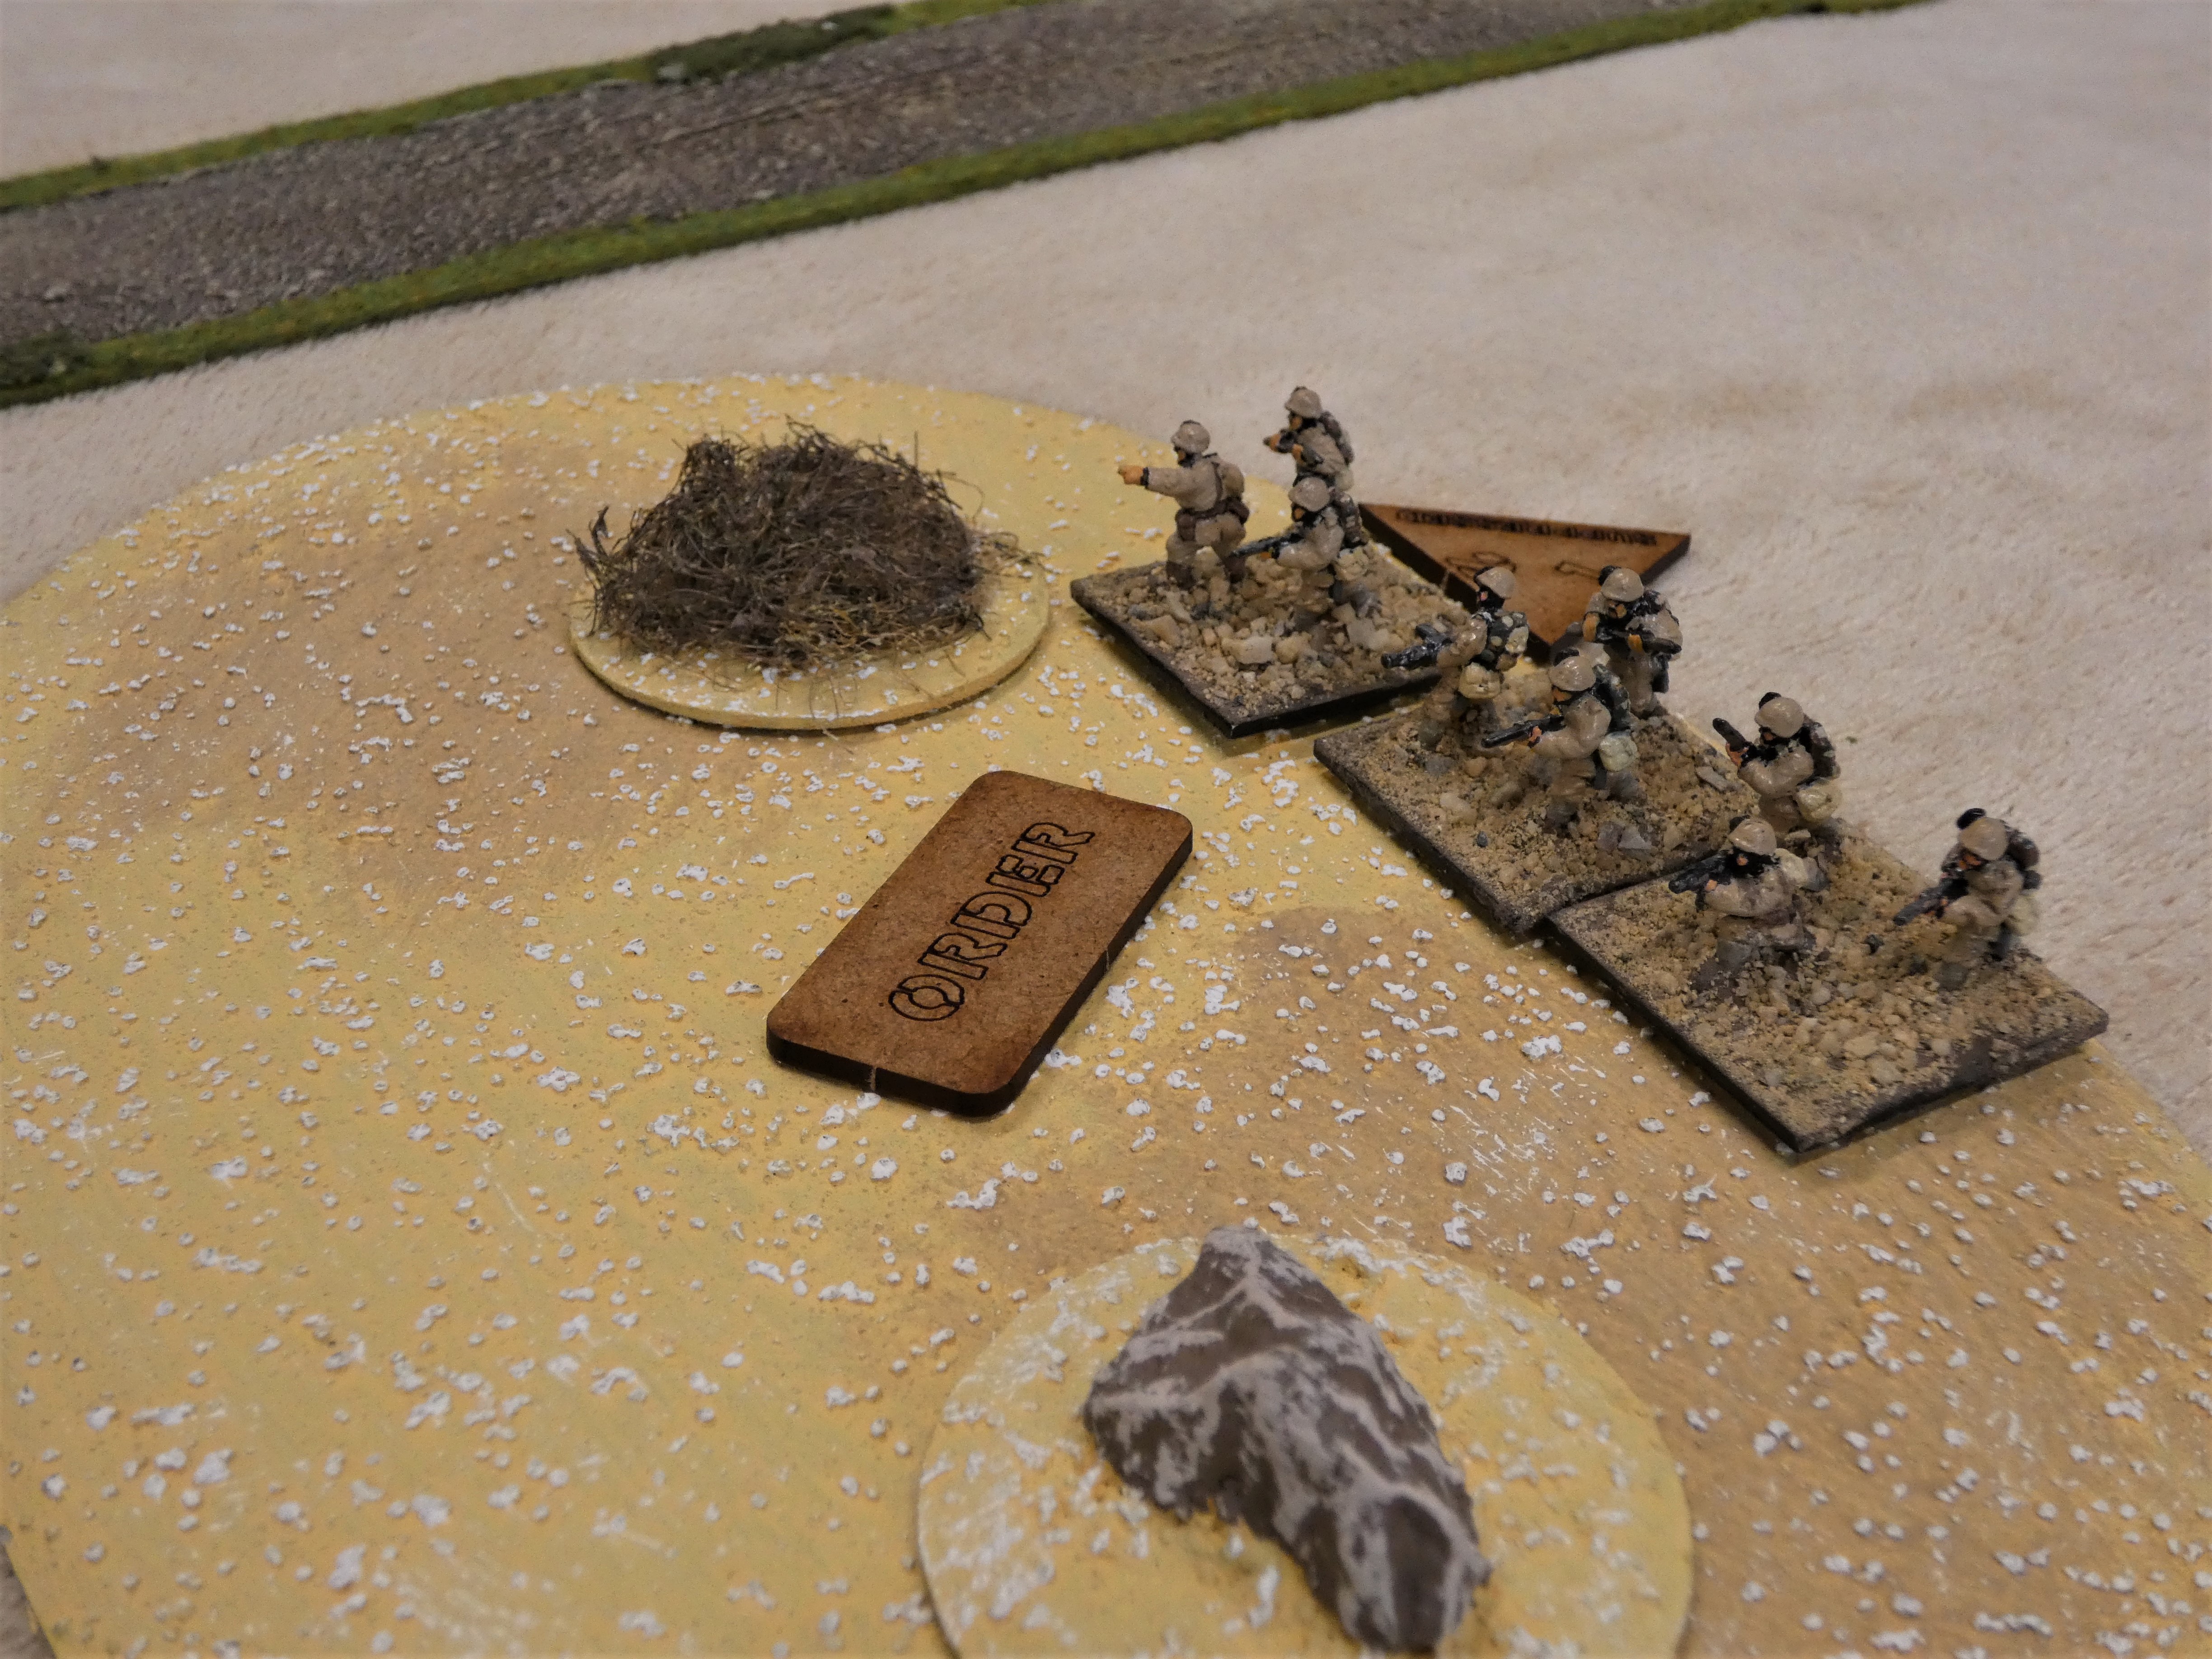
Initial dice rolls saw the British gain a number of Combat patrols (CP’s), with one further ambush unit, so the 2-pdr anti-tank guns were indicated to me as being in ambush, one on each low rise. With an infantry platoon in the rough on the left flank The Italian roll also saw a number of CP’s available, plus three platoons deployed on table.


Stephen & Tom took a company on each side of road, holding the regular company and antitank rifle off table. The first two tank platoons arrived on the road.


The Italians advanced, with no indication of where the British were, apart from a few CP’s. The speed of their advanced hampered by rolling three consecutive ‘hesitant’ companies!


As the Italians pushed their infantry forward on their right, a multiple platoon target presented itself to the British FOO, who had some success causing shock on both platoons and tying up that Italian flank for a number of turns as they struggled to rally off shock and/or move, while also prioritising their attacking options.


As the Italian armour advanced down the middle, both antitank guns deployed from ambush, hitting absolutely nothing! They then became ‘bullet magnets’ next turn and subsequently vanished, having contributed little to the British defence!


Numerous infantry fire fights were going on at this time, with shock being applied and ‘rally’ actions
attempting to recover.

With the British armour appearing on their left flank and a further Italian armour platoon arriving on the road, the scene was now set for a long-range armour battle, which dominated the centre of the table for a number of turns.

The A13/A10’s are fairly evenly matched, with both having an AT of 5 with the M11/39 on 4 Front armour is 4 & 5 for the A13/A10 respectively and 5 & 4 for the M13/40 – M11/19.


The British had also deployed their reserves on turn 5, choosing to take a 37mm portee (I know, it’s a 2pdr portee!) over a Vickers Mark V1, thus extending the game to 14 turns.

As both sides banged away, first blood went to the British, as an M13/40 brewed up and another took shock, both M11/39’s were also taking some damage.

On the Italian left flank, the other M13/40 squadron was fighting back, with the A13 soon destroyed and one of the A10’s taking damage. The portee continued to chip in with further damage to the M11/39’s but was unable to find that killer blow.


The tank battle was only likely to end one way, with the anti-tank guns not in play and not helped by Ben’s shooting dice! With 7’s required to hit and 2 tanks firing, Ben managed to roll double 1, double 2 in the British turn, followed by exactly the same roll in the react phase!! The writing was on the wall for the British Armour!

In between the ongoing armour battle, the Italian infantry and been slowly pushing forward, forcing the British to deploy theirs to counter. And although the Italians were starting to make progress, they were approaching two FUBARS, with the British on one.

As we approached turn 12, with two turns to go and the Italians on two FUBARS due to ongoing infantry losses adding to the armour, Stephen was heard to say, ‘let’s call it a day, I don’t think we can win’.


With time still left in the day and a possible outcome either way, we decided to play on. The Italians launched an infantry assault on their left and a British platoon evaporated. The British then counterattacked and pushed the victorious Italians back. The Italians counter attacked again! the game hang in the balance!

With a final devastating round of fire, the Italians inflicted two further FUBARS on the British, victory
to the Italians!!


Historically, the Italians were unable to break through and surrendered en mass, once elements of 7th Armoured Division started to appear.

I felt the scenario played well, with the outcome in the balance right to the end. The map for the scenario appears to suggest playing width ways, but we played length ways on a 6 x 4. I think the game would have been over quite early otherwise, with more of a predicted win for the Italians. I’d certainly like to play it again length ways to test my theory.


Mistakes? As per usual there were a couple. I treated soft skins as being able to hold shock, when, in reality, for each hit, a KIA roll is made, with a 5+ knocking out a section (p60) so the portee may not have hung around as long as it did!

I didn’t penalise the ‘2nd line’ companies by deducting 1D6 if they fired and moved, or make the rout test 5+ (p14).

Finally, and this could have been a game changer, re reading the scenario as I wrote this, I’m not sure I made the two 2nd line companies only two platoons each!! Oh well, it made for a good game. 

Thanks to Stephen, Tom, Colin and Ben for playing in a good spirit and waiting while I looked up the rules, or while Stephen and me had a lengthy discussion on interpretation!!


It wouldn’t be a wargame otherwise!

Next up, either a refight of the scenario, or I’d like to do more of a tank company battle.

Infantry figures are a mixture of Flames of War, Peter Pig & Skytrex. Armour mainly Flames of War, with the M11/39’s from Butlers printed models.

Steve M

Saturday 17 June 2023

The Battle of Waterloo June 18 1815 Braine l’Aleud - Changing History


Editors Note:
With the two-hundredth and eighth anniversary of the Battle of Waterloo, fought on the Sunday 18th June 1815, what better way to commemorate this very significant famous battle than a post from David covering his game, run this month at the club, and focussing on one of the Allied contingents that formed the army commanded by the Duke of Wellington, namely the Dutch-Belgians.  

. . . . . . 

The first army I ever collected in the mid 1980’s was an 1815 Dutch-Belgium one. In my defence, in the club I belonged to then, there were British, Austrian, Prussian and Russian armies and of course, like at any re-enactment, pot loads of French with a weighty Guard component. I wanted to collect something different, so, because of my love of Waterloo, Dutch-Belgians it was. 

What I hadn’t realised in my naivety was that you fielded your own army in the club games, so I was soundly thrashed every time I took to the field. Not surprising as we were playing Peter Gilder rules (which I still have a nostalgic soft spot for) which gave a blanket -2 modifier if a Dutch-Belgian unit so much as sneezed. I was very popular with my enemy opponents and most unpopular with my Allies.

Fast forward to the present and the opportunity came to run a Waterloo themed game at DWG. I had already dusted off my Brunswickers in a previous game, Engagement at Genappe - Seig oder Tod! (link below).

Devon Wargames Group - Seig Oder Tod!.html

So I decided to let the Dutch-Belgian’s loose and see what happened.

There was no getting away from the fact that Dutch-Belgian troops were more B.S. than sliced bread. They were raw and supplied with whatever firearms were left in the arsenal. 

Their officers, however, were another matter. Take Luitenant-Generaal Baron David Hendrik Chassé for example. Chassé served in the army from the age of 10, first in the Dutch army and from 1788 in the French army, eventually fighting in Spain at Talavera and being made a général de brigade under, of all people, Jean-Baptiste Drouet, Comte d'Erlon. He fought at the battle of Vitoria and the battle of Maya and so distinguished himself that Napoleon affectionately named him “général baionette" for his fondness of the bayonet charge. 

Fighting underway around Braine l’Aleud, Jerome's French VI Division v Chassé's 3rd Netherlands Division

Or the much-maligned Generaal-Majoor Albert Trip van Zoudtlandt, who led the three Carabinier regiments at Waterloo. He entered the service of the Dutch Republic in 1791, as a cadet in an infantry regiment but soon changed to the cavalry becoming a commander of a regiment of cuirassiers. 

On the amalgamation of the Dutch Army into the Imperial French Army Trip's regiment became the 14th Cuirassier Regiment. With this regiment Trip took part in the French invasion of Russia in 1812. His regiment distinguished itself at the Battle of Berezina, during the harrowing retreat of the French army from Moscow. Trip also took part in the final campaigns of Napoleon and distinguished himself again at the battle of Leipzig. 

It wasn’t only the high-ranking officers who commanded respect. Luitenant-Kolonel Wijlbrandis Augustus de Jongh, who commanded the 8th National Militia at Quatre Bras was severely wounded but ordered his staff to tie him to the saddle so he could stay with his battalion. These men demanded respect and must have generated considerable fear. Their very presence must have strengthened the resolve of the raw recruits, and it was this I wanted to test in this scenario. Could a poorly equipped raw force commanded by such officers as these stand up to a professional, experienced French Army.

I had some guiding advice from Nigel Marsh, the designer of the excellent computer moderated game Carnage & Glory. Allow ten units for each playing hour e.g. a game with thirty units would last about three hours, and make sure the sides are in effective artillery range of each other. Following this simple rule of thumb, with 34 units on the board and the players still getting used to the rules, the game lasted just over four hours and we got a result.

So having got the game length sorted, would the inspirational elan of the Dutch-Belgian commanders be enough to offset the more than questionable quality of their troops?


The scenario would be set around the village of Braine l’Aleud on the extreme west flank of the Allied army at Waterloo. It was the position taken up by Chassé’s division on the day of the battle. 

A French Division under Prince Jérôme Bonaparte would advance up the hidden valley to the west of Hougoumont and fall on the Dutch-Belgian position around Braine l’Aleud. 

During the game various routing Allied units would enter from the direction of Hougoumont, culminating in the Coldstream Guards (not routing, but ‘called away’) and finally the Old Guard would make their appearance to provide the coup de grace. 

Would the Dutch-Belgians last until the arrival of the Guard, thus gaining a moral victory, or would they yet again get a sound thrashing.

Advance of the French right

I used the excellent Ferraris map to make up the playing area and was pleasantly surprised to see that there were defensible positions as well as a potential strong point in the Church and graveyard of Braine l’Aleud. The valley to the west of Hougoumont was clearly marked as were the hedge lines and a small wood.

https://maps.arcanum.com/en/map/belgium-1777/?layers=37&bbox=473149.9823995092%2C6589064.735119662%2C498928.3701886849%2C6598026.976686099

The players received the following briefs and orders of battle.

TERRAINE – Pasture and arable with gentle slopes.
BRAINE l’ALEUD – Stone BUA with one stronghold, Max D.F.8. Present D.F.2. S.N.12
WOOD – Medium Cover
TREE LINE – Soft Cover and blocks LOS
HEDGES – Soft Cover and impassable to Cavalry and Artillery
VISIBILITY – Woods and BUA; 100mm and 40mm from their edge to units outside of them.
RIVER – No effect on Infantry movement; Difficult Terrain for Cavalry and Artillery unless crossing by ford to the west.
ROADS – No effect

d'Aubreme Brigade in front of Braine L'Alleud 

Général de Division Prince Jérôme Bonaparte
Having advanced along the hidden valley to the west of Château Goumont fall upon the enemy located in and around Braine l’Aleud.

VI DIV 1e CORPS
Général de Division Prince Jérôme Bonaparte
2e Companie 2e d'Artillerie a Pied (2x6lb 1x Med How.)

1er BDE Général de Brigade Baron Pierre-Francois Bauduine
1er Bn 1ére Régiment de Légère
2e Bn 1ére Régiment de Légère
1er Bn 3e Régiment de Ligne
2e Bn 3e Régiment de Ligne
3e Bn 3e Régiment de Ligne
4e Bn 3e Régiment de Ligne

2e BDE Général de Brigade Baron Jean-Louis Soye
1er Bn 1ére Régiment de Ligne
2e Bn 1ére Régiment de Ligne
3e Bn 1ére Régiment de Ligne
1er Bn 2e Régiment de Ligne
2e Bn 2e Régiment de Ligne

IIe CAVALRY DIV Général de Division Comte de Piré
2e Companie 4e d'Artillerie a Cheval (2x6lb)

1er BDE Général de Brigade Baron Huber
1er Régiment de Chasseurs-à-Cheval
6e Régiment de Hussars

2e BDE Général de Brigade Francois-Isidore Wathiez
5e Régt de Chevaux-légers (Lanciers)
4e Régiment de Hussars

DB occupy Braine L'Alleud

Luitenant-Generaal Baron David Hendrik Chassé
You are charged with protecting the right flank of the Allied Army and provide support when required. Your men may be inexperienced in battle but their resolve with be greatly strengthened by their officer’s Elan and Leadership.

3rd Netherlands Division
Luitenant-Generaal Baron David Hendrik Chassé

1st BDE Kolonel Hendrik Detmers
Bataljon jagers No. 35
Bataljon Infanterie van linie No. 2
Bataljon Nationale Militie No. 4
Bataljon Nationale Militie No. 6
Bataljon Nationale Militie No. 17
Batterij rijdende artillerie (H.A.) 2x6 pdr gun, 1xMed howitzer

2nd BDE Generaal-Majoor Alexander d'Aubremé
Bataljon jagers No. 36
Bataljon Infanterie van linie No. 3
Bataljon Infanterie van linie No. 13
Bataljon Nationale Militie No. 3
Batterij artillerie te voet (F.A.) 2x6 pdr gun, 1x Med howitzer

BRIGADE ZWARE CAVALERIE Generaal-Majoor Albert Trip van Zoudtlandt
Regiment karabiniers No. 1
Regiment karabiniers No. 2
Regiment karabiniers No. 3

INDEPENDENT UNIT Luitenant-Kolonel Ignance Louis, Baron Duvivier
Regiment huzaren No. 8

Dutch battery charged 

Because of the closeness of the setup, things got going pretty quickly. Both French infantry brigades threw out skirmishers and started their advance, slowly pushing back the Dutch-Belgian skirmish line There was already consternation in the Dutch-Belgian ranks.

‘There’re thousands of ‘em.’
‘Look to your front. Mark your target when it comes’. (Okay, wrong movie but massed French columns do look very daunting)

Fire-fight 

A cry of ‘Charge the guns’ rang out (right movie this time) and the 4th Hussars lead by Général de Brigade Francois-Isidore Wathiez, thundered towards the Dutch foot battery. With the war-torn features of Kolonel Hendrik Detmers looking on, they unhurriedly loaded their pieces with double canister.

Much scorn was heaped on Wathiez for the naivety of such a tactical blunder, which quickly turned to admiration for such an audacious manoeuvre when the cavalry charged home despite severe loses, which in turn changed to disbelief when the Dutch gunners stood their ground, forcing the 4th Hussars to retire and reform. A case of Dutch courage, perhaps.

French centre advances

The cavalry Divisional Commander, Comte de Piré, attempted to turn the Dutch-Belgian right flank, but repeated charges and counter charges by the Carabinieres lead by the much-maligned Generaal-Majoor Albert Trip van Zoudtlandt, kept them at bay, forcing them to retire and reform, much to Piré’s frustration.

French right outflanking manoeuvre

The French right, under Général de Brigade Baron Jean-Louis Soye, were slowly pressing forward past the tree line, but suffering from nagging skirmish fire from the 36th Jagers and the unwelcome attention of d'Aubremé Foot Battery, deployed on the high ground to the Southeast of Braine l’Aleud. d'Aubremé Brigade had formed a defensive line in front of the village. 

That’s when ‘bad things’ started to happen. From nowhere it seemed, a routing mob of soldiers in black streamed from the direction of Hougoumont and headed towards his position. He considered rallying them but was reluctant to move far from his Brigade. ‘Let them go,’ he thought. If Hougoumont fell, he was going to have his work cut out.

Pire's Division

Pressure was building on the Dutch-Belgian line as it started to become heavily engaged with units from Bauduine’s Brigade who had pushed through the woods. A close-range musketry battle developed with neither side having the will to go in with the cold steel. 

Pire tries to turn Dutch-Belgian right flank

Suddenly the stalemate broke and 3e and 4e Bn of the Régiment de Ligne charged the Dutch Horse Battery. They looked around for the reassuring presence of Kolonel Hendrik Detmers but he had disappeared and pretty soon, so had they. Their 'Dutch Courage' had deserted them, and they fled to the rear. Lacking gun support and despite Trip’s strenuous efforts, the Carabinier Brigade was at last driven back by Baron Huber’s Light Cavalry. 

Soye's Brigade

Detmers brigade was also losing the musketry duel and the Dutch-Belgian line was starting to crumble. On the Dutch-Belgian left, despite routing two battalions of the 2e Régiment de Ligne, d'Aubremés Brigade was being forced back into Braine l’Aleud. They had also lost the 36th Jagers who had become isolated engaging the French Divisional Battery. Added to this, there was now a stream of Allied routed troops flowing around his position. 


One last charge and the Dutch-Belgian line would be swept away. Detmers took up his position behind his battered Brigade, to his front, the 8th National Militia, their Lieutenant-Colonel, Wijlbrandis Augustus de Jongh, still tied to his saddle. Two Battalions of Bauduine’s Brigade lowered their bayonets and charged the thin blue line (yes, all right). The crashing volley delivered by the 8th Militia routed one unit and halted the other in its tracks. 


To their rear they heard another cry of ‘Charge the Guns’. It was none other than Prince Jérôme Bonaparte. Not having endeared himself to his men, he charged into the wood alone to find that, first, there were no guns, and second, Dutch Belgian hospitality left much to be desired.


D'Aubremé knew that the game was up when none other than a battalion of Coldstream Guards joined the tidal wave engulfing his position. They must have been ‘called away,’ he thought.

La Guard Arrive

And then over the crest, emerging from the smoke of battle, he made out the tall bearskins he knew so well, accompanied by their drums beating the 'Pas de Charge'. The end was fast approaching. But then he heard another sound. It was the band of the 8th National Militia striking up their Regimental March, ‘I’m Still Standing’.


Who says history can’t be changed.


My thanks to Ian, Mike, Gregory, Luke and Ken for playing in such a generous and good humoured way, and for their continued positivity and enthusiasm.

Mat Tiny Wargames
Buildings Hovel
Roads Fat Frank
Figures AB, Minifigs, Battle Honours, Museum Miniatures, Fizzer Johnson 

Sunday 11 June 2023

Battle of Cape Ortegal, or Strachan's Action, 4th November 1805 - A Kiss Me Hardy Scenario

The Battle of Cape Ortegal is described succinctly in Wikipedia thus:

'The Battle of Cape Ortegal was the final action of the Trafalgar campaign and was fought between a squadron of the Royal Navy and a remnant of the fleet that had been defeated earlier at the Battle of Trafalgar. It took place on 4 November 1805 off Cape Ortegal, in north-west Spain and saw Captain Sir Richard Strachan defeat and capture a French squadron under Rear-Admiral Pierre Dumanoir le Pelley. It is sometimes referred to as Strachan's Action.


Dumanoir had commanded the van of the line at Trafalgar and had managed to escape the battle having suffered relatively little damage. He initially attempted to continue the fleet's mission and enter the Mediterranean, but fearful of encountering strong British forces, changed his mind and headed north to skirt round Spain and reach the French Atlantic ports. On his journey he encountered two British frigates and drove them off; shortly afterwards he encountered a single British frigate and gave chase to it. 

This period map shows the position at about 11.45 am with the French squadron in line (a-d) the
British frigates looking to envelop it from the leeward side having harassed the rear of the French column and Strachan's flagship, Ceasar (1) leading up the other British third-rates (2 and 3) and with the slow old Namur (4) making best speed to try and catch up.

The frigate led Dumanoir within range of a British squadron under Strachan, who was patrolling the area in search of a different French squadron. Strachan immediately gave chase, while Dumanoir fled from Strachan's superior force. Strachan's squadron took time to form up, but he was able to use the frigates attached to it to harass and slow the French, until his larger ships of the line could catch up.

There then followed several hours of fierce fighting before Strachan was able to outmanoeuvre his opponent and double his line with frigates and ships of the line. The French ships were then overwhelmed and forced to surrender. All four ships were taken back to Britain as prizes and  commissioned into the Navy. Strachan and his men were handsomely rewarded by a public who viewed the successful outcome as completing Nelson's victory at Trafalgar.'

The map below shows the setup for this scenario, laid out here for my larger table of 10' by 5' but translated for our game onto my brand new 6' by 4' sea cloth from Tiny Wargames which I purchased to stage my small squadron, single ship actions on at club.

The game setup as seen in our pictures below recreating the scene of battle at about 11.45am on the 4th of November 1805.

This action offers a couple of setup possibilities, namely the historical action seen above as it actually unfolded from or a 'what if' set up which assumes Dumanoir had actually managed to bring his line about on an opposite tack earlier, looking to bring on an action where his line was moving opposed to Strachan's, giving him an opportunity to overwhelm the slow-sailing Namur bringing up the British rear, before his opposing commander could come to its aid.

William James' in his Naval History of Great Britain described the set up above thus;
'At about 11 h. 45 m. A.M., finding an action unavoidable, the French admiral threw out the signal for his ships to take in their small sails, and haul up together on the starboard tack, with their heads to the north-east by east. This they presently did, and then fell into a line ahead in the following order Duguay-Trouin, Formidable, Mont-Blanc, Scipion. From the last-named ship the Caesar at this time bore about south by west rather more than a mile distant: consequently she was well on the weather quarter of the French rear.

The Révolutionnaire managed to bring all of her seven broadside 32-pounder carronades, (see ship sheet below), into action, when she delivered this stinging short-range bow rake to Dumanoir's flagship Formidable late on in our game.  

The Namur and Révolutionnaire had been great gainers by the slight change in the wind. They were now running with it upon the quarter, and bore from the commodore and his line, the one south-west, or nearly astern, distant about 14 miles, the other west-south-west, or a little upon the lee quarter, distant about seven miles. A trifle to the westward of the Révolutionnaire's line of bearing, and just out of gun-shot from the enemy, lay the Aeolus; and much nearer, the Santa-Margarita and Phoenix, who had already performed so well, and who were still doing their utmost to cripple the rearmost French ship.'

The Révolutionnaire was a captured French 40-gun Seine class frigate
converted to a standard 38-gun British one in 1794, (normally using 4d6 for her broadside)
only to be reconverted in 1803 to carry 32-pdr carronades instead of her 18-pdr long-guns
 and the 7d6 broadside she displays here with the restriction to firing at short range..

My notes also included some other factors pertinent to this little battle that would hopefully help capture some of its more unique aspects.

Setup Notes
Dumonoir has ordered line ahead on the starboard tack, with the British to windward just outside of maximum range.

Strachan has ordered his squadron to form line windward of the enemy, looking to close the range to short on a parallel heading and make best use of his gunnery whilst the frigates get to the leeward side whilst harassing the rear of the enemy line in support.

Note the frigates Santa Margarita and Phoenix have been swapping bow and stern chaser fire with the Scipion since 09.30.

Umpire’s Notes
The British frigates were an integral part of Strachan’s battle plan, historically doubling the French line with their combined fire with that of the British battle line and forcing a speedier conclusion to the fight that might otherwise have been. 

A balance will need to be struck to encourage the British player to act similarly because a full broadside from a French third-rate can easily demolish a frigate at short to medium range which is why there was a convention that ships of the line did not fire at frigates unless they fired at them.

Of course a canny French player will easily determine that it might be to the French advantage to fire at full effect on a frigate to quickly cause this to happen and help to impact British fleet morale more readily, than tackling the enemy ships of the line, if the option presents.
 
My suggestion is to insist that if the British present targets on each broadside of a French ship of the line, then a full broadside may only be fired at the principle threat, namely an enemy ship of the line, whilst only a partial broadside will be fired simultaneously against a frigate. Thus if the British unwisely have a frigate present as the only target then they must accept the full broadside likely to follow such a move.

Fleet Morale
Fleets never fought to the last ship, just as armies never fought to the last battalion. After a number of ships had been lost, one side would try to break off the action and retreat to the nearest friendly port. At that point, the victors would usually be too tired, too badly damaged, or too disorganized to pursue (common phenomena among land armies also).

The battle would end with the victors in possession of “the field” and some of the enemy’s ships.

Preservation Level:
Whenever the total preservation point value of ships lost or dismasted exceeds a fleet/squadron’s preservation level, all the ships in that fleet/squadron must test take a retreat test and if passed repeat when a ship in the fleet/squadron reaches a new level of damage (see Damage States below) or strikes. The ship’s entire preservation level is counted if the ship strikes, sinks, burns up, explodes, or is captured by boarding. One less than the ship’s preservation value is counted if the ship is dismasted (loses all rigging squares). The extra point is added back to the calculation if a dismasted ship strikes, etc., later. 


The preservation level of a fleet/squadron is the proportion of the total Preservation Point Values (PPV) the fleet/squadron can lose without trying to disengage and retreat:

The French are on 9 PPV (3 for the flagship and 2 for each for the three other third rates) and will break test on 2.7 PPV lost, i.e. when the flagship is lost or two of the other third-rates. 

Likewise the British are on 13 PPV (3 for the flagship, 2 for each for the three other third rates and 1 each for the four frigates) and will test on 6.5 PPV lost similarly as above.

Retreat Test:
Roll a d6 and add the commander of that fleet or squadron Command Rating (CR). The Fleet or Squadron breaks and disengages on 4 or less. 1 is always a failure. Disengaged squadrons must move to exit the table and may not fire unless enemy ships fire at them.

Admiral/Commodore Command Rating (CR)
Strachan +1
Dumanoir 0

Game End Effects:
The winning side is the last side whose Fleet Morale breaks or the last side with an unbroken squadron on the table. 

If neither side has an unbroken squadron at the end of a turn then game is a draw.

Losing side – roll a d6 for any ships that have suffered Heavy Damage. They founder and sink on a 1 or are captured by the enemy if they have any ships of the same rate or larger that are not more than Light Damage.

Battle stations with all ships cleared for action as the French line 'haul up together on the starboard tack, with their heads to the north-east by east' to quote the late-great William James

So with our players briefed and the situation of this historical scenario firmly established we set up the table as seen above and below with Bob taking the role of Commodore Sir Richard Strachan aboard his flagship HMS Caesar 80-guns, ably supported by Mark leading the British frigate squadron, Whilst Ian took the roll of Rear-Admiral Pierre Dumanoir le Pelley likewise ably supported by one of his senior captain's Sam

The same view above from the rapidly deploying British pursuit column with the old Namur bringing up the rear, closet to camera supported by the frigate Révolutionnaire. Note the ship reccord cards, range sticks, turning circles and gunnery arc templates we use for games of KMH.

All the standard chits for a game of Kiss me Hardy (KMH) were in the bag together with chits for Strachan's squadron, the British frigate squadron and of course Dumanoir's squadron.

Also, with this game set in the November stormy Bay of Biscay we additionally had the 'Wind Directional Change' chit and the 'Getting Choppy' chit, both of which would end up playing a pivotal role in our refight.


Initially both sets of players decided to stay with the plans adopted by both historical commanders, that saw the lead British frigates exchanging chase fire with the rearmost French ship Scipion, taking care to keep out of the broadside arc of the larger third-rate, whilst Strachan led the deploying British line forward to parallel the French line on their starboard (windward) side.

Likewise Dumonoir opted to signal his lead ship Duguay-Trouin to tack and come about on the opposite heading hoping to catch the British out before they could shake out fully into line.


However, as the saying goes, 'the plan changes on first contact with the enemy' or should that be weather, which was often the common enemy to mariners of all nations; whatever, the plans certainly changed in our game, as the lead French ship Duguay-Trouin tacked, only to be taken aback 'in irons' with a sudden shift in wind direction that was to be just the first of three such shifts in the game.

Duguay-Trouin is seen successfully tacking at the head of the French line, just as the wind shifts and changes everyone's plans!

The French commander had only just signalled his change of course but, with his ship effectively leading his line, now took advantage of the change in wind heading to wear around on the larboard side leading his line with him and leaving the Duguay-Trouin to sort herself out as best she could and rejoin her compatriots on the new heading.


Strachan also saw an opportunity present, and with the wind still in his squadron's favour, either on the quarter or stern, allowing him and them to make best speed to cut the French line as it turned, whilst the frigates continued to group to the leeward side of the French keeping in step with their larger consorts so as not to allow the French an easy target of opportunity.

The Duguay-Trouin, bottom right, has recovered going into irons and is coming about to rejoin the French line, while HMS Caesar has pierced the French line as he signals to his squadron to 'engage the enemy more closely'.

HMS Caesar initiates a close range salute as she administers broadsides to Formidable and Mont Blanc

Strachan's aggressive move had placed his flagship amid three enemy third-rates as he sought to disrupt the French line and bring on the pell-mell struggle that would likely favour his ships, however the following British third-rates Hero and Courageaux were struggling to come with yet another change of wind direction that put both 'in irons' but with both British crews managing to avoid damage to their respective ships as they managed to successfully swing their bows to starboard, whilst keeping their foremasts intact.

As the action hots up with Caesar's attack, the British Frigates gather their strength to come to the support of the British flagship

Thus the honour of coming to the support of the British flagship fell to the British frigate line which now, finding the wind on their quarter, spread their canvas and formed line on the starboard side of the French, with Santa Margarita 36-guns and Phoenix 36-guns lending their fire in support of Strachan's attack.

The British third-rates Hero and Courageux follow the Caesar in towards the French line as Duguay-Trouin looks to get clear and come about

HMS Caesar surrounded by enemy third rates as she takes the fight to the centre of Dumonoir's disorganised line

The frigate line had come up just in time, as the Caesar had lost the use of her helm in the previous rounds of firing, and unable to alter her course dropped out of the fight, to make necessary repairs as her following battle line came up to cover her from the rest of the French line.

The British frigate line joins the attack on the Formidable, as Santa Margareta, Phoenix and Aeolus, pour on the hurt.

Suddenly it was now Formidable's turn to feel surrounded as at first three British frigates passed her bows administering broadsides enroute to go with the fire already received from Strachen's flagship Caesar.

The Formidable, like Caesar was a large 80-gun third-rate, somewhat reduced in offensive capability due to damage taken during the Battle of Trafalgar and the recent chase by Strachan's squadron, that saw three of her 12-pounders dismounted in the previous battle and another twelve from her quarter deck thrown overboard in the chase leaving her with just 65 guns and fighting as a 64-gun third rate in our game.

The battle has turned into a bit of a confused dogfight as the lines have become mixed and formations disrupted by the unpredictable wind, leaving the players much to ponder as each side struggles to gain the ascendancy.

However the Formidable was living up to her name in terms of her structure and heavy timbers which meant that she was more than capable of soaking up a lot of British firepower before her day was done and no matter how many strike tests were administered the ships bulk and her status as a flagship maintained the crew's morale sufficiently for her to shrug them off on each occasion.

Frigates Aeolus and Révolutionnaire perform the 'frigate sandwich' with a French 80-gun third rate for the filling

Still the Formidable came under yet further attack as the Révolutionnaire made full advantage of the quartering wind and her frigate sailing qualities to rapidly close with her three sisters and nimbly turning to starboard to cross the bows of the French flagship at short range, to administer a wood crunching bow rake with her eighteen 32-pdr carronades and five 9-pdr long guns thrown in for good measure.

This attack was doubled up with short range stern rake from the 32-gun Aeolus up-gunned to carry 18-pdr long guns instead of the usual 12-pdrs for a 32-gun frigate, able to pour in shot from her thirteen 18-pdrs, two 6-pdr long guns and five 24-pdr carronades, leaving Dumonoir the challenge of passing yet another strike test.

The Formidable has struck (far right of picture) and the Révolutionnaire has stopped to lower boats to send over a prize crew as the rest of the French squadron turn about and head in the direction of France, as the other British ships start to appreciate the change of events.

The game had reached it's turning point, with the other British third-rates starting to take a toll on the French line, the French flagship was still on only a basic 20% chance of failing a strike test, based on the damage she had taken.

However the effect of the fire from Aeolus and Révolutionnaire added in the morale shaking factors of being raked and suffering High Officer Casualties as a result of a critical hit from all that frigate fire, leaving Formidable teetering on a 35% chance to fail, which she did, seeing Dumonoir haul down his colours and force a squadron morale test for the rest of his force, which they also duly failed.


The announcement to the French players of their force morale failure was kept to them alone and left the British players having to form their own opinion as to why the French were now not initiating attacks of their own volition but simply replying to British attacks, and their sudden change of course, seemingly looking to head for one specific table edge.

With the French move to obviously vacate the table, the race was on to stop any such escape and even the weather wanted to get involved in the drama, as the 'Getting Choppy' test produced a positive result and, with the swell on the rise, all the third rates were forced to close their lower gun ports to avoid swamping in the heavy seas


At this stage of the game, it begun to look less and less likely that any of the French would make their escape and with the pub calling us to shore we called the game with Rear Admiral Dumonoir presenting his sword to Captain Hotham commanding HM Frigate Révolutionnaire and an end to much fun had by all in a very entertaining day's play.


All the vessels involved bar the frigates and Namur were carrying significant scars of battle towards the end and with some of the French having lost masts with the wind changes and leaving the British ahead on points at the stage when Formidable struck, but I guess the game is amply illustrated by a look at the respective ship cards for both flagships, with the Caesar having lost her mizzen mast from her earlier battle and half her guns pushing her into the heavily damaged criteria as illustrated above, requiring much repair work ahead in the Plymouth repair yard. 


Similarly the Formidable displays a similar picture with about half her remaining guns knocked out but with only light damage from all that frigate gunnery, with the dead and wounded officer count and getting raked making the final difference when asked if she would keep fighting.


The picture below of the aftermath of the battle by Francis Sartourius from 1807, entitled 'Bringing Home the Prizes', definitely captures the spirit of our little encounter with ships bearing their scars of battle, even if the Formidable in Sartourius' depiction seems to have acquired an extra deck.


Thank you to Jack, Bob, Mark, Sam and Ian for all the fun and looking forward to the next game.

JJ