Saturday 30 April 2022

It's Maida, JJ, But Not As We Know It


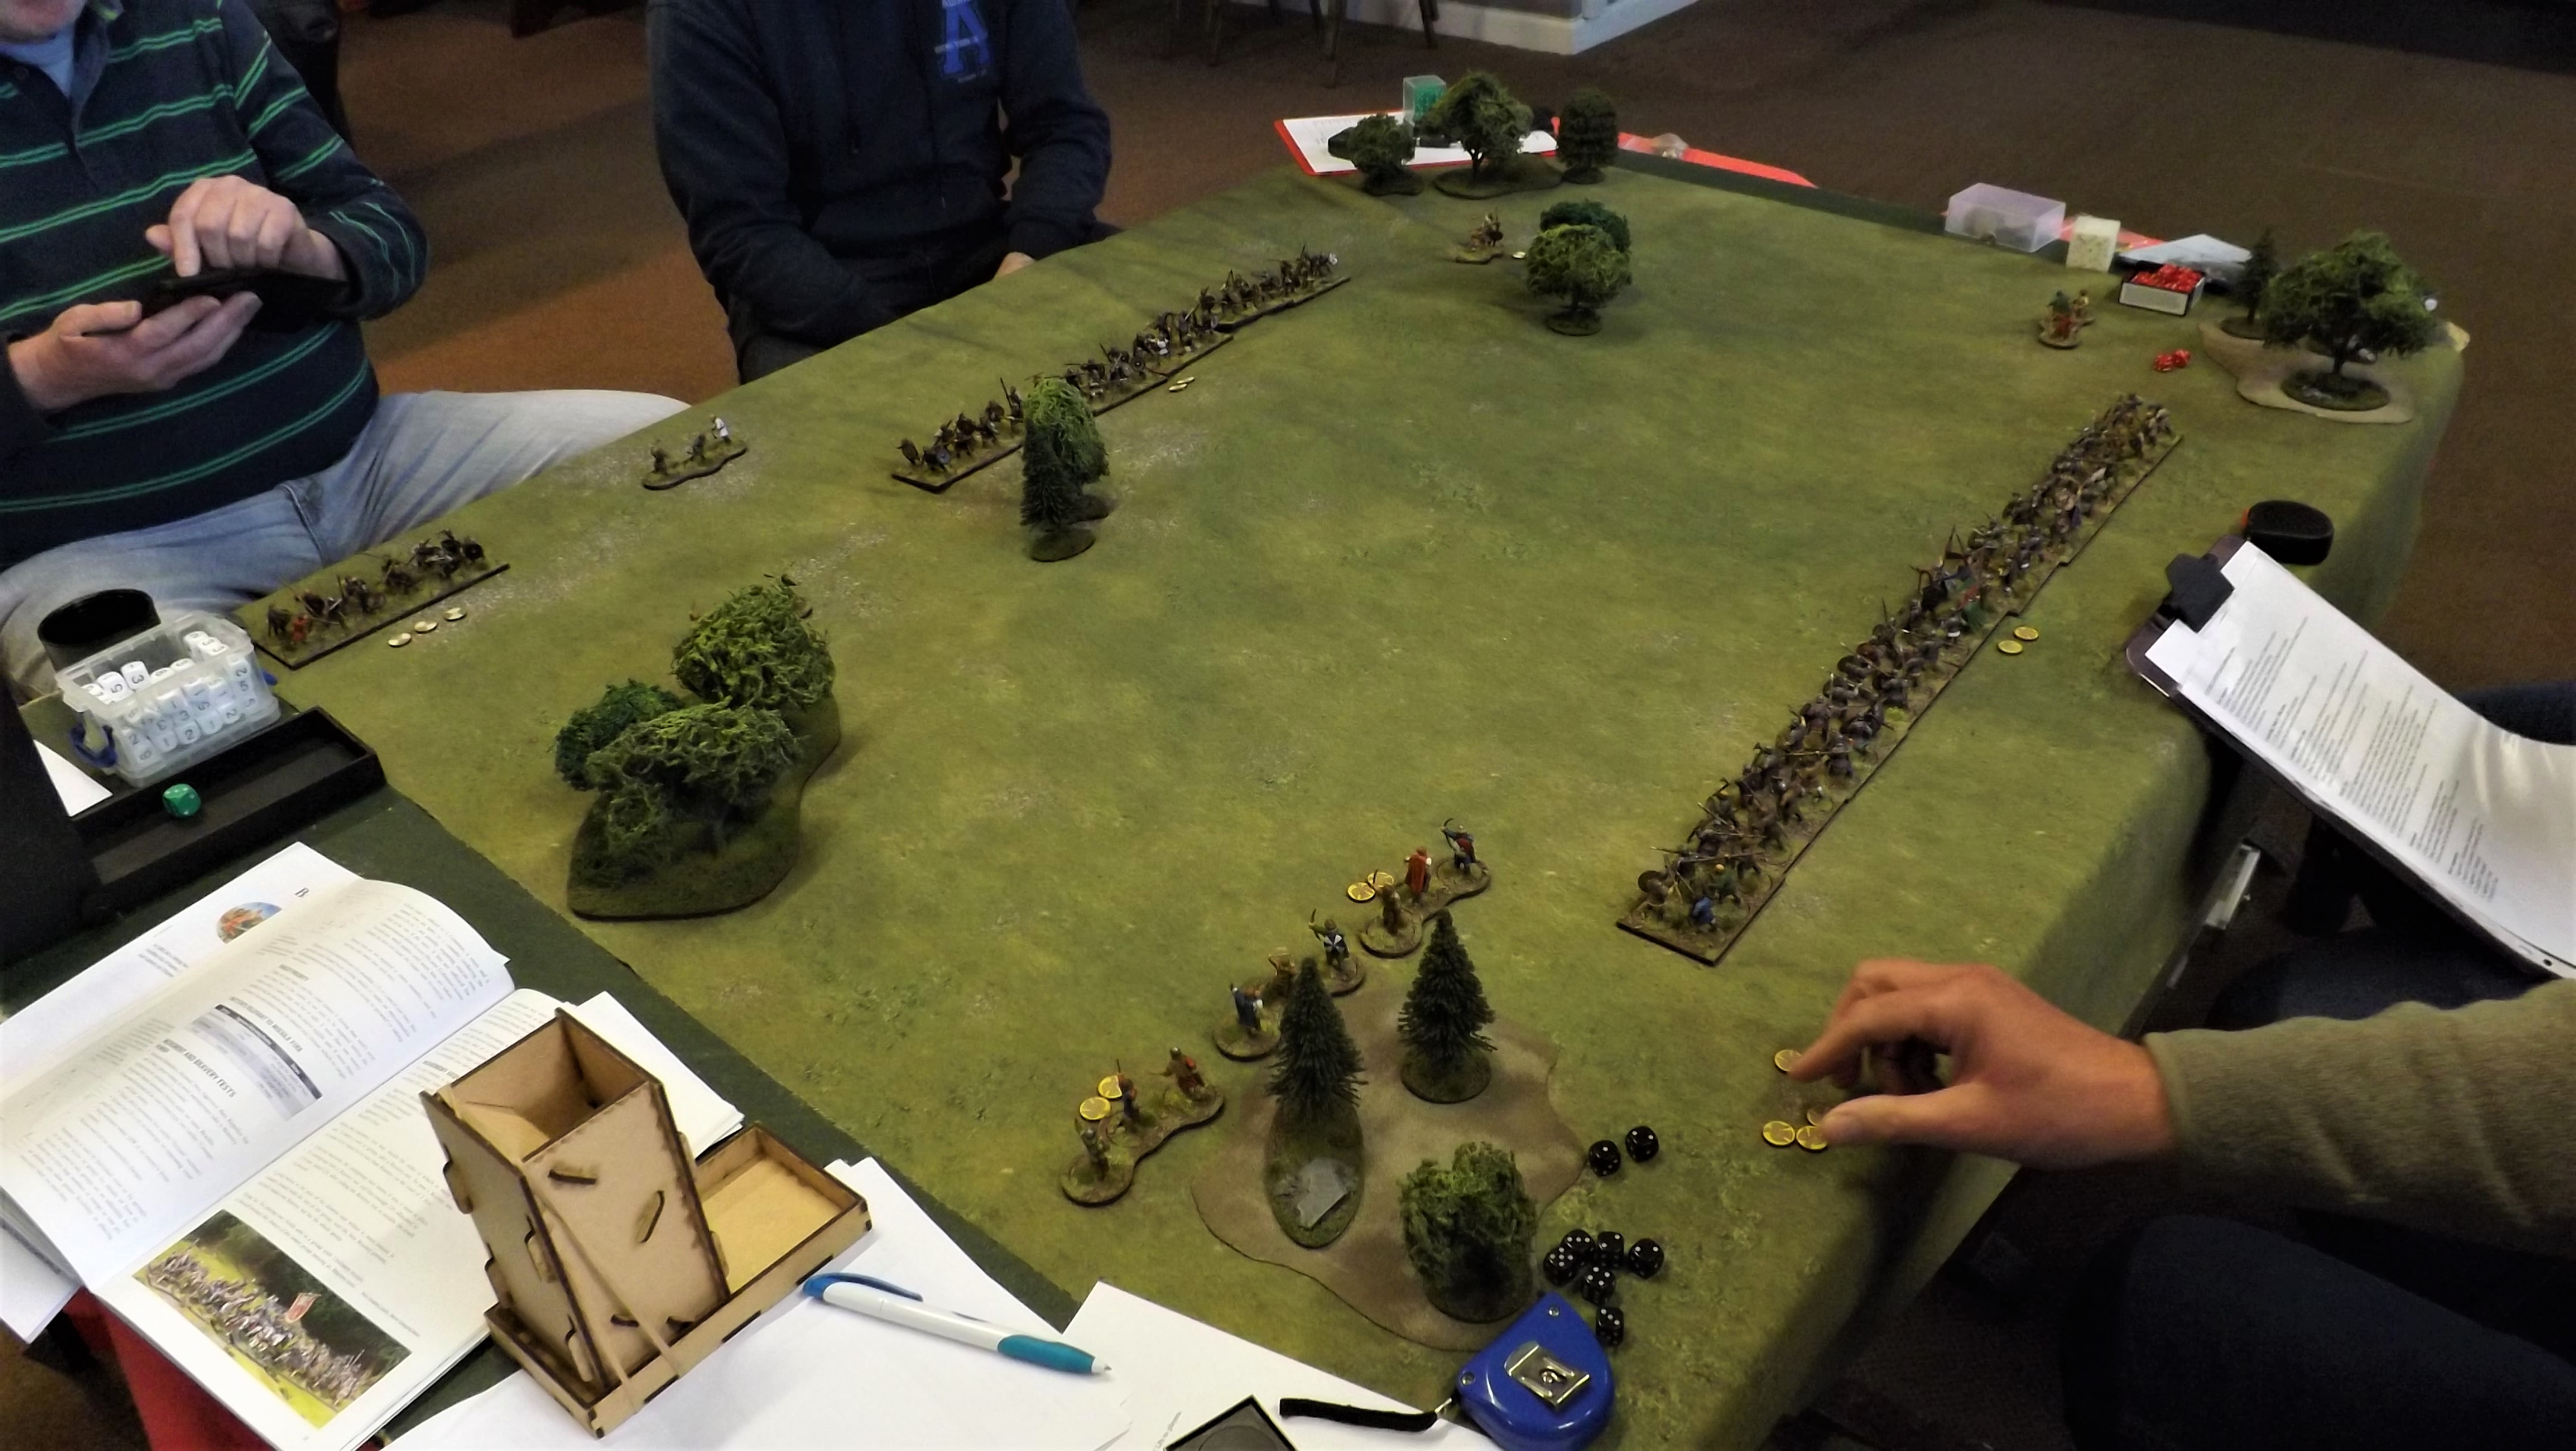
OK. Let’s come clean straight away. When I offered to put on a game at the club based on the battle of Maida with Russian and French forces fighting in the snow, there was much raising of eyebrows and scrabbling for laptops. DWG puts on historical wargames, and, apart from the odd Nazgul flying across the table at Christmas time, historical wargames is what DWG play. So, Maida, fought under the scorching Italian sun between British and French, being played on a frozen waste between Russian and French forces. Hmm.

The thing is, I have been building up both a French and a Russian Division and I had an excellent, spanking new Tiny Wargames snow mat and I wanted to play with my new toys. I was also introducing the club to my set of Wargames rules, and I knew that Maida was the perfect scenario for this, being essentially an infantry engagement of approximately Divisional size.


The Battle of Maida was fought on 4th July 1806 and is popularly (and erroneously) seen as the first time that the fire power of the two deep British line overwhelmed an attacking French column, but let’s not go down that particular rabbit hole. It was a welcome victory after the humiliation of Ulm and crushing defeat at Austerlitz and showed that a French army could be defeated. Maida Vale owes its name to the battle, there apparently being a pub called The Maida or The Hero of Maida in reference to Sir John Stuart (later Count of Maida) who led the British troops.

The British force landed on the Italian coast and force marched to attack the French camp at Maida. Stuart’s force, numbering some 5,000 men, was made up of 11 battalions, (two of which, the 78th and the 81st were untested) and 8 guns. Regnier, the French commander, was notified of the British landing and with a slightly larger force of 8 Battalions, 4 squadrons of cavalry and 4 guns, left his well-fortified position to confront Stuart’s force. Confident of victory and eager to avenge his defeat in Egypt five years earlier, Regnier immediately ordered an attack on the outnumbered British force.


The players were given the following briefing and map.

Russian Intelligence reports that a French force of Divisional strength is crossing the river to the east with the intention of mounting an attack on the Russian Supply Depot. A Russian Division under Count Mikhail Fedotovich Kamensky, is ordered to leave at first light to attack the French before they can establish a foothold.

The French Division under Marshal Jean Lannes, 1st Duke of Montebello, Prince of Siewierz, has crossed further South and has force marched through the night with the intention of mounting a surprise attack on the Russian Supply Depot at Dawn .

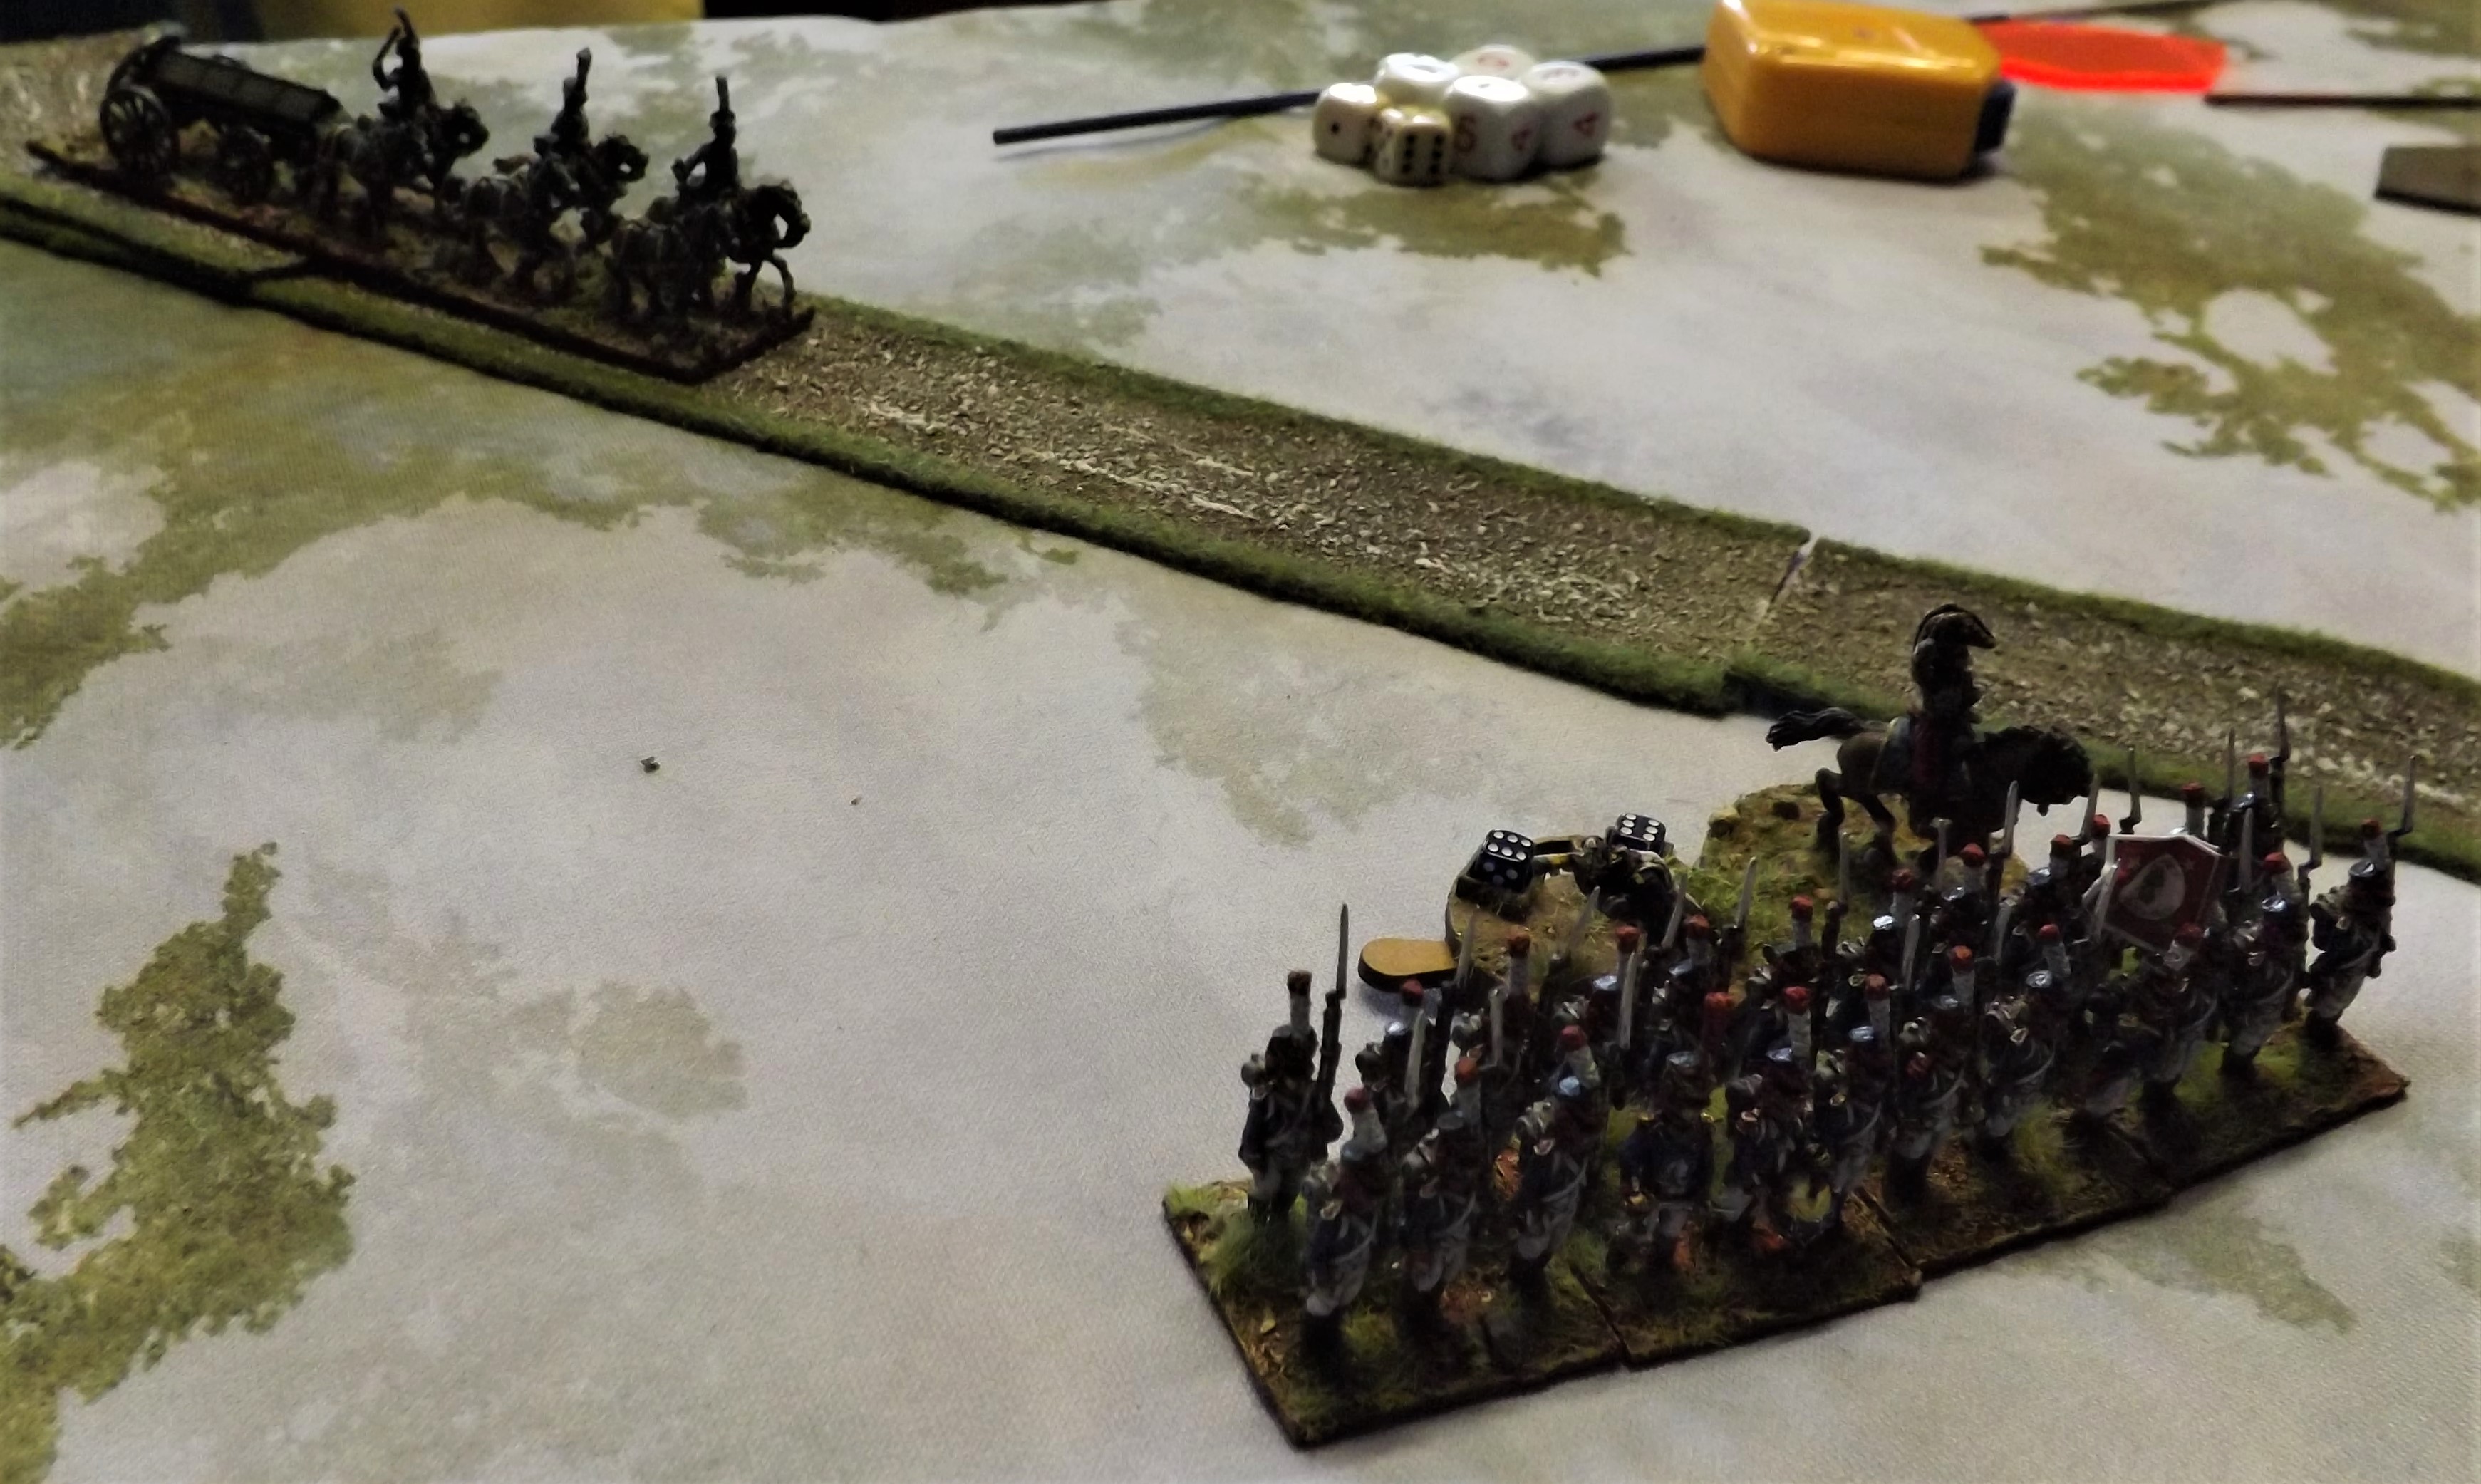
First light finds Count Mikhail Fedotovich Kamensky’s forces strung out in March Column leaving the depot, with the French bearing down on their right flank.

French Line of Communication

TERRAIN
Snow areas and forest - Broken Terrain
Area of ground to West of River - Broken Ground only passable in Skirmish Formation
River - Broken Ground only passable in Skirmish Formation

The map was flipped East to West and the Low Ridge was ignored. It doesn’t feature in any accounts of the battle so even if it did exist it was of no tactical importance The Russian forces under Kamensky were based on the French order of battle with Light infantry units on both their flanks. Davydov’s brigade consisted of two raw militia battalions in place of the Swiss and Poles in the French Order of battle. Neither regiment covered themselves in glory on the day. Would the militia share the same fate? Raevsky’s Brigade was beefed up to make the French worry about their Line of Communication, but the flip side was that the units of his Brigade would be harder to keep in Command. 

In addition, all the Infantry were classed as stubborn which meant, although they were regular or raw and wouldn’t fire or fight particularly well, they would be harder to break.


So that left Stuart’s forces to be represented on the tabletop by the French forces of Lannes. Sacre Bleu!

I reduced the number of brigade commanders for the French force because I wanted them to have to think about command and control. Each Brigade officer has a command control of 150mm - any unit outside that range can’t do much except defend itself. To the Russian commander and Brigade officers, command and control was a constant headache because with a command range of 300mm for the Russian commander, it was impossible for him to be in control of all his forces all the time, relying on his Brigade commander’s initiative, which wasn’t great.


So what happened? Is it just me, or do all scenario designers worry that the game will last two turns? Would using Average Dice make the results too predictable? Would the Command-and-Control mechanic prove too restrictive? Would having casualty disc markers to show fatigue and strength casualties be too fiddly? Would the game just clunk along?


Raevsky on the Russian left immediately had command and control problems and had his work cut out to get his forces moving through the wooded terrain. Tuchkov and Davydov’s Brigade formed a defensive line and awaited the onslaught as both Maransi and Veillande advanced confidently with no command-and-control problems. The first shock was the loss of 2/17 legére who were caught in Skirmish formation and ridden down by the Izyum Hussars. Maransi quickly recovered his composure and closed to musket range, starting to wear down the Russian line with his superior fire discipline. Tuchkov’s Brigade, although getting the worst of it, refused to break initially, but eventually, the fire came too hot for the 1/19 Jägers, who routed leaving an inviting gap for Maransi to exploit.


Veilande did away with the niceties of a fire fight and ordered his battalions to charge unloaded. As the Russian Battalions confronting him were the two raw St Petersberg Militia Battalions, he expected to make short work of them. Filled with confidence, the 3/64 ligne and 1/34 ligne, passed their moral with ease and advanced to contact. They were stopped in their tracks by a crashing volley – from the raw Militia Battalions. Some unerringly high dice rolling, (06.18% chance – one tends to take note of these things when freakish results pop up) together with the presence of the charismatic and inspirational Davydov, ensured the Militia inflicted eyewatering casualties which routed one battalion and caused the other to stop and deliver a ragged volley, only to remind their officers that they had been ordered to charge unloaded. Had the Militia been allowed within the rules to volley and charge as the British did, (there’s that rabbit hole again) that would have been the end of the matter.


It was now Lannes who was wrestling with command and control. Should he attempt to rally the 3/64 Ligne to stop his Army moral from plummeting? Doing so would potentially leave both his Brigade Commanders out of command. He decided to attach to the 3/64. Heartened by his presence, the battalion rallied. Maransi passed his initiative, and his Brigade continued to press the Russian right flank, getting close up and personal. With Veilande still in command and reserves in hand, the remaining two battalions of his Brigade charged the St Petersberg Militia, but this time with loaded weapons. Both battalions, the 1/40 ligne and the 1/100 ligne, were untried. Would they emulate their counter parts in the real battle, the 78th and the 81st, who behaved as seasoned soldiers on the day.


Alas, no. The 1/40 ligne turned out to be raw and the 1/100 regular. Nevertheless, with the encouragement of Veilande, they charged forward, to be halted once again by a steady volley from the Militia. The 1/40 returned a ragged volley which did little to harm the Militia. Davydov’s ADC begged his commander not to expose himself to so much danger, to which he replied in defiant mood,

“You seem unusually afraid of dying today.”

 A shot rang out, and he fell lifeless from the saddle. One shot, one dead General.


Despite his loss, the Militia held their ground, routing the 1/100 ligne and capturing Veilande, who had his horse shot from under him. It was at this point that Raevsky Brigade emerged from the woods on Veilande’s right flank. The game was up. Despite the hole in Tuchkov’s line on the Russian’s right flank, Lannes conceded defeat. With his line of communication threatened and both Brigades in a sorry state, he recognised the pointlessness of carrying on the fight.


Well, it lasted for longer than two turns and we got a result; the Average Dice produced remarkably above and (for the French) below average; Raevsky’s Brigade arrived just in time to deliver the coup de grace. However, skirmishers need to be handled differently in the rules. Losing a whole battalion of light infantry near the start of the game shouldn’t have happened as it did. They should have a least been given a chance to evade and fall back on their supports. When the rules were conceived some thirty plus years ago, skirmishers were treated more as gun slingers who roamed freely over the board, throwing dice, and saying ‘Bang, your dead’, which was fine for single figure skirmishers but battalions in skirmish order need to be handled differently.


Our game did in a rather bizarre fashion, mirror (sometimes quite literally) some of the events of the real battle. Two of the French regiments, 1st Swiss Regt. and the 1st Polish Regt. behaved badly and broke. These two regiments were represented in our game by the two Militia Battalions, and we know what happened there. 


The British force had two untried battalions, the 78th and the 81st. They fought well in the battle, unlike their French counter parts in our game. The similarity of the impetuous, overconfident French advance being stopped in its tracks by well-directed musketry was striking. 
 

For those of you who would like to know more about this battle, I recommend Richard Hopton’s book The Battle of Maida 1806 Fifteen Minutes of Glory.


My thanks to Mike (I throw high Average Dice), Si (I throw low Average Dice), Steve L (who could see the wood for the trees) and especially Nathan, who didn’t throw his toys out of the pram when his light battalion was ridden down by the rules, rather than the Izyum Hussars. All four made my life very easy with their patience and enthusiasm. 


It is a great strength of the club that everyone is there just to enjoy playing and to have a good time and to make sure that everyone else has a good time. Having said that, I’m not sure if the chairman will let me off the hook for running such a dubiously historical game.

To misquote a misattributed quote. It’s Maida, JJ, but not as we know it.

Figures: AB, Museum Miniatures, Xan
Russian Command figures: Boki
Terrain: Fat Franks, Tiny Wargames.

Sunday 10 April 2022

The Battle of Pinhoe - Dux Bellorum

 
Three years ago, I had just completed the build of my Anglo-Saxon and Viking forces for Dux Bellorum, Dan Mersey's, and Osprey Wargames, Dark Age wargame rules designed for battles around the Arthurian period of British history, 367 - 793AD but just as usable across this early medieval period, and perhaps one of my favourite sets of rules from him and in the Osprey collection.


The use of the Leadership Points (LP's) mechanism to recreate the direction given to these large groups of warriors, some no doubt very practiced in their skill at arms but mostly less so in their abilities to manoeuvre, particularly during the chaos of battle, seems to me to be a really clever one, designed to capture the command difficulties of managing such a force for the commanders of the day.

Not only that but it also presents the opposing players with multiple command decision points throughout the turns of play as the battles swing back and forth in terms of one side gaining the advantage over the other and the need to emphasise to the warriors on the table to concentrate more on defence in one part of it or attack in another and with skirmishers, having survived the initial exchanges of missilery, a constant annoying threat to the more heavily armed warriors from being attacked from unexpected directions from these faster moving more lightly armed and clad warriors or being goaded by them to make an unwise charge and being enveloped in an immediate counterattack.

Watching two battle lines going at each other in Dux Bellorum is like a replay of just about every battle scene you have watched from Last Kingdom, with individual cameo actions happening along the line and of course with opposing commanders having to remember Uhtred of Bebbanburg's guiding words;

"Destiny is all"

With my collection built, the next part of the project was to pull together a scenario to capture our own local battle down here in our part of Devon, on the outskirts of Exeter and the charming village of Pinhoe, that probably appeared less charming in 1001AD, when it reluctantly played host to Jarl Palig Tokesen and his raiding force of 5,000 Viking warriors, intent on 'going a viking', having sacked the neighbouring villages along the River Exe after being turned away from the city walls of Exeter in a failed attempt to overawe the garrison into surrender.

I designed a scenario for Dux Bellorum to recreate the encounter this force had, with a relieving force of Anglo Saxon warriors raised by Thegn Kola the High Reeve of Devon who brought with him probably around 3,000-3,500 men from Devon and Somerset and planted his smaller force, it is thought, atop the commanding heights of Beacon Hill overlooking Pinhoe, Exeter and the River Exe Estuary with its panoramic views seen below in a picture taken during my battlefield walk in 2019.

Having walked the suspected battle site and, with the help of fellow DWG club friends play-tested some ideas, I got together with David at the club in 2019 to play the Battle of Pinhoe for the first time and you can read the post of that game in the link below and a post covering my walk of the battlefield posted to JJ's Wargames in the link above.

Devon Wargames Group - Battle of Pinhoe,1001AD, Dux Bellorum, 2019

Next month I and a group of friends are planning to run out Dux Bellorum yet again for a 'big-bash' game with multiple forces using the 'Bard's Tale' scenario from the book, always guaranteed to get opposing players throwing their men into furious battle and, conscious of the need to have a pre-game warm up, offered to host another re-run of Pinhoe for yesterday's club game.

Beacon Hill above Pinhoe, Exeter, with the Anglo-Saxon troops of High Reeve Kola to the right on the reverse slop and the mass of Viking warriors banging shields before them on the front slopes under Jarl Tokesen, to the left.

A little preparation was required, as I couldn't find my original draft of my scenario and so sat down to re-write it together with a few adjustments for this latest incarnation.

The view of Beacon Hill from Tokesen's lines with the first LP tokens being laid to ensure the troops go where they've been ordered.

The arrival of Kola's little army presented Tokensen with a problem that he was forced to deal with, namely getting rid of this enemy force that could threaten his whilst they went about pillaging and looting the local area, but in doing so, not losing too many men that would threaten their ability to deal with any more resistance arising, and speedily so as to allow time for more pillaging before the inevitable relief column arrived, forcing a return to the boats.
 
The progress of Jarl Tokesen's 5,000 strong force of Vikings to Beacon Hill having originally landed at Exmouth, and marched on Exeter, they were busy doing what raiding Vikings do when the army of Reeve Kola was discovered above Pinhoe.

Because the game represents an historical battle, with both commanders, not surprisingly untroubled by points and army balance but making do with what they had, the scenario objectives had to reflect those demands.

My army sheets, list the troop types and numbers together with their respective stats and the number of casualties each force can take before morale checks kick in or indeed the army breaks

Reeve Kola, aware of his weakness in numbers and quality, wisely placed his troops on the steep Beacon Hill to provide his army with the force multiplier the steep slopes and commanding views provided, namely, protection against surprise attack and the steep slopes likely to tire an enemy charging up it.

So the Viking troops likely to go into an uncontrolled charge, would get their charge impetus of +1 but suffer the -2 for attacking uphill and the -2 for taking on a shield wall.

If the Vikings managed to hold their ground in the subsequent rounds the uphill deficit was negated, but should they be pushed back and required to move in again on the next round, they would again be subjected to the -2 uphill charge modifier.

The Army List for Tokesen's army readily shows the advantage in numbers the Vikings enjoyed

The game is classed as an 'annals battle' but instead of the 18 turns of battle, we instead used the moving clock of 54 turn-points reduced at the conclusion of a round of play by the score of a d6, with the pressure to get on with things that variable timer can induce to the play.

Thegn Kola prepares to advance is line onto the summit of Beacon Hill

Likewise the objectives were an assessment of the actual result which saw the Vikings achieve a tactical victory by driving the Anglo-Saxons off Beacon Hill, but a strategic defeat, in that their army was severely battered by the battle and Kola survived with the core of his force and was able to retreat back to Exeter to await reinforcements, forcing an early Viking departure.

Thus Kola was tasked with surviving the battle, ideally holding the hill and destroying three Viking warrior groups in the fight, to better the historical result and indeed a tough ask. Surviving and being forced off the hill would have been historical and Kola killed with the bulk of his army destroyed and with the Viking warrior loss under three units, a Viking improvement of their historical one.

The mighty host of Tokesen advance confidently

With our two lines set up on opposite sides of the hill with distance up to the summit slightly favouring its defenders, the LP's started getting laid and had both sides favouring a complete line of warriors flanked with skirmishers, but seeing the Saxons detach their levy shieldwall to move out to the Saxon right flank in support of their javelin and slinger armed skirmish line.

The early encounters usually see skirmishers out on the flanks exchange missiles. The Vikings are well supported by four bases of bows.

The two lines meet as the Vikings surge forward in an uncontrolled charge to hit the Saxon shield wall. 
In this first clash and the -4 modifier in effect the Viking commander has opted for three shield tokens face up for defence on this part of his line. Inverted tokens would indicate their use to upgrade an attack.

As the Viking line closed it split into two distinct groups of warriors before launching into an uncontrolled charge up the hill to meet the single group of Saxons awaiting them on the summit.

From the Saxon line, this early clash against the shield wall and with the Saxons enjoying their uphill advantage at practically full strength, sees them opt for a more aggressive stance, and all the tokens save one are inverted to support their attacks. The first casualties have already fallen, indicated by the blank discs on the sabots or 'manhole covers' as I call them.

Viking bow skirmishers having disposed of their Saxon opponents support the attack on the Saxon line

The decision of the Saxons to await the Vikings in a single line was perhaps unfortunate as Dux Bel. only allows a maximum of three LPs to be distributed to each base or distinct group of warriors, and with only three available to the complete line of Saxons on the hill, the Viking leadership bonus of six LPs soon showed the value of smaller distinct groups operating together.

Jarl Palig Tokesen signified by his multiple banners gets stuck in with his companions aided with two attack and one defence token

On the opposite line, Reeve Kola, axe held high, inspires his men from the front with three attack tokens supporting him and his companions

However despite their LP advantage the Saxon line took full advantage of the -4 uphill charge deficit on the Vikings and gaps started to appear in the lines as Viking warriors fell to the jabbing spears protruding from the stubborn shield wall.

The Saxon line starts to buckle under the furious assault by Tokensen's army as large gaps appear on the summit at the close of our battle with only ten time points remaining from the original fifty-four, 

The Saxon line made a hard fight of this battle as the two bases of Viking warriors with the rear ranks missing in the centre of the picture indicate. I must at some time paint up some dark age casualties as this hill top would have been littered with dead and dying warriors.

Both sides recognised the importance of supporting the attacks made by the leader's companion groups and were soon throwing in attacks of ten and twelve d6, but even then seeing the occasional miss by such attacks only to have smaller unsupported attacks along the line make annoying strikes with a six scored and no defensive LP's to hand.

With the centre of the Saxon line broken but the resistance as fierce as ever, multiple tokens support the various sectors of the Viking line in preparation for declaring their use in attack or defence.

For the Saxons, this game is all about running down the clock, whilst killing Vikings and holding ground, and with just ten points of game time remaining and multiple Saxon groups gone, but the line still holding if broken, the pressure mounted on the Vikings to seal the deal and force them to retreat of it.

The end came dramatically in two succeeding turns of play with one Viking attack striking down a Saxon base with three hits, followed by two hits on Kola's base in the next that saw the High Reeve fall and the following 50% morale checks on all bases break the remains of his army.

Kola determinedly holds the Saxon centre with an eye to attack and defence with his line now broken

Suddenly with just ten points of game time remaining the Saxon line collapsed and Kola lay dead, with his army destroyed but having just missed by three more casualties, taking out a third base of Viking warriors. Like the armies we were all exhausted after this furious battle that swung both ways during play and we packed up ready to enjoy a well earned trip to the pub.

Victory then to Jarl Tokesen, doing better than the historical outcome, but still suffering some bloody losses, narrowly avoiding the three more casualties to have caused three of his warrior bases lost in the fighting.

Great fun, and a classic game of Dux Bellorum.

Thank you to Martin, John, Steve M and Bob for an absorbing game and a re-run of our own local dark age battle, bringing to life the events just outside the city one thousand and twenty one years ago.

JJ

Saturday 2 April 2022

Maurice - Seven Years War Austro-Bavarians vs Prussians

Heroics to the front as the infantry get close and personal in our Seven Years War clash using Maurice

Last month, Maurice featured at the Devon Wargames Group, as Martin entertained us with a Seven Years War Prussians vs Austro-Bavarian clash, using his Pendraken 10mm collection that got its first run out on JJ's Wargames, see link below, as Steve M and myself reacquainted ourselves with a favourite set of rules.

http://jjwargames.blogspot.com/2022/03/maurice-in-seven-years-war.html

Our club game was a much larger affair that saw the Austro-Baviarian force lined up on a long ridge overlooking an important river crossing before a small village with two bridges, one leading through it and the other further upstream.

The Bavarian division man the hill directly behind the village on the river. These four battalions would be in the thick of the fighting before the games end.

The Austrian general in command was busying himself overseeing the extraction of a rather important convoy of foods and munitions that were hastily assembling in the village, together with some important nobles and their ladies, keen to avoid an early introduction to the Prussian General Staff; and to cover their withdrawal a brigade of Austrian cavalry supported by Croatian Grenz covered the approaches.

The rear-guard force cover the withdrawal of the supply column

Important nobles and their ladies gather their belongings ready to join the retreat

Croatian Grenzer

Croatian Grenz cover the bridge, and road into the village 

Steve M and Gregory were tasked with administering the Austrian rear-guard, as Vince and I prepared to lead the charge on the behalf of the King of Prussia as our advance guard came up the road ready to challenge the Austrian possession of said village with jaegers and cavalry to the fore, closely followed by the main army ready to exploit an early success by crossing the river to challenge the main Austro-Bavarian army lined up on the ridge beyond.

Jagers and Prussian Hussars lead the advance guard of the Prussian army

Martin had managed to squeeze an exquisite level of detail out of these very small miniatures that only added to the enjoyment of our game. 

The early card play in Maurice is very often a case of one army getting into a position where it is ready to contest with its opposition.

The Prussians in this case, were forced to spend their cards trying to orchestrate the movement of their forces whilst the opposition did its best to frustrate and disrupt those movements, looking to create an opportunity for a counterattack or to weaken a later enemy advance.

Further along from the Bavarian division on the ridge beyond the river lay the main Austrian army supported with some very well laid artillery covering the approaches to the bridges.

With the village an obvious route of advance on perhaps the weaker part of the Austro-Bavarian army, we decided to clear the village with one part of the Prussian army while the other part got across the river upstream and shook out into battle order ready for an advance.

Austrian cavalry in force completed the army over watching the withdrawal


The battle for the village and its bridge became a fierce skirmish between the Grenz and Jaegers with the later able to shoot their way into the village and clear it with the sword bayonet and both the opposing cavalry stared at each other as the battle progressed.

With an early indication of the accuracy of the Austrian gunners, the main Prussian infantry force of elites and grenadiers together with the bulk of the cavalry quickly crossed upstream of the village and sought shelter in the lee of nearby woods as the jaeger cleared the village of Grenz opponents

The Prussians were also quick to support the river crossing with their own force of heavy guns

With the village cleared, the second division of Prussian infantry crossed over the river and deployed close to its outskirts, whilst the other infantry force and main Prussian cavalry were sorting out their messed up crossing behind the woods close by,  caused by rather accurate Austrian gun fire during their passage.

The second division of Prussian infantry followed the jaeger and light cavalry to support their advance and to threaten the Bavarian flank

As Gregory pulled the Bavarian cavalry back from the village, Vince spotted an opportunity to exploit the move by ordering up the Prussian infantry to advance in pursuit in line, a formation that, provided the flanks are secure, is a very dangerous threat to any opposition, given the deadly firepower of Prussian infantry of this era.


The move by the Prussian infantry proved to be the principle attack of the Prussian army leaving the other flank quiescent as the attack demanded the limited pool of activation cards to support it and seeing the Bavarian cavalry with its back pinned against its infantry that had come down from the hill behind in its support, as the Prussian muskets went to work.

The Grenz are forced back into the village by accurate Prussian rifle fire and would be destroyed later by the follow up close assault

The Bavarian infantry looking secure in their lofty perch above the village soon to find themselves in front of massed Prussian musketry

The front Bavarian cavalry regiment was decimated before the Prussian fire, and as the Bavarian infantry came forward to cover the retreat of the remaining horse, they to found themselves battered by a similar musketry fusillade followed by a charge.

In desperate need to turn the tide in their favour the Bavarians traded activation cards to bring up their single artillery piece to help, but it was too little too late as the Prussians traded battalions for battalions, whilst relying on Gregory to continue to throw sixes every time a units was destroyed, further adding to the loss in army morale points that inevitably followed.
 
With the Grenz hard pressed and eventually broken around the village, the Bavarian general ordered the cavalry rear-guard to withdraw on his main force

The Prussian second infantry division consolidate the hold on the village with the Grenz destroyed and the Bavarian cavalry withdrawing. Then Vince ordered the advance!

Behind the woods space was a premium as the main elite Prussian units sorted themselves out beyond the reach of Austrian guns

The really clever piece in card play with Maurice is that combat inevitably consumes cards rapidly in activations and event moderations, and the need to pause the fight as both sides attempt to rally off their disruptions.

In those pauses the other quieter parts of the front may get the opportunity to influence the battle within a battle by causing the enemy to react to other units elsewhere doing other threatening moves which forces card play in response.

Having crossed the river the Prussian guns deployed in preparation to cover the next phase of the advance, with a weather eye on that advancing Austrian cavalry, top left

The sudden withdrawal of the Bavarian cavalry offered an opportunity to exploit and the Prussian general in charge martialled the infantry to prepare to advance in hot pursuit.  

Thus the Austrian main cavalry advanced out into the plain, seemingly looking to threaten the main Prussian line and cause a reaction to take the pressure off the Bavarians.

Sadly the Prussian line responded with its first infantry division and artillery mutually covering all approach routes that the Austrian cavalry might close through and thus stymying this advance allowing card play to return to the battle before the Bavarian hill.

The Prussian advance on the Bavarian hill

The table overview at the close of our game shows the advance of the second Prussian Infantry division on the main Bavarian position as it moved off in pursuit of the Bavarian cavalry that withdrew from the village. To try and threaten this advance the Austrians advanced their cavalry but halted before getting in sight of the Prussian gun line. Note the Prussian infantry in line behind the woods to prevent any cavalry advances in that direction

The same overview from the Austrian positions

As our game came to its inevitable close and with the pub beckoning, the Prussian second infantry division and the Bavarian division lay battered at the foot of the hill behind the village, with both sides desperate to replenish their hands of cards, looking to rally off disruptions, bring up much needed supports and keep on killing the enemy, but unable to do all of it at the same time!

This is another glorious modelling of this type of linear warfare, artfully captured in the play, and it was the card play that had the last laugh as with the opportunity to cause the Austro-Bavarian army to teeter yet closer to calling a withdrawal, the Prussians played the 'Death of a Hero' event card which seemed very appropriate amid the carnage in front of the Bavarian position and more morale dropped from the Austro-Bavarian army card in the last phase of play.

The early decision point as the Prussian infantry lie battered before the Bavarian line having lost two battalions and the third one on the extreme left of picture teetering on three disruptions (red die) but with its Bavarian opposition in a similar state. The other two Prussian units accounted for two Bavarian infantry units and a cavalry regiment destroyed by their musketry, added to the two Grenz units destroyed in the fight for the village. Not the other Bavarian cavalry unit teetering on four disruptions, and both generals in close attendance.

The opposite flanks of the two armies were comparatively quiescent as the fighting on the Bavarian flank consumed the bulk of card play and activations

At the close the Prussian army morale was still riding high on the success of the assault by the Prussian infantry down five army morale points on a start of eighteen

What a game and its leaves me a little exhausted writing it up a few days later, but adding to the catalogue of memorable games played with this clever set of rules.

The Austro-Bavarian force in comparison was in a desperate state with a loss of twelve points, added to in the last turn with the Prussian play of the 'Death of a Hero' card that saw another two point decline as an important Bavarian officer was seen to fall at the close.

Thank you to Martin for bringing along his glorious collection of figures and terrain to provide all the fun and to Vince, Gregory and Steve M for making an enthralling and entertaining encounter in the Seven Years War with Maurice. 

Good times

JJ