Saturday 24 February 2024

Mobile Bay, 5th August 1864 - Dawn of Iron.

Battle of Mobile Bay, by Louis Prang. 
At left foreground is the CSS Tennessee; at the right the USS Tecumseh is sinking.

This battle was an opportunity to dust off some much loved Peter Pig ACW ships and try out a new set of naval rules.


The rules are “Dawn of Iron” and are published by Scary Biscuits Studios. They are a simple set of rules that are easy to learn. 

https://www.scarybiscuitsstudios.com/dawnofiron

This is ideal for a club game where we wanted to use a lot of ships. In addition they are devised so the book keeping is kept to a minimum.

Example of Ship Card.

Example of Damage Card.

This scenario “Damn the Torpedoes” was taken from their extensive Battles Packs. There are plenty of battles to choose from.


We played the rules with no changes except to reduce the turn arc to 22.5 degrees from 45 degrees. This worked well in our game and did cause a few more collisions that would have otherwise occurred. Always a good outcome in a naval game.

The table set up :-


The CSS Tennessee is the pride of the Confederate navy being a large Ironclad. The other three ships were less impressive but well armed.

The four Union ships are Ironclad Monitors, all with large guns.


In addition the Union had the following wooden ships:-

USS Brooklyn & Octorara
USS Hartford & Metacomet
USS Monongahela & Kennebec

The Union Fleet was bigger than this but we did not have enough models, also, we wanted the Confederates to have a chance of winning.


The objective of the game was for the Union fleet to enter the harbour and eliminate the Confederate ships. The Confederates would win by preventing this and by sinking half the Union ships.

Before the game started the Union commander opted to attack at high tide. This would allow ships to sail between the torpedoes and land. However this would be for a limited time before the tide started to go out.

Gregory, who was given the job of Admiral Farragut, planned for the Monitors to sail through the gap and silence the Water Battery and Fort Morgan.


Things started well, the Union soon silenced the Water Battery and were steaming past Fort Morgan. It was then that the Tennessee came into sight. Gregory told Vince to take her on with the USS Tecumseh. This he did by ramming into her. Both ships were now entangled for rest of game.

At this point the two Steve's who commanded the Confederate Fleet were not looking confident. Gregory now unleashed the rest of his fleet to finish of the Confederates.


This was when the Union snatched defeat from the jaws of victory. As each wooden ship came on and tried to sail through the gap they were hammered by the remnant of Fort Morgan. What was worse, the tide started to go out, the USS Manhattan got stranded and then Admiral Farragut was killed. 

Then the Confederate Gunboats sailed in for the kill and finished off the Union Wooden ships.


Finally remember the Tennessee and Tecumseh, well they were still entangled. They had been hammering away at each other and finally the Tecumseh was beaten into a derelict vessel and surrendered.


The Union had now lost 50% of there fleet so the Confederates claimed a victory.

A most enjoyable game played in good humour. Steve M and Steve L were the Confederates who did not give up when the Monitors broke into the harbour. Gregory and Vince were the gallant Union players who were convinced they would win in a return game.


The rules played well and gave a good feel of the period. Some realism has been sacrificed to keep the game mechanism simple but they have captured the main elements of the conflict. 

Friday 16 February 2024

French Indo-China - Dinassaut Commando Raid on Gian Khau 1948.


Background
We tend to think of the French position in Indochina as “a losing-hand”, that wasn’t always so. Following the post war reoccupation, the French pacified most of Indochina more or less. The Viet Minh found it hard to operate outside of their strongholds, in the face of superior French firepower and aggression. Only after the fall of China to Mao’s communist forces, did the Viet Minh have a safe-havens in to train and equip. 

Dinassaut Commandos

Today’s game is set in this earlier period and is a French Dinassaut raid on a village, used by the Viet Minh for logistics and training, along the River Day (Song Day). The village of Gian Khau is deep in Ninh Binh province and in the heart of Viet Minh resistance. 

The time is 04.30 on 2nd February 1948, the weather is clear and warm.


The Dinassat - Division Navale d’ Assaut (Naval Assault Divisions) was a riverine unit employed by the French Navy in Indochina; ten units were created by General Leclerc in 1947. Each Dinassault consisted of approximately 12 craft, often American landing craft modified with armour and using tank turrets or 81 mm mortars, to be employed as riverine artillery (source Wikipedia).

Riverine Monitor

Rules
We used Chain of Command by Two Fat Lardies, with the Vietnam and French Indochina supplements by Jason Sendjirdjian, see link below:

http://carportgaming.blogspot.com.au/

French Order of Battle
Six Command dice, one of which is red and counts for 1,2,3 & 4 only. All troops are elite.

Commando HQ
  • Officer (Snr Leader), SMG and grenades. 2 i/c Snr Sergeant (Snr Leader), SMG and grenades plus Medic.
Commando Stick One
  • Sou Sargeant (Jnr Leader), SMG and grenades
  • 8 commandos with SMG’s and grenades
Fire support team
  • Inferior Jnr Leader &
  • BAR with 3 crew
Commando Stick Two
  • Sou Sargeant (Jnr Leader), SMG and grenades
  • 8 commandos with SMG’s and grenades
Fire support team
  • Inferior Jnr Leader & BAR with 3 crew
Fire Support Team Three
  • Bipod MMG with 5 crew
Sapper Demolition Engineers
  • Sou Sargeant (Jnr Leader) carbine
Two Demolition Teams
  • 3 sappers, demolition charges and carbines per team
Riverine Monitor
  • 37mm gun, 81mm mortar and two MMG’s. All fire is long range.
Notes: troops that disembark at jetty deploy and move normally, those that disembark in the river
have no deployment bonus and move as difficult terrain. French troops are motivated and well equipped, the rules limiting hand grenades to not apply. Commandos will not surrender.

French Briefing and Objectives.
Gian Khau village is identified as a Viet Minh logistic and training hub. Gian Khau cannot be attacked by land due to the poor roads and many ambush positions. A paradrop was considered and rejected because extraction will be by via same roads. The newly formed Dinassaut forces have been allocated this task.

You will attack just before first light, taking advantage of the river mist to approach (visibility is limited to 10 inches at least to start with). The village is lightly held by local defence troops but recent aerial reconnaissance has been hotly engaged by ground machine gun fire; three possible locations for these guns have been identified; two emplacements on the riverbank and one on the jetty. The best place to land is probably alongside the jetty, but the river is wadable to a certain extent (counts as heavy terrain). You can expect enemy reinforcements to arrive quite quickly, as this is an enemy training area too.


A recent photo-recon image is enclosed showing Gian Khau and jetty, possible machine gun positions and the roads leading to the nearby training camp.


Your objective is to destroy all the building and transport which are filled with supplies. Then make an expeditious exit the same way you arrived. Buildings are of light weight construction and can be easily demolished by gun, mortars or by engineers.

Viet Minh Order of Battle and Briefing
Five Command dice, most units count as regulars.

Gian Khau Village Garrison
  • Snr Leader pistol (no grenades)
  • 2 i/c Snr Leader, SMG (no grenades)
  • Commissar & two runners
  • 1 squad of 6 rifles (no grenades) Green Troops
  • Support Weapons, Regular, 2 x MMG in sand bagged positions, with crew of 6 each
Gian Khau Main Force Training Camp.
  • Company HQ
  • 1 superior Snr Ldr, pistol (no grenades).
  • 2 commissars, pistol with two runners each (no grenades).
Platoon
  • Snr Leader, SMG (no grenades).
  • 2 i/c Snr Ldr, SMG (no grenades).
4 rifle squads each consisting of:
  • 1 Jnr leader with rifle and
  • 9 riflemen (no grenades)
Viet Minh Briefing and Objectives.
The Deuxieme Bureau in Hanoi has released part of a speech by a senior commissar who visiting
Gian Khau; it is all you need to know:

“Comrades of Gian Khau village, by your efforts the day of liberation draws ever nearer. Daily you unload motivated comrades, weapons and rice, the three wants of the peoples’ struggle. After a dangerous transit, often from far away, these three wants are delivered for your safekeeping. By day you labour and by night you guard the three wants vigilantly. Even though Gian Khau is far from our beloved leader, your unceasing struggle does not pass unnoticed.”

Your objective is to defend the village buildings and lorry-park, where these important stores are kept. But first, you must mark the positions of your two machine guns and the entry route of the Main-Force reinforcements, on the aerial photograph recently acquired by one of our comrades working in the Deuxieme Bureau, Hanoi.

How the Game Played
Before the game started the Viet Minh (VM) player, had a couple of decisions to make; the location of two machine guns and where the Main Force reinforcements would enter. With his map now annotated the first set of six command dice were rolled by the elite French Commandos, commanded by Lawrence and Tom. 


The French split their forces into two almost even groups and stormed ashore from the river, rather than land at the jetty. During the first turn the range was limited to ten inches, but despite being sufficient for the two machine gun positions to see the landing, the VM held their fire. 

As the French consolidated their landing position, by bringing on more of their force, the VM deployed their village defence force, a small and poorly armed body of village folk, but well-motivated by their leader and supporting commissar. With the village force deployed the two VM machine guns opened-up, one in a sand bagged position and the other at the end of the jetty, killing two French commandos but ineffective against the monitor.


Luck now favoured the French with a double phase and they poured a huge return fire of sub machine gun, grenades all supported by the monitor’s machine guns and 37mm gun fire too; the VM gun crew were soon reduced to one. 

Lady luck now gave the VM a double turn. The VM realising that they would never out gun the French, used the tactic of “grasping the enemy by the belt buckle” and surged forward towards the nearest group of commandos and into melee. The village VM group never got to roll their second phase; the melee saw their whole force destroyed and village morale collapse to zero. In one sweep the village defence had been overrun by the French but not without cost as four more French commandos had been killed in the desperate hand to hand fighting; something the French force could ill afford.


The sound of the fighting in the village had alerted the VM main force troops at the training camp, who now started to appear at their pre-designated jump off point (B). Equally as poorly equipped and equally as highly motivated as the village defenders, the VM Main Force were determined to see off their oppressors. 

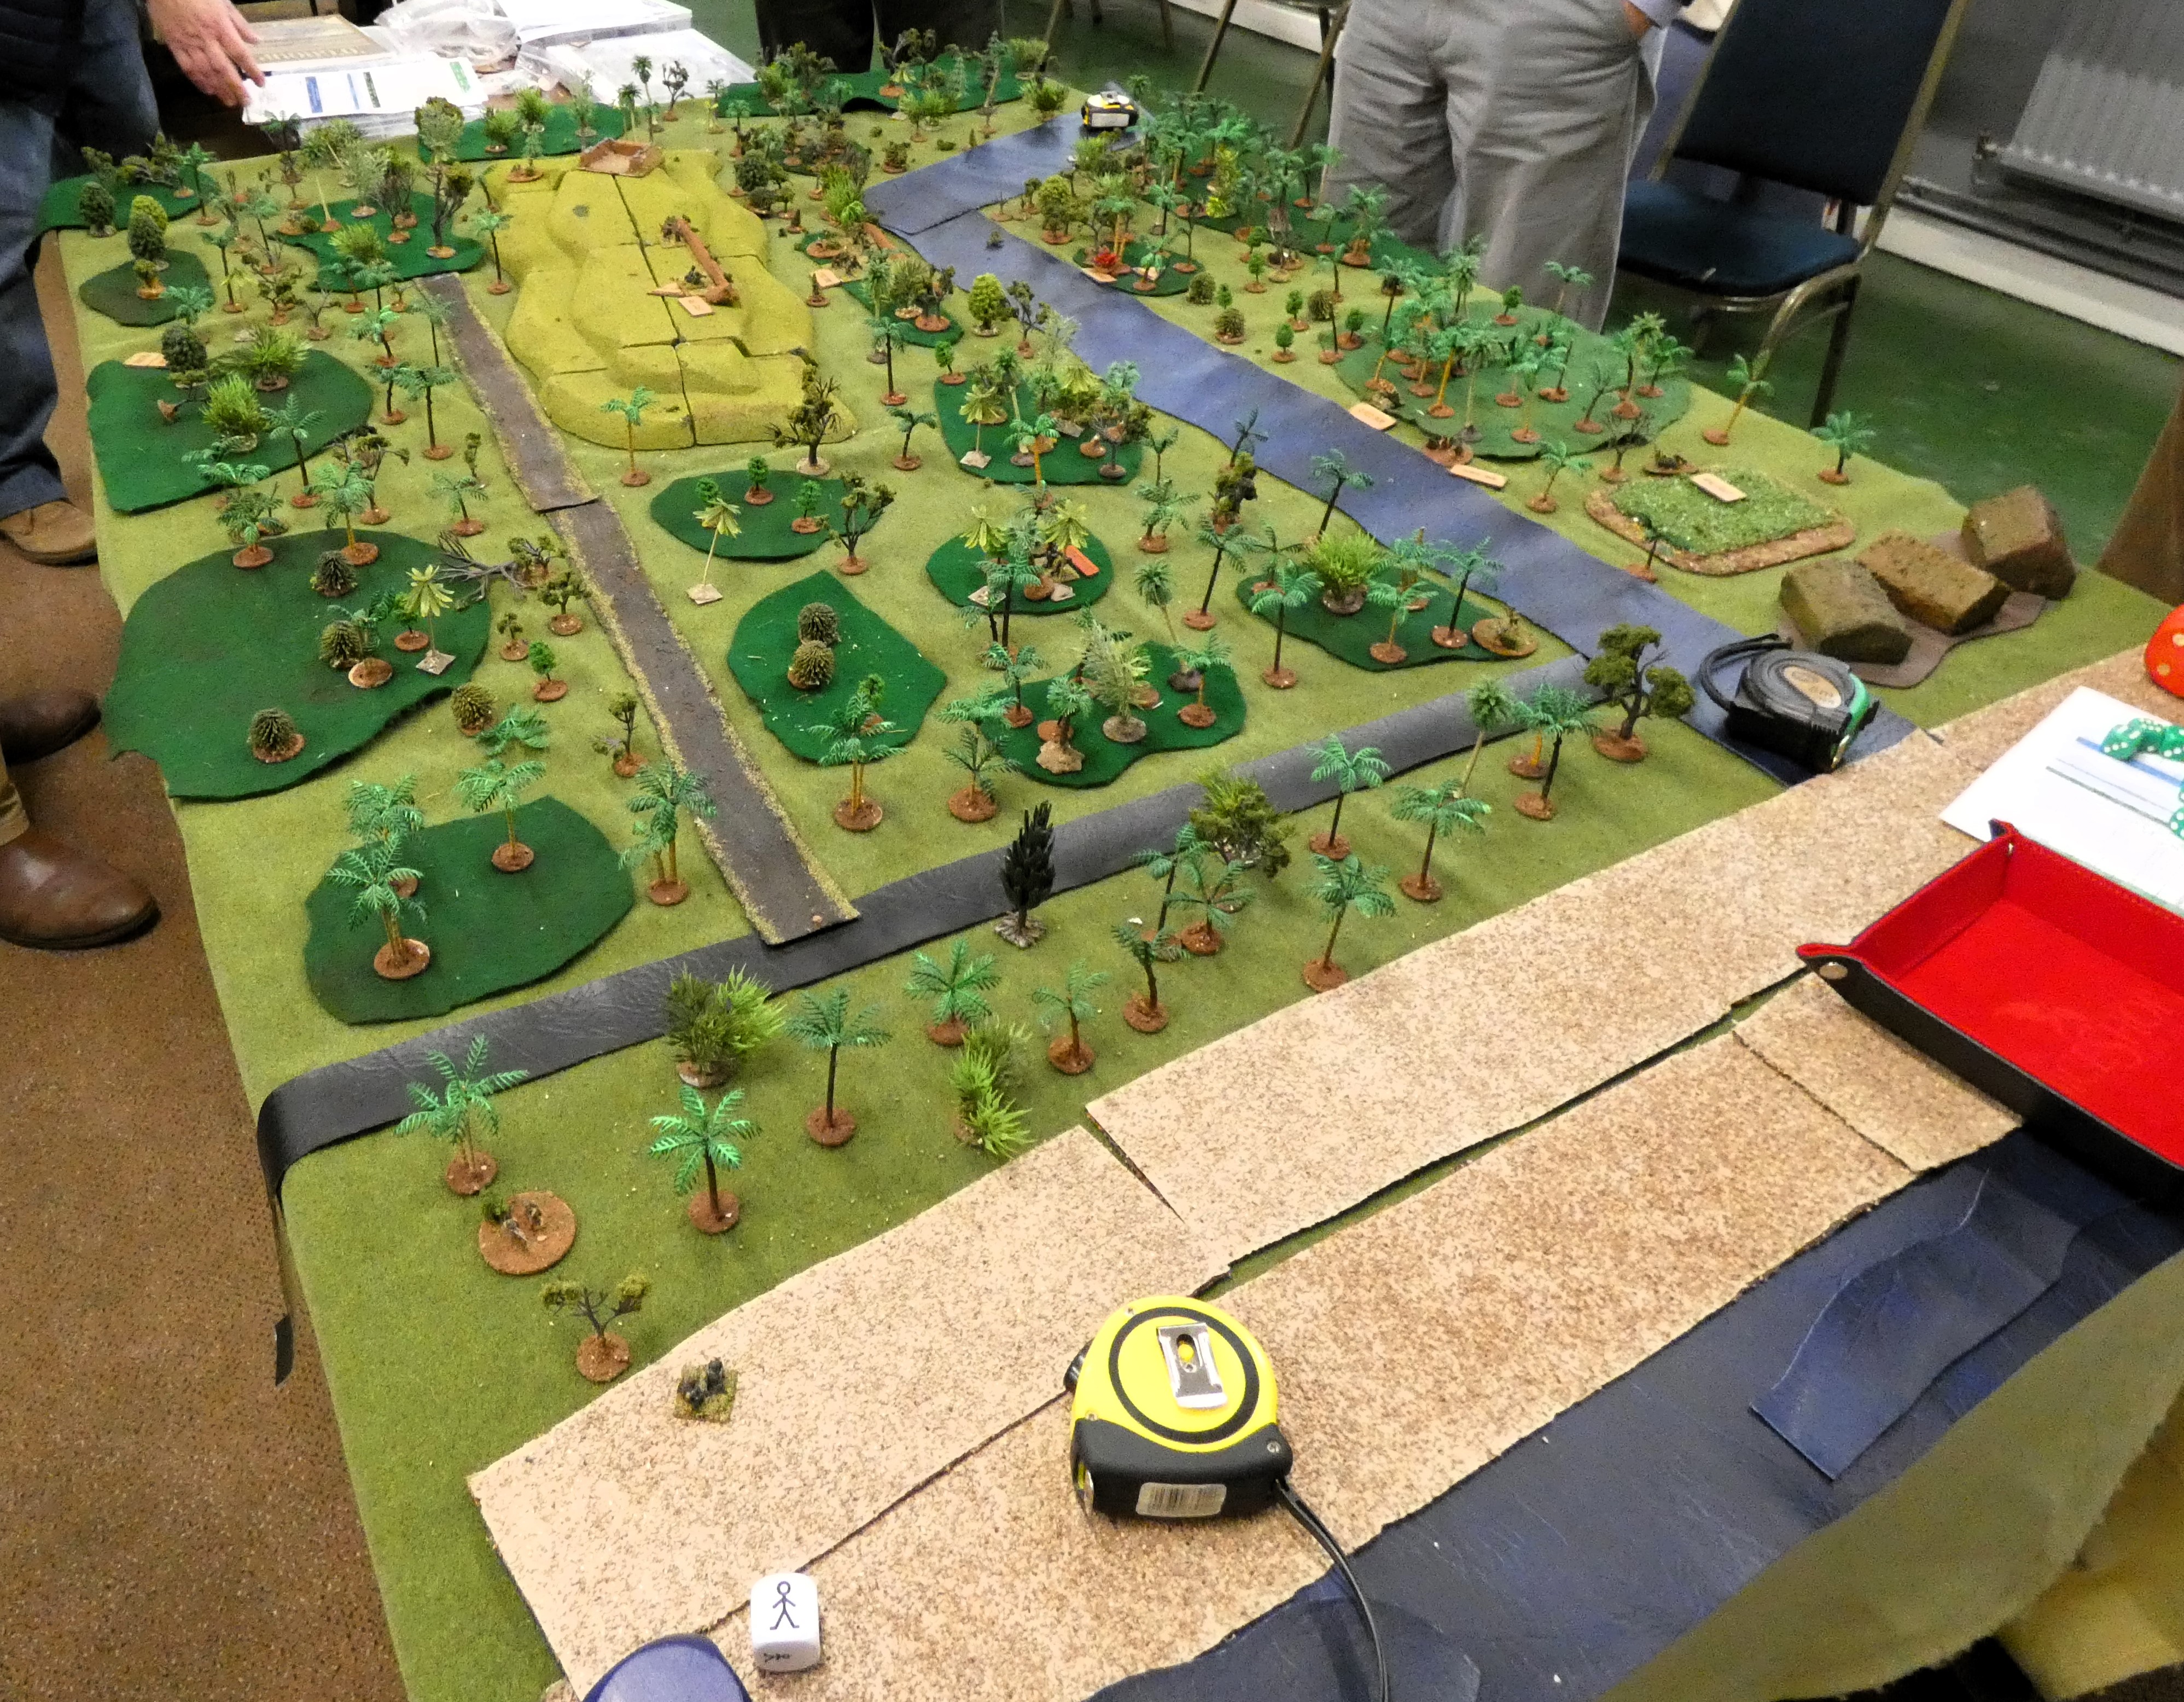
The French demolition teams wasted no time in moving though the village destroying buildings and supplies. The monitor crew joined in the process using gun and mortar fire to destroy further buildings. The commandos meanwhile spread out into the paddy fields behind the village, taking up positions behind the field bunds. And to bring their superior firepower to bear, the French used their chain of command dice to end the turn, which increased visibility to 15”.


With increased visibility some fire was exchanged but with little effect, one side or the other would have to close the range to achieve anything decisive. Knowing that their firepower was distinctly inferior to the French, the VM accepted that it would have to be them. Skilfully using the poor visibility to avoid being caught in too much cross fire, the VM entered the paddy fields making use of the bunds for cover, while concentrating their attention on the weaker of the two French groups. Awaiting the right moment a commissars leapt to his feet, grasped the flag and as the bugle sounded the charge he fell-over as he crossed the bund and splashed into the paddy (that is to say - the VM rolled a one on their movement dice!). 

Fortunately, the hail of French fire only caused one VM casualty; perhaps the commissar was not that inspiring after all? On the second attempt the VM poured over the bund and meleed the French commandos. The result was predictably a brave loss by the VM, who lost all their men, except for the commissar and the senior leader, both last seen skedaddling-back the way they had come. But the French suffered two killed and the squad Sou-Seargent wounded as well; fortunately for both sides the morale effects were not very severe. The French, realising that they need more visibility to bring their superior firepower to bear, ended the turn so increasing the range to 20 inches.


The French and VM had fought each other to a standstill on one flank but on the other the French, meeting little resistance had made good progress. All the stores and building in the village had been destroyed as they pressed deeper into VM territory to blow-up and last storage area. 


The senior sergeant had established his men and the company support machine gun, in the paddy fields where they engaged fleeting VM targets, though with little effect. He had hatched a plan whereby the engineers would outflank the VM positions through a burnt-out wood, supported by suppressive fire from his men and the mortar on the monitor; sadly things quickly went pear-shaped. There was a breakdown in walky-talky communication with the monitor as the supporting mortar fire went everywhere, except on target. 


The VM senior leader quickly deducing the French plan and used his chain of command dice to move his jump off point, so he could more effectively deploy his remaining reserves. A clash ensued between the engineer team and a squad of approaching VM riflemen. While there were no casualties to either side, the French realising they were outnumbered retreated from the hill, pausing long enough to point out the approaching VM to the senior sergeant. This was just as well because the senior-sergeant had just enough time to rearrange his defences before the VM charged down-hill to melee his men. 


As in previous melees the French superiority in fire power carried the day, killing every single VM, but not before three commandos were killed, including the senior-sergeant. This time the morale dice rolls were not so kind the VM and their steadily declining morale collapsed and the remaining VM force quitting the field.


Conclusion? While the French had carried the day and destroyed considerable amounts of VM stores, they had taken heavy casualties amongst the highly trained commandos. With the village and surrounding areas now secured, the French would demolish the reminder of the VM buildings and stores. 


For the VM, the decision to melee the French were ever possible, would always result in heavy casualties but with inferior firepower it was probably the best decision. While the precious stores were lost, both the VM main-force senior leaders and commissars had all survived; the VM could rebuild their force and the struggle continue.

Acknowledgement
Most of the information used to construct this scenario comes from “Mourier pour L’Indochine – Wargaming French Indochina 1946-54”, by Shawn Taylor. While these are not the rules used to play the game today, they are a set that I will try to use in further games at the DWG, especially as they allow for larger scale deployments than do Chain of Command.

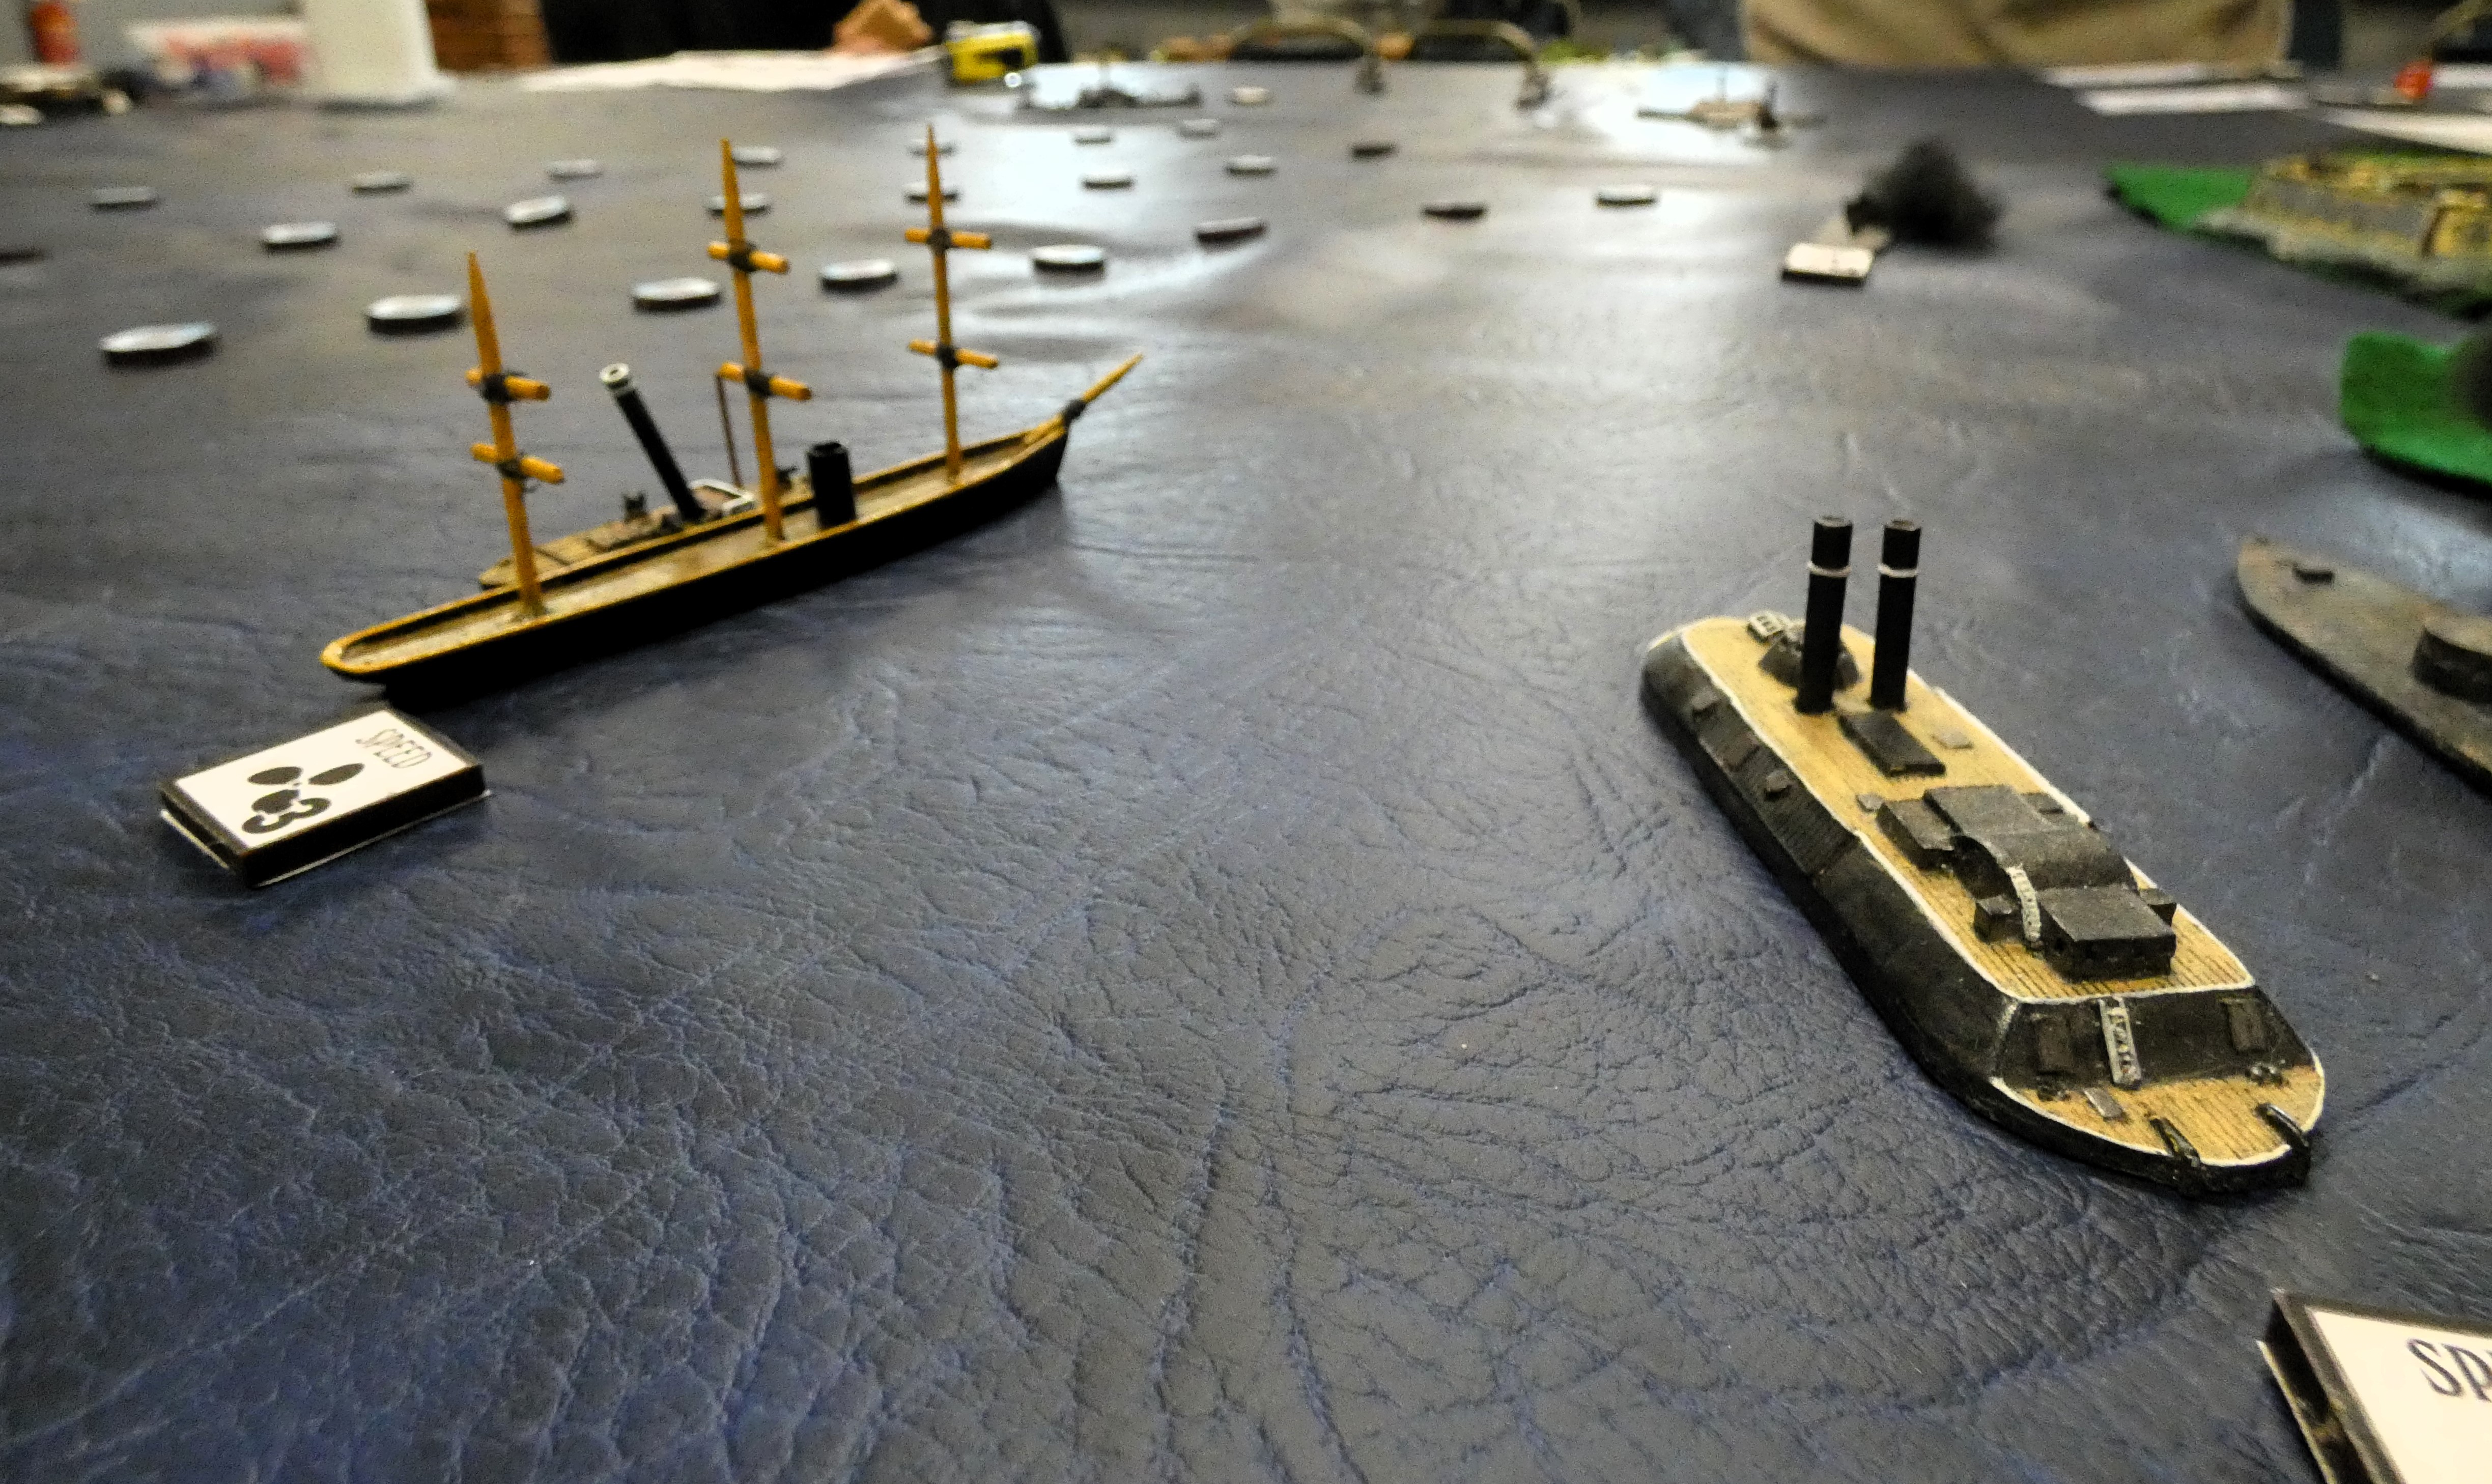
Thanks to Tom, Paul and Lawrence for playing the game, especially as VM Paul managed to keep an inscrutable poker face throughout. Figures are Empress Miniatures alongside several Warlord Games and Rubicon Miniatures plastic sets that I have “kit-bashed”, plus US troops I purchased second-hand but don’t know the manufacturer. Apologies for some of the French riverine fleet. Perhaps, since the vessels are more representative than involved, I should get these models in 15mm so the table would be less cluttered.

Stephen Huntsman
29 1 2024

Saturday 10 February 2024

Guadalcanal 1942 - 'O'Group.


This game was based on the fighting around the Matanikau River 21st October 1942. 

The American Marines have formed a defensive line to the East of the river, one flank is against the sea the other extends into the jungle.

The table set-up with the American lines to left of picture, holding the river line and with the beach area closest to camera.

The Japanese objective is to break through this defence and for one of there units to exit on the coastal road on Eastern table edge.


For this game the rules chosen were O Group by Reisswitz Press.

An initial bombardment was quite brutal on the Marines and they lost a platoon.


Then the Japanese opened the attack with heavy weapons whilst advancing to the river. This was driven back when the Marines exposed their position and fired upon the advancing Japanese. 


Following this initial setback the Japanese started to deploy their infantry platoons for an attack on the exposed ridge. As they could deploy Combat Patrols from the Southern table edge the ridge was in danger of being flanked. Therefore the Marines started sending reinforcements to this area.


However by the time they arrived onto the ridge the Marines front line had collapsed as the Japanese initiated Close Combat assaults.


Things were not looking good for the Americans, however time had run out and the game had to finish.


Technical Stuff


At present there are no official order of battles for the Pacific War so I compiled my own battalion organisation which is attached.


The Japanese were based on the 1940 lists (poor artillery etc) but they were made confident as they were very sure they were going to win. I also, used some ideas suggested by the Lardies Forum.

https://toofatlardies.co.uk/forum/viewforum.php?f=45&sid=48232f5a1f2809e34a75e3c23ef7df5a


The US Marines were based on the US list from the rules but using bolt action rifles. 


Changes to the rules were minimal. Jungles had to be traversed by infantry in column. All motorised units had to throw for bogging if off the road or beach. 


Thanks to Gregory, Vince, Dave and Stephen for playing the game in the fun manner it was intended.

Saturday 3 February 2024

Zulu - The Boys from Isandlwana.


On the 22nd January 1879, Witt's Missionary Station at Rorke's Drift, a remote outpost held by one-hundred and fifty British soldiers, thirty of whom were sick and wounded, held off a force of 4,000 Zulu warriors, this following the crushing defeat of a 1,300-man British column by the Zulu armies at Isandlwana.
 
Wargame Vault - The Boys from Isandlwana, Zulu War rules

The film Zulu depicted this heroic stand and was first shown on the 22nd January 1964 on the 85th anniversary of a battle that saw the award of eleven Victoria Crosses, one of the largest number awarded for a single action and the largest number, seven, awarded to one unit, the 2/24th Foot, in a single action, and is considered by many as the finest example of a masterly defensive action and heroism against overwhelming numbers.

Little wonder then that as a wargamer I never grow tired of playing this famous stand or of enjoying my pal and fellow DWG club mate Nathan's wonderful collection of terrain and figures to do it with and I think this is probably my third go at playing this action, this game in the week of the 145th anniversary of the battle, and another chance to roll out the regular film quotes, my favourite being;

'Why us Sarj?'
'Because we're ere laddy, now face your front, and mark your target.'


So with this little battle, or probably better described siege, being probably the most famous action of its type, I will not take too much time describing the scene, with massed Zulu impis surrounding the defended compound of the Rorke's Drift, hospital and missionary station.


The rules is use were our usual choice of 'The Boys from Isandlwana' by Chris Pagano, which provide a fast flowing sequence of play that recreates quite well the relentless Zulu movements in the face of withering British fire as they seemingly defy the casualties suffered in their drive to bring the redcoats into assegai range, if they can get past the Martini Henry bayonet - Colour Sergeant Bourne, over to you!


Having played this action several times commanding both sides, the key to British success is to vigorously defend the perimeter until you can't and then to give ground grudgingly, inflicting punishing casualties on the Zulus as you retreat to a smaller perimeter, with the redoubt ready to administer the final coup-de-grace for the defenders.  


For the Zulu commanders its a case of feeling out for the weak spot and rapidly reinforcing success to prevent the new defence line taking shape, or by making the defence harder by causing enough casualties during the pull back.

Of course this presupposes that the British will defend their perimeter until they can't, but in our game, our two Imperial commanders, Chard and Bromhead decided to take men off the back wall of ammunition boxes, mealie bags and the transport wagon, to focus efforts on building the redoubt.

Zulus cascade over the vacated rear barricade and enter the hospital compound. Oh dear, never mind!

As can be readily imagined the men facing their front in front of the hospital must have become decidedly nervous as they became increasingly aware of Zulu chants to their rear as seen in the pictures below


What's the noise behind Sarge?

Never mind the noise behind, face your front and mark your target!


The decision to focus efforts on the redoubt had resulted in a rapid building of said defensive work at the expense of lots of Zulus getting into the hospital compound and forcing a retreat from the front facing barricades to the hospital building and effectively dividing the compounds into two separate battles 

To add further woes to the British defence, the Zulu snipers from the rearward escarpment were proving more than usually effective, only hitting on 10 on a D10, they picked off at least six redcoats over the course of our battle, that didn't make things any easier for the garrison.


Our two British commanders were experiencing the utter sense of desperation that probably typified much of the actual defenders experience as the Zulu's kept up a relentless attack, recycling destroyed regiments and able to bring in fresh reserves sprinting across the now open ground around the perimeter to rapidly support the advances made by their compatriots.

However the Zulus weren't having it all their own way, as the redcoats kept on taking a fearsome toll on the warriors that were forced to fight their way into the compound, sector by sector and with each of the four Zulu players able to bring on a further six regiments each, it was interesting to see how many of our allotment we had used, with all my six on the table at game end.


As the relentless Zulu attack made ever encroaching gains, with desperate fighting in the hospital building as the defenders left in that sector were force to fight in the rooms and on the veranda as Zulus above set light to the thatch, the centre of Imperial resistance devolved in front of the mission station building and around the redoubt.


Eventually the British defenders in the missionary compound were forced back from the cattle kraal walls and out of the main building to find themselves compelled to form the classic double line alongside the redoubt, as the hospital garrison fought back to back amid waves of ebony warriors and it seemed that the defence had reached its end point, with Lieutenant Bromhead, a prominent casualty, killed defending the front barricade on the missionary compound.


Great fun once again and I consider my Zulu War itch well and truly scratched.

Thank you to Nathan for hosting this year's anniversary Rorke's Drift game and to my fellow combatants, Ian Mc, Mark C, Mark & Matthew, Mike B, Mark E, for helping to create all the drama behind this narrative.

Until the next time
JJ