Sunday 14 October 2012

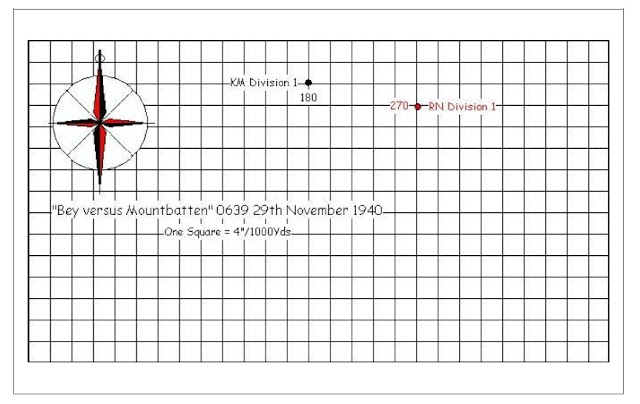
Bey vs Mountbatten, November 1940

After originally planning to run an Age of Sail naval scenario using my "Clear for Action" computer rules, I was having problems saving my game scenarios. So with one day to go before our club meet and not wanting to not have a game ready to go I turned to a very reliable set of rules namely "Shipbase III" which after a bit of fine tuning, halving the gunnery to allow for battle conditions, always give a fun game. Admittedly this wasn't going to be Age of sail, but instead of frigates we had destroyers in action.


The scenario above is my adaption of the scenario created and available on Len's Naval Warfare page for his rules "Fire on the Water"

http://fireonthewaters.tripod.com/index.htm


HMS Jersey (Early in the war)

KMS Karl Galster
This scenario recreates one of the early clashes between the Royal Navy and Kriegsmarine in home waters, and being a Devon based club we are very familiar with the conditions that can occur in our home waters. This action happened on a murky moonless night off Cornwall, with the Royal Navy force sailing towards the gun flashes observed as the German force was getting stuck in to some armed tugs. In this game we were running our add on command and control and night fighting rules.

Both forces were on set speeds and courses until the enemy was spotted. Then forces could react according to their standing orders. Only then could either Bey or Mountbatten start to signal to their respective commands to adopt different sailing and gunnery tactics. As this was a dark foggy night with primitive signalling techniques compared to modern times, things were likely to go wrong!!

This was going to be a "knife fight" of a battle as the ranges were often only one to two thousand yards, and as wargamers we were not just going to shoot and scoot, things were likely to be bloody.
HMS Jupiter having turned after launching her torpedoes is spotted by Karl Galster and is badly hit

We had the RN force on alert and they duly spotted the KM ships before the Germans knew they were there. Jack and Charlie standing in for Mountbatten had opted for fire star shell and launch torpedoes as their reaction to spotting the enemy. As the KM destroyers cruised on their current course a star shell was observed on their port side and HMS Jupiter launched 5 torpedoes at the German ships. The Jupiter only launched half her possible strike of 10 fish and at slow speed setting they would take two turns to cross the KM course by which time the RN force was spotted.
The German reaction was swift, with orders to open fire on first contact, increase speed to 30 knots and turn across the enemy. Sadly for the Germans only the third ship in line, Hans Lody, reacted to the new order, with her two consorts sailing on in line ahead. However the gun barrage from Lody at HMS Jupiter was devastating at about 2000 yards causing 60% damage and three fires, forcing her out of the line limping along at 6 knots.

Admiral Bey in KMS Karl Galster leads KMS Richard Beitzen as a star shell is observed to port (top left)
The RN torpedo's all missed and both sides were well aware of each others presence and desperate to bring order to their reactions. Both sides had ships out of formation and command and so had to fight with what was available. Both sides opted for a combination of gunnery and torpedoes to settle the affair and after thee turns of action, two RN destroyers Jupiter and Kashmir and KMS Hans Lody were sunk.

At this stage discretion would normally have been the better part of valour, and with the ranges increased and the darkness re-enveloping the forces our respective commanders may well have withdrawn to lick their wounds. We however are wargamers keen to try out our rules to destruction, and so we turned towards our respective foe and armed the torpedoes.

The survivors of the first round turn in for the final clash
As both sides charged towards each other on opposite tracks the night grew lighter and visibility increased. Three RN destroyers vs two Kriegsmarine with signal lamps flashing to order launch remaining torpedoes, fire the guns and take evasive action.

At one stage there were 26 torpedoes in the water and that was going to hurt at 2000 yards. The first ship hit was the Karl Galster, two torpedoes broke her back and she sank fast. However her six torpedoes caused five hits sinking the two rearward RN ships and having a dud hit the lead. The gunnery from both remaining ships was ineffective and they were both limping away when the final salvo of British torpedoes found their mark. KMS Richard Beitzen had avoided nine fish but it only took one to seal her fate.

The RN force (nearest) charge in for the final pass with their KM foes
With daylight approaching HMS Jackal limped away at 3 knots badly damaged but afloat and keen to avoid the Luftwaffe on her desperate return to Blighty, but that as they say is another story.

Thanks to Jack and Charlie for a very enjoyable afternoons gaming.

Warfare in the Back of Beyond


Baron Von Ungern-Sternberg


A big thank you to Chas for running a really good game today. Haven't enjoyed a bash like that for a long time.

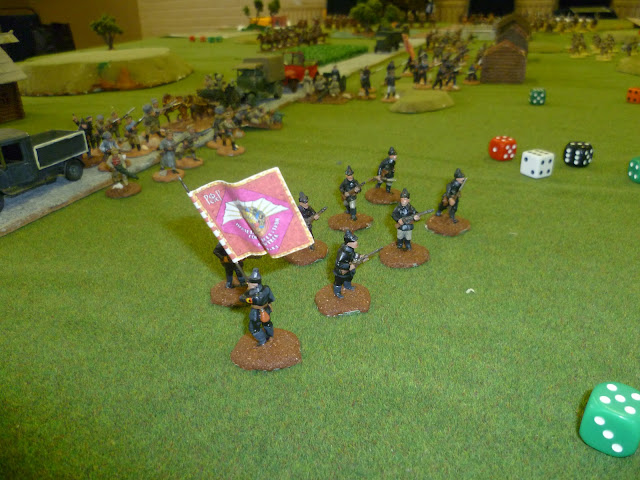
We took to the Mongolian steppe to refight a strange little war from the early 1920's. An Austrian Baron called Von Ungern-Sternberg decided he had not seen enough slaughter in the First World War and fighting for the Russian army, so raised an army to fight for Mongolian independence (as you do).Needless to say the Bolsheviks had something to say about this, not least when he invaded
Russia.


Andy B, Clive and myself took the mad Barons men. Chas and Andy C played the Reds.

The scenario saw a red convoy being attacked by the mad Mongols, Chinese and assorted bandits. The Reds had to get their main man off the table, with his car laden with Mexican silver destined for the pay chest (or perhaps a nice Dacha).

Our infantry flanked the road and moved towards the convoy. The reds deployed a number of infantry units and our Chinese infantry started to feel the pain. Red cavalry rushed out to cover the other flank.


Our Mongol cavalry horde rushed on from the rear of the convoy and ran straight into the marksmen of the Siberian infantry. The Russians must have been panicked, as soon the Mongolian "Spoons" squadron was amongst them with two more Mongol horse units following up.

The rest of our cavalry broke right and flashed up the flank. The Russian armoured car and an HMG unit stopped to cover the threat.

The Red army cavalry clashed with the Baron and his bodyguard. It was the last thing they did. With the Baron there are no survivors.


Despite Andy B's best efforts, the weight of fire forced some of the lesser units back and a couple decided to go home.

With his force engaged, Chas decided it was time to get his car off the road and make for safety.

Our infantry were starting to go to ground, but a unit of Chinese peasants knew no fear and to a cry of "Big swords", they burst over the crest of a hill and into the elite Cheka.

With Mongolian horse rampant in his rear, Chas deployed his last fresh infantry unit to cover his escape. What could go wrong ?

At that moment the Baron and his bodyguard charged into view. A volley from the reds failed to stop them, but it looked like they would fall just short.


 The Baron used his special rule to force an extra few inches out of the charge and the Russian commander fell beneath their whirling sabres. The last thing they heard was a shout from the Baron, "No prisoners."

A good outing for the "Setting the East Ablaze" rules and nice to see such a varied collection of 28 mm figures on the table. Most of the units were of very poor morale and fighting quality, but I've rarely seen such a mix of abilities, nationalities or weapon types on the same table !

Played in the usual easy going style, a good time was had by all.

Vince