Saturday 28 October 2017

Battle of Qadisyyah 636 AD - Swordpoint


With the deployment of a large Sassanid army to modern day Iraq, the Sassanid empire forced the nascent Islamic state back to the Arabian desert. Having reinforced and reorganised in the desert, Caliph Umar ordered Saad to take his army back into Iraq to bring the Sassanids to battle. Shahenshah Yazdegerd lll, the Sassanid king, commanded his military leader Rostam to move into the south of the country and block the Arabs near modern day Kufa. With more than 50,000 Sassanids facing around 30,000 veteran Arabs, the scene was set for the battle of Qadisyyah.


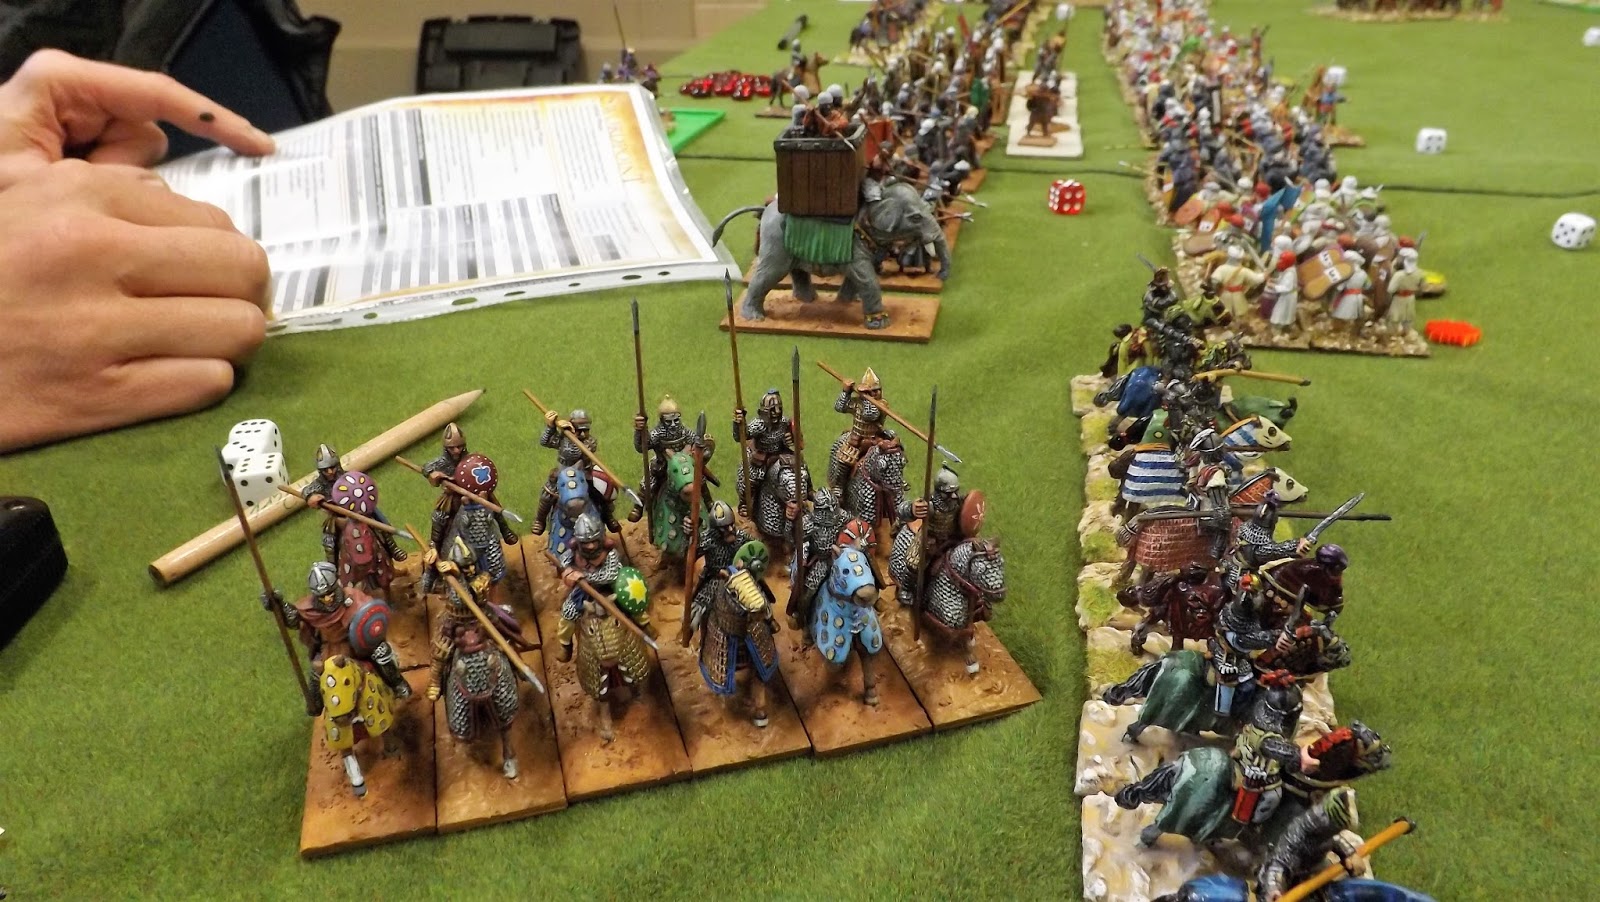
Our re-enactment pitted Chas as Saad, ably assisted by Steve M & Steve H, against Andy C as the child king Yazdegerd lll and myself as Rostam. The battle was played to Swordpoint rules in 28mm.


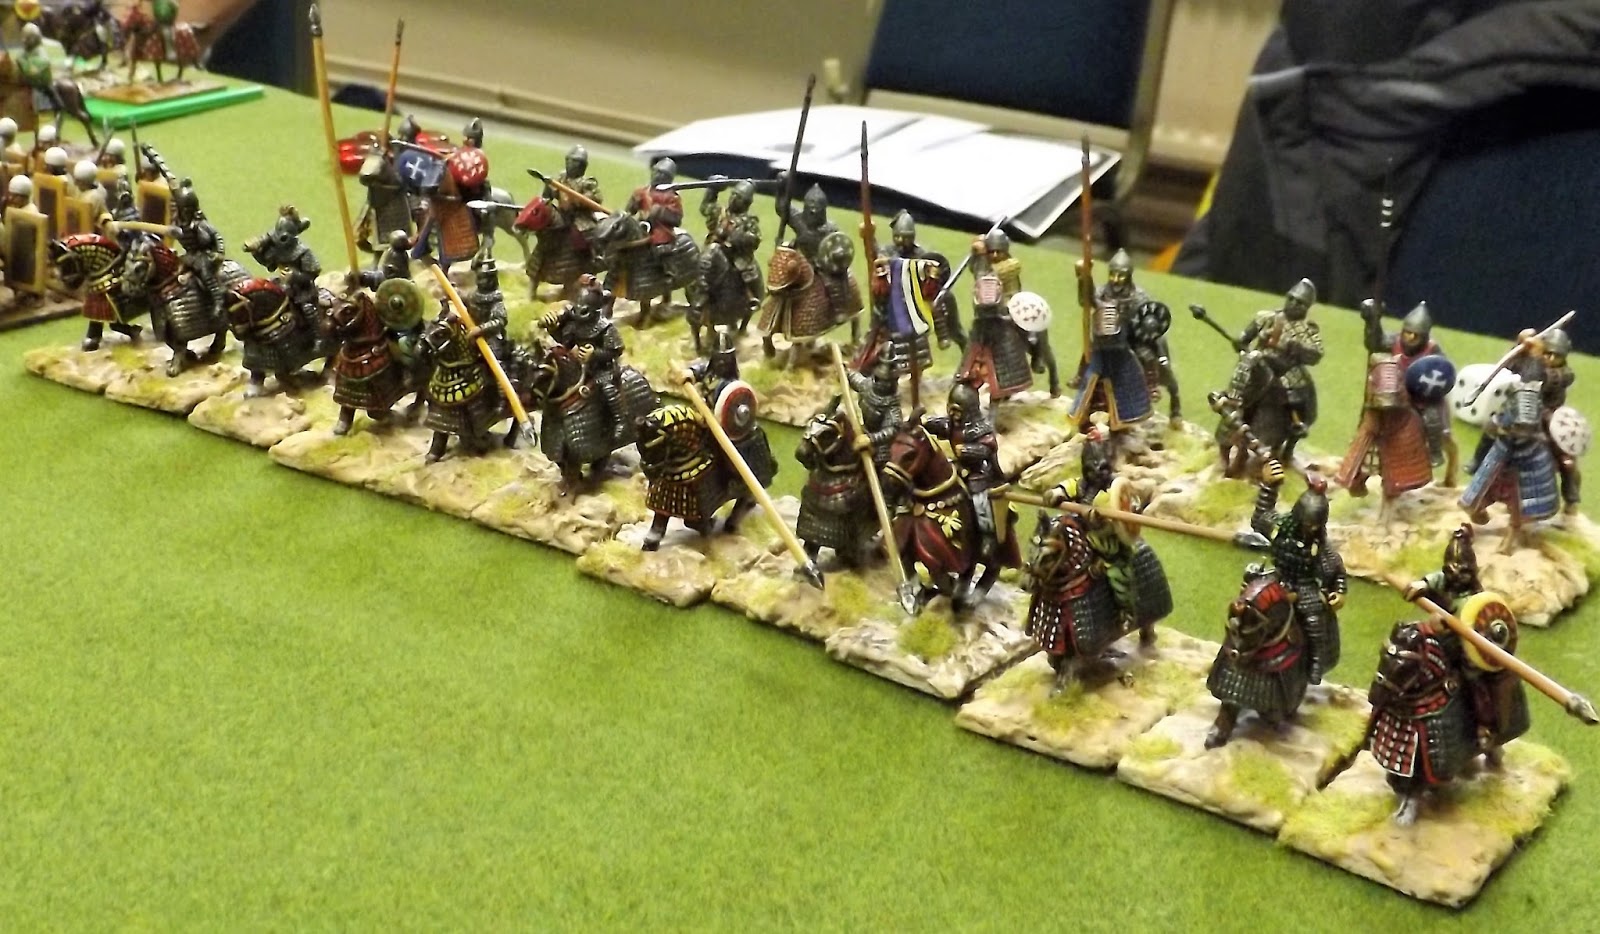
The Arabs used a "stratagem" to force the Sassanids to deploy first. There were no great surprises in our dispositions, with our centre being made up of militia and levy infantry, with a mix of spear and bows, supported by a unit of elephants. On either flank, cataphract cavalry (upgraded Azatan nobles) and Azatan clibinari horse supported the infantry, with horse archers on both flanks and another elephant unit supporting the left flank cataphracts.


The Arabs deployed their religious volunteer infantry in the centre, supported by tribal foot, with heavy cavalry and tribal light cavalry on the flanks.


As the Arabs advanced in the centre, they found that every man and his dog on the Sassanid side bent bow and shot. The Arab horse suffered early losses and the Sassanids started to gain "momentum" tokens. These tokens allow useful "pluses" to melee combat results and initiative rolls.


Both side's skirmish infantry were forced to retreat by weight of fire, as the mass of Arab infantry ground towards the stationary Sassanid line.


With the Arab centre getting too close for comfort, Andy ordered the first line of Sassanid heavy horse to charge the infantry opposite them. Meanwhile the horse archers on either flank evaded the charge of the Arab heavy cavalry, whilst peppering their pursuers, thanks to their "Parthian shot" ability.


In melee, the Sassanid cataphract and clibinari proved as tough as they looked, despite the Arab throwing spears and the Arabs were forced back. The Arab infantry now charged the Sassanid levy and militia foot and their supporting unit of elephants. A titanic struggle developed with the elephants proving too much for their attackers. The levy held the Arabs further along the line, largely due to the use of "momentum tokens" to influence the combat result.


The charge and evade game of cat and mouse continued between the Arab horse and Sassanid horse archers. One horse archer unit did not run fast enough and was driven from the field in the ensuing melee.


In the centre the Arab foot were still being forced back, but the Sassanid elephant unit was taking hits from the fire of Arab skirmishers. Seeing no sense in being shot at, the elephants charged an Arab religious volunteer infantry unit. The sight of a herd of pachyderms bearing down on them, made the Arabs remember an important appointment elsewhere and they broke.


The Arabs had a quick conflab and decided that the day was lost.


A good fight, to an interesting set of rules, that were on their first outing at our club. I particularly liked the way the momentum tokens worked. They can be gained from 'beasting' units with shooting, successful charges, breaking units etc and allow (limited) additions to combat results or initiative rolls. This leads to some difficult command decisions, as you never have enough tokens to satisfy all the competing demands. In our game a unit of horse archers were sacrificed to allow a +3 added to the combat result in the Sassanid levies combat. This was a crucial melee, despite the quality of the participants!


One of the few games where I have seen the same number of elephant units finish the battle, as started it! That said, elephants are very brittle and vulnerable to missile fire (as they were historically).

Many thanks to all the participants for their contributions and for playing the game in a good-humoured fashion. "Swordpoint" is certainly a set of rules I shall purchase, as I want to see how they work with my Norman and Saxon armies.

Vince

Saturday 21 October 2017

Eighty Years War Skirmish in the Low Countries - Donnybrook


Last club meeting I brought along my figures and terrain to play a scenario set during the Dutch Revolt. For those of you not in the know, the Low countries, as they were known, were part of the Spanish Empire due to a complicated mess of marriages and inheritances. During the mid 1560's however, the reformation, differences in the way the provinces were to be governed (and in particular the division of new bishoprics imposed from Spain) and desire for freedom of worship, caused a bubbling pot of resentment to boil over into open revolt. The resulting wars carried on for 80 years and the latter part being contemporaneous with the 30 years war. My figures concentrate on the earlier stages of the conflict, from about 1568 till roughly the mid 1580's.

Onto the fun bit. An advance force of Dutch rebels had managed to gain control of a small village with an important river crossing. The Spanish garrison had been forced off in surprise and had gone to alert the local commander, who was at the time overseeing the investment of nearby Leiden. The Spanish dispatched a force consisting of three companies of shot, two squadrons of Horse arquebusier and a group of volunteer gentlemen armed with swords and bucklers.


The Dutch on the other hand had sent for reinforcements and a company of pike and another of shot, escorted by two squadrons of Reiters were on their way to support the two companies of shot and the veteran halberdiers hiding in the town.


The rebels had built barricades on the bridge and at the ford next to the mill in order to try to slow the advance of the Spanish.


We used Donnybrook for rules which gives a nice bloody game. If you haven't seen these before they are form Clarence Harrison and Barry Hilton who are also responsible for Beneath the Lilly Banners and run the League of Augsburg blog and forum. They are a card driven set of skirmish rules with each of the troop quality types given a different dice (d6,d8,d10) to use for all their actions.


The Spanish made a general advance towards the river to try and to get into range, apart from the gentleman swordsmen who seemed to have forgotten to gain their order from their colonel. The rebels revealed a cannon and fired it ineffectively at one of the Spanish companies. The crew then promptly decided they had done enough for the day and marched off home. The Horse on the left wing shot at the rebel arquebusiers and caused a fair amount of injury.  The Spanish Musketeers used their longer range and their professional attitude to devastate the Rieter squadron that appeared and then destroyed a company of arquebus as they tried to move back into the town for cover. The other Reiter squadron waded across the deep river and charged the Spanish horse who had been thinned out by some of the rebel shot. The Spanish came off decidedly worse.


The rebel shot in the centre of town piled into the house nearest the bridge to try and gains some cover from the devastating fire of the Spanish shot but found the flimsy houses were no good at stopping Spanish lead. The Dutch reinforcements reached the edge of the town and one of the pike groups marched straight in to a sticky bog in-between two of the houses (Lord knows what caused that!) and spent a inordinate amount of time skulking out of range of the Spanish.


The Spanish musketeers climbed into the mill in order to give themselves an elevated firing position and the two groups of Dutch shot on the other side of the river felt the sting and their numbers quickly dwindled. Meanwhile a company of arqubusiers were attempting to dismantle the barricades at the bridge while the gentleman of the company were attempting to show the peasants how it was done by dismantling the one at the ford. Round about then the Spanish commander decided that, despite the successes across the battlefield, the Spanish couldn't possibly win and immediately ran for home, not even stopping to look back.


The right of the Spanish line was looking strong but the horse on the left had been destroyed and the centre was having a hard time crossing the bridge as they were charged again and gain by the remnants of the Rieters (one heroic officer) and the halberdiers and them finally the pikemen. Despite a unit of reinforcements coming onto the field to aid the rebels, things were looking bad for them.
The gentleman had come across the ford and were heading for the centre of the village to finish off any resistance and the few remnants of the rebel force were struggling to hold back the tide at the bridge.


The heroic rebels had given a good account of themselves but it there was little they could do in the face of the greatest army in the world and, despite giving the Spanish a bloody nose, they were destroyed without mercy by the might of the soldiers of the Tercios.


The game certainly gave me something to think about. The Dutch are in desperate need of some musketeers and the Spanish will require some pike (not that they needed them). I also want to try out the Sharply Buffed rules that were published in the Lardies summer special as they are designed exactly for this period. I hope Jason and his son had as much time playing the game as I did running it. Next time I hope to get more players at the table so we can have more arguing..sorry..strategic discussions.


Sunday 15 October 2017

Target for Tonight - "The Big City"

A No.57 Squadron Lancaster mid-upper gunner in his turret, February 1943. CH8795
Last month one of the games featured was a set of WWII Bomber Command rules entitled "Target for Tonight" (TfT) published by D.W Thomas back in 2000.
https://devonwargames.blogspot.co.uk/2017/09/target-for-tonight.html

I was a little surprised at the interest generated in this, now somewhat old set of rules, and the inability of finding anyone in a position to supply them.

I am at the present reaching out to people I know in the hobby to see if anyone can shed any light on Mr Thomas and his rules and as part of the effort to create a bit of attention to them in that regard I got together with the chaps at the DWG to run a second game using them.

The new mission map

I should say that I haven't played these rules for a number of years prior to these two recent games and looking back through my files on previous run-throughs it strikes me that TfT are showing their age in that the basic concepts and structure are sound and provide a compelling narrative game with a lot of period detail that help set a game in a particular stage of Bomber Command's campaign .

That said the rules seem to me to be unfinished in many respects with a rather clunky mission planning process requiring plenty of flicking back and forth between pages and list of potential events that can affect aircraft as they progress from take-off to hopefully a safe landing via the route to and from the target, that are not intuitive from the first read through.

Slightly modified target maps as used in the previous game 

The game organiser really needs to do quite a bit of prep work for each mission that really needs setting up as part of the rules to allow a speedier process of mission organising that not only includes target plan as seen above but a quick plan for the route as seen below to allow a speedy set up of the tiles.

Thus I present my map based on the map used in Ian Dury's game "Enemy Coast Ahead", suitably adapted to show the various targets colour coded by zone but also nearby targets should aircraft be forced to divert to somewhere nearby.

In addition on re-reading, the rules reveal gaps that Dury's rules covered off quite well, with his use of cards to not only generate events similar to TfT but act as a record of fuel consumed during the flight adding another potential issue of concern to flight crews. Other gaps included ditching in the North Sea and bailing out over occupied Europe and Germany with the potential of escape and evasion for surviving crew members.

Route planner diagrams to speed up the game set up
I mention these aspects because on playing this game, recreating a deep raid to Berlin, and a follow up shorter, in and out raid on Kiel, the players involved discussed the idea of running a squadron campaign running missions across the period from late 1942 to the end of the war which would need to include that kind of added detail.

These aspects were just part of the improvements we felt needed to be considered. Others included moderating the somewhat over deadly aspects of the events and their likelihood of occurring with the events generating die roll changing from a D10 to a D20 which seemed to give a much more representative risk profile and seemed better to mimic Dury's card generated risks.


The D20 was played on our Berlin game but even then we considered the events occurrence better modified, the crew responses to them needed yet further modification with the use of a D8 rather than a D10 to give a better profile in that area.

In addition to these slight modifications we added the fuel element by using micro dice, placed by the models on the route to record fuel points used on the flight with hazards such as being chased by night-fighters, dodging flak, losing the route or having to go around again on the bomb drop adding to fuel consumption and possibly posing the issue of when to abort a mission to be able to get back.

Finally a few other modifications considered were
  • To run a squadron attack of say up to sixteen aircraft we needed multiple plane stat cards laminated for repeat use, with players able to manage up to eight aircraft on one card. 
  • The addition of the other bombers used by main force including Wellington and the Short Sterling with the added hazards using those types brought to any mission particularly in the latter stages of their deployment.
  • Addition of potential German intruders over Bomber Command airfields.
  • Mosquito and Beaufighter intercepts of German night fighters.

New plane data record cards

So on with a summary of our game, staging a raid during the Bomber Command Campaign against Berlin which got going on 23rd/24th August 1943 with the first attack by 727 aircraft and which saw a loss of 56 planes, the largest single loss in one night in the war to that date.

Our mission was shown to be taking place in February 1944, the month that saw the heaviest attack on the "Big City", as Berlin became known in RAF parlance, during the whole war with 561 Lancasters and 315 Halifaxes supported by 16 Mosquitos, 891 aircraft in all, delivering 2,643 tons of bombs and losing 43 aircraft (26 Lancasters and 17 Halifaxes) of 4.8% of the total force involved.

Our force of 4 Lancasters and two, novice crew, Halifaxes took off without incident and headed out over the North Sea as seen in the picture below.

The flight to Berlin and back was a true test of endurance for bomber crews and the number of sectors involved with the addition of three flak zones leading up to the target followed by the equally hazardous return journey hopping the channel with all those potential night-fighter intercepts lining the route give a vivid impression of the challenge facing our player-crews, now with the added concern of those little red micro dice recording fuel consumption.


The flight out to the coast and over the North Sea was relatively uneventful except one of the Lancasters flight engineers mis-managed their fuel flow causing engine failure from iced up carburettors and sending the aircraft into an uncontrolled descent until the pilot managed to rescue the situation only to leave the aircraft at a dangerously low altitude likely to draw the attention of the Nachtjagd.

In addition the icy conditions caused one of the Halifax crews to mismanage their anti-icing procedures which left one of the "Halibags" with ice covered wings and at low altitude in a similar situation, but with both crews pressing on with the mission.


As the six aircraft made their way successfully to the first flak zone it seemed the D20 modification was working well and the players were congratulating themselves on a job well done all be it with night-fighters drawn away by that spoof raid on Frankfurt and the fun of watching a couple of aircraft including a novice Halifax crew needlessly burn up fuel evading an unseen night-fighter with a false alarm on the MONICA beacon sounding in the pilots headset; all this while narrowly avoiding a mid-air colliding with another bomber in the stream whilst taking this avoiding action.


You see as game-meister you can have so much fun with players, watching the forehead sweat beads appear as they desperately try to put space between their bomber and that night-fighter model and make sure they offer the best deflection angle in the process.

Is this for real or just a false alarm! A Halibag in trouble

Even as the D10's roll to resolve damage from hits they don't know what's happened until the umpire acts as their tail gunner announcing the all clear and an sheepish call of "he must have broke off skip".

Perhaps black and white  is more appropriate for that period feel
 As I said everyone was congratulating themselves on making it unscathed into the flak zone with all the aircraft experiencing the buffeting flak when Bob decides to roll a 20, oh dear, how sad, never mind!

Lining up for a deflection shot or will the bomber turn before the fighter opens fire into empty night sky?

The resulting 20 meant that Q -Queenie was struck in the fuselage by a flak shell probably delivered from one of the mighty flak towers surrounding Berlin.

Oh well at least it was a fuselage hit, all the engines are intact, the bomb bay is untouched and so on we go, better just get the crew to sound off and check for casualties.

Wow we've all made it to the flak zone - at least we don't have to worry so much about night fighters here!
 " Rear gunner here skip, making my way forward, Jonny in the mid upper's had it, so has Dusty and Jim with Dennis severely wounded and his maps and stuff all over the place, plus we have a large hole amidships. I am getting forward to take over the bomb sight."


So Berlin was starting live up to its reputation and as the six aircraft lined up for the target in the third flak zone O-Orange took a flak hit right in the bomb-bay causing a massive explosion in the night sky with several crews reporting later that the Germans were using star-shells on the way in.

The bomb run was no less eventful with low cloud and searchlights creating the so called "Ground grass screen" known as Mattscheibe to the Germans, where the cloud masked the target causing in this case a misplacement of the Target Indicators two rows back on the target map and also allowed the search light batteries to shine their light onto the cloud base, silhouetting the bombers to Wild Sau night-fighters operating above it.

S-Sugar was subsequently strafed by a FW190 using the newly fitted radar for single seat fighters which took out the Lancaster's port inner engine and possibly causing the bomber to drop short of the TI's.

A Lancaster on the run in over Berlin

The three remaining aircraft unloaded on the TI's with the reports showing hits on the SS Reich Ministry buildings, an SS Barracks and the Flak Park, but with the city hospital also hit (note the Berlin industrial target map has a few additions peculiar to Berlin). The effects of the low cloud base meant that none of the industrial targets were touched in the attack.

The return flight saw the loss of a further two aircraft to night-fighters and C-Charlie on final approach, catching fire and exploding in mid-air as a hung up photo flash exploded pre-landing.

The D20 modification worked really well on this the hardest of missions and with the change as outlined to crew capability rolls it was felt that the risk profile would improve still further. In addition the fuel dice added yet more tension as players watched nervously the results from various manoeuvres carried out during the flight.

On the second quicker mission to Kiel, six aircraft set out with one lost to a night-fighter and five safely returned but with only one of the four managing to bomb the U-boat factory, with the others all bombing short due to jittery bomb aiming.

Still stuff to do with this game but one we all felt has great potential once the issues are ironed out.

Thank you to Bob, Ian, Jack and Charlie for a fun afternoon with lots of drama in the night skies over Germany.

Friday 13 October 2017

Chain of Command 1940


One of two games ran at last months meeting of the DWG was this large Chain of Command 1940 set to which had lots of stuff out on the table. The scenario was a Operation Sealion "what-if" game. The Germans had seized a vital bridge with a sneaky Fallschirmjager landing, preventing reinforcements for the LDV force trying to stem the German breakout from the beaches.


I am not exactly sure how this game turned out as I was running the Target for Tonight bomber game, but I thought you might like to see some pictures from the this game. 
The Germans had 3 forces, a Fallschirmjager platoon at the bridge holding until relieved, with an infantry platoon and an ad-hoc Panzer platoon trying to break the British defensive line at the far end of the table. The British also had 3 platoons. An LDV force was dug in on the far table, attempting to slow the German advance. On the nearest table a regular infantry platoon with mixed armoured platoon in support were rushing to join them, only to find a bunch of sneaky Germans in their way.


The German advance from the landing zone, facing a lot of mines, barbed wire and roadblocks along the way. Initial forces were infantry only, using them to find the defenders before the armour arrived.


German's advancing bravely. They did this for a while, then some old fellas started shooting at them and they went to ground.


As you can see the chaps in the club have a nice collection of WWII kit in the larger scale which really helps bring the platoon level game alive with sections of men very much core to the system.  The German commander skulks behind his men leads from the rear! Brave chap that he is.


Meanwhile the Fallschirmjagers prepared themselves for combat. In the distance they could hear tank tracks and engines, but whose were they?


Its also nice to have a change to the early war period and no Tiger tanks anywhere to be seen. Nathan did want to use a Tiger tank, "It could be a prototype" he said. Instead the Germans had a StuGIII, Panzer II and Panzer 38t. The advancing infantry had revealed a couple of sections of LDV troops, so the Panzers arrived. Also visible here is an engineer team trying to clear the minefield. Dinner plates upside down you say? What a sneaky trick.


With a platoon commander in a "State of the art" Panzer III! His advance was stalled by the roadblock and some suspicious looking milk churns.


That said the equivalent of a Tiger for this period did put in an appearance with a Matilda II rumbling around the French lanes. The Matilda is awesome, unless you need to shoot some infantry, then it's lack of HE and single MG make it less so. Above are some of the LDV types doing their best to stop the German advance.


The German armour was very pedestrian, sitting on top of a hill and laying in fire. They got a bit of a shock when a Smith gun starting taking shots at them, even more so when a Boys anti-tank rifle joined in too. Meanwhile the infantry were taking a hammering from 2 sections of old men and boys, one did have a Vickers MG with it though.


Alongside the German and British armour we had armoured cars and Fallschirmjager on the prowl with anti-tank guns at the ready.  The Fallschirmjagers support was very limited as elite troops don't get much for their money. They did have a nice little Pak36 though. Would it be enough to stop the British armour?


A Morris CS9 armoured car lead the way, with the mighty Matilda behind it.  The British forces had to roll a dice to see where they came on from as they rushed to the sound of battle.


On another road a Vickers VIc light tank arrived, joined by an armoured car. No real heavy armour this side of the table.


Regular British infantry move up with the Matilda, but lots of German MG34s were waiting for them.

Not sure about the allied star but the useful bren carrier served throughout the period
Also available was a small carrier section, 2 vehicles with 3 men in each. We had to make do with late war Universal Carriers as we  don't have any Bren or Scout Carriers......not yet anyway.

Lots more to come this weekend at the the DWG with a new bunch of games to present.  Fallschirmjagers defend the garden. The end result was a bit of a draw. The LDV got broken, but not before decimating the German infantry. The Panzers were largely untouched, a few minor damages. At the other end the British regulars had been slapped about a bit but they had, with the help of the armour, broken the Fallschirmjagers and were able to seize control of the bridge.

It was a fun game, a bit of a mish-mash of troops and a mixed scenario but it worked well enough and played well with 6 people taking part.