Sunday 31 March 2019

Fornovo 1496 - Furioso


Our club has several collections of 28mm early renaissance miniatures, but has struggled to find a set of wargames rules that we feel give a good sense of the era, so these miniatures have languished “in the box”. With the publication of “Furioso – Renaissance Warfare rules for the sixteenth century” by Alternative Armies written by Steve Danes, we hope to have overcome this problem.

In addition to the rules, a supplement covering the “Italian Wars” has also been published. So after a few test games, to get a hang of the rules, and after consulting the supplement, which gave us the orders of battle, deployments maps, victory conditions etc. we decided to refight the battle of Fornovo.


Furioso Renaissance Wargame Rules

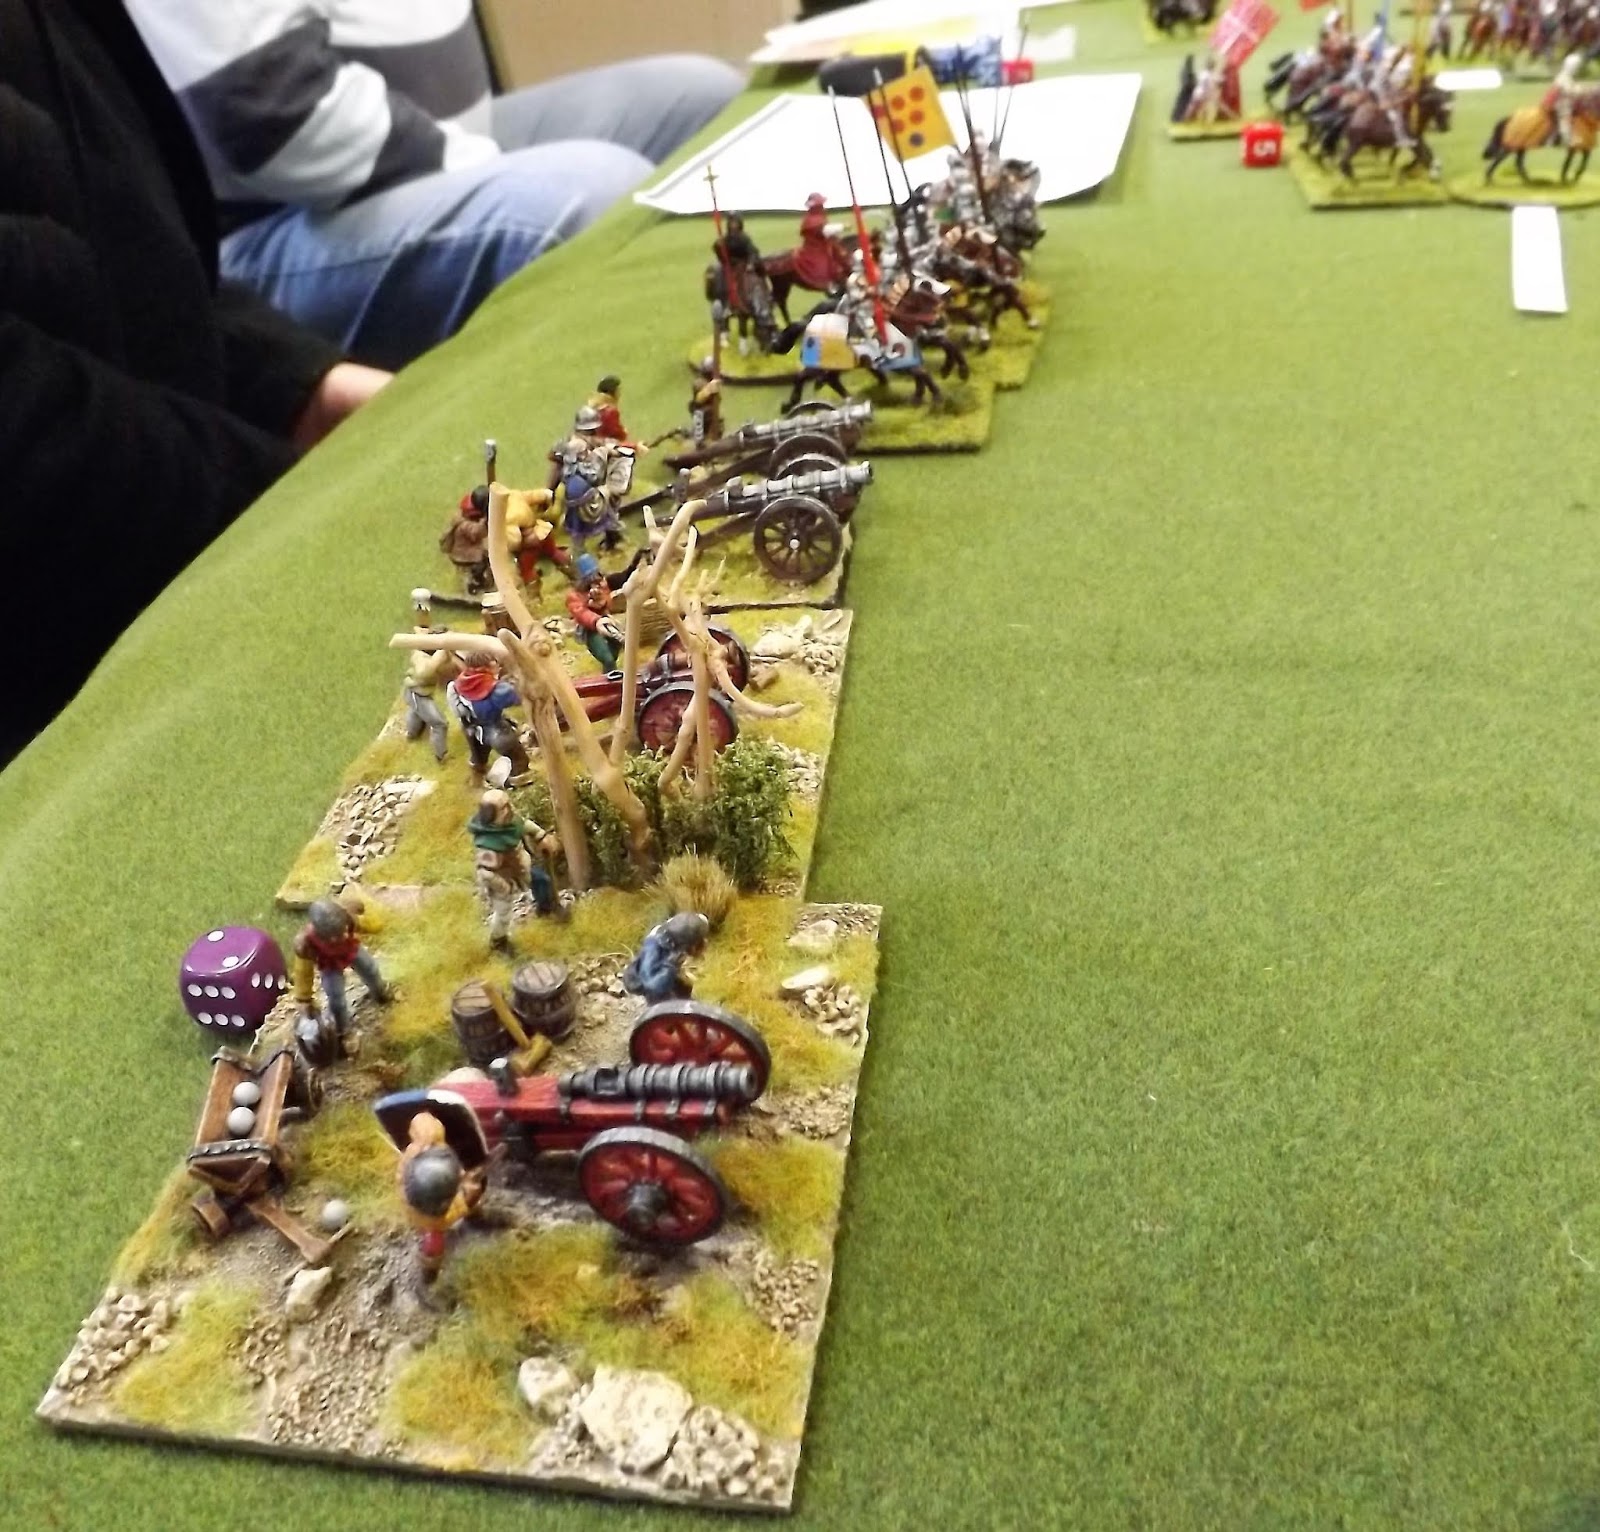
Italian Wars & Figures - Alternative Armies

The Battle of Fornovo was fought on 6th July 1496 between the forces of King Charles VIII and a combined force of Italian City States.


King Charles had invaded Italy earlier in the year and reached as far south as Naples. His progress was aided by the disunited response of the various Italian states and the superiority of the French army, who had brought a ruthlessness to warfare that the Italians were not accustomed too.


Now King Charles was marching north towards safety with a depleted army, due to the need to garrison important positions enroute and encumbered with a large amount of loot. At this stage the Italian states decided to try and intercept the French, with a much larger combined army, comprising troops from Milan, Venice and the Papal State, under the over-all command of the Marques of Mantua.

A classic quality against quality battle would take place. The Italian army deployed awaiting the arrival of the French army, along the route it would have take to get back to safety. The battlefield was divided and bisected by the River Taro, which was normally fordable, but recent heavy rain made this much more difficult – the French were counting on the flooded river to obstruct the Italians.


Can the Italians stop the French getting away, or at least give them such a bloody nose, that they won’t come back and what about the baggage train piled high with loot?


An important part of the Furioso rules is the command and control system, that determine what the
various units will (or will not) do each turn. At the start of the turn a D6 is rolled for every unit, which is then added too or subtracted from, depending on the unit’s quality and this determines the sequence in which units move/fire/melee i.e. high numbered units go before low numbered units.


Unsparingly highly motivated troops like the Swiss mercenaries and the elite French Gendarmes add to their dice role and less enthusiastic Italian mercenary cavalry and skirmishers subtract. The dice role is further increased by another pip, if troops are within range of traditional enemies, in this case French employed Swiss and Italian employed Landsknechts.


Units that have an adjusted command factor of more than six are considered impetuous and must advance continuously towards the enemy or their traditional adversary. Units with an adjusted command role of zero or less do nothing that turn.


So it wasn’t long before the French gendarmes were making a bee-line for the Italian armoured cavalry and the Swiss mercenaries were advancing on the Landsknechts. The Italian army advanced more steadily towards the French, in fits and starts, with the exception of their Balkan mercenaries, who headed directly for the French baggage train and the Landsknechts towards their sworn Swiss adversaries.


As the Italian army started to cross the river, often disordered by the higher than expected water level,
the French gendarmes contacted them and scattered the lead units. But the French successes was not
without casualties, either from the melees or from the mounted Italian crossbowmen.


The French army, lacking any light troops had no answer to the mounted crossbowmen, who now pressed forward towards the baggage train, shooting at any French units in the way.


The French gendarmes having fought off further Italian armoured cavalry charges and stung by the crossbow bolts, were gradually destroyed. The Italian pikemen now started to cross the river and engage with the French pike units who fought valiantly too, one unit under the command of the King himself.


But what of the Swiss and the Landsknechts who were fighting their own private battle, with little regard for what was going on around them… a clear case of business matters overriding the personal
considerations.

Both units were advancing towards each other impetuously and in a furious state of mind (thus the name of the rules - Furioso) The Landsknechts made a good crossing of the river and clashed with the Swiss face-to-face. The Landsknecht’s Double-soldiers got the better of the Swiss halberdiers to start with and with both sides being “Furioso” the rules allowed for repeated bouts of melee between the protagonists, rather than the single bout per turn, for other troops.

However, the Swiss were not so easily disposed of and in the following turn scattered the Landsknechts and then held their position, despite a charge in the flank by heavily armoured Milanese’s cavalry. Even with heavy casualties the Swiss continued to participate in the battle, assisting a Gendarme unit to rout a unit of Italian armoured cavalry trying to cross the river.


By now it was clear that things were drawing to a conclusion. The King of France was in imminent
danger of capture, the elite Gendarmes were no more, the French pike blocks were surrounded by
Italian light cavalry and the French baggage was pillaged; only the Swiss were in a good way, despite
their casualties.

Meantime the Italian army had suffered many losses too, but the tactical situation was sufficient to declare the battle a victory for the Marquise of Mantua.

We can only conjecture the end result on European history. The King of France in a hair-shirt doing penance in Rome and emboldened Venice holds off the Ottoman empire, Milan intervenes in the Wars of the Roses, the road southwards is now safe for St Peter’s pence to flow towards Rome, Martin Luther - whose he?. If you are a doctor, you will know of other benefits from this outcome too.


Thanks to Dave for his role as King Charles, ably assisted by Vince and Mr. Steve and to Bob C as the marquis of Mantua and his allies Colin M tabling his force of Milanese and Steve M for the Venetians.

Your correspondent was in command of the Albanian mercenaries, and has now returned to Durazzo
with more than his fair share of the looted French baggage train

Saturday 23 March 2019

Sidi Ahmed April 24th 1943, WWII North Africa - IABSM


The Run for Tunis, an effort to capture Tunis in late 1942 following Operation Torch had failed and
since the end of the year, a stalemate had settled on the theatre as both sides paused to re-build
their strength. The 5th Panzer Army defending Tunis was being strengthened as was the Allied First
Army.

Map showing the campaign area and front in 1942 with allied forced centred around
Medjez al Bab and the Medjerda Valley
https://www.ibiblio.org/hyperwar/USA/USA-MTO-NWA/USA-MTO-NWA-17.html


This battle takes place thirty miles from Tunis in the Medjerda Valley, which has the German held peaks of Djebel Ahmera and Djebel Rhar, later known as Longstop Hill after the position just behind the wicket keeper in a cricket match.

The Battle for Longstop Hill showing the area for our battle around Sidi Ahmed to the north east
https://www.ibiblio.org/hyperwar/USA/USA-MTO-NWA/USA-MTO-NWA-17.html

On the 22 April the Battle for Longstop Hill commenced with an assault on Djebel Ahmed by the
Argylls and two squadrons of the North Irish Horse. By nightfall the Argylls supported by the Surreys had captured the hill but couldn't press the attack to Djebel Rhar the second peak until a small ridge to the north had been cleared of Anti-tank guns and machine gun nest, this ridge was called Sidi Ahmed.


The rule system I`m using for this is I Ain`t Been Shot Mum.

German Forces
HQ
Big man - level 4, 2 MG42 and 1 PzB 39 AT rifle
2 Zug of 3 x Gruppe (8 men) all veterans
AT platoon of 3 x 50mm PaK38 AT guns
Off board support of a battery of 105mm leFH18 Field guns, pre-registered fire support.
Reinforcements of 2 x Panzer IVs and 4 x Panzer IIIs enter after the end turn card is pulled out three times.

Allied Forces
HQ
Big man - level 4
Big man - level 3
1 Boys .55 AT Rifle
4 x 3" mortars
3 x Platoons of 3 x 8 man sections 2 veteran and 1 elite
3 x Troop of armour 3 x M3 Grants, 3 x Sherman, 3 x M3 Stuarts
To soften up the defenders the Allies get 1 per game stonk.


The German position is set in a small group of buildings with a small compound to the left flank
and other small buildings running through the middle of the deployment area.

A road runs through and off to the rear of the board where their are two small hills, one covers the right hand flank and the other to the rear of the left hand flank.

These two hills have an AT gun dug in on each and the right hand hill has a MG42 dug in. The buildings to the centre has a German Zug entrenched with a Big man 4. The small compound on the left has the other Zug and the MG42 with firing positions cut in and reinforced walls. The last AT gun and the AT gun team is positioned behind the compound looking down the road.

All German units set up on blinds with two dummy blinds positioned in the centre of the defences.


The Allies have to advance across open ground towards the enemy with no cover at all but the dust
churned up by the tanks. The tanks advance to the front with the M3 Grants to advance on the hill to
the German right flank with the Sherman and Stuarts to attack the centre and compound with a
veteran infantry platoon following close behind them. The other two infantry platoons are to attack the compound with a big man 3 and the mortars giving support.

The tanks made good the charge towards the German defences managing to get halfway across the
stretch of open ground before two of the AT guns opened up on the Sherman`s,knocking out one and
immobilising another. The Grants instantly returned fire with their hull mounted guns forcing the crew of the AT gun on the hill to their front to abandon the gun.


The infantry advancing on the compound came under fire forcing them to go to ground and, for the moment, stalling the attack.

The M3 Stuarts came out from their blind to fire HE at the compound catching it on fire. The defenders had no choice but to abandon part of the building.


But the AT gun on the hill behind knocked out one of the Stuarts and the AT gun behind the
compound knocked out another. With the building on fire and the defenders in disarray coming
under ever increasing infantry fire from two infantry platoons which silenced the MG42 position and
drove the defenders back into the courtyard on the opposite flank, the M3 Grants charged up the hill
and over ran the AT gun and the MG42 position crushing the two guns.


It was then that the allied 3"mortars decimated the AT gun on the hill behind the compound leaving just the one AT gun left intact behind the compound which had new targets in the form of M3 Grants on the hill.

The Zug in the middle opened up and fired at the advancing infantry behind the Shermans but with tanks on their flank they were over run in no time.


The AT gun behind the compound fired three times at the Grant with no results before one of the allied infantry platoons charged them from the rear and captured the position. With the compound surrounded and on fire the remaining Germans, with the sound of there own tanks just the other side of the ridge, surrendered. With the road captured and the guns knocked out the Panzers were pulled back.

With Sidi Ahmed captured the push for Djebel Rhar could now commence. By the 27 April the whole
of Longstop Hill and Djebel Rhar had been secured. Longstop was the last great natural barrier
barring movement towards Tunis.


On the 7th May, British armour rolled into Tunis, taking Axis forces buy surprise. By 15th May all Axis forces had been cut off and soon surrendered with more than 250,000 taken prisoner, ending the
campaign in North Africa.

Saturday 16 March 2019

Rebels and Patriots - French Indian War


I’d picked up a copy of these rules at the Penarth show, intending to play test at home before putting on a club game. But when I noticed the number of planned games for March’s meet was looking low, I thought I better take the plunge and pull something together! I’d read through the rules a fair few times but hadn’t actually had troops on the table.


Rebels & Patriots (R & P) is the new Osprey set from Micheal Leck & Dan Mersey, and covers rules
for North America, during the period from the French & Indian War (FIW) 1754-63, to the Fenian
Raids, 1866-71. There’s also the opportunity to look at a British intervention in North America (1860’s) as a ‘what if’.

Being I have quite a large FIW collection now, this was my ‘go to’ period. I’ve played a fair bit of FIW using Donnybrook, Muskets & Tomahawks & Sharp Practice, so was interested to see how these
compare.

The rulebook follows the standard Osprey format in its 64 page content, 36 pages of introduction and rules, followed by 17 pages covering scenarios (12 scenarios in total), 9 pages of 24 point starter armies covering all the suggested periods and 2 roster sheets.

There is no quick reference sheet, which is a bit of a bind.

I thought I would have to provide a game for multiple players, so adopted the approach of combining 2 of the scenarios from the book, and fighting it on one 6 x 4 table, with 2 players a side. I chose ‘First clash at Lament ridge’, which is a fairly straightforward ‘seize and hold’ an objective in the middle of the table, and ‘Defend Mendenhall’s battery’, which as the name suggests, is about defending a battery of guns! Hopefully the pictures show the table set up.

As mentioned above, a starter army consists of 24 points. This can be made up of line infantry, light
infantry, shock infantry, skirmishers, natives, light, medium & heavy artillery, light and shock cavalry.

The French form up ready to attack

Each unit has a standard points value (4 points for line infantry as an example), and a starting list of
factors for; Unit size (12), Firing factor & firing range ( 5+/18’’), Fighting factor (6), Discipline (0),
movement (6’’) and special rules (First fire or fighting which gives +1, may form close order. These
and others will become clearer further on). Some of the factors can then be modified to represent
various categories of troops. So Green troops become ‘Discipline -1’ and this costs -1 point per unit,
Veteran becomes ‘Discipline +1’ and cost +2 points per unit. Firing, Fighting and unit sizes can also be changed using a similar process.

For my game I took 2 forces from the book for the ‘Lament’ scenario and made up a company using
the points value suggested for the ‘Mendenall’s’ scenario.

So for the ‘Lament’ scenario, the French company consisted of;
2 Light infantry @ 6 points each (Compagnies Franches de la Marine). May form close order, if in
open order always they count open ground as cover, may try to evade, may use ‘skirmish’ action.

1 Skirmishers that are Sharpshooters @ 6 points (skirmishers are usually 2 points, but the ‘Sharpshooter’ upgrade costs 4 points and makes the firing 4+/24’’). Not slowed by difficult terrain,
count open ground as cover, may try to evade, always fight with only have their dice, may use ‘skirmish’ action.

1 Large unit of aggressive natives @ 6 points (usually 4 points for 12 figures, upgrade to ‘Large’,
increase to 18 figures for 1 point and ‘Aggressive’ Fighting, usually 5+ becomes 4+ for 1 point). Not
slowed by difficult terrain, may try to counter attack if attacked by infantry, may follow up if winning
in fighting against infantry, may use ‘skirmish’ action, may not use ‘fire’ action.

British Company (Colonial Militia)
4 Green line infantry @3 points each (-1 Discipline on each unit).
3 Skirmishers that are ‘Good shooters’ @ 4 points each (‘Good shooters’ gives a firing factor of 4+/12’’) Unfortunately, I only fielded 2 units for some reason!

The other force was, 22 point (I ‘short changed them for some reason’!)

The French Indians emerge from the tree line full of aggression 

French;
2 Line infantry @ 4 points each
2 Green Canadian militia @ 3 points each
2 Skirmishers, Good shots @ 4 points each

British;
3 Line infantry @ 4 points each
2 Medium guns @ 6 points each

British-American militia form up

The Game
As it was, other people had similar thoughts about the number of games, so there were plenty to go
round and JJ and I decided to give this a go ‘one on one’.

I took the British and deployed the guns on the left. One unit could deploy with the guns, the other two started from the table edge. This naturally made the French the attacker. On the British right, the
attacker deploys and moves first, so we diced for this and the French were attacking. In the scenario
briefing is says to take it in turn to deploy units, but to save time we went all on at once.

British guns and regular infantry open up on the French regulars and militia in the open ground opposite

Units move by passing their activation. This is 6+ on two dice, modified by things such as the discipline rating (so -1 for green troops), having your leader within 12 ‘’ (+1), being in close order (+1), ( –) any disorder markers (accrued when failing morale or failing to Rally – 2 separate things).

If you fail your roll you don’t move, but DO move on to the next unit. Line units get slowed to half speed when in difficult terrain (woods), and have to stop at obstacles, then cross next turn.

Actions available to units are;
Move
Attack (any unit except artillery)
Fire (except natives and light cavalry)
Skirmish (move half and fire at half effect)
Form close order
Volley fire (infantry in close order only)
Rally

On the British left, the French made slow progress through the woods, with the exception of their
skirmishers, who quickly closed the range and started taking pot shots at the Artillery, initially with
no effect. One unit of militia and one of the regulars struggled to find a route through (they failed their activation roll!).

The French forces on the right struggle to advance following confusing orders (well two double 1's actually) and accurate British fire.

To fire, units usually roll twelve dice, unless using the ‘skirmish’ action, or if disordered (then six dice are rolled). At the start we thought that twelve dice per gun was a bit much, so reduced it to six. As it happens it should have been twelve. To hit you have to equal or beat your ‘fire factor’. At short range (up to 12’’) two hits = one model removed, at long range (over 12’’) three hits = one model removed. If the target is in cover, one more hit is required to remove a model (so becomes three at short range, four at long). This is the advantage of Light infantry etc, who always count open ground as cover from firing (when in open order).

When hits are taken, units then roll for morale, Discipline rating, Close order, officer within 12’’ and
disorder markers are calculated as usual, then -1 for each casualty. If units are fired on twice, then two separate rolls are made if casualties are inflicted. 6+ is required to pass on 2 D6.

However on the French left the advance was brisk moving into the cover of the slight hill, with the Indians itching to close.

If passed, no additional markers are placed, but unit retains any markers it already has.

If failed, but total is above two, unit adds one additional disorder marker. If already disordered (one
marker), it becomes ‘Broken’ and must retreat half a move and attempt to rally on its next activation. If Broken the unit automatically routs from the table.

If failed and the total is less than two, the unit gains two additional markers and must immediately retreat half a move and rally on its next activation. If already Disordered or Broken the unit routs.

Being Disordered or Broken inflicts additional limitations which, to save space, I won’t go into detail
on.

To Rally, the process is similar to the above, with some of the outcomes being slightly different.

In our game, the skirmishers started to inflict casualties on the gunners, forcing them to retreat.
Return fire from the supporting British unit proved to be ineffective, One of the French line units
advanced in isolation, to be met by a good volley from the British support units coming up.

The French left, topped the hill and opened up some telling fire along the line

While one of the militia units finally got out of the woods, the other regular and militia units were
struggling! On the activation rolls, there are additional effects for rolling a double 1 or double 6.
With 1’s being bad. When rolled, you then roll another D6 to see what happens. JJ managed to roll two double 1’s on the trot, meaning his regular unit with his officer (the officer is part of the 12 figure
unit and never leaves it) got a result that meant his unit got a disorder marker, for the officer giving
confusing orders! The militia unit had to make a double retreat move away from the closet enemy!

So although the artillery had been driven off, the French didn’t have units close enough to exploit.
On the British right, units on both sides advanced towards the ridge, although some of the British
were a bit hesitant! Some sporadic skirmisher fire took place, but casualties were minimal. Then
suddenly, due to a covered advance, the Indians appeared in front of the British and charged the
nearest militia unit. This did not look good, and so it proved! The ‘Attack’ action, if passed, means
the unit moves the distance of the 2 D6. Contact needs to be made for combat to occur. If not, you
stop short! The Indians, being Aggressive, were on 4+ to hit, with ‘charging’ making that a 3+! The
Militia hit on a 6. Combat is simultaneous, but needless to say the militia lost, but survived and had
to retreat.

The Indians close on the Militia and demonstrate their handiness with a tomahawk

On the next British move, shooting at the Indians proved ineffective, enabling them to charge again
on their next move. This killed off the militia unit, causing all units within 12’’ to test, with various
disorder markers being spread around. At the same time, a British skirmisher unit, having taken
numerous casualties, failed its Rally and also routed. The British fire eventually caused the Indians to
retreat, but by this time other French units were on the objective, with none of the British being
close. At this stage it was a clear French victory.

Needless to say, not all the rules have been covered in detail. In particular this is a ‘campaign’ style
game, where the first part of the game is rolling for officer ‘traits’, with the aim being for your officer
to gain ‘honour points’ during the games and get promoted, get additional traits etc. This is not how
I like to game, but hopefully as you can see, it still gives a good ‘standalone’ game.

On the French right the regulars struggled to press their success in driving off the British gunners and silencing the battery

Closing thoughts
Did we like the rules? ‘Yes’. Would we play then again? ‘Yes’. Are they the perfect set? ‘No’ (is there
such a thing???)

  • In comparison with the other rules mentioned above, I would put them above Donnybrook for complexity, but below Muskets & Tomahawks.
  • One observation is that a force who all have the ‘count open ground as cover’ as the force with the Indians in did, can be very hard to kill!
  • We didn’t get to try out the ‘close order’ or ‘volley fire’ actions.
  • Movement trays could probably come in handy.

There’s probably things we didn’t play properly, there are some questions that require answers, but
all in all we both agreed it was an enjoyable game, which played quickly, and by the end we were
calculating the various factors without reference to the rules.

As I said, the lack of a QRS is a pain, but I did knock up a quick one beforehand.

Thanks to JJ for giving it a go, and his patience why I looked up the rules! He liked it so much he’s
already talking about putting together some small forces……AWI maybe????

Figures are a mixture of Galloping Major, North Star, 1st Corps, Perry and the artillery are Foundry.

This was a Steve M game

Sunday 10 March 2019

WWI East Africa - Chain of Command

Chain of Command  WWI East Africa  - https://ww1live.wordpress.com/2017/10/18/mahiwa/

A number of small British supply dumps were set up on the southern shores of Lake Victoria, to support the latest British foray into German East Africa. The local German commander dispatched a company sized force to one of these dumps to relieve the British of the desperately needed supplies.

https://commons.wikimedia.org/wiki/File:World_War_I_in_East_Africa.jpg

The supply dump was normally guarded by a platoon of Kings African Rifles, but there were also a number of additional small units awaiting the next boat. They had been forewarned of the German approach, and had time to construct makeshift defence works. The dump had the lake shore at its back, and was otherwise surrounded by bush, which reduced line of site, but had been cleared immediately adjacent to the buildings.


British
Platoon of Kings African Rifles Askaris
Two Sections of British regular infantry plus a Vickers
One Section of Indian infantry
One section of Irregular Askaris


Germans
Platoon of European Schutztruppe
Platoon of Schutztruppe Askaris
Platoon of Ruga-Ruga irregular Askaris


The initial German plan was for all three platoons to attack simultaneously across a broad front; however, this soon went the way of all plans on contact with the enemy. The Ruga-Ruga (on the right flank) quickly outstripped the other two platoons and found themselves isolated and under the concentrated fire of the defenders, at the same time, the Askaris (on the left flank) seemed to be rather reluctant, and were falling further behind, so that the three platoons were now in echelon.


The Ruga-Ruga, being poorly armed but ferocious in hand to hand, rushed the almost undefended British left flank, only for the Sikhs and irregular Askari reserve to be deployed onto the table behind the very defences which moments before had appeared empty. After receiving withering fire, the Ruga-Ruga launched an attack on the newly arrived defenders, and wiped them out to a man; unfortunately in doing so they were left in tatters, and the few remaining survivors broke and fled. Unfortunately for the German commander, the next platoon was too far back to exploit the situation immediately, and the gallant defenders were able to redeploy a section of Askaris who had been held in reserve. Two sections of the European platoon did manage to get into the defences, but after some really vicious hand to hand fighting, they were so depleted that they too were forced to withdraw.


By this time the German Askaris had cleared the bush and were making their way across the open ground, but under the concentrated fire of the defenders, having lost a Junior Leader and having the Platoon Commander wounded, they too were forced to pull back, and the German attack was over.

Wednesday 6 March 2019

Battle of Zorndorf 1758 - Honours of War

Frederick II at the Battle of Zorndorf - Carl Rochling

I have always liked the battles of the Seven Years War. I find the period gives a good balance between
infantry and cavalry, with artillery being less dominant than in later periods. Consequently I was
pleased when Chas and Andy suggested we play a Seven Years War game, not least as it would give us all a chance to see Andy's mythical Russian army; an army that he started painting last millennium.


The battle to be fought was Zorndorf, with the man himself Frederick the Great in action.
Frederick was attempting to knock out a Russian army, before it had the chance to join up with Austrian and Swedish armies moving on Prussia and more specifically, Berlin. Worse still, the Russians knew he was coming and had taken up a strong defensive position near the village of Zorndorf. Their rear was backed by peat marsh and to their front was a wilderness of firs, heaths and
cultivated land.


The Russians had 43,000 men and a strong artillery line, facing 35,000 veteran Prussians with equally
impressive artillery. On a battlefield that did not allow for flanking manoeuvres, the Prussians made
a frontal attack. The superb Prussian cavalry saw off their opposite numbers and fell on the Russians
infantry, but they had no where to go and died where they stood. With Prussian infantry now in hand to hand combat to their front, both sides ran out of ammunition and a vicious hand to hand struggle developed. By the time the battle ended and both sides withdrew, the Prussians counted 11,000 casualties to over 20,000 Russians, but the Russians did not break, they just died. Even Frederick was shaken at the result, although he had made the Russians withdraw and prevented them joining up with their allies.


For the refight Andy and I played the Russians. Chas, "Mr Steve" and Mark the Prussians. The rules
used were "Honours of War".


Mr Steve brought his left flank cavalry forward to support the attack of his infantry (the terrain splitting his attack from that of Mark's infantry). Chas attacked with the cavalry on the Prussian right,
whilst I faced off Mark and Chas, Andy bore the brunt of the main attack with his infantry and cavalry on our right.


As in the historical battle, the terrain restricted both side's frontage and prevented sweeping flanking attacks. On both flanks Russian cavalry swept forward to face off their opposite numbers and protect the infantry from having to deal with a combined arms attack.


Pretty soon both side's cavalry wings were engaged and a vicious to and fro battle developed. Meanwhile, our artillery started to inflict casualties on the Prussian infantry across the line. The Prussian artillery initially caused us problems, but was soon largely masked by their advancing infantry.

Andy managed to push back the Prussian cavalry, but my cavalry got the worst of it on the other flank and I had to extend my infantry line to prevent a breakthrough.


Contacting our gun line, "Mr Steve's" infantry took a face full of canister and the first line recoiled.
Mark's infantry suffered a similar fate against my guns and soon both players were bringing up their
second lines. Given the chance to rally, Andy's cavalry pressed on. Soon the infantry were also exchanging volleys along the line.

After more infantry casualties and with Andy's cavalry threatening "Mr Steve's" infantry, it became clear that the Prussians no longer had the strength to force both lines of Russian infantry and they withdrew in good order.


All in all a good game. "Honour's of War" rules seemed to play well and reflected the period nicely.
There was some debate about the effect of artillery and whilst the Russians had some very lucky dice,
we all felt that artillery did a little too well in melee. This can be easily solved by giving artillery a
minus one for "artillery in combat" AND a minus one for "small unit". To be fair this may be what was intended in the rules, but we failed to find it at the time.

Many thanks to all involved for playing like gentlemen and it was nice to see so many pretty 15mm
figures on the table.
Vince