"Gazala Dust Up"
 |
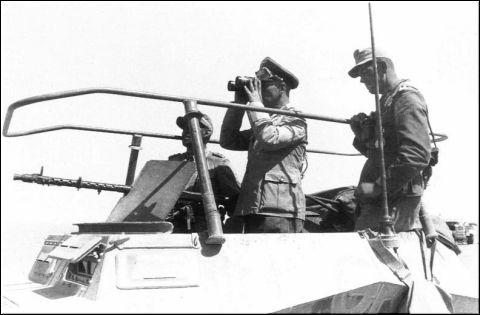
| Rommel, always close to the action, surveys the scene |
This months game was a Flames of War encounter between 15th Panzer Division and 4th Armoured Division in a meeting engagement east of the Bir Hacheim strongpoint at the end of the Gazala line in May 1942.
 |
| The opening moves as Rommel's armour sweeps to the south of the Gazala position |
 |
| RAF ground attack aircraft were becoming a potent threat to the Panzers |
The map shows the layout of our terrain, with the objective placed by both sides. The red objectives indicating the German set up edge and the blue the British. As both sides were armoured companies we diced for the attacker and the British gained the advantage.
 |
| The table set up with British and German edges left and right respectively |
With the positions agreed the British began the set up process by placing their 25lbr troop in the lower right corner. The process of placing platoons alternated from then on until up to half the platoons had been placed. The remaining forces were held in reserve to be diced for from turn three. The pictures below show the initial set ups, with all the British armour on from turn one together with the artillery. This left an armoured car, motor infantry, portee and towed anti-tank gun platoons to come on later. The British also had limited air support from RAF P40 Kittyhawks.
 |
British set up with three troops of Honey's, one troop of Grants, Company HQ (2 x Honey) and a troop of 25lbrs
|
The German force was a potent one with an HQ of one Panzer III and a Panzer IVF2, an 88mm FlaK platoon (1 x 88mm), a Panzer III platoon (3 x Panzer III & 1 x Panzer IIIJ), a Panzergrenadier platoon with an integral 50mm Pak 38, and a platoon of 4 x 105mm howitzers. Off table in reserve was another Panzer III platoon (2 x Panzer III, 1 x Panzer IVF1), an SP AA platoon of 3x20mm halftracks, and an armoured car platoon (3 x Sdkfz 222 ACs).
 |
| The German set up with a Panzer III Special nearest to camera |
As this was a meeting engagement both sides entered the table moving, and the race was on to occupy the most favourable terrain and be in a position to contest an objective. The British armour having the initiative raced across the open terrain of no-mans land (Honeys are light tanks and gain an increased movement) to threaten both objectives, the Honeys being supported by the slower but more potent Grant tanks, newly arrived in the Western Desert and coming as a big surprise to German troops.
 |
| British armour closes with the Afrika Korps. On the left the Honeys and Grants are duelling with the Panzers, whilst another Honey troop swing to their left to attack the German gun lines around the second objective. |
As the armour rushed forward the RAF made its first attack on the German lines with a strike of three Kittyhawks, which pinned the Panzer Grenadiers, who remained pinned for the remainder of the game. The RAF were superb in this battle appearing on four consecutive moves with two attacks of three aircraft and one of two planes. They knocked out the Panzer IVF2 in the German Company HQ and took out several artillery teams despite suffering hits from the German 88mm gun platoon.
 |
| RAF Kittyhawks come screaming in to bomb the German lines |
The battle between the opposing tanks hung in the balance for a couple of moves until the Grants took a move of stationary firing to knock out three of the four Panzer IIIs and cause the platoon to rout, at the cost cost of a Grant and Honey tank. With the German armoured threat removed the British tanks turned on mass to assault the German artillery placed around the second objective, and pinned following a successful airstrike by the hard fighting Kittyhawks. The British artillery supported this attack by smoking off the German HQ and FlaK platoon to the right of the German gun line.
 |
| British and German armour duelling with the attack going in in the centre against the German artillery position with a smoke barrage (centre top) protecting the flank. |
The coup de grace came in turn 6 as the British tanks swarmed on to the German gun position, followed up by a second assault on the German HQ position by Honeys and Humber armoured cars. The German Company was below half strength and was forced to test morale before being able to attempt to shift the British tanks off the objective. As reinforcements of Panzers arrived on the German left flank which threatened to wipe the British armour out, the German morale failed and they were forced to concede the field of battle.
 |
| The gallant Kittyhawks bomb the German Company HQ position |
This was a nail bitter of a game with swings of fortune throughout and the German force was close to getting the initiative back when the game ended. This game was memorable because of the influence of the air support which was not devastating but definitely tipped the balance in favour of the British,
Thanks to Steve M for setting up the game and umpiring the day, and to Steve and Martin as the German commanders for making it an exciting finish to a close fought action.
Jon