Report by today's gamesmeister - Steve Hallet
About 18 months ago I decided to have another crack
at 15mm 7YW so I scoured the world for suitable rule sets, they needed to be
base driven, not figure, To have command and control, give the right period
feel to the game and suitable army lists . Now I like a good army list me but
can I say in my defence that I don't hold with super maxed out armies so for
every Maison Du Roi there has to be some appropriate low life as well. The final
choice was Koenig Krieg, so I bought the PDF from Siegeworks and went to check
under the bed for the remnants of the armies I had from 20 years ago.
I found
some Austrians, quite a few Prussians and a goodly amount of Russians, Obviously
the thing to do was to immediately buy Allies and French from Old Glory and get
under way. With the figures painted and based up I gave the rules another
thorough read through and then started the " how do I" questions to make sure I
had a good grasp. Confident that I could bluff my way through a game I found
suitable volunteers and organised one of the September games at the Devon
Wargames Club.
 |
| The View from the Anglo-Hanoverian lines |
The armies were 1000 points a side and each had 6
brigades as any more makes using Sub Generals compulsory and for the life of me
I cannot see what their purpose is apart from annoying you.
Each had 4 Infantry brigades of various strengths
and class, 2 horse brigades and some Light guns .
 |
| The Franco Swiss lines |
Koenig Krieg is split into 3 distinct phases:
First is the Command and Control Phase; Any retreating unit automatically rally's, replace leaders, mark any unit which is out of command, move Generals and place Activation markers on each Brigade leader.
To be in command you have to stay within 4" of your Brigadier, if not then you have to throw 1-2 or 1-4 depending on how many combined legs you have.
 |
| Swiss line flank the French Guard |
Second: March and Volley Phase. Each Brigade gets to activate, Infantry have 1 action and Cavalry 2, so you can either March or Volley, double if away from the enemy, change formation or stand still. Now to decide the order you roll off against your opponent and then choose to move or force the other side to move, this is key to the game. Let me explain why I like this, in most Horse and Musket games there is a great unwillingness to be the first person who moves into firing range and therefore gets shot. This way if the opposing brigade has already activated then you can close in and see what happens next turn.
Perform any morale as it happens and repeat until all brigades have moved.
Third Close Combat Phase. All units with 1" or 2 " ( depending again on accumulated legs) get activation markers. Again you roll off and again the sequence is critical, defenders can shoot as you charge if they have a marker, so do you wait and see if you can force them to spend it before getting stabby, if so then I can counter this by retiring out of combat range .
There is exploitation after winning a fight and army morale every four turns to check on but enough rules.
 |
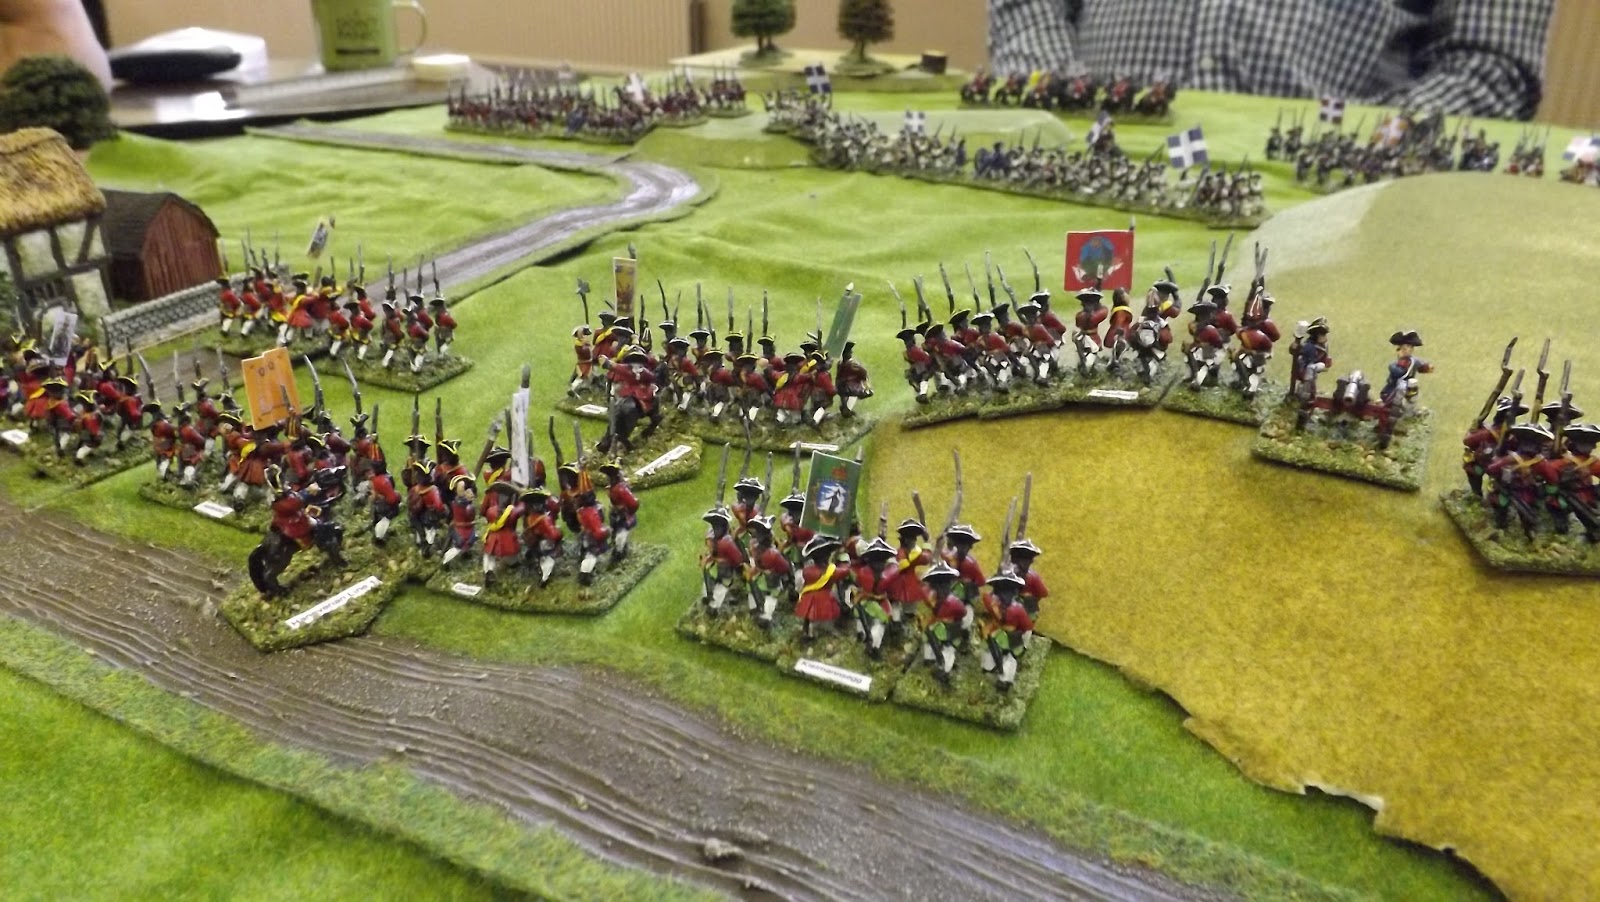
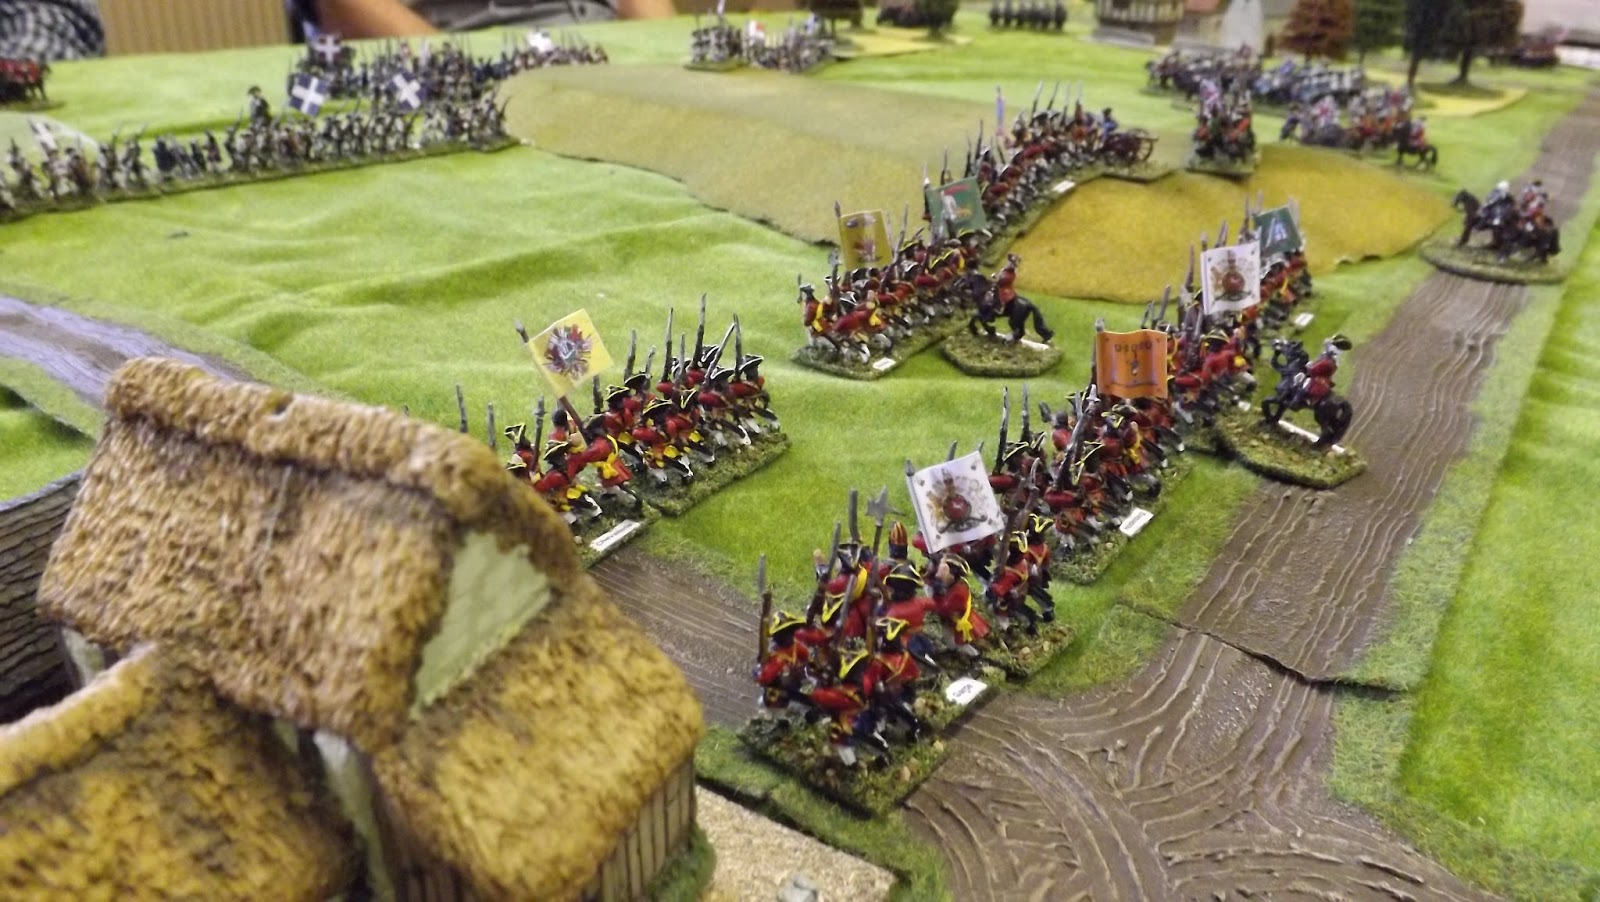
| Hanoverian Line brigade |
Both sides advanced, the Allies put their poorer troops into a village and hoped that no one spotted this blatant ploy and the Dragoons on both sides headed towards each other. Eventually both lines were just outside firing range and as usual no one was too keen to close in especially against the three British Foot Battalions .
 |
| Cavalry melee on the British right flank |
 |
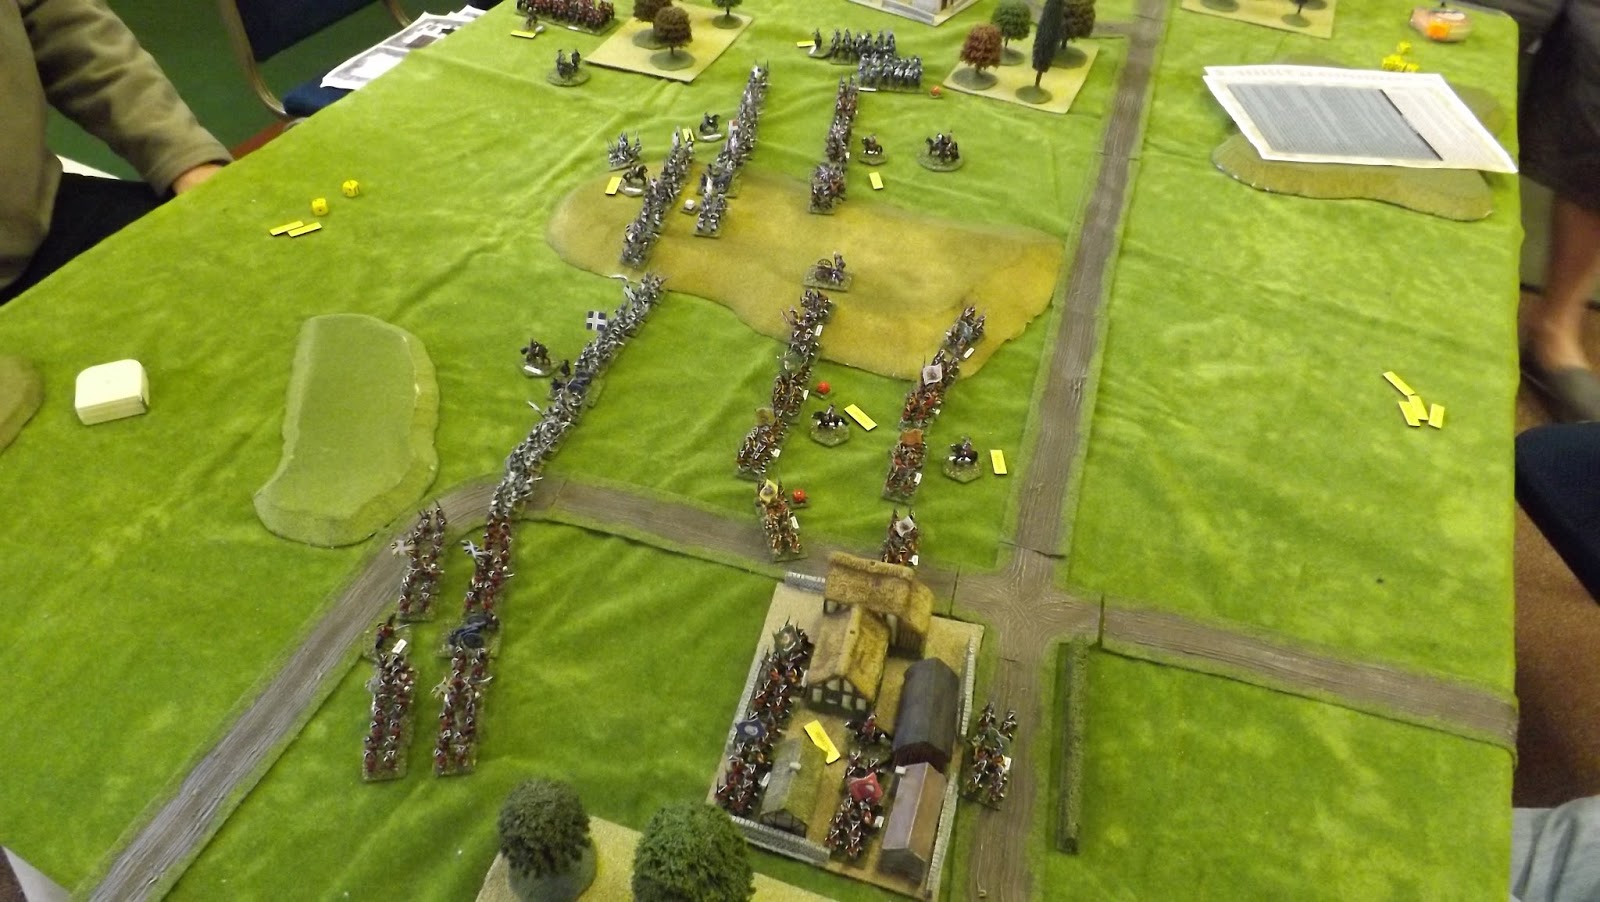
| The fight for the centre ground |
The dragoons clashed and the Allies forced the first French unit back and then exploited, Throwing 5 or 6 makes cavalry go uncontrolled and off they went in pursuit . However in KK retreats are either 8" or 12" ( Leg qty again ) and as movement is only 4" for everyone you don't get to ride down routers, however the French had taken a bashing and lost again the next melee and retreated off the board followed by the Hanoverians in hot pursuit.
 |
| Both sides start exchanging volleys |
 |
| Overview as the two lines close to musket range |
 |
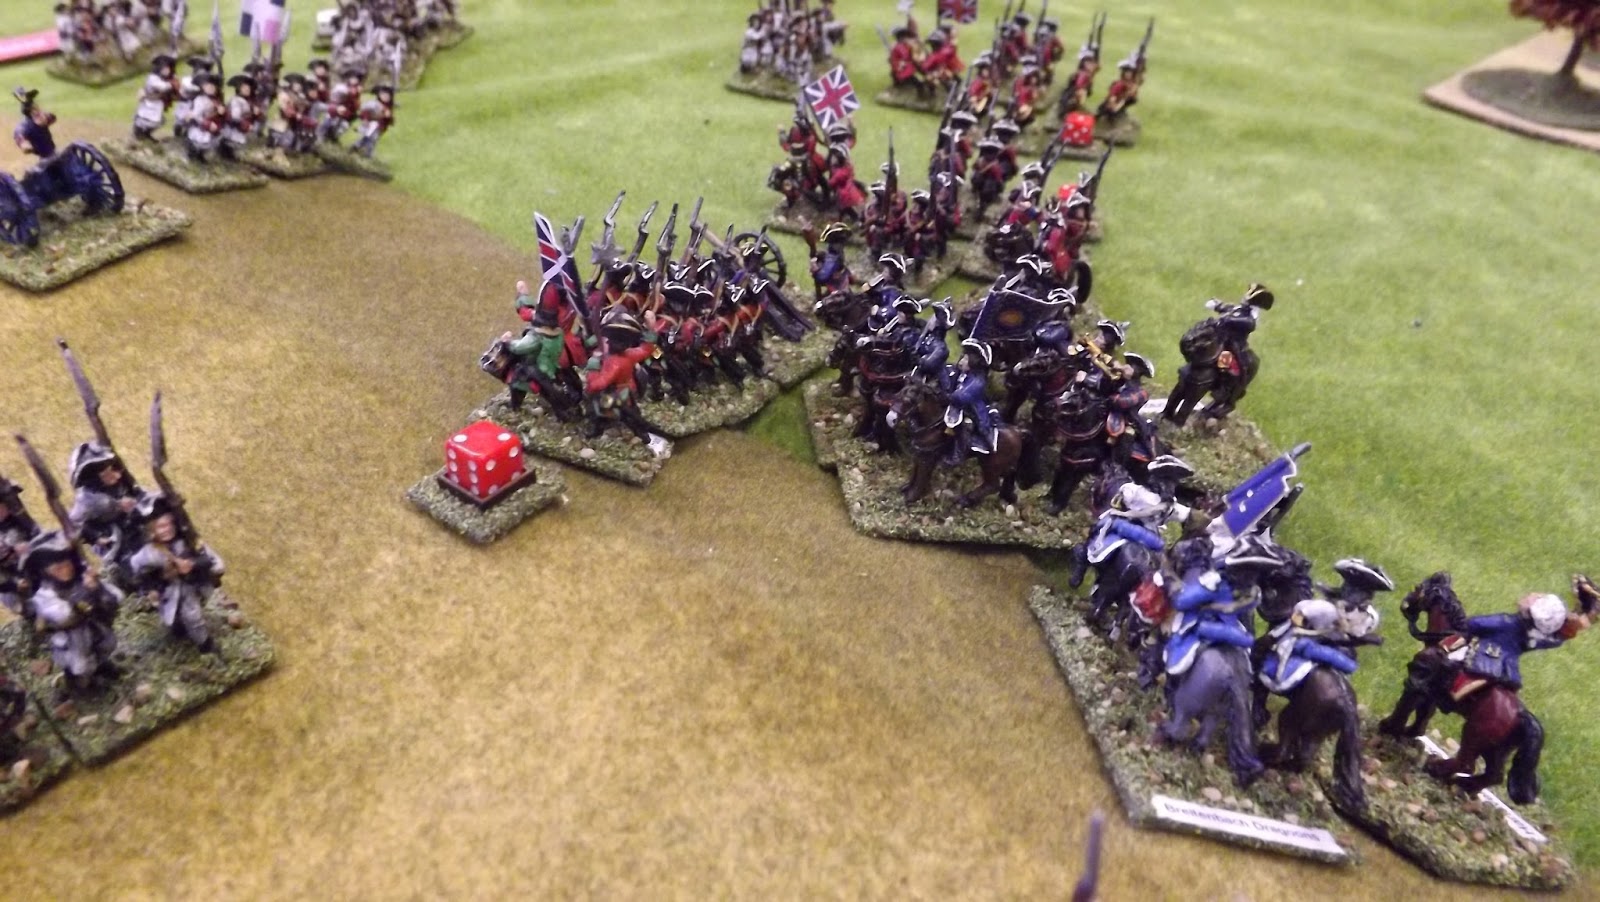
| The French cavalry threaten to roll up the British flank |
Strangely the exact opposite happened with the second dragoon squadrons but fate had something planned for these two units . The infantry had realised that you can move in if the opposing brigades had already activated, so firing was imminent. The British machined gunned down the poor French in front of them (16 man units as opposed to 12 , 1 dice per 2 men , British kill on 4+ as opposed to 5+) but the French chipped away and this brigade, although badly damaged, still held ground all be it a lot further away and in less numbers (50% of a brigade lost counts on Army Morale even if you are still fighting on). I was worried about the British power before the game as in theory they could, with lucky enough throws, destroy a conscript class unit in 1 shot.
 |
| The French infantry move up to engage |
 |
| Hanover vs the French Guard |
The other two brigades either volleyed each other or marched pointlessly around, however the second French dragoon unit defeated its opponent again and, being well controlled chaps, were poised to charge into the back of the British. The climax had arrived. In the close combat phase the Allies moved first, faced with French infantry in front and dragoons behind, the British foot formed square (yes it did happen in 7YW, just not as often),
 |
| The British reinforce the centre |
The Allies moved again and the remnants of the Dachenhausen dragoons charged the French dragoons (any morale fail at any time for the Allied dragoons would take them off as they were down to one base) throwing the required 1, then in they went, the French of course, on taking their 'being charged' roll, throw a 6, break and being trapped were destroyed.
 |
| Prussian cavalry attack the French cavalry as they attempt to close in on the British |
Now with two brigades wrecked to one Allied the French were on a 3 or less to keep going (Army Morale every four turns). Skipping to the end, some more people got shot, posh boys on big horses got scratched and the Swiss went home without getting their Muskets dirty. Allied Victory.
 |
| The French Guard start to wilt under Hanoverian musketry |
The rules played well, gave the right period feel and there is a lot of strategy in the game not just rolling dice. Of course we must have got some rules wrong but we had a good game.
 |
| The British move to take control of the centre |
Last bit.You include your Army commanders in the points total and you can therefore buy, for most armies, anything from Level 0 to Level 3 which is then added to the dice rolls . The Allies had a level 2 General and the French quite rightly was a Level 1 so the Allies had for most of the game +1 on every dice roll. This turned out to be decisive and the Super British Infantry were starting to look very sorry towards the end. Once you have shot four to six of them then they are then going backwards just like everyone else (currently only three battalions out of fifteen with more "low life's" on the way).
 |
| The French cavalry are destroyed leaving the British infantry able to advance |
Thanks to Ian, Chas. Vince, JJ and Clive


Lovely collection of figs. How did you find the OG15s? Their ancients are decent, do the 7YW compare well?
ReplyDeleteFMB
Old Glory SYW line is IMO the best available 15mm going. I have the Eureka, Frei Korp, Essex and a few others and hands down go with OG. Molds are mostly flash free, sizing amongst the various nations is the same, poses are varied but not comical and for the prize, they are tops in sculpts quality. they take paint well with the cuts giving you the shadows and highlights vs needing to add them ala Essex. HIGHLY recommended.
DeleteJJ made me go to the Fighting 15's stand at Colours to look at the new Eureka 18mm 7YW and they are great but OG do give you all the ranges you need and the figures are good plus you can if necessary fit in some from Lancashire games or from someone else I saw at Colours and who's name I have completely forgotten . I will post it after several coffees have jogged my memory. True you do only get the marching at the porte poses but that's all you get from anyone. Regarding comparrison I do have a lot of 15mm ancient armys as its my main era but I have never bought any OG figures so I cannot say.
ReplyDeleteThe other supplier at Colours was Colonel Bill Miniatures who sell Frei Korps.
ReplyDeleteVery nice report, great looking minis!
ReplyDelete