Showing posts with label Lion Rampant. Show all posts

Saturday, 18 May 2024

Lion Rampant - "Defending the Indefensible".


The game was based on the third scenario from the new Lion Rampant rules titled "Defending the Indefensible".


The game takes place in and around a village in the Levant in the year 1098. An ambitious Bishop has decided to raise a very fancy large wooden cross in the village square. His intention is to attract more pilgrims to stop and worship and purchase religious artefacts. 


Those containing pieces of the original cross are particularly popular and he has a seemingly endless supply of these. The local Emir, whose beloved mother was born in the village, is less than impressed and he has sent a force to enter the village (by force if necessary) and destroy the newly erected cross.


The village is defended by a Frankish force who have caught wind of the Emir's plan. Within the walls of the village are a unit of heavy infantry, a unit of crossbow men, two units of skirmishers and a unit of foot knights with their warlord. 


The Bishop is also present and his religious fervour will boost the morale of the unit of heavy infantry that he is attached to. There are Frankish support units that enter from the north edge of the board at the start of the game. These comprise two units of mounted Knights and a unit of foot Knights.


The defenders notice a cloud of dust and sand in the distance and immediately rush to take up defensive positions. The skirmishers who are classed as "fast" are able to move through rough terrain unimpeded and they position themselves on the rooftops, with one unit on the western side and one on the eastern. Their armour increases from one to two against missiles and the added cover from the rooftop will raise it further to armour three. 


The crossbows man the western front wall of the village, while the heavy infantry form up around the cross to protect it. The foot knights are near them ready to intercept any incursions.


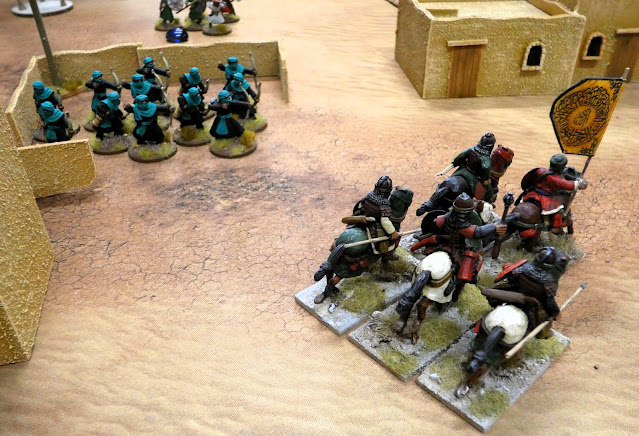
Out of the cloud of dust and sand appears groups of Seljuk infantry, archers and cavalry. The infantry is made up of two units of elite foot (the equals to the Frankish foot knights) and two units of light infantry armed with javelins. The archer unit is armed with war bows that out distance the bows of the Frankish skirmishers. (The Frankish skirmishers are "Hard to Target" and so cannot be shot at by an enemy outside 12". 


In addition to the infantry and archers, the Seljuk force contains three units of heavy cavalry all armed with bows that have a 12" range. What this force lacks in terms of heavy armour, it makes up for with missile weapons.


The Seljuks surge forward towards the village and their archers quickly start to target the unit of crossbows, but with little effect. Their light infantry units move forward on the left and right flanks supported by their cavalry. The two units of elite foot move towards the entrance to the village. One of the two Seljuk warlords notices that the entrance to the village has no barricade and he directs a unit of cavalry to attempt to enter through it. The mounted unit is slowed by the narrow archway forming the entrance to the village and is repulsed by the defenders.


The Frankish heavy infantry form a wall of spears around the cross. This will increase their armour by one in hand-to-hand. The Crossbowmen return fire on the Seljuk archers and there more powerful weapons cause some casualties, but the archers are undeterred and continue to move up to find a more advantageous position. The skirmishers on the rooftops fire down on an approaching unit of light infantry on the western side of the village causing some casualties, but the Seljuk foot continues towards the crossbowmen manning the front of the village.

The Frankish support units, hearing the noise of combat race towards the village. One unit of knights moves to the western side of the village and the other the eastern side. The unit of foot knights also moves towards the north eastern end of the village.


For the crossbowmen at the front of the village the situation is becoming desperate. They have started to take casualties from the Seljuk archers and are then assaulted by a unit of light infantry armed with javelins. There is a bloody fight at the wall and the crossbowmen recoil and are battered.

After the unsuccessful attack through the archway, a determined unit of elite foot together with a holy-man to boost their morale, successfully fight their way into the village and enter combat with the Frankish warlord and his unit of foot knights.

Meanwhile, outside the village each unit of Frankish Knights charge towards the mounted Seljuk heavy cavalry who fire their bows at the knights, but cause no casualties. The Knights hit them causing heavy losses.


All is certainly not going the Franks' way. Having been battered and thrown back from the walls, the crossbowmen take additional casualties and despite the proximity of their warlord they turn and flee from the village. With only the skirmishers to support him from the rooftops, the warlord and his Knights stand their ground and fight against the Seljuk elite foot and a unit of mounted heavy cavalry. They are wiped out, but the courage of the defenders remains firm. Seemingly, the warlord was not particularly popular with his men. 

Just in time the support unit of elite knights enter the village as the Seljuk force turns its attention on the unit of heavy infantry protecting the cross. This unit, realising missile could soon be coming their way, changes formation to a shieldwall to improve its armour against both hand to hand and missile attack.

A unit of Seljuk light infantry now attempts to dislodge a unit of Frankish skirmishers from the roof of the building on the eastern side of the village. The "fast" skirmishers run from one roof top to another. The Seljuk infantry, encumbered by swords, shields and javelin are unable to follow. At the same time a unit of mounted Frankish Knights, now jumps a wall to enter the fray.


What follows is an almighty melee within the village. The Seljuk force throws all its might against the Frankish defenders and successive valiant attempts to reach the hotly contested cross are thrown back. The Frankish force has taken heavy losses, more than the attackers in fact, yet they still stand firm even after the loss of a warlord. The Seljuk force realises that it is never going to be able to reach that cross and they withdraw form the village.

The outcome of the battle:
Technically this was a Frankish victory, but it was a perfect example of a Pyrrhic one. Their force had lost a warlord and his unit of elite knights together with a unit of valuable crossbowmen and their heavy infantry was reduced by a third as were their skirmishers. Another determined attack by a Turkish force would inevitably see the village taken and the cross "removed".

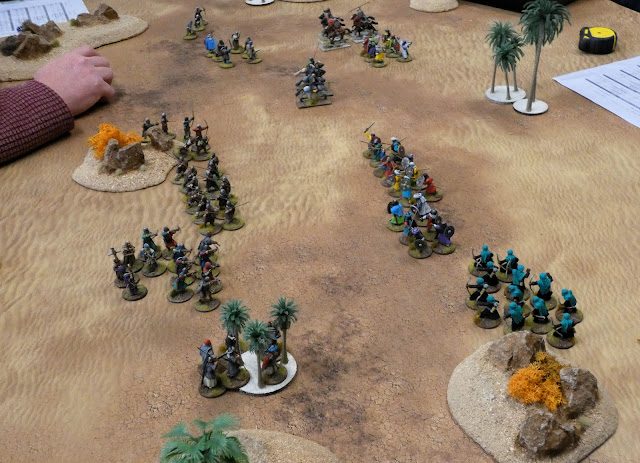
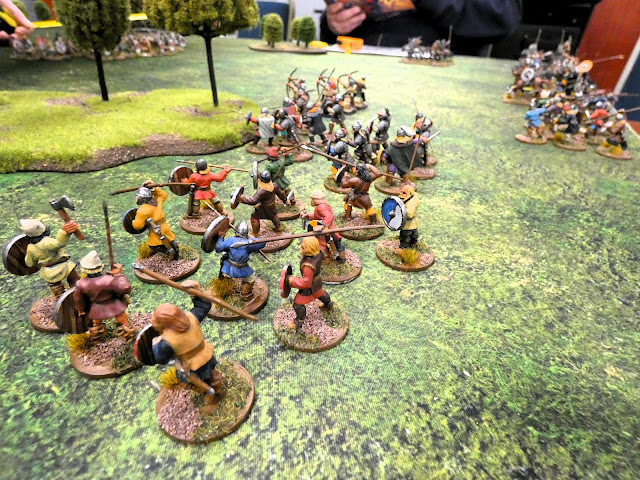
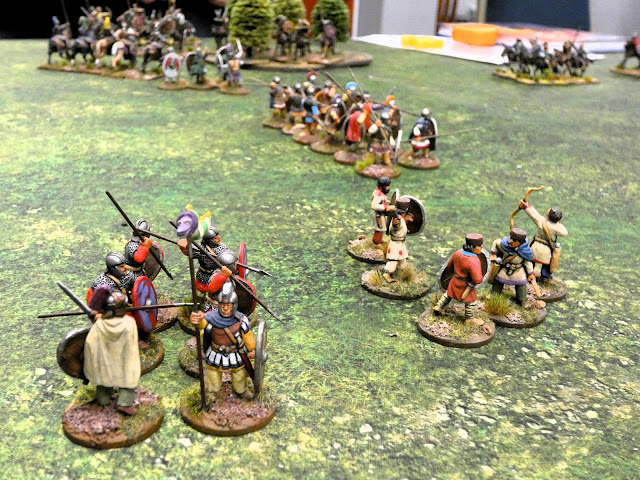
Editors Note - Mike's game finished earlier than planned, so the chaps rearranged the table and set up a straight-forward open terrain battle to end the afternoon on and I include a couple more pictures from Mike's lovely collection of figures and terrain in action from that little clash.


Saturday, 27 January 2024

Romans v Goths/Huns in 28mm - Lion Rampant Second Edition.


The new wargaming year got off to a cracking start when Mike C offered to bring his lovely collection of late Romans and opposing barbarians to run a Lion Rampant (LR) set-to at club this month based on the scenario 'Hammer and Anvil'.                                                                                  


I still refer to my first edition copy of LR, and must update myself with the newer second edition at some time, but found the rules just as fun as the first time I played them, perhaps more towards the game parameter rather than simulation, but still a well crafted set of rules that produced a gripping narrative of a game.

Our table set up with the Roman infantry in the centre and their cavalry and supporting light infantry nearest to camera. At the opposite end of the valley are the approaching Goths and Huns 

The preamble for our late Romans versus Goths and Huns clash sees the latter returning to their homelands after a successful expedition raiding the Empire and have been tracked down and cornered by the local Roman Dux in a wooded valley, with a Roman force of heavy infantry together with some light troops and archers thrust forward to its centre intending to provoke an attack.

The Goths and Huns, full of bravado after a, so far, successful raid into the Empire, advance up the valley with a mixed force of infantry and bow armed cavalry

The Roman infantry have the support of a strong body of heavy and light cavalry, with some drawn up at one end of the valley behind them, ready to come up in support and deal with any barbarians attempting to pass and escape home, whilst coming up behind the Gothic-Hun horde are another force of Roman heavy cavalry and light infantry, acting rather like 'beaters' to drive the game-birds towards the guns and pick up any limping stragglers.

Gothic light infantry move into the woods flanking the valley sides

The Goths and Huns have only one object in mind and score victory points accordingly, namely to exit as many units as they can off the opposite end of the valley, whilst the Romans are seeking to send a firm message to other potential raiders by destroying as many of the enemy that they can, being rewarded similarly for doing so, in victory points for each enemy unit dealt with.

The Gothic-Hun force are very mobile with plenty of missile troops as well

Steve M was my fellow Roman commander and duly took the Roman infantry in the centre of the table, whilst I strapped on my spurs, grabbed my kontos and led the Roman cavalry, ably supported with a unit of light infantry specially trained to keep up with and support my 'donkey wallopers'.

The Roman shield wall braces itself for the impending assault as their cavalry advance up the valley to their support.

Meanwhile Nathan and Sam loosened up their bow arms, filled the quivers with extra arrows and divided their forces as they led their men towards the Roman line ready to pepper them with missiles as other units explored the flanks of the valley looking to exploit beyond and enable better routes of exit for their comrades.

First clash as the elites of both sides go toe to toe on the Roman left as the Huns try to force a way past the Roman infantry. Both Roman commanders would meet their end on this part of the battlefield.

The scenario creates a great struggle as the barbarians attempt to force their way up the valley by either breaking Roman units already in their way, attempting to hold them up, or using their rapid movement capability inherent in a light cavalry force to exploit gaps to either escape off table or support the struggle in the centre.

However with fresh Roman units, mainly cavalry, entering the table at either end, the Gothic-Hun force have to be wary of becoming to embroiled in the fight and forgetting their mission objective, namely to escape off table

Roman heavy cavalry come up at the canter.

Similarly the Roman force is looking to fight and win as many struggles as possible by routing enemy units, but are forced to spread themselves thinly initially to plug potential escape routes, with the cavalry acting like fire brigade units moving back and forth to plug gaps or aid in the destruction of an enemy units brought to battle.

Inevitably gaps in the line occur and the units end up too busy fighting elsewhere to plug them all and so the game develops into a struggle for both sides to put points on the scoreboard with early victories.

The Roman infantry are forced to spread their line to contest the passage of enemy units.

Our game followed the script closely, with the Romans scoring some early victories that forced the Goths and Huns to fight and destroy Roman units to create gaps in the line, which created choices for the Romans as to when and where to put their units into fights to attempt to overwhelm opposing enemy units, or to leave a fight in the balance to free up a unit to move to fill a gap in the line.

As the Huns and Goths press forward the trap is sprung as the first pursuing Roman units enter the valley in their rear.

As the game progressed more and more units were removed from the table either as battle casualties or as escapees, with the final fights producing a close finish as both sides looked to see how many successes they had accumulated and where another potential success beckoned, with the last few remaining barbarian units moving at flank speed for the nearest exit, whilst Romans sought to overwhelm those not quick enough to join the withdrawal.

Roman heavy cavalry come on in pursuit of a Hun unit.

As it turned out, after the dust of battle had settled, the game ended in a draw with equal points gained by both sides, but with the Romans paying a dividend on their hard earned result, with both their commanders in the infantry and cavalry making the supreme sacrifice for the Empire.

The battle reaches its close with the Roman infantry thinned out but not beaten but with Roman cavalry forced to ride to their right flank looking to cut off escaping enemy units.

Thank you to Mike for hosting a splendid game to start the new year on and to Steve M, Nathan and Sam for creating the drama of our game.

JJ

Friday, 14 October 2022

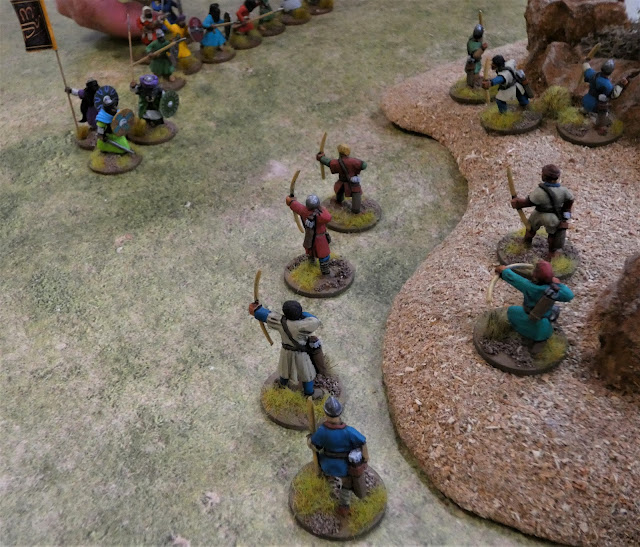
The siege of Antioch and the Twenty-Five Genoese Martyrs, 1097-1098 - Lion Rampant Second Edition


The game was played using the new Lion Rampant second edition rules together with The Crusader States supplement. It is based on the events described in scenario 1 on page 93 of the supplement, but instead of the game covering the last stand and massacre of the Genoese infantry by the Turks we take up the narrative at the point where Bohemond of Taranto intercepts the Turkish force responsible for the massacre to exact his revenge.


Background
A Genoese fleet lands at the harbour of St Symeon about ten miles from Antioch. Bohemond of Taranto meets the fleet and persuades a force of Genoese to accompany him to Antioch to assist in the fight against the Turks. On the road to Antioch Bohemond and the Genoese are attacked by a larger Turkish force. Bohemond and his men are mounted as are some of the Genoese who ride and escape making their way to Antioch.


The remaining Genoese foot put up a brave defence, but are so out numbered they are killed to a man.
Bohemond returns from Antioch with reinforcements and intercepts the Turkish force and here begins our game:


Victory conditions
Turkish players
One Victory Point for each unit (even those having taken casualties) they manage to exit from the opposite end of the board.


Frankish players
One Victory Point for each unit they rout or wipe out.


Special Rules
Failed activations do not pass play to the opposite side. Activations continue until all units have had attempted activation. The warlord can give a re-role to any unit within 12” of his figure once per turn. Due to the number of units on the board the 3” distance rule for friendly troops is reduced to 2”.


As the Turks are the defender they set up first on the southern edge of the board and the Franks on the north end. The Turks deploy a unit of archers on their left flank with two units of light infantry in the centre supported by a unit of elite foot and a unit of heavy cavalry with bows who are blood thirsty (all sixes rolled by them in a melee count as two hits). On their right flank are two more units of blood thirsty mounted bows and another unit of elite foot with the warlord.


The Franks set up next putting two units of Genoese heavy cavalry on their right flank supported by two groups of skirmishers taking cover in rough terrain with a unit of heavy foot behind them. Bohemond is in the centre with two units of elite foot who are effectively blocking the road. On the Frankish left flank are two units of mounted blood thirsty knights (elite cavalry) supported by a unit of crossbows.


The Franks quickly get their mounted knights moving up on their left flank and the crossbows move into rough terrain to make use of what cover they can in support of the knights. Bohemond and the two units of elite foot maintain their position blocking the road. On the Frankish right flank the Genoese heavy cavalry remain static seemingly content to wait their moment and watch the battle unfold.


The Turkish force are quick to respond to the threat of the Frankish knights and the two units of mounted bows surge forward to intercept them while a swift unit of their light infantry move towards the Frankish crossbows supported by the warlord and his elite infantry. The Turkish mounted bows fire on the Frankish knights and have some success but the knights’ resolve remains firm and they charge home inflicting casualties on the mounted Turks who pull back staying within bow range but out of charge range of the knights.


In the centre a unit of Turkish light infantry moves over to support the Turkish archers who have taken cover behind rocks on their left flank and have started to target the Genoese heavy cavalry. Because of the distance they are shooting, their arrows have no real effect on the Genoese who remain passively looking on. In fact the whole Frankish right flank remains static while the battle continues on their left flank where the first unit of knights has been reduced by the constant rain of arrows from the Turkish mounted bows who eventually charge them and wipe them out. Seeing this the second unit of Frankish knights hesitates.


All is not going so well for the Turkish light infantry moving in on the Frankish crossbows who deliver devastating volleys and reduce their number to half in a very short time. Buoyed up by the proximity of their warlord, they stand their ground. However when a third volley hits them they rout and quit the battlefield. Soon after the unit of mounted Turks are also hit by the crossbows and die to a man. Things are not looking good for the Turkish side.


It is at this point, that scenting blood, the Genoese heavy cavalry make their move and ride towards a unit of Turkish light foot who are braced in a shieldwall next to their archers who are taking cover in the rocks. The first unit of cavalry hits the shield wall causing and receiving casualties. The shieldwall stands firm and now the Genoese cavalry are much closer, the Turkish archers fire on them removing one unit from the field of battle and causing the second to become battered. The Frankish skirmishers in the rocks on the Frankish right flank see the unite of Turkish elite foot containing the warlord coming towards them and they target the unit eventually reducing it by half, but with the Turkish warlord present, the units courage holds and they enter the rough terrain attacking the skirmishers killing some and driving both units back and out of their cover.


Bohemond now realises that his right flank is crumbling. The heavy infantry move forward to intercept the Turks and Bohemond and his elite foot move forward to try to intercept a unit of Turkish mounted bows who manage to ride around him and make their escape off of the board edge.


With their left flank now wide open, the Turkish force uses a unit of their mounted bows on their right flank to fight a delaying action against the remaining unit of Frankish knights and elite infantry, while the rest of their force make good their escape on their left flank.


Conclusion
The Turkish force took substantial casualties, however the Franks only succeeded in killing and routing two of their units. With such a high casualty toll, in a usual game the Turks would have simply fled the field as their numbers were so depleted. In this scenario however, they did not have that luxury, as simply turning back would have seen them hunted down to receive the same treatment as they gave the Genoese infantry. 


The Turkish force managed to get five units off of the board and so they won 5 Victory points to 2.

AAR courtesy of Mike C.