
 |
| Major David Currie (left with revolver in hand) oversees the surrender of German troops in St Lambert to Canadian forces 18th August 1944 |
Perhaps one of the most iconic scenes that epitomises the closing of the Falaise pocket and the closing stages of the allied campaign in Normandy is the pictures of the end of the battle to take St Lambert sur Dives which saw the awarding of the Victoria Cross to Major David Currie.
The map below illustrates the significance of the little hamlet of St Lambert and it's taking by Canadian troops as being pivotal in preventing remaining German troops from retreating back over the River Seine and the Belgian border beyond.

The club is having a bit of a resurgence in playing "I Aint Been Shot Mum" just recently following a lot of games of its stable mate "Chain of Command" and for this game Ian pulled together his collection of figures and terrain to play the scenario "Canadian VC" that models the battle to take St Lambert and is featured in the main rule book.
Too Fat Lardies - I aint been shot mum
 |
| The map of the terrain from the scenario briefing |
The village of St Lambert is described as a typical Normandy village with sturdy stone built buildings surrounded by open orchards and light hedgerows atop a slight rise overlooking a stream in the valley below it.
 |
| Major David Vivian Currie VC - South Alberta Regiment |
The village was held by a "hotch potch" of German troops scraped together for the sole purpose of holding the route open for as long as possible.


Conversely the Canadian force is rated as Veteran and the motivation that rating brings would see the Canadian troops able to take the fight direct to the German defenders and very quickly gain the ascendancy.
 |
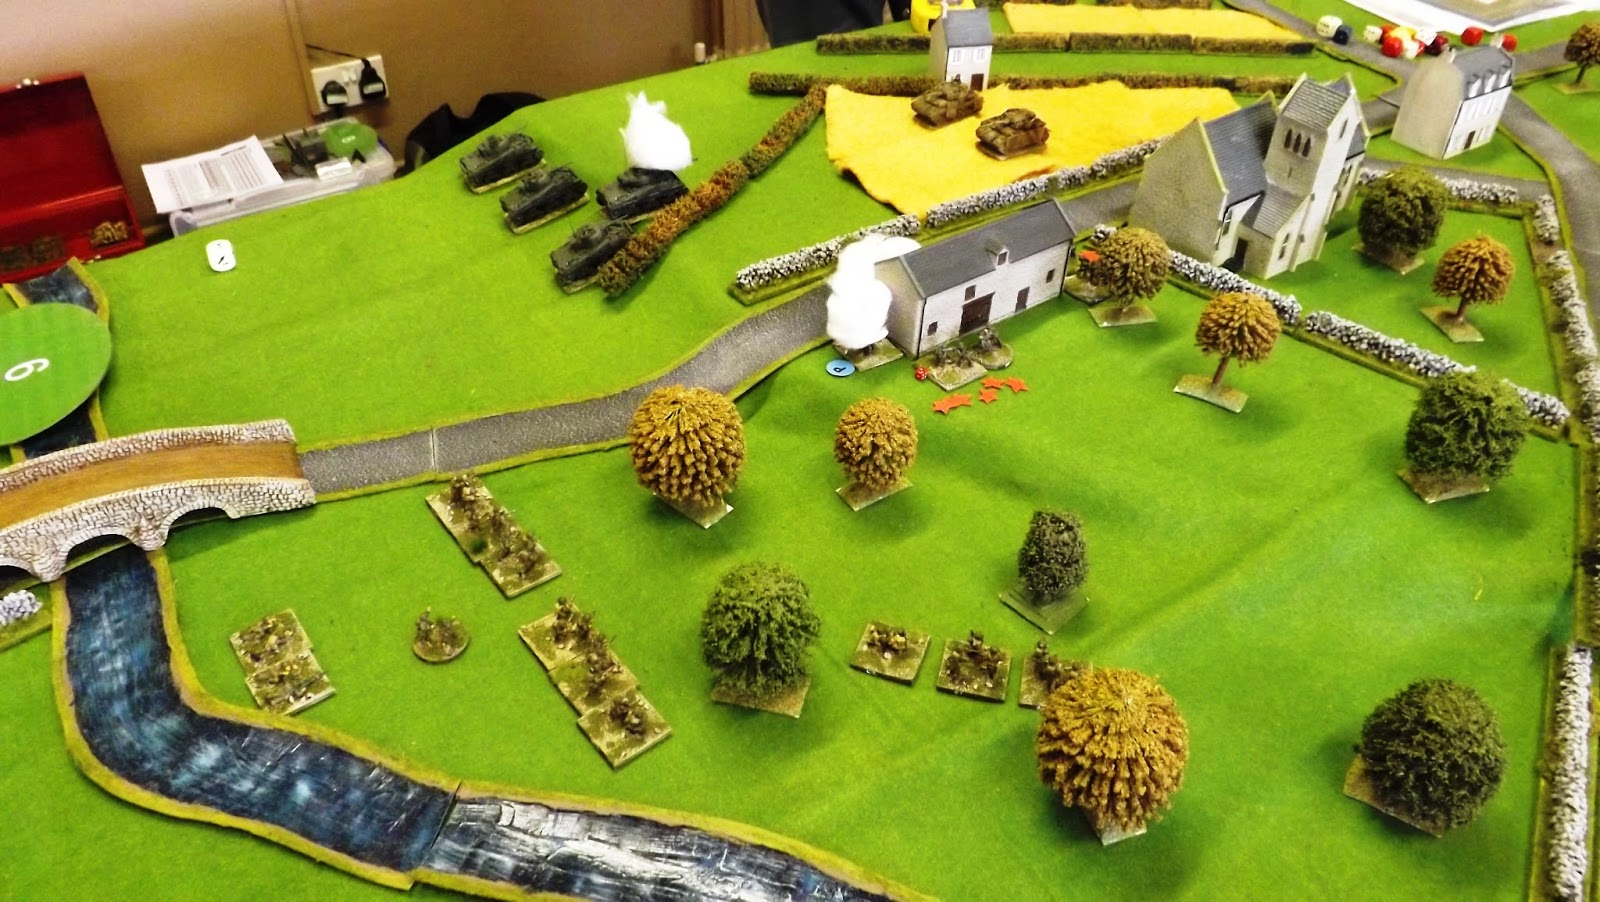
| The table top interpretation of the map, with the Canadian entry road top right |
There objective was to break the German force holding the village and take the crossroads at its rear, without being a broken force at game end.
 |
| The view of the village from the Canadian edge with the stream to their front, a likely bogging obstacle to tanks not using the bridges |
 |
| Canadian forces moving into the village outskirts on blinds |
 |
| First contact as a Canadian Firefly is dispatched by the Panzer IV zug |
 |
| As the armour on the left 'bumps' enemy tanks the Canadian infantry moves in against the buildings under the cover of 2" mortar smoke rounds and plenty of small arms fire (note the red shock markers) |
Meanwhile Mitchell's infantry, making best use of their veteran four action capabilities, poured on mass small arms fire at the first house on the road and then placed 2" mortar smoke in preparation for their assault on the badly shocked and pinned German infantry.
 |
| With the German infantry pinned and smoked off the Canadians prepare to assault |
The second German zug fell the way of their comrades, coming under fire from Mitchell's platoon and Lt Gill's platoon, before Gill lead his men forward with grenades and bayonets to clear the wall.
 |
| The Canadian attack is relentless with their infantry holding the centre of the village and their armour in support |
The Tiger/Panther zug rumbled out into the fields on the German right to take up the fight with Currie's troop, quickly disabling one of the remaining Shermans and forcing the other two to retire to hull down on the slope, taking pot shots at the big cats frontal armour.
 |
| Major Currie's troop of Sherman's having knocked out the Panzer IV zug comes under fire from the Tiger/Panther zug forcing them into hull down positions. Canadian infantry set about clearing the village. |
Hunkering down on the wall to their front, Gill's men returned the fire as best they could and were amazed to see huge chunks of masonry fall from the building as the first shells from Captain Redden's tank troop smacked into it as the Sherman tanks drew up behind their infantry.
 |
| Stalemate as the German armour is pinned by Currie and unable to break off as the remaining Canadian tanks and infantry take the German infantry apart. |
The German defence was clearly unhinged with three of the five zugs written off and their remaining infantry zug under withering fire from Canadian tanks and infantry and little hope of relief from their remaining tanks who were pinned holding off Currie's troop.
The German ability to manoeuvre was now compromised as the loss of 60% of their forces had reduced the number of their force cards in the deck very much in favour of the Canadians who were now more likely to get the drop on their opposite numbers and so we called it a Canadian win.
 |
| German troops surrendered in St Lambert. The German soldier extreme right, grinning, looks particularly pleased to be out of the war |
The map below illustrated the Canadian attack and three separate actions that turned the battle leaving the Germans with a battered infantry zug at blue 5 and their two tanks at blue 4.

 |
| Tiger tank knocked out in St Lambert sur Dives |
IABSM produced a fast moving unpredictable feast as usual and allowed us to do a bit of tag-wargaming as I was able to hand over command of the Canadians for the first part of the attack to prospective new member Simon, who joined us early in the day, whilst I went off to photograph and record events in the other games being played.
 |
| The sole remaining German infantry zug, holding out on the objective but badly battered from infantry and tank fire |
Thanks to Ian for pulling the game together and for Steve and Simon in making another pleasant day of gaming at the DWG.
Great AAR and some xecellet looking terrain and kit.
ReplyDeleteI played this scenario recently and my Cannucks got creamed as Tiger and Panther killed both Fireflies tout suite and lowly Sherman's could not cope with them.
Great post and great report! Terrain and pictures are fantastic, and additions such as maps and historical photos just splendid...Congrats!
ReplyDeleteNicely done!
ReplyDeleteBeing a Canadian I really ought to play this scenario.