
 |
| Sergeant Masterson of the 87th Foot capturing the Eagle of the 8me Ligne at Barrosa |
A few weeks ago I received my eagerly awaited copy of Over the Hills (OTH) Second Edition Napoleonic Rules from Stand to Games and have been planning to get a game set up to see what was new and to reacquaint myself with what is a very good set of Napoleonic rules.
Having read through the new version, I was very happy to see that the fundamental features of the rules, built as they are around the concept of fatigue affecting units, formations and armies, gradually leading to one side unable to continue the battle, have been retained, but now with a better laid out book with adjustments and additions that we found added to the original set without losing what was really good first time around.
So much so that we found ourselves quickly picking up the rules again using our own home produced QRS which we were able to make notes upon where we detected some slight changes or where I intend to add in some of the additions such as testing to rally a broken brigade, which came up in our game.

Looking back I see that this is the third rendition of the Battle of Barrosa we have played at the club, see the links below, with the previous game in 2017 using the first edition of OTH.
http://devonwargames.blogspot.com/2017/03/battle-of-barrosa-1811-over-hills.html
https://devonwargames.blogspot.com/2015/03/battle-of-barossa-5th-march-1811.html
I remember that that game was one of our first using the rules and we made some key errors in play whilst getting our heads around them, plus I soon realised after further reading that the set up and layout of the game was wrong in some key areas, which I set out to re-write in a new version of the scenario as part of a Kickstarter collection for the release of the new rules and my Peninsular Scenario book written for OTH.

https://jjwargames.blogspot.com/2019/01/oer-hills-is-published.html
It was really nice to get the Peninsular War collection back out on the table again since we finished play testing the scenarios for O'er the Hills back in February last year and with a group of players very much involved in the creation of those games, ready to get back into a first love, Napoleonics.
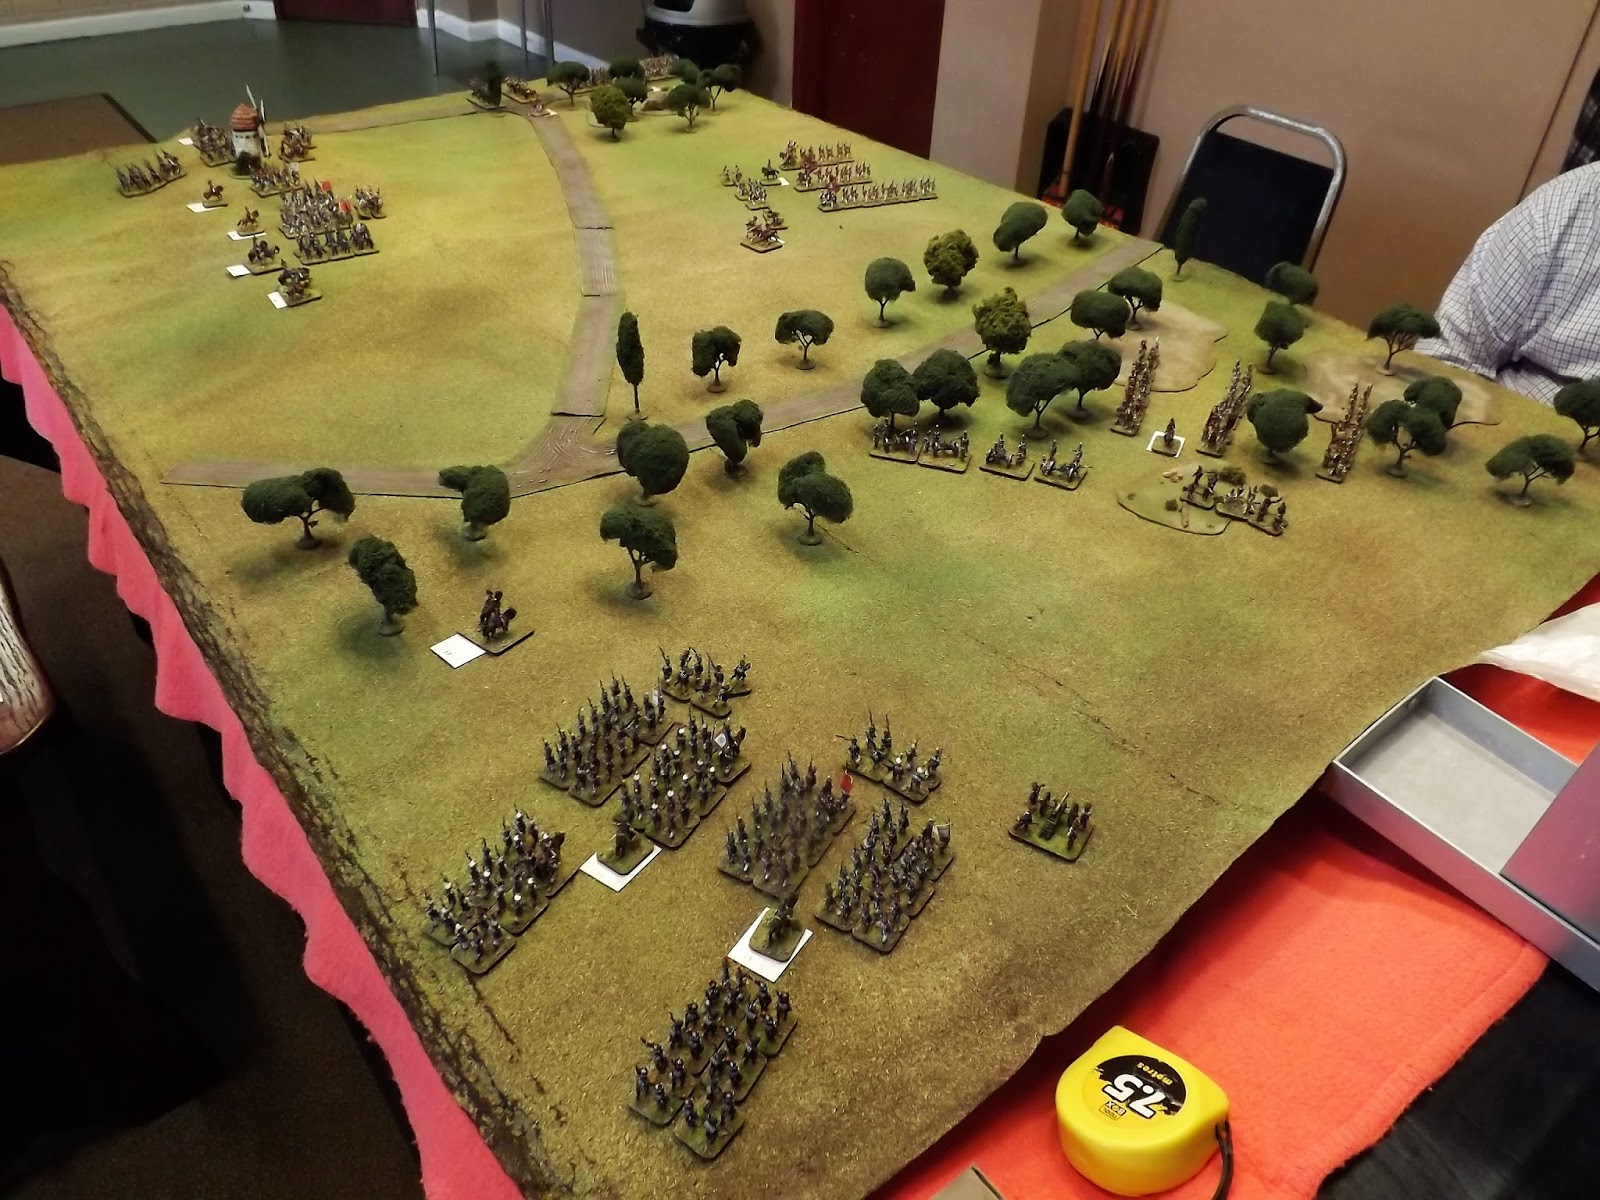
The table below shows the position of the two armies on first contact, with the British about to be set up into lines ready to meet the French who are surprised to find the Anglo-Spanish troops advancing to meet them.
 |
| Troops deployed and the Battle of Barrosa is about to begin |
Part of the adjustments to this scenario is that both armies are stating the game on 'Attack' orders, that is moving forward to closely engage the enemy and that the two parts of the Barrosa battlefield are distinct, being separated by the woodland running across the table.
 |
| The initial set up for the new Barrosa scenario |
The terrain and rapid deployment by Sir Thomas Graham meant that some of his troops became confused moving through the trees to get into position ready to attack seeing two companies of British guards separated from their parent battalion and fighting on the opposite flank.
In addition, recognising the threat posed by the French rapidly closing in on the rear of the allied column, Graham felt compelled to slow the French advance by throwing out a couple of 'speed bumps' on each flank in the form of the two composite light battalions seen ahead of their parent brigades; who set off ahead of their supports to tackle the French divisions unsupported whilst the line infantry prepared to come up in their support.
 |
| The view from the French right with Wheatley's brigade debouching from the tree line |
The playing of the orders process in OTH really enables the peculiarities of a given battle to be modelled in the scenario of it and so playing the role of Graham, I decided to follow his battle plan and press on with the allied attack, whilst Steve M playing the role of Victor hastily stopped the advance of his troops now occupying the hill whilst pressing forward on his other flank.
One other slight alteration we decided to make was to combine the six companies from three different parent battalions that fought on the British left flank into a composite battalion, and to allocate the weak French artillery to one of the French infantry brigades they were supporting.
 |
| The British brigade under Dilkes, dress their lines after their rapid deployment as Browne's Light Battlaion sets off ahead to confront the French under Ruffin occupying Barrosa Hill |
Thus with the table set up we pressed on with our game with the Anglo-Spanish assuming the role of Side A in the sequence of play, but only being able to move forward their light battalions in the first turn and to fire their deployed artillery.
Likewise to simulate the surprise of the French finding the Anglo Spanish debouching from the tree line in readiness to attack them only the French guns were able to fire in the opening turn.
 |
| Surprised to find themselves under attack, Ruffin's guns open fire on the Anglo-Spanish troops |
One of the first decisions I had to make as commander of the Anglo-Spanish troops was whether to support my attack by Dikes' brigade with the Anglo-Spanish cavalry, looking to occupy their French opposition in the form of the two squadrons of the 1me Dragoons.
Throwing caution to the wind Samford Whittingham joined the KGL hussars as they cantered along the coast road to be met by their heavier French opponents, with the Spanish dragoons held back in support.
 |
| Likewise on the opposite flank, the opposing artillery opens fire |
In this first combat between the two armies, valour got the better part of discretion as Whittingham was cut down in the ensuing three rounds of combat as the KGL fought toe to toe with their French opposition.
The result saw the rout of the allied cavalry brigade but left the French brigade likewise teetering on a similar outcome should they engage any other allied troops with just 2FS remaining on their brigade card.
 |
| The two batteries of British nine pounder guns soon started to dominate their side of the table with multiple hits from roll through roundshot. |
 |
| Ruffin and Victor decided to move over to defence whilst occupying Barrosa Hill. |
It was however on the opposite flank that the battle started to take an early turn as the British artillery supported by the damaging sniping of the riflemen in Barnard's Light Battalion started to take a toll on Leval's two brigades as the mounting casualties wore down their divisional fatigue scores.
 |
| With the Anglo Spanish cavalry routed the Spanish infantry cautiously advance on the battered French dragoons |
Soon the opposing lines were closing and the first volleys of infantry fire replaced the early sounds of cannons as the guns pulled off ready to support the British right flank as the 87th and 28th Foot prepared to administer the coup de grace on Leval's recoiling French.
 |
| The French guns are destroyed and the two French brigades are teetering on breaking as they try to hold back the advance of the 87th Foot |
However Leval's division was a veteran force composed of men who had fought the British at Talavera two years previously and so their brigade commanders were well placed to test to keep their brigades in the fight as their FS hit zero.
The first brigade to test easily passed and the combat entered a second round of struggle, only to see the next brigade fail its test and break, quickly followed by the other, as their lead battalions took further hits causing them to rout.
 |
| The line of Guardsmen start to move up in support of Browne's Light Bobs as events unfold on the opposite flank |
 |
| As the British Guards close on the hill, Victor receives news that Leval's Division on his right flank are broken and in full retreat |
With the French right flank in tatters and the British guns being redeployed to support the attack of Dilkes' brigade on Barrosa Hill, Victor called for a general retreat as he looked to cover the rear of his broken forces and with the allied cavalry unable to interfere with the pull back.
 |
| The Spanish are emboldened to press forward with the arrival of British Guards to their left |
 |
| Overseen by Sir Thomas Graham, Dilkes' brigade prepare to assault the hill as the French start to break contact |
Over the Hills played really well and it was great to find that we were getting back into the sequence of play and remembering the rules really quickly which I think is a sign of a good set, as well as producing a game that closely mimicked the actual battle.
I have come away with a few errors identified in the scenario brief which I can now rectify with an update, and with notes made to our QRS to allow me to update it with the few changes we identified in the second edition rules.
I am about to set off on a three week holiday exploring the Peninsular War battlefields and this game has really fired the imagination in preparation for my trip.
Thanks to Steve M, David and Jack for a really enjoyable game.
JJ
It's so nice to see your Napoleonic figures on the table again JJ. Top stuff!
ReplyDeleteGreat looking figures and terrain.
ReplyDeleteGreat to see the Napoleonics back in action, albeit a small engagement.
ReplyDeleteEnjoy your trip, I hope you share some words & pictures from your travels...
Best wishes,
Jeremy
Where can I get a print of the sezies the first French eagle to be captured battle of Barossa March 1811
ReplyDelete