

Yesterday at our monthly club meeting I was planning to play my first game of "Chain of Command", but owing to some unfortunate illness amongst our game organisers (get well soon Jason & Nathan) I needed to pull together a game at short notice.

Way back on the 9/10/2011 I staged a game from the board game "Hold the Line", effectively "Command & Colours" for the American War of Independence. The scenario was the Battle of Harlem Heights using figures on a hex mat.
You can read the game report here

I've thought that the scenarios in Hold the Line would translate well into scenarios for Maurice, so here was an opportunity to try out a game.
 |
| Table top interpretation of the map from the American positions |
 |
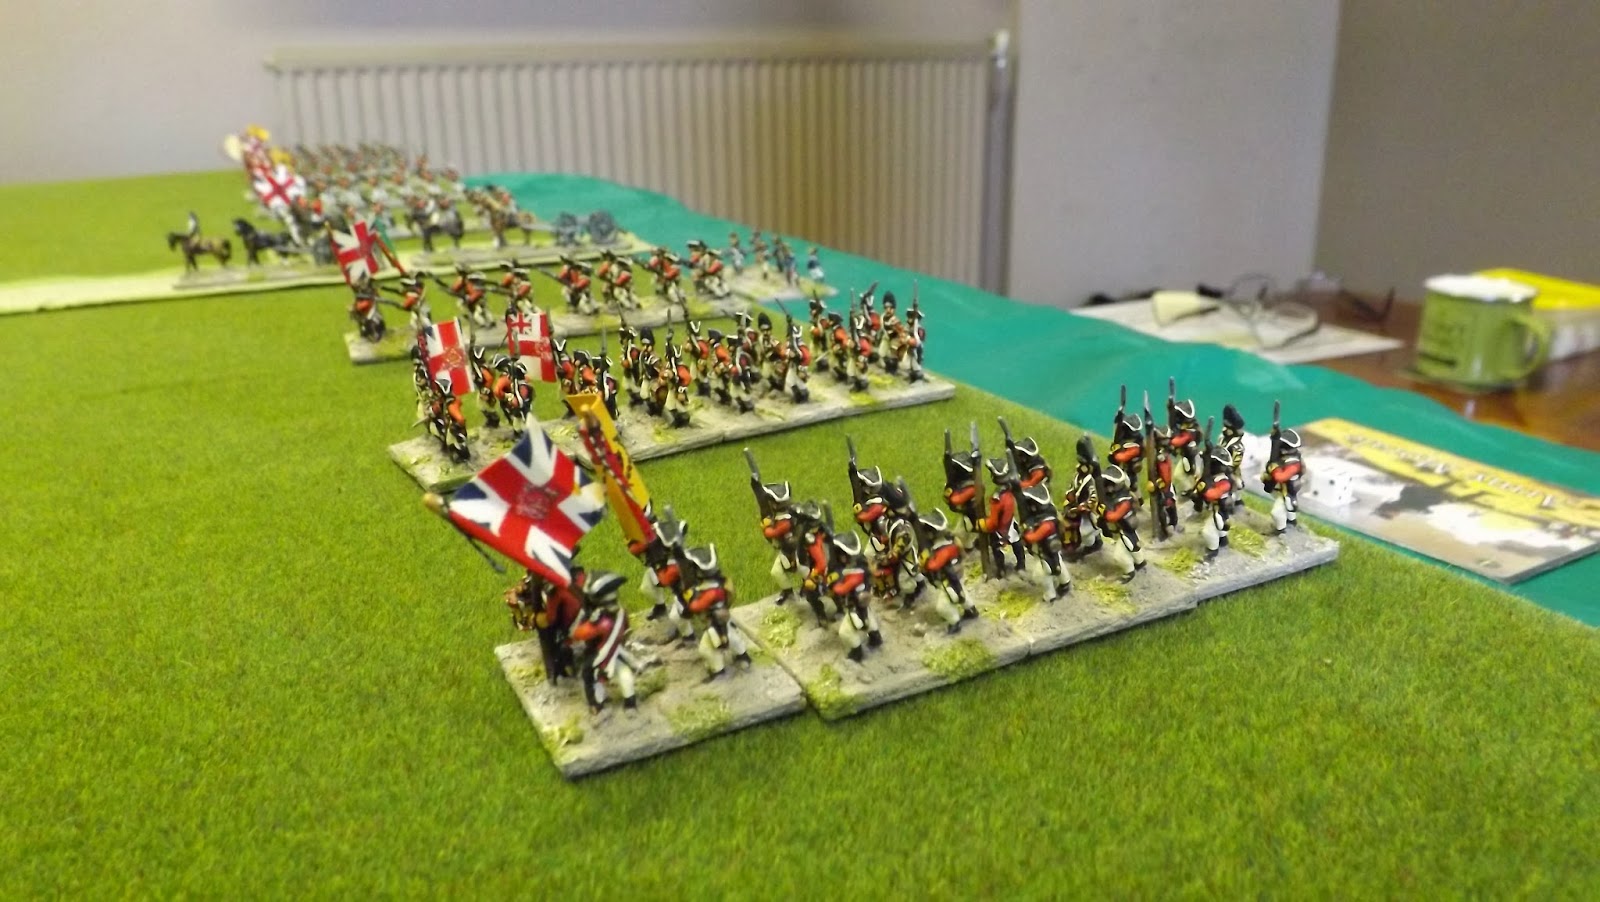
| View from the British positions |
British commanded by General Howe
5 Elite Regular battalions (2 x Grenadiers, 2 x Lights & 1 x Highlanders)
9 Trained Regular battalions
2 Artillery
Americans commanded by General Washington
8 Trained Regular battalions (Continentals)
4 Conscript Regular battalions (Militia)
2 Irregular Infantry (Rifles)
1 Artillery
The basic premise of this scenario is that the American army is attempting to ambush the British advance guard (the five elite battalions) and destroy them before the main force under General Howe can come to their aid. I should say that this game was experimental in that I now know stuff that I didn't when we started. Thus the objective (the gathering of waggons and ammo carts behind the British advance guard) needed to be closer to the American positions than where we placed it in our game. It was simply too far away for the Americans to have a chance of occupying before the British main force turned up (hey, this was a put together game and we wanted to start playing, thus the pre-planning was minimal - if you play this, you will know different!).We put a chance card in the deck to indicate when the British main force showed up (Maurice is a card driven game with the deck determining what players can do and if neither force breaks when the game ends) and selected "Steady Lads", "Oblique Order" and "Lethal Volleys" for the British, and "Steady Lads" for the American Continentals, to represent the qualitative difference between the two armies at this stage of the war (National Advantage cards allow you to tailor a force to match an historical profile of that army) .
 |
| General Howe's main force waiting to advance up the table |
As the American commander it was obvious I had to get in quick and do as much damage as I could before Howe could intervene, and so the American continentals advanced from the woods, with the emphasis placed on the American left where the British line was left hanging and the extended tree line gave me an opportunity to use my irregular riflemen to protect my flank should the need arise.
 |
| The objective markers |
 |
| The British advance guard of elite regulars |
 |
| The continentals advance out of the tree line |
Fortunately my British opponent (Ian) was feeling bold and relieved me of some of the pressure over who would strike first. After some desultory musketry between the two lines his 71st Highlanders charged into my lead continental line, hoping to take advantage of my disruptions. However due to combination of poor die rolls on his part, my line held and the Highlanders fell back with more disruption. Now it was my turn and, after an heroic rally which cleared all my disrupts, I used weight of numbers to get two units in on the highlanders destroying them in the first melee and knocking off two morale points on the British Army Morale.
 |
| Washington oversees the attack on the flank of the British advance guard |
This attack was swiftly followed up by a second on the next British unit in the line, the Grenadiers, who shot up and unable to rally off their three disruptions dissolved under the attack of three continental battalions that had passed through the ranks of the leading units (using an appropriate card) without disruption. This caused another morale point loss (sadly only one) and General Washington had destroyed the right flank of the British advance guard. However one continental unit also carrying three disrupts was destroyed in this attack also with the loss of two morale points to the Americans army morale.
 |
| The two lines close |
 |
| American artillery on the road |
With the approach of the British main force the game changed and, as the American commander, I felt I now needed to change tack and prepare for the onslaught. (on reflection I am thinking that the British reinforcement card should not go into the deck until after the first deck has been played. This keeps things interesting for the Americans and extends the period from when they would have to change role from attacker to defender).
The first deck of cards was used up with the British marching to close up on the American line and the Americans shaking off their disrupts from the first combats to prepare for their arrival.
 |
| British Army Morale after the first hand - looking good |
 |
| American Army Morale after the first hand - looking not so good |
The morale state of the two armies was very much in favour of the British and, with the Americans now on the defence, they would have to be far more cautious in their attacks.
 |
| The American left flank prepares to greet the British main force |
As the American commander, I sensed a slight opportunity here, as I had no real strength to assault the forces protecting the objective (four battalions of militia staying close to the tree line for obvious reasons), but I did have sufficient force to take on the British approaching my left flank.
The problem was that if the British suddenly changed their assault to my right flank I could find my army being rolled up, with my left flank engaged in a struggle of their own.
 |
| The British advance guard feeling more confident with the arrival of reinforcements |
 |
| General Washington re orders his lines |
 |
| The British main force closes in on the American position - fox out in the open! |
 |
| Continental infantry, bloodied but not cowed. |
We had a lot of fun playing Maurice and I can honestly say that that is true for every game of Maurice I have played. I also think that the Hold the Line scenarios have a lot of potential for conversion to Maurice.
Thanks to Ian for a very entertaining afternoon of action in the former colonies
My daughter lives not to far from were these battles were fought. A lot more heights there than I imaged. Great report.
ReplyDeleteJon
Hi Jon, thank you, glad you liked it
DeleteJonathan
Beautiful pictures! Great looking game, photos and figures are really good, and I love your wagons!
ReplyDeleteThanks Phil.
DeleteAh yes the wagons, part of the lovely range from Hallmark