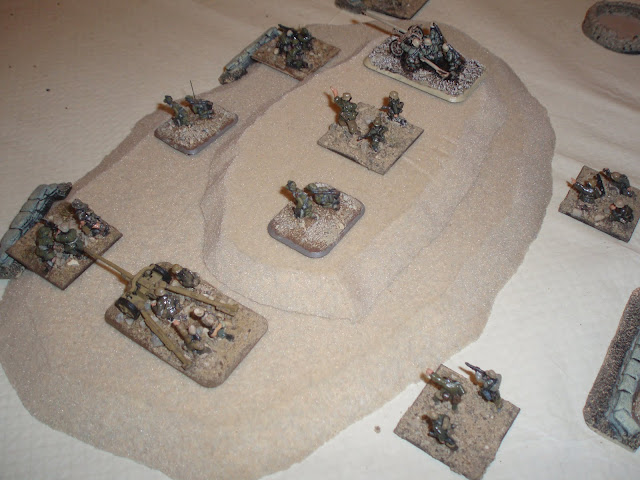
November saw Chas, myself and Andy B put on a scenario from Operation Barbarossa, using "Flames of War" rules. Jason joined in because no one else wanted him.
It was a 3000 point a side game, with the Soviets fielding a battalion of tanks (including 5 monster T 35's and 11 T 28's) and a battalion of infantry, all with attendant supporting arms.
The German force was more modest, with a tank company, supported by a company of panzer grenadiers and attendant supporting forces (including priority air support - Stuka schwerpunkte).
The scenario was an "encounter" battle, so half the platoons on both sides were deployed on the table, with the rest being delayed and scattered reserves (roll for entry from turn 3 and dice for where each platoon arrives).
Initial deployment saw 33 Soviet tanks facing 6 panzer III's and 3 armoured cars. The Soviets raced forward and the German pioneers raced onto the central hill objective and did what pioneers do best, dig in !
The German armoured cars were wiped out by a company of T 28's. The German motorcycle recce on the other side of the table saw two companies of Soviet light tanks and decided discretion was the better part of valour.
The German tanks went firm and shot it out with the T 26's and BT 5's, inflicting serious loses and sending a company of T 26's and one of BT 5's packing. The wave attack rule came into play and the BT 5's reappeared, at full strength, as if by magic !
A platoon of T 35's and a horde of infantry joined the Soviets and a platoon of Stugs bolstered the Germans facing the T 28's (much to Chas's relief).
The shooting contest started again and the new BT 5 and T 35 companies suffered the same fate.
The above picture shows the point when the Soviets conceded. Chas can be seen leaving the scene, suppressing his laughter.
Quality beat the quantity this time, but it might have been a different story if the Soviets had refused to engaged in a long range shooting contest and had just rushed the German positions.
Just to show there were no hard feelings the Soviet players posed for a picture with "Chuckling Chas".
Vince
Showing posts with label Flames of War. Show all posts
Sunday, 11 November 2012
Barbarossa 2012 - Flames of War
On the other table this month we had a beautiful collection of early Russian Front Flames of War action going on. The models and terrain capturing the feel of Russia 1941. Enjoy some wargamers porn, including Jason
| Masses of Russian Light Armour |
| German units looking on in awe |
| Masses of Russian Heavy Armour. You've got to love those multiple turrets! |
| German Infantry preparing to see off the Russian Horde |
Saturday, 11 February 2012
Gazala 1942, 4th Armoured vs 15th Panzer
"Gazala Dust Up"
![]() |
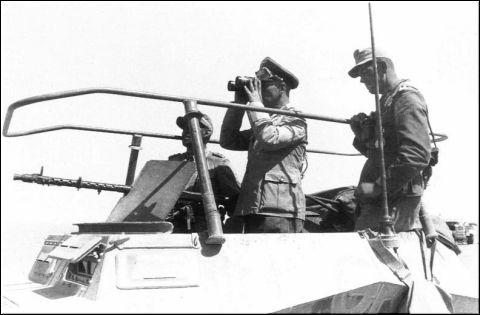
| Rommel, always close to the action, surveys the scene |
This months game was a Flames of War encounter between 15th Panzer Division and 4th Armoured Division in a meeting engagement east of the Bir Hacheim strongpoint at the end of the Gazala line in May 1942.
![]() |
| The opening moves as Rommel's armour sweeps to the south of the Gazala position |
![]() |
| RAF ground attack aircraft were becoming a potent threat to the Panzers |
The map shows the layout of our terrain, with the objective placed by both sides. The red objectives indicating the German set up edge and the blue the British. As both sides were armoured companies we diced for the attacker and the British gained the advantage.
| The table set up with British and German edges left and right respectively |
With the positions agreed the British began the set up process by placing their 25lbr troop in the lower right corner. The process of placing platoons alternated from then on until up to half the platoons had been placed. The remaining forces were held in reserve to be diced for from turn three. The pictures below show the initial set ups, with all the British armour on from turn one together with the artillery. This left an armoured car, motor infantry, portee and towed anti-tank gun platoons to come on later. The British also had limited air support from RAF P40 Kittyhawks.
| British set up with three troops of Honey's, one troop of Grants, Company HQ (2 x Honey) and a troop of 25lbrs
|
The German force was a potent one with an HQ of one Panzer III and a Panzer IVF2, an 88mm FlaK platoon (1 x 88mm), a Panzer III platoon (3 x Panzer III & 1 x Panzer IIIJ), a Panzergrenadier platoon with an integral 50mm Pak 38, and a platoon of 4 x 105mm howitzers. Off table in reserve was another Panzer III platoon (2 x Panzer III, 1 x Panzer IVF1), an SP AA platoon of 3x20mm halftracks, and an armoured car platoon (3 x Sdkfz 222 ACs).
| The German set up with a Panzer III Special nearest to camera |
As this was a meeting engagement both sides entered the table moving, and the race was on to occupy the most favourable terrain and be in a position to contest an objective. The British armour having the initiative raced across the open terrain of no-mans land (Honeys are light tanks and gain an increased movement) to threaten both objectives, the Honeys being supported by the slower but more potent Grant tanks, newly arrived in the Western Desert and coming as a big surprise to German troops.
As the armour rushed forward the RAF made its first attack on the German lines with a strike of three Kittyhawks, which pinned the Panzer Grenadiers, who remained pinned for the remainder of the game. The RAF were superb in this battle appearing on four consecutive moves with two attacks of three aircraft and one of two planes. They knocked out the Panzer IVF2 in the German Company HQ and took out several artillery teams despite suffering hits from the German 88mm gun platoon.
| RAF Kittyhawks come screaming in to bomb the German lines |
The battle between the opposing tanks hung in the balance for a couple of moves until the Grants took a move of stationary firing to knock out three of the four Panzer IIIs and cause the platoon to rout, at the cost cost of a Grant and Honey tank. With the German armoured threat removed the British tanks turned on mass to assault the German artillery placed around the second objective, and pinned following a successful airstrike by the hard fighting Kittyhawks. The British artillery supported this attack by smoking off the German HQ and FlaK platoon to the right of the German gun line.
| British and German armour duelling with the attack going in in the centre against the German artillery position with a smoke barrage (centre top) protecting the flank. |
The coup de grace came in turn 6 as the British tanks swarmed on to the German gun position, followed up by a second assault on the German HQ position by Honeys and Humber armoured cars. The German Company was below half strength and was forced to test morale before being able to attempt to shift the British tanks off the objective. As reinforcements of Panzers arrived on the German left flank which threatened to wipe the British armour out, the German morale failed and they were forced to concede the field of battle.
| The gallant Kittyhawks bomb the German Company HQ position |
Thanks to Steve M for setting up the game and umpiring the day, and to Steve and Martin as the German commanders for making it an exciting finish to a close fought action.
Jon
Saturday, 17 September 2011
Hellfire and Back, "Dust Up" in North Africa
Last weekend Steve got his desert forces out to try out one of the new missions in FOW's "Hellfire and Back" early war in the Desert book.
The forces pitched British and German forces in a tank on tank shoot out.The force list as below with Steve taking the Panzers and me the Brits.
The map shows the terrain, set up of forces, the reinforcement deployment areas and the objective positions. The objectives are "hot" from turn one so are open to a rapid dash, provided they can be held uncontested. At least half the platoons are held as reinforcements entering the table after turn 3.
I Chose to lead with my artillery, 2lbr portees, Honey Company HQ and a troop of Honeys. Steve led off with his artillery, Panzer Kompanie HQ, Panzer II platoon and his PaK platoon. However I soon realised the error in my deployment choice when the Germans got their first reinforcements and the British drew a blank. Steve immediately placed his infantry platoon on my flank threatening my gun line as my Honey troop "swanned off " into the desert seeking death or glory, see below.
I had however taken the precaution of dismounting my AT guns and digging them in around my artillery position, so this provided them a modicum of cover from the German small arms fire that came their way. My company HQ with their two tanks also enabled some return fire with their machine guns.
In the centre a temporary standoff occurred as Panzer IIs and Honeys eyed each other looking for an opening with the Brits all to aware of the PaK front formed up behind the German armour. I took the unhistorical option of choosing discretion and not wading in. Perhaps Battlefront should have early/mid war British armour having to take a control test when in close proximity to the enemy, to see if they fail to resist charging in, rather akin to British cavalry in the Napoleonic period.
However on turn 5 events took another twist with the reinforcing British armour turning up on the German flank. Now it was Steve's turn to have his gun line threatened. So putting the pedal to the metal, my Honey platoon charged in on the 105's knocking out a gun and forcing another to leave the table in retreat. In addition I was in behind the PaKs and Panzers causing a temporary halt to their advance on the objectives.
The appearance of the British armour led to a classic tank on tank pell-mell battle with flaming wrecks appearing on both sides. I chose to reinforce this fight with the third Honey troop, ignoring the German armour that was building on my own flank, consisting of the Panzer IIIs and IVs who were jousting with my Company HQ and 2lbr/25lbr gun line.
With the game moving into turn seven, events took another twist. The Brits had a remarkable stroke of luck with the 2lbr AT guns knocking out two Panzer IIIs causing the platoon to fail its morale check. This changed the balance in the middle of the table as the other German armour was primarily engaged in dealing with the two Honey troops in their lines. I made a dash in the centre to grab the middle objective with the remaining Honey troop, looking to smoke them off with my artillery to enable them to stay on uncontested.
However it was not to be, the fickle dice gods enabled me to fail to call the guns in on three rolls and with my AT guns failing a morale check and bugging out in turn eight we called it a day.
In FOW the mission uses the Fair Fight rule comparing lost platoon counts on the losers column of the Victory Points table, which gave Steve a 2:1 win. The VP points system in FOW is very simple and probably fails to give a good indication of how clear a win was, so I have included an alternative approach which I saw on another blog and have adopted (apologies, I cannot recall where). This looks at the value of units damaged and destroyed to calculate an advantage, which called the game a draw. Either way both Steve and I agreed that this was a very enjoyable mission, and gave us plenty to talk about re set ups and initial troop placement.
Thanks to Steve for a great game.
Friday, 25 February 2011
South African Rifle Co. vs 90th Light Panzergrenadiers
Hi all,
Steve and I played a FOW game last night, pitching South Africans against DAK in a throw together mission. We both came up with our own force lists up to 1500 points.
Co HQ
2 x Panzergrenadier Platoons
1 x Heavy Weapons Platoon
2 x Pak 38
3 x Pz IIIG
1 x Pz IIIJ Long
3 x Sdkfz 222
4 x 10.5cm howitzer
Limited Air (Stukas)
South African Rifle Company - Reluctant Veteran
Co HQ
3 x Rifle Platoon
1 x HMG Platoon
2 x Valentine Troops (6 tanks)
Recce Troop (3 x Humber AC)
SP AT Platoon 3 x 2lbr portee
SP AA Platoon 3 x 40mm AA Bofors
RA Battery 4 x 25lbr
Limited Air (Hurribombers)
We randomly chose our mission which was Withdrawal and diced off for attacker/defender, with the Germans getting the defender role.
Steve opted for a night attack and advanced across the table towards the German position.
The Germans occupied a ridge in the centre with a patch of scrub on their left and a depression on their right. The three objectives were evenly spaced along the back edge slightly towards the German right.
We played 6 turns, with the Germans withdrawing their Panzers, which were held in ambush, and their artillery, whilst having one of the Panzergrenadier platoons destroyed in an assault.
The South Africans lost a Rifle Platoon, the Recce platoon and one rifle platoon being one base of 50% strength.
My Panzergrenadiers were almost permanently pinned throughout the game and would surely have inflicted even higher losses if they had managed some decent dice.
The final act before we totted up the score was the Stukas came in to the attack braving some bofors fire, only to break off because I stupidly left a group within 16 inches, doh!!!
Good game, German losses in points 14%, South Africans 21%
Friday, 28 January 2011
Sunday, 12 December 2010
War in the Desert
Hi all,
Thought I let everyone know about the game this weekend at the club, put on by Steve Mathews who brought out his ever growing collection of FOW desert troops.
Sadly I didn't have my camera with me so no pics of Steve's collection. This month also saw a reduced turn out due to various members being away, so the Brits were played by me (JJ) and Steve Hallett vs Chas and Steve M running the Afrika Korps.
The mission was the Withdrawal mission, which had a mixed bag of 2 x German Infantry platoons supported by 3 x Panzer IIIs, 3 x Sermovente 75s, 3 x Sdkfz 222 A/Cs, a couple of PaK38s and 7.5IGs, an 8.8cm Flak gun in ambush and support fire from a battery of 105mm guns, who were tasked with holding at bay the Australians whilst gradually taking platoons off the table to simulate the rearguard. The Australian force consisted of 8 x Crusader IIs, 3 x Honeys, 2 x platoons of Australian Infantry, 4 x 2lbr portees, and a battery of 4 x 25lbrs on call. The force was also supported by Hurribombers.
Steve and I decided to focus our assault on the right flank objective whilst refusing the left flank and centre. The Crusaders led the way followed by a platoon of infantry, supported by fire from the 25lbrs. The holding force of the 2lbr portees and Stuarts formed line against probing Pz IIIs and Sdkfz 222's.
The assault rolled forward with the Crusaders racing through a platoon of Sermoventes with niether side able to inflict casualties on each other. The 8.8cm in ambush declared itself to fire at the onrushing Crusaders and promptly missed. The 25lbrs caused the 7.5IGs to pin, and with anticipation I announced to Chas that my Crusaders would assault his pinned guns, literaly inches away from the objective that could win the game for the Aussies.
Meanwhile on the other flank, Steve H had dispatched a 222 with the Honey's and caused a Pz III to bail with the Portees. It only left our Hurribombers to come roaring in and tip the balance in our favour by dispatching the German artillery support.
THEN THE WHEELS CAME OFF. The Crusader is not the best tank to assualt with, with its paltry side armour of 2. Chas took full advantage and his infantry gunners promptly unpinned and shot the Aussie cavalry out of its saddles. The follow up Infantry took on the Sermoventes and with their lack of machine guns were eventually overcome by the Infanteers only for the German Artillery to whack the Aussies with a barrage while they were still clustered round the smoking wrecked Italians. The RAF continued to put in a reluctant appearence with only one aircraft showing up on 75% of the calls.
Steve H dispatched the 222 platoon, but with the assaulting Aussie armour shot together with half the infantry and the nearest objective removed, the game was a clear cut Axis win.
Thanks to Steve M for a very enjoyable and instructive game.
Thought I let everyone know about the game this weekend at the club, put on by Steve Mathews who brought out his ever growing collection of FOW desert troops.
Sadly I didn't have my camera with me so no pics of Steve's collection. This month also saw a reduced turn out due to various members being away, so the Brits were played by me (JJ) and Steve Hallett vs Chas and Steve M running the Afrika Korps.
The mission was the Withdrawal mission, which had a mixed bag of 2 x German Infantry platoons supported by 3 x Panzer IIIs, 3 x Sermovente 75s, 3 x Sdkfz 222 A/Cs, a couple of PaK38s and 7.5IGs, an 8.8cm Flak gun in ambush and support fire from a battery of 105mm guns, who were tasked with holding at bay the Australians whilst gradually taking platoons off the table to simulate the rearguard. The Australian force consisted of 8 x Crusader IIs, 3 x Honeys, 2 x platoons of Australian Infantry, 4 x 2lbr portees, and a battery of 4 x 25lbrs on call. The force was also supported by Hurribombers.
Steve and I decided to focus our assault on the right flank objective whilst refusing the left flank and centre. The Crusaders led the way followed by a platoon of infantry, supported by fire from the 25lbrs. The holding force of the 2lbr portees and Stuarts formed line against probing Pz IIIs and Sdkfz 222's.
The assault rolled forward with the Crusaders racing through a platoon of Sermoventes with niether side able to inflict casualties on each other. The 8.8cm in ambush declared itself to fire at the onrushing Crusaders and promptly missed. The 25lbrs caused the 7.5IGs to pin, and with anticipation I announced to Chas that my Crusaders would assault his pinned guns, literaly inches away from the objective that could win the game for the Aussies.
Meanwhile on the other flank, Steve H had dispatched a 222 with the Honey's and caused a Pz III to bail with the Portees. It only left our Hurribombers to come roaring in and tip the balance in our favour by dispatching the German artillery support.
THEN THE WHEELS CAME OFF. The Crusader is not the best tank to assualt with, with its paltry side armour of 2. Chas took full advantage and his infantry gunners promptly unpinned and shot the Aussie cavalry out of its saddles. The follow up Infantry took on the Sermoventes and with their lack of machine guns were eventually overcome by the Infanteers only for the German Artillery to whack the Aussies with a barrage while they were still clustered round the smoking wrecked Italians. The RAF continued to put in a reluctant appearence with only one aircraft showing up on 75% of the calls.
Steve H dispatched the 222 platoon, but with the assaulting Aussie armour shot together with half the infantry and the nearest objective removed, the game was a clear cut Axis win.
Thanks to Steve M for a very enjoyable and instructive game.
Monday, 8 November 2010
Plastic Soldier Company Ltd 15mm Rigid Plastic
Painted Plastic Soldier Company Ltd 15mm rigid plastic WW2 Soviets
Size comparisons: Painted PSC, Unpainted PSC, More Painted PSC, Painted Battlefront and the fat boy on the end with the tuck box is from Peter Pig !
Vince
Labels:
BF(3),
Flames of War,
Left to right,
PPig(1),
PSC(3),
PSC(6),
wargames porn,
WW2
Saturday, 9 October 2010
October 2010 Meeting - Winter War
Chas and Steve M attempted to storm famous "Polar Bear" bunker on the Mannerheim line, in this 2500 point FOW Winter War game. Andy tried to survive long enough for reinforcements to arrive.
This was a Winter War game to the "Hold the Line" scenario in the FOW rule book.
HERE THEY COME -

Andy, keen to get in shot, poses for the camera, as the Soviet horde gets uncomfortably close to the line. Frustrated he returns to the field telephone in his bunker to check if my men have left Helsinki yet.
A LITTLE HELP HERE -
A couple of hideous turns for the Soviets see Chas and Steve remember they have left the gas on in Leningrad.
HOME TIME -

A good bash, with the Soviets getting close, but being check by accurate fire from the A/T guns in the bunkers and fire from the infantry in the trenches. That said, the Fins looked in trouble when they lost the A/T gun platoon and the HMG platoon in the trenches.
This was a Winter War game to the "Hold the Line" scenario in the FOW rule book.
HERE THEY COME -
Andy, keen to get in shot, poses for the camera, as the Soviet horde gets uncomfortably close to the line. Frustrated he returns to the field telephone in his bunker to check if my men have left Helsinki yet.
A LITTLE HELP HERE -
HOME TIME -
A good bash, with the Soviets getting close, but being check by accurate fire from the A/T guns in the bunkers and fire from the infantry in the trenches. That said, the Fins looked in trouble when they lost the A/T gun platoon and the HMG platoon in the trenches.
Despite it all we weren't so cocky until the landships were burning though !
I decided Andy was doing so well I would leave my troops in the box until turn 4. Glad I bothered to paint them.............
Vince
Friday, 17 September 2010
September Game, Tel el Eisa
Battle of Tel el Eisa First Alamein 1942
Steve M held a FOW desert clash between the Ausies of 9th Australian Infantry Division and the Italian Sabratha Division supported by elements of Afrika Korps.
This battle represented the crumbling attacks carried out by General Auckinleck to hold Rommel's forces in a battle of attrition, forcing him to commit his mobile armoured reserves to bolster his Italian allies.
Auchinleck attacked again on July 10 at Tel el Eisa in the north with the fresh 9th Australian Division. 89 Germans of the 621st Radio Intercept Company and 835 Italian troops that were largely part of an infantry battalion and artillery group of the "Sabratha" Division were taken prisoner by the Australian 2/48th Battalion under Lieutenant Colonel H. H. Hammer. A battalion of the Italian Bersaglieri was committed to plug the gap and initially recovered some of the lost ground at Tel el Eisa and even took 13 prisoners. According to the 2/48th Battalion diary: "[a]t approx 2000 hrs enemy tks-number unknown-and inf attacked D Coy front. They overrun posn and enemy inf forced D Coy to withdraw and occupied their psn."[18] While the Bersaglieri suffered heavy losses, it bought time to allow the Italian XXI Corps to rush in a battalion of the "Trieste" Division and L3 and M13/40 tanks of the 3rd "Novara" Armoured Group and Major Gabriele Verri's 11th Armoured Battalion to affected sector and seal off the Australian breakthrough.[19]
The picture below shows the initial Italian position upon their ridge with wire out front. As in the original action the Aussies attacked at night struggling to get their vehicles up to the ridge without bogging in the broken terrain.
The position was penetrated on the Italian left, but the leading Aussie platoon was destroyed carrying the position.The ridge was consolidated by the Crusader and a follow up infantry platoon, both having doubled to get to the ridge.
On turn 6 the German armour with Bersaglieri infantry turned up and we ended up with a historical result, with Aussies on the ridge but unlikely to penetrate the position further. However the German commander had been forced to bring up the Panzers, losing a Panzer IIIJ for his pains.
Good game Steve, a very enjoyable encounter.
Subscribe to:
Posts (Atom)