

Quatre Bras is a battle which is full of ‘what ifs’ and provides a great source for Wargames scenarios.
What if Ney committed his forces to attack earlier, what if Wellington concentrated more of his army at the crossroads, what if d’Erlon’s Division had not spent the day counter marching between Ligny and Quatre Bras. The possibilities are endless.
 |
| Gemioncourt Farm pictured in 2015 during the Waterloo Bicentenary Commemoration. More pictures of the battlefield from that trip can be seen at JJ's Wargames- Mont St Jean, Gemappe & Quatre Bras |
This ‘what if’ scenario explored what would have happened if a British infantry Brigade and a Dutch Belgium infantry Brigade along with a Dutch Belgium Cavalry Division had occupied the crossroads and Ney had attacked in force at first light. I also wanted to present the French command with similar problems endured by Ney, whilst being careful that the players frustration was not vented by slinging the toys across the table.
The first false flag was to provide bogus briefs to both commanders.
Vanguard Anglo-Allied Army
General William, Prince of Orange GCB
A small French force is advancing on your position from the south. The main French Army is engaged in the region of Sombreff. Lose no time to drive all before you from the field and advance east on Sombreff, falling on the French left flank. Your axis of march is the Nivelles a Namur Chaussée. As this is also your Line of Communication it must remain under your control.
Left Wing, Army du Nord
Marechal d'Empire Michel Ney
A strong Anglo-Allied force is situated north of your present position. A large Prussian force to the east in the region of Sombreff has been pinned by the main French Army. If the Prussian Army remains inactive, the Guard Corps will be ordered to march West along the Nivelles a Namur Chaussée and fall on the left flank of the Anglo-Allied force to your front. It is imperative that you take possession of the Nivelles a Namur Chaussée to allow the reinforcements to arrive. The fate of France is in your hands.
Both sides were issued with the relevant section of the Ferraris Map.

The third deception was that one French Brigade, Soye, would not be present at the start of the battle and the promised Guard reinforcements would be recalled by the Emperor before arriving on the battlefield. The final false flag given to the French command was that the gently rolling hills and tall crops, concealed more enemy foot units then they could see at the start of the game.
 |
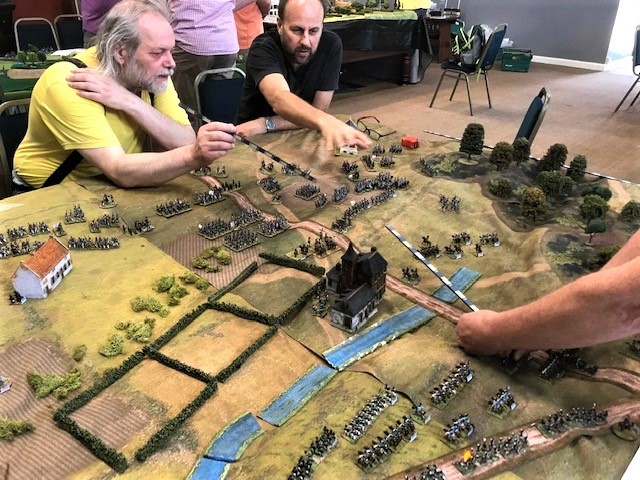
| David, our gamemeister, oversees the results of all the command decisions played out on his laptop screen. |
The narrative I envisaged was that the three French Brigades would in time force back Bylandt’s disguised Brigade but getting bloody noses in the process. Soye’s errant brigade would arrive together with Kellerman’s heavy cavalry Division, putting pressure on the already weakened Brigade of Bylandt as well as the ‘real ‘Dutch Belgium Brigade of Major General Alexander d'Aubremé which had more realistic characteristics of Dutch Belgium infantry.
I reckoned the Dutch Belgian cavalry would have had a slight advantage at this stage, which would be lost when Kellerman’s Heavy cavalry Division turned up.
Finally, the Duke of Brunswick’s rather brittle Corps would arrive to either shore up the defences, drive the French from the field, or retreat with the remnants of the two Dutch Belgium Brigades.
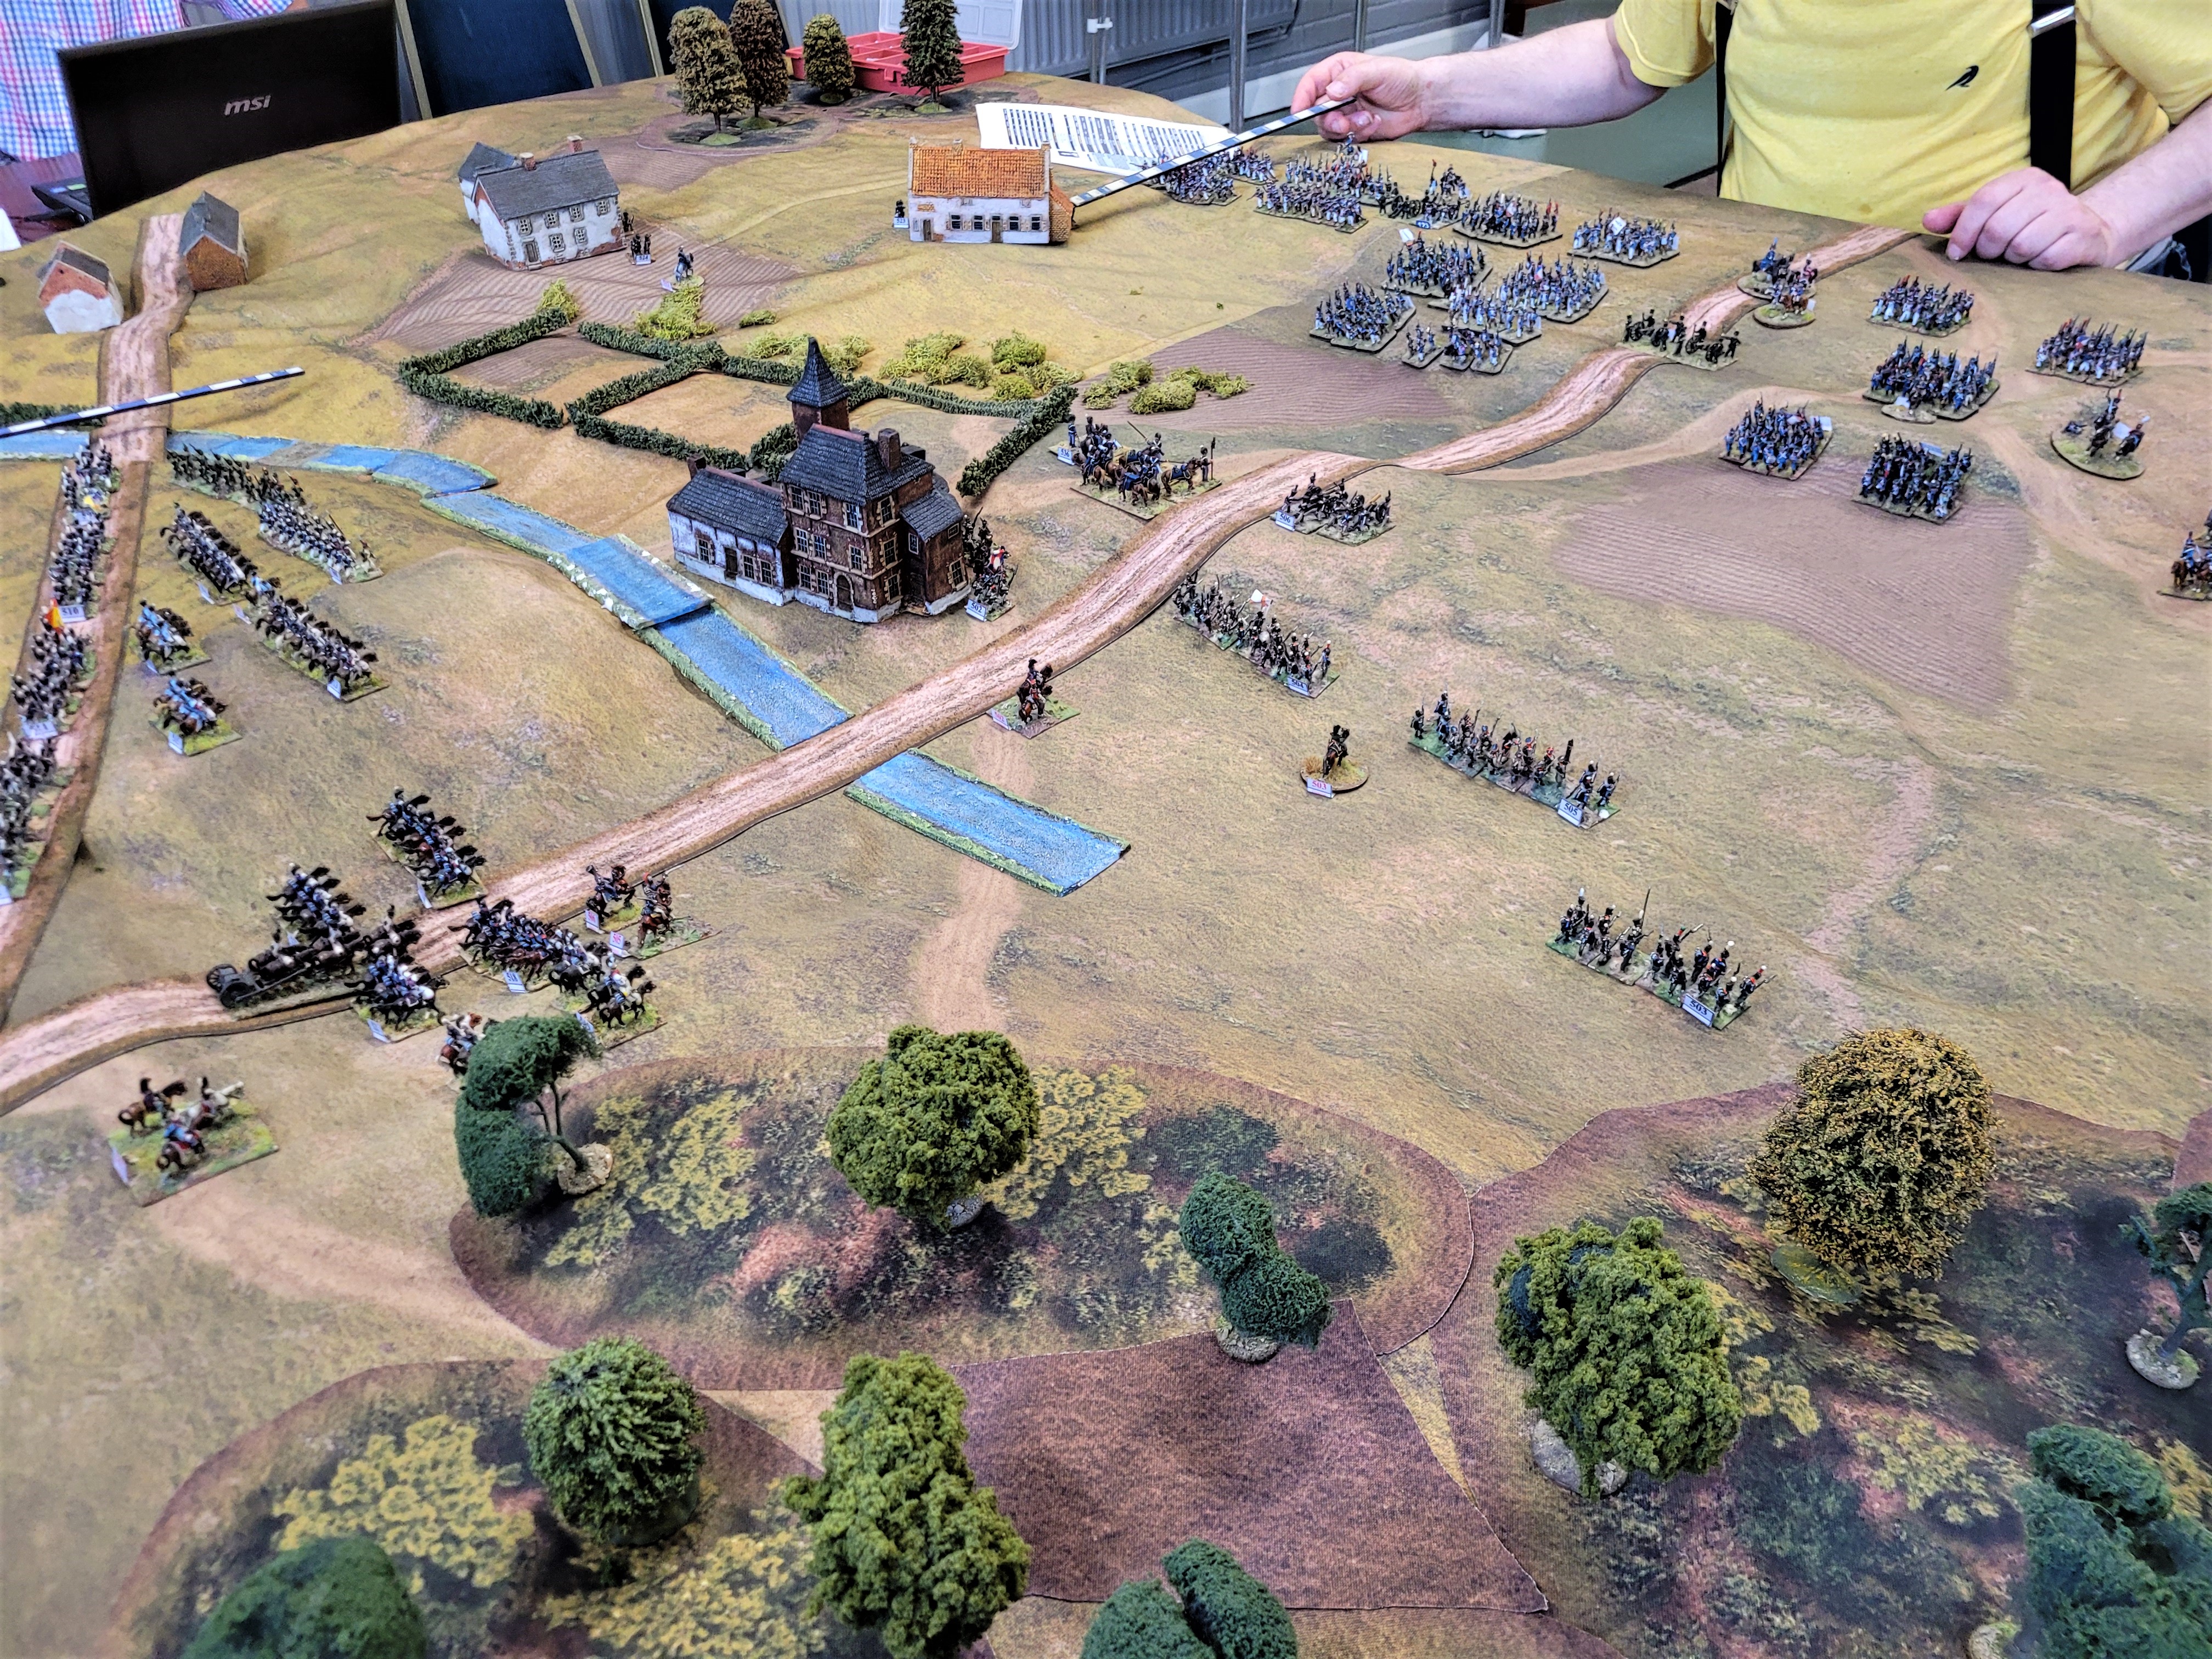 |
| The Prince of Orange deploys his troops, as Major General Willem Frederik van Bylandt deploys his battalions on the ridge to the right of Gemioncourt, supported by the rocket troop and his foot guns, up on the ridge, centre of picture. Major General Alexander d'Aubremé leads his brigade to occupy the high ground to the rear of the stream, back left, whilst the Dutch-Belgian cavalry support in the centre-rear. |
No plan survives contact with the enemy: no narrative survives contact with a war gamer.
General de Division Hippolyte Piré’s light cavalry Division deployed on the western flank, Jerome’s Division took the ground on their right, with Foy’s Division occupying the centre right position. The Guard Chasseur a Cheval were deployed rather hopefully on the French right flank.
The Anglo-Allied commander had no choice but to deploy d'Aubremé’s Dutch Belgian Brigade in manoeuvre column on the Nivelles a Namur Chaussée, stepping out to Sombreff as ordered. Collaert’s cavalry Division was deployed as a central reserve, with the Carabinier Brigade on the right of the Brigade. Bylandt’s brigade was deployed in the centre with the 27th Jägers occupying Bossu wood. The 7th Line Battalion garrisoned the farmstead of Gemioncourt (classified as a stone stronghold) with the remaining three battalions in support behind the low ridge line.
A small Brunswick contingent of two Avant Garde battalions with a rocket battery attached had also arrived. The Avant Garde battalions occupied Le Rat and Piedmont (classified as BUA) and the rocket battery together with Bijlevelld’s foot battery were deployed on the forward ridge on either side of the Charleroi a Brussels Chaussée.
 |
| The Prince of Orange nearest to camera oversees the deployment of his heavy cavalry supporting Bylandt's infantry forward on the ridge ahead. |
Just as the French were about to launch their attack with a general advance, Ney received the unwelcome news that discipline had broken down in Soye’s brigade and they were looting the French baggage. He then received a dispatch from Colonel Eugene de Beauharnais of the Guard Chasseur, informing him that by order of the Emperor, the Guard had been ordered to reverse their direction of march. The French commanders resignedly removed the offending units.
It quickly became apparent that the main thrust of the French attack would be over the gently undulating terrain in the Anglo- Allied centre and the attack on La Rat and Piermont on the eastern flank was not to be pressed home. Bossu wood, on the western flank, was to be bypassed.
 |
| Marshal Ney, centre, encourages the columns of Baudin's brigade forward up the ridge ahead as General de Brigade Wathiez's lancers cover their left flank and the woods beyond. |
Bijlevelld’s foot battery and the Rocket troop deployed on the ridge in front of Gemioncourt commenced a steady fire on the advancing French columns. I was hoping that the Rocket troop would be as entertaining as a night goblin doom diver (ooops - sorry Chairman). Unfortunately, under the personal direction of the Prince of Orange, who wanted to show off his new toys, the Rocket Troop had been deployed too far forward to be effective, and it was quickly forced to retire giving the French a foothold on the ridge.
The battalion in front of Bijlevelld’s battery, the 1/100em Regiment de Ligne, fared less well and were quickly routed losing 156 men out of 423. Further west along the ridge the French battalions were met by steady musketry volleys from the two Dutch Belgium battalions which had advanced to the ridge line. This halted the French columns which then attempted to form line only to be driven down the slope in disarray by a well-disciplined counter charge. It was a classic Peninsula action.
Further west the ground between the ridge and Bossu wood had been defended by a Dutch Belgian Militia battalion in square which manoeuvred expertly to deny the French cavalry any chance of breaking through. It was almost as if they were a British Guard battalion - which of course, characteristic wise, they were.
 |
| The battalions of General de Brigade Baron Jamin's deploy into line as they receive galling skirmish fire from the Brunswick Advance Guard under Major von Rauschenplatt occupying the buildings in Pireaumont. |
The French cavalry were also discomforted from flanking fire from Bossu wood and after a rather ineffective effort to drive out the Belgium Jägers with carbine fire, Piré decided to pull back his Division, but not before General de Brigade Wathiez bought a nasty stomach wound.
To alleviate pressure on the French centre, which was collapsing, Gauthier’s Brigade of Foy’s Division advanced in earnest on La Rat, forcing the Avant Guard to withdraw. But where were the desperately needed reinforcements to stabilise the position and take advantage of this small gain on the French right?
 |
| Rob and Mark discuss their options on how to dislodge the Dutch-Belgian infantry disputing the ridge line to the right of Gemioncourt as the Allied heavy cavalry advance to their support. |
Soye had failed to re-establish any form of discipline and was to take no part in the battle. And Kellerman’s Heavy Division? It was the last straw for Ney to find out that the courier he had despatched left in in such a hurry that he had left without the orders.
 |
| As the French infantry advance up the slope (centre right) their supporting cavalry try to turn the Dutch Belgian infantry's flank only to be confronted by a Dutch militia battalion in square and to receive flanking fire from Dutch jaegers occupying Bossu Wood to their left. Dutch Belgian heavy cavalry support from the rear, left of picture. |
Ney had no choice but to call off the attack, whilst the Prince of Orange settled down to pen his Quatre Bras despatch. Four days later, on the 20th of June, ‘Great and Glorious News’ was being read on the streets of London.
The Orders of Battle at the close of play (Casualties and affected commanders and units are highlighted);
Quatre Bras 16th June 1815
As of Game Turn: 5
Army William, Prince of Orange GCB
[501] General William, Prince of Orange GCB - Active C [1400 paces]
Division Baron David Hendrik Chassé - Defend
[502] Lieutenant General Baron David Hendrik Chassé - Active B+ [950 paces]
Brigade Willem Frederik van Bylandt - Defend
[503] Major General Willem Frederik van Bylandt - Active B [500 paces]
[501] 27th Light Battalion 2/ 788 B+ Esk+ ( 3) Good Tiring
[502] 7th Line Battalion 0/ 689 B sk- Ex'lent Fresh
[503] 5th National Militia Battalion 23/ 441 A- ( 2) Good Tiring
[504] 7th National Militia Battalion 45/ 599 A- ( 2) Ex'lent Acceptable
[505] 8th National Militia Battalion 52/ 472 A- ( 3) Good Tiring
[506] van Bijlevelld Foot Art Batt 5/ 105 [ 4] C+ ( 6) Good Exhausted
Brigade Alexander d'Aubremé - Defend
[504] Major General Alexander d'Aubremé - Active C [400 paces]
[507] 36th Light Battalion 0/ 631 C- Esk+ Good Fresh
[508] 3rd Line Battalion 0/ 611 C- sk- Good Fresh
[509] 12th Line Battalion 0/ 431 C- sk- Good Fresh
[510] 13th Line Battalion 0/ 664 C- sk- Good Fresh
[511] 3rd National Militia Battalion 0/ 477 D+ sk- Average Fresh
[512] 10th National Militia Battalio 0/ 579 D+ sk- Average Fresh
[537] Krahmer Horse Artillery Batt 0/ 200 [ 8] C+ Good Fresh
Division Jean Antoine de Collaert - Attack
[505] Lieutenant General Jean Antoine de Collaert - Active B [875 paces]
Brigade Albert Dominicus Trip - Attack
[506] Major General Albert Dominicus Trip - Active B [450 paces]
[517] 1/1st Carabiniers 0/ 210 C- Esk+ Good Fresh
[518] 2/1st Carabiniers 0/ 210 C- Esk+ Good Fresh
[519] 1/2nd Carabiniers 0/ 188 C- Esk+ Good Fresh
[520] 2/2nd Carabiniers 0/ 186 C- Esk+ Good Fresh
[521] 1/3rd Carabiniers 0/ 186 C- Esk+ Good Fresh
[522] 2/3rd Carabiniers 0/ 187 C- Esk+ Good Fresh
Brigade Jean Baptiste, Baron van Merle - Attack
[507] Major General Jean Baptiste, Baron van Merle - Active B [450 paces]
[513] 1/5th Light Dragoons 0/ 300 C- Esk+ Good Fresh
[514] 2/5th Light Dragoons 0/ 300 C- Esk+ Good Fresh
[515] 1/6th Hussars 0/ 180 C- Esk+ Good Fresh
[516] 2/6th Hussars 0/ 180 C- Esk+ Good Fresh
Corps Duke of Brunswick En Route
[508] Lieutenant General Duke of Brunswick - Active C+ [1400 paces]
Brigade Wilhelm Treunch von Butlar - En Route
[509] Lieutenant Colonel Wilhelm Treunch von Butlar - Active C [400 paces]
[525] Lieb Battalion 0/ 565 A- Esk+ Ex'lent Fresh
[526] 1st Light Infantry Battalion 0/ 668 D+ Esk+ Good Fresh
[527] 2nd Light Infantry Battalion 0/ 621 D+ Esk+ Good Fresh
[528] 3rd Light Infantry Battalion 0/ 691 D+ Esk+ Good Fresh
Brigade Friedrich von Specht - En Route
[510] Lieutenant Colonel Friedrich von Specht - Active C- [350 paces]
[529] 1st Line Battalion 0/ 586 D- sk- Good Fresh
[530] 2nd Line Battalion 0/ 500 D- sk- Good Fresh
[531] 3rd Line Battalion 0/ 667 D- sk- Good Fresh
[532] Moll's Foot Battery 0/ 200 [ 8] C Good Fresh
Brigade Von Cramm - En Route
[511] Major Von Cramm - Active C- [350 paces]
[533] Uhlans 0/ 235 C- Esk+ Good Fresh
[534] 1/2nd Hussars Regiment 0/ 340 C- Esk+ Good Fresh
[535] 2/2nd Hussars Regiment 0/ 347 C- Esk+ Good Fresh
Regiment von Rauschenplatt - Defend
[512] Major von Rauschenplatt - Active C+ [175 paces]
[R] [ 523] 1st Batt Advance Guard 26/ 304 B Esk+ ( 5) Good Acceptable
[524] 2nd Batt Advance Guard 0/ 330 B Esk+ Ex'lent Fresh
[536] 2nd Rocket Troop 11/ 139 [ 2] B ( 4) Good Tired
Strengths:
losses/active
148/11314 Bayonets
0/3049 Sabres
16/644 Artillerists
4/22 Cannon
164/15007 Total of all arms
10 Colours present
[D] Denotes dispersed
[Y] Denotes in rout
[R] Denotes Halted in disorder, in retirement or in retreat
[W] Denotes no advance unless accompanied by an officer
Quatre Bras 16th June 1815
As of Game Turn: 5
Wing Michel Ney
[101] Marechal d'Empire Michel Ney - Active B- [1400 paces]
Regiment Eugene de Beauharnais – Recalled by the Emperor
[102] Colonel Eugene de Beauharnais - Active B+ [250 paces]
[143] 1/2 Chasseur de Cheval 0/ 250 A+ Esk+ Ex'lent Fresh
[144] 3/4 Chasseur de Cheval 0/ 246 A+ Esk+ Ex'lent Fresh
[145] 5/6 Chasseur de Cheval 0/ 248 A Esk+ Ex'lent Fresh
Corps Honoré Charles Reille
[103] General de Division Honoré Charles Reille - Active C+ [1200 paces]
[133] 7/2em Artillerie a Pied 0/ 200 [ 8] C- Good Fresh
Division Jérôme Bonaparte - Attack
[104] General de Division Jérôme Bonaparte - Active D [575 paces]
[112] 3/2em Artillerie a Pied 0/ 200 [ 8] C ( 1) Good Fresh
Brigade Bauduin - Attack [No Advance]
[105] General de Brigade Bauduin - Active C [350 paces]
[D] [101] 1/1er Régiment e Legere 300/ 225 C+ Esk+ Broken Exhausted
[D] [102] 2/1er Regiment de Legere 313/ 308 C+ Esk+ Broken Exhausted
[W] [103] 3/1er Regiment de Legere 6/ 609 C+ Esk+ Good Fresh
[W] [104] 1/3em Regiment de Ligne 0/ 578 C- Esk+ Good Fresh
[W] [105] 2/3em Regiment de Ligne 0/ 569 C- Esk+ Good Fresh
Brigade Soye – Looting baggage train
[106] General de Brigade Soye - Active C+ [400 paces]
[106] 1/1er Regiment de Ligne 0/ 587 C Esk+ Good Fresh
[107] 2/1er Regiment de Ligne 0/ 592 C- Esk+ Good Fresh
[108] 3/1er Regiment de Ligne 0/ 587 D+ Esk+ Good Fresh
[109] 1/2em Regiment de Ligne 0/ 593 C- Esk+ Good Fresh
[110] 2/2em Regiment de Ligne 0/ 585 C- Esk+ Good Fresh
[111] 3/2em Regiment de Ligne 5/ 582 D+ Esk+ ( 1) Good Fresh
Division Maximilien Sebastien Foy - Attack
[107] General de Division Maximilien Sebastien Foy - Active C [725 paces]
[123] 1/6em Artillerie a Pied 0/ 200 [ 8] C ( 1) Good Fresh
Brigade Gauthier - Attack
[108] General de Brigade Gauthier - Active C [350 paces]
[113] 1/92em Regiment de Ligne 14/ 539 C- Esk+ ( 9) Good Tiring
[114] 2/92em Regiment de Ligne 5/ 460 D+ Esk+ ( 4) Good Acceptable
[115] 1/93em Regiment de Ligne 2/ 469 C+ Esk+ ( 1) Average Fresh
[116] 2/93em Regiment de Ligne 0/ 472 C+ Esk+ Good Fresh
Brigade Baron Jamin - Attack
[109] General de Brigade Baron Jamin - Active C [350 paces]
[D] [ 117] 1/100em Regiment de Ligne 156/ 267 C+ Esk+ Broken Acceptable
[118] 2/100em Regiment de Ligne 0/ 424 C- Esk+ Good Fresh
[119] 3/100em Regiment de Ligne 0/ 246 D+ Esk+ Good Fresh
[120] 1/4em Regiment de Legere 24/ 509 B- Esk+ ( 5) Average Acceptable
[121] 2/4em Regiment de Legere 32/ 504 B- Esk+ Good Fresh
[122] 3/4em Regiment de Legere 1/ 534 B- Esk+ Good Fresh
Division Hippolyte Piré - Attack
[110] General de Division Hippolyte Piré - Active C [800 paces]
[124] 2/4em Artillerie a Cheval 0/ 150 [ 6] C ( 1) Good Fresh
Brigade Pierre Antoine François Huber - Attack
[111] General de Brigade Pierre Antoine François Huber - Active B- [400 paces]
[125] 1/1er Regt. Chasseur a Cheval 4/ 242 C Esk+ Good Fresh
[126] 2/1er Regt. Chasseur a Cheval 0/ 242 C Esk+ ( 1) Good Acceptable
[127] 1/6em Regt. Hussars 0/ 280 C- Esk+ ( 2) Good Fresh
[128] 2/6em Regt. Hussars 39/ 241 C- Esk+ ( 2) Average Fresh
Brigade Wathiez - Attack [No Advance]
[112] General de Brigade Wathiez - Dressing wound C [400 paces]
[R] [129] 1/5em Regt de Lancier 29/ 171 C- Esk+ Broken Acceptable
[W] [130] 2/5em Regt de Lancier 0/ 198 C- Esk+ Good Fresh
[R] [131] 1/7me Regiment de Hussards 71/ 129 C- Esk+ Broken Acceptable
[W] [132] 2/7me Regiment de Hussards 26/ 179 C- Esk+ Average Fresh
Corps François Étienne de Kellermann Courier arrived without message
[113] General de Corps François Étienne de Kellermann - Active B+ [1400 paces]
Division L'Heritier –
[114] General de Division L'Heritier - Active B [875 paces]
[142] 3/2em Artillerie a Cheval 0/ 150 [ 6] C Good Fresh
Brigade Picquet - Support
[115] General de Brigade Picquet - Active C [400 paces]
[134] 1/2me Regiment de Dragons 0/ 296 C Esk+ Good Fresh
[135] 2/2me Regiment de Dragons 0/ 294 C Esk+ Good Fresh
[136] 1/7me Regiment de Dragons 0/ 254 C Esk+ Good Fresh
[137] 2/7me Regiment de Dragons 0/ 246 C Esk+ Good Fresh
Brigade Guiton - Support
[116] General de Brigade Guiton - Active B- [450 paces]
[138] 1/8em Regt. de Cuirassiers 0/ 150 C Good Fresh
[139] 2/8em Regt. de Cuirassiers 0/ 150 C Good Fresh
[140] 1/11em Regt. de Cuirassiers 0/ 150 C+ Good Fresh
[141] 2/11em Regt. de Cuirassiers 0/ 175 C+ Good Fresh
Strengths:
losses/active
858/10239 Bayonets
169/4141 Sabres
0/900 Artillerists
0/36 Cannon
1027/15280 Total of all arms
12 Colours present
[D] Denotes dispersed
[Y] Denotes in rout
[R] Denotes Halted in disorder, in retirement or in retreat
[W] Denotes no advance unless accompanied by an officer
The game was played using the computer moderated system, Carnage and Glory II, created by Nigel Marsh.
I have dabbled in computer moderated Wargames, from Hard Pounding to Iron Duke and have always approached the games with a sense of keen anticipation which would inevitably turn to frustrations and ultimately disappointment in the system.
Don’t get me wrong. Things going pear shaped in a game is all part of the fun, but events have to be believable. An officer failing to find another officer in a wood when they are a few meters apart, a first and subsequent volley that misses absolutely everything, an officer who leaves the battlefield sick only to return at the start of the next turn fit as a fiddle - and then leaves sick again at the end of the turn, an officer repeatedly failing to receive an order when he is next to the commanding officer delivering it. All these things have happened, which is why I would lose faith in the system. No wonder wargamers seem to have a love hate relationship with computer moderated wargame systems.
So what about Carnage and Glory II? Well, it’s brilliant. Stuff happens, yes, but it drives the narrative and puts flesh on our lumps of metal, and I can believe it. In our game I can imagine Ney absolutely at the end of his tether with the hand that fate had dealt him, going into an absolute rage and venting his frustration and fury on the luckless courier. No wonder the poor chap left in such a hurry and forgot the order.
In addition to it being believable, the support offered by Nigel Marsh is outstanding. No matter how naïve the question, Nigel’s responses are quick, helpful and detailed. Added to this the excellent knowledge base in the IO Group forum (link below), and the after sales support can only be described as superb.
 |
| Carnage & Glory II Computer Moderated Wargame Rule Systems https://groups.io/g/carnageandgloryii |
If you want to know more about Carnage and Glory II and how it handles fatigue, moral and playing tips, have a look here:
 |
| JJ's Wargames - Carnage & Glory - What's it all about then? |
Do I like marmite? I certainly do! Why not give it a try.
My thanks to the players, Rob and Mike (French forces) and JJ & Liz (Prospective new club member) (Anglo- Allied forces) for providing such an entertaining day of gaming with the usual good humour and tolerance (especially on the French side)
Ferraris Map (see Link) Ferraris
Map
Terrain mat and roads Tiny Wargames
Buildings Hovels
Figures AB and MiniFigs
Editors Postscript:
I haven't played C&G for at least five years now and it was so nice to be reacquainted with an 'old friend' after having spent the time in between focussed on much different themes (Romano-Dacians and Napoleonic Ships for example) and so it was great fun digging out some of my French infantry and commanders to support David's game; which reminded me of what a really unique set of rules Nigel Marsh has developed with the stable of Computer Moderated game systems covering other horse and musket themes as well as Napoleonics and now with a campaign system to support them.
It was a nice change to be away from the laptop and experiencing the fog of war of being a tabletop commander, issuing orders to the troops and overseeing their combat deployment but not really sure of how exactly things were going, as various units fell back or broke in rout or retreat, only hinting at the carnage and glory that was evolving in those confrontations between our metal miniature warriors.
I should add that compiling this AAR from David provided me with a lot of entertainment as, playing the Prince of Orange, I had no idea that Bylandt's brigade were the formidable force they surprised all of us to be during the game and of course had no idea of the problems Rob and Mark were contending with commanding the French other than gathering from their disappointed expressions that much needed reinforcements had gone astray.
The game C&G creates is quite different and, in my humble opinion, much more realistic of the situation experienced by the real life historical commanders and their troops and is one, paper based rule sets struggle to recreate, because of the need to constantly weigh up all the factors that can stress out and degrade combat units when close to and in the face of the enemy with the constant threat to life and limb, something computer moderation is uniquely able to do.
If you haven't tried this way of playing your games yet, I would reiterate David's comments. C&G II is perhaps the best system around for getting this kind of gaming experience and is well worth playing at least once in any gamers time in the hobby.
JJ


