Labels

Showing posts with label Koenig Krieg. Show all posts

Tuesday, 13 June 2017

Seven Years War - Koenig Kreig


It was a while back, in 2013 that Mr Steve graced the club with his 15mm Seven Years War collection using Koenig Krieg (KK).

http://devonwargames.blogspot.co.uk/2013/09/seven-years-war-koenig-krieg.html

Since that game he has been adding to his collection of French/Saxon/Swiss and British/Hanoverians with Russians and Ottomans.

At this months meeting we got to play with the larger former collection and threw together a meeting engagement using KK.


As you can see we had quite a few toys on the table, numbering eleven brigades on each side, with the Anglo/Hanoverians lined up either side of the small village to the right of picture.

The view along the French lines with dragoons, heavy cavalry and elite 'Maison du Roi' troopers anchoring their right flank
The game was very much a throw down 'play from where you start affair' as the terrain was quickly laid out with undulating ground, a central road and small hamlet in amongst light woods.

Each side took it in turns to set up a brigade and the French planned to refuse their left, with the stronger units set up on the right and opposite the village.

The Allied cavalry deployed against the French right flank
Both sides went very traditional in placing their cavalry on the flanks and in true wargaming fashion nobody kept a brigade or two in reserve.

The cavalry clash first as the French right closes on the Allied line
The first forces to clash were the cavalry opposite each other on the French right flank, and after some early initial success the Allies gradually got the upper hand in the struggle that lasted the whole game and left victor and vanquished well and truly beaten up.

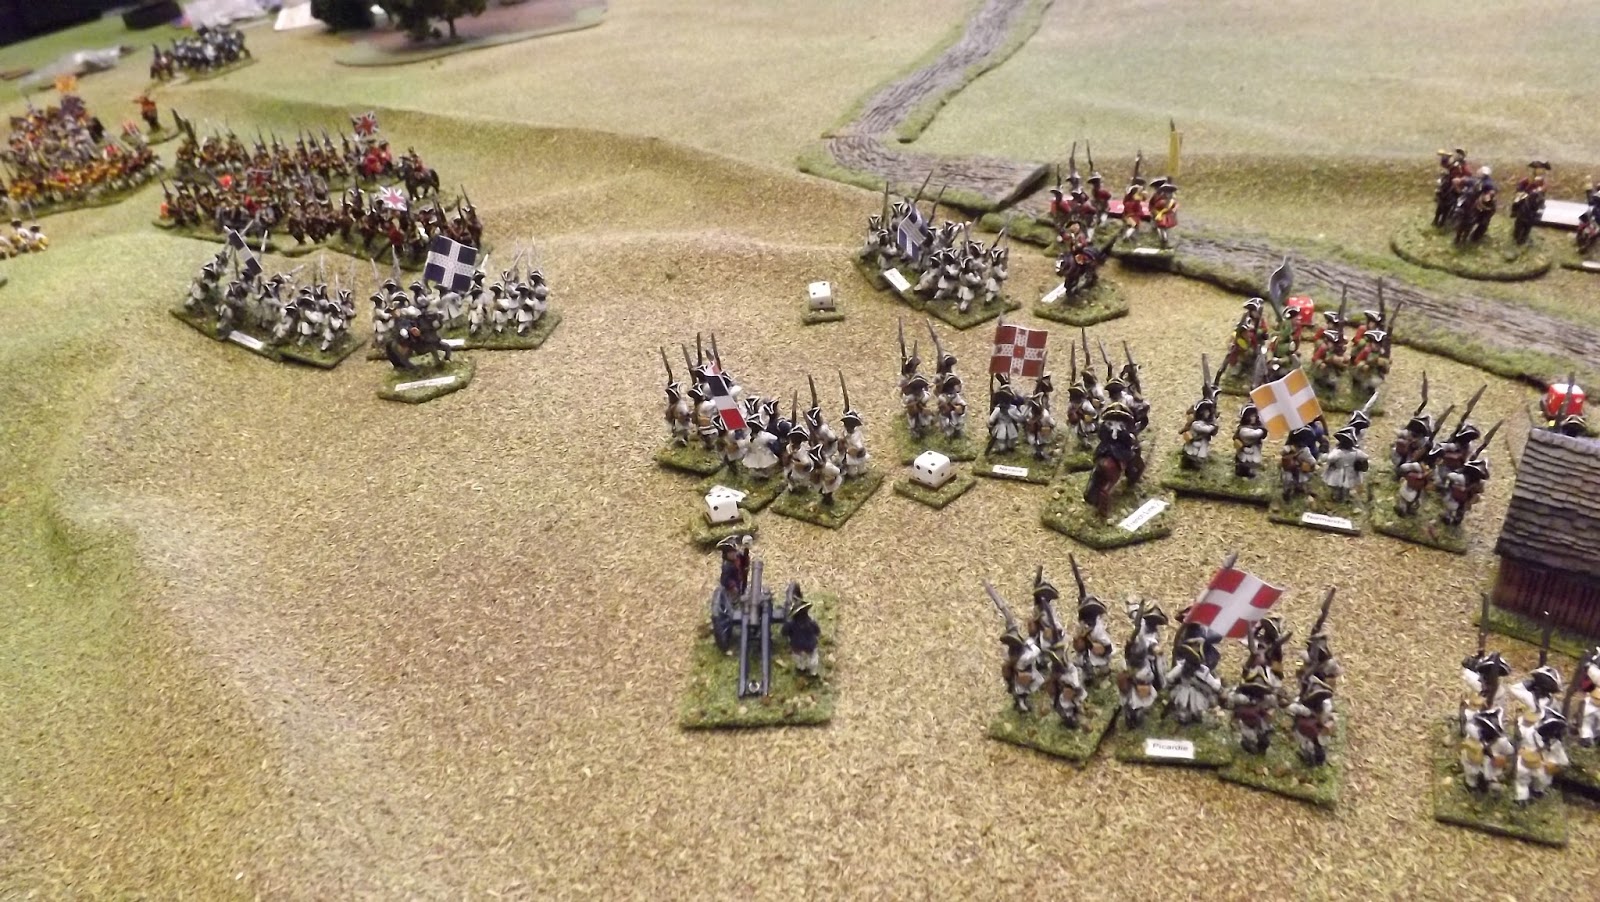
The Swiss brigade advances on the Hanoverians supporting the troops garrisoning the village
As the cavalry got stuck in the French refusal of their left meant that the first infantry fighting flared up close to the village and in the centre leaving the British and allied troops to do all the marching out on their right flank.

The Saxon brigade advances towards the Allied line

As the cavalry tussle starts in the background the two lines close around the village
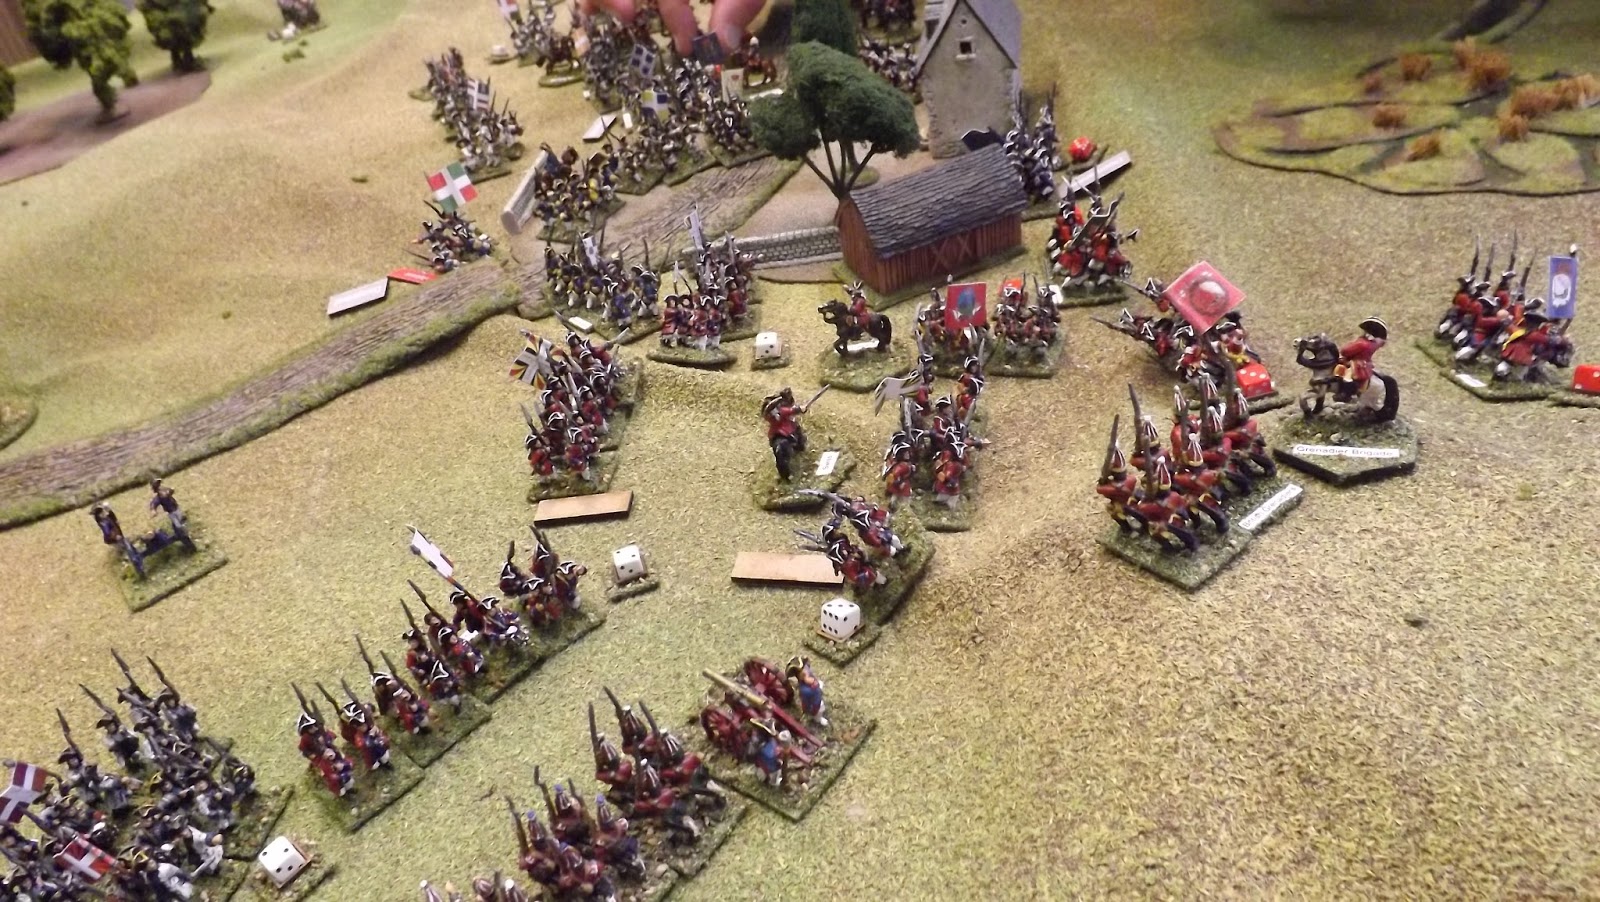
The fighting around the village involved the elites from both sides as Swiss line, French and British grenadiers got up close and personal, plus the bayonet work became even busier as the French stormed into the village and started a remorseless push into the centre.

Allied cavalry forced back in the initial exchanges

Both sides make gains in the first cavalry combats opening gaps in each others line
As the fighting around the village grew in intensity, the first Allied units started to retreat which was only just held in check, with the rallied units returned back into the fray to resist the French onslaught.

The French and Swiss prepare to assault the village
The Allied force had the quality but the French made up for that in numbers and as the saying goes, numbers have a quality of their own.

The cavalry oblivious to the infantry battle away to gain superiority
The Franco-Swiss forces fighting around the village were forced to keep an eye on both flanks as the cavalry battle swung back and forth on the right and the British marched closer to the left eager to get to grips and force the issue elsewhere along the line.

The infantry close in and the volley fire commences closely followed by the steel

The British brigade advances on the the refused French centre left
British fire-power in line can be formidable but not on this occasion and time and again the French were able to force the issue in close combat.

British cavalry supported the Allied attack on the refused French left flank

And still the cavalry on the right flank went at it with the fighting lasting all day

The French force their way into town amid bitter street fighting
Suddenly a crack appeared in the centre of the Allied line as several battalions broke and fled leaving a yawning gap between the remaining Allied units.

The opposing lines go toe to toe supported where possible by light guns

The Swiss infantry push their way forward in support of the French troops fighting in the village
If the break in the line wasn't bad enough, the village was close to falling to the French and the Swiss on the other side of it had repulsed the attack of the British grenadiers.

Suddenly the Allied line around the village looked vulnerable

The British threw in their Grenadier brigade in an attempt to stem the advance of the Swiss

Meanwhile the British and their allies take the fight to the French left flank
Apart from some sharp fighting by the British cavalry versus their French counterparts out on the Allied right their was little combat affected before the collapse of the centre and as our game closed with the Allied line in some disorder there would have been little else for these British troops to achieve except to act as a rear guard to the other forces now in full retreat.

The vulnerabilities exposed in the Allied line suddenly turned into a gap as a brigade broke and fled in the centre

The Allied troops attacking on the French refused flank were now separated from their comrades around the village 

French and Swiss infantry maintain their grip on the Allied left flank as the British grenadiers are forced back

However the French did not have it all their own way as the Allied cavalry finally broke the opposition, but leaving themselves badly battered

The Allied line is broken in the centre and the village looks likely to fall into French control

The Allied line continues to lose battalions 
As you can see we had a lot of toys on the table and the rules performed reasonably well with the numbers involved, although there are some frustrations with their layout that does nothing to make a quick finding of various rules easy, this despite two of us overseeing the rule looking up process whilst the others pressed on with other parts of the game.

The British on the French left press on regardless
That said I think we all enjoyed the game they created and we whistled along with them quite well considering we hadn't played them for a while and Mr Steve's eye candy collection made the experience better.

The Allied right flank is starting to look a bit messed up

The French left flank resists the Allied assault

French troops start to clear the village

The Allied centre is defeated as French troops occupy the vacated ground
I think at a later stage we will give the collection a go with Carnage & Glory and see what we can do with them.

With their centre and left flank defeated the British and their remaining allies can only look to make a fighting withdrawal
Thanks to Greg, Steve M, Nick, Ian and Mr Steve for providing the fun.

Sunday, 15 February 2015

Seven Years War - Koenig Krieg

Hanoverian Infantry
This month's meeting at the DWG, saw "Mr Steve" get his lovely SYW toys out on the table to fictional clash between an Anglo/Hanoverian - Allied army vs his Franco-Swiss using the rule set Koenig Krieg


The last time we played with these rules was back in September 2013, so needless to say we were a bit "ring rusty" when we got going, and some of us had never played the rules at all. If you want to get a better idea about them then follow the link to our previous game where Steve H posted a bit of an overview.
http://devonwargames.blogspot.co.uk/2013/09/seven-years-war-koenig-krieg.html

One of the principle drivers in the rules is the gaining of the initiative and using it to do something with your units immediately or to force your opponent to commit to an action before they necessarily would have chosen to do so. Actions are therefore not simultaneous and the classic situation is to fire before your opponent thus hopefully inflicting casualties that reduce the return fire, or to force an opponent to use his initiative with a force that allows you to approach to a closer range without interference.

In this battle the Allies were plus one on a d6 roll vs the French straight d6, giving the Allies a slight advantage.

French line to the left, Allied to the right - "here I am, stuck in the middle with you!"
As you can see in the picture above, the two sides faced each other across couple of valleys one with a town in the centre the others on each flank being broken with woods on the valley floor.

The French on the left of picture chose to keep their better Swiss infantry in reserve, with the Grenadier brigade nearest to camera, their basic French infantry and levies in the centre forming two brigades and their Foreign allied brigade further along, As with the Allies the French massed their cavalry on their left flank facing off against their Allied counterparts.

French Grenadiers hold the extreme French right flank

French line infantry with artillery support
The terrain caused both armies to choose a similar deployment. The interest in the game developed as the two armies wrestled to gain the upper hand in different sectors of the battle. The choices made in the initial deployment started to influence the success gained, or not, as the game went on.

French cavalry massed on the left flank
The only off table reserve force was held by the French, looking for an opportunity to force an advantage in the town sectors or to support an attack on the Allied left flank using the next best brigade in the French army, the Grenadiers.

Allied massed cavalry massed on the Allied right flank
The beginning of the battle saw the two armies seeking to grab a terrain advantage in the centre table area. The town sectors and hills gave advantages in protection and combat and became valuable pieces of real estate.

Hanoverian infantry and artillery massed in the centre
The French despite their initiative disadvantage managed to make good use of their successes by doubling up to the town and grabbing two thirds of the buildings, and their cavalry getting the best views out over the lower lying land.

A small but very effective British brigade of infantry with their heavy dragoons beyond the next infantry brigade

The French line infantry and Hanoverian Guards fought for control of the town

The Allied force had mixed success in the early clashes with their cavalry winning the first melees and pushing the French off their hills.

The French got possession of more of the town and had more artillery in support
The Hanoverian Guards sent into contest the town leaving their lower quality line comrades to defend in the open, had a torrid time as French guns and line infantry occupying more of the buildings poured on a withering fire that wore down the large elite battalions as the game progressed. The French were then moving fresh infantry into the towns to relieve damaged units and thus keep up the attrition.

More Hanoverian infantry held back to stop any flanking move on the Allied left 

The Hanoverian infantry had a small toe hold in each town sector 
The Allies sought to take advantage of their early success with their cavalry, by following up with the British infantry and break the Foreign brigade in the French centre.

The British and Allied infantry prepare to move forward in support of their cavalry to their right
Unfortunately the French grabbed the initiative pouring in galling cannon and infantry fire onto the British line and disrupting their attack.

The Allied cavalry make a general move towards the French

British cavalry break though onto the ridge forcing the French Foreign brigade to turn, whilst British infantry move forward
In addition the French cavalry started to win a few melees and cause the French left to stabilise just as the French Grenadiers and Swiss Line started to develop their attack to the right of the town.

In response to the cavalry attacks pressed on the French left, the Swiss and French Grenadiers attack the Allied left

The British infantry bring up artillery to support their attack in the centre right
French artillery played on the four battalions of Hanoverian line infantry, causing casualties on two of them as the eight battalions of Franco Swiss infantry closed on them. Meanwhile the fighting in the town was swinging to the French line infantry and with a rousing cheer the French charged in a bayoneted the surviving Hanoverian Guardsmen, clearing the sector nearest the French Grenadiers of Allied Infantry.

As the French infantry gain the upper hand with the Hanoverian Guards in the town, the Swiss lead the move to flank it
However it all proved too little too late as the janitor was threatening to lock us in and I had to get back to cook tea.

The Hanoverian line comes under French artillery preparation fire 
So based on the final situation who do you think would have grabbed the battle honour had we been able to play on?

Leave your thoughts on a comment.

The French attempt to stalemate the Allied cavalry attacks whilst their infantry start to apply pressure on the Allies left flank
Thanks to Mr Steve for bringing his figures along and running the game, or should that be "herding cats"? Also thanks to Ian, Steve L, Nick and Tom for playing.