Labels

Showing posts with label Chain of Command. Show all posts

Saturday, 19 October 2024

Chain of Command - Normandy Training for Version Two.

Inspired by recent news of the forthcoming v2.0 for the stalwart WW2 ruleset Chain of Command by Too Fat Lardies, a game was laid on at club to teach one of our newer members how to play. No matter that the rules will be updated soon, as the forthcoming changes are ‘polishing’ improvements and the core mechanics will continue in its current form. Despite both having 15mm forces on the painting table I wanted to dust off my own knowledge of how to play too, so we used my existing 28mm forces until such time as the smaller scale ones are ready.


I put together a Normandy style layout before going to the club, and took photographs to aid reconstruction. This gives me lots of time to try out different things when creating a table, and also speeds things up once I get to the club as I can just share the photographs with the other players and we all chip in to recreate what’s in the photo.


After the dark art of the patrol phase (I know it’s important, but I’ve never seemed to fully master
where to get my jump-off points to be most useful!) both the Americans and Germans had a good spread of deployment points across the width of the table, with the Germans having managed to push a bit further towards the river and therefore the centre of the table. 

American paratroopers deployed on their right flank as the first unit on the table and put themselves into overwatch. An opposing elite Fallschirmjäger platoon hid behind a hedge to block their advance.


Whilst being on overwatch was initially useful in trying to spot a sniper deployed in the church, the sniper failed to achieve much from then on and the paratroopers sent - in vain - a scout team to try and rouse their opposite number. 


In an attempt to find another route onto the other side of the table, the American players deployed first a machine gun team and then a mortar team into the centre behind a wall. Both became bullet magnets for German platoons deployed behind similar walls on the other side of the river.


With their superior output (2 x MG42 per platoon) the krauts soon reminded me why you don’t put support units out on their own. They broke and fell back, costing us morale points on the way.

With a few unfortunate rolls on the part of the Allies regarding injured Junior Leaders the game was over depressingly quickly. On the plus side Mark seemed to be picking the mechanics up remarkably well, so I had successfully taught him the game, just how to lose….

With a few hours ‘til hometime we decided to have a ‘do-over’. I positioned jump-off points without a patrol phase.

Trying a different tactic, we yanks tried a push on the left-hand side, deploying two full platoons there with a senior leader to whip them into shape, and a machine gun in the upper floor of the farmhouse to cover them.


In full acknowledgement that no plan survives contact the enemy we had to delay this to deal with an anti-infantry gun that had been placed on a hill and was trying to rain down hell on such a tightly grouped bunch.


To do this, a platoon of veteran paratroopers were deployed from the same centre point that had been the focus of fire in the previous game. Remembering the concept of suppressing fire, we managed to get the Germans to keep their heads down long enough to make a break for the gun.


Unfortunately they got stuck out in the open, with command dice failing to provide the pips needed to activate units to follow them. In the end they ran back towards the massed group of colleagues to try and lend weight to an assault on the American’s left side. 

Fate was not on our side, and despite the Germans throwing an incredible five dice all showing four…. 


…it proved not to be the ham-stringing we had hoped for. There were two senior leaders on the table for the Axis, and they activated so many MG42’s that our force morale plummeted once again.


A brief showing of armour looked like getting a few morale points off the Germans when they failed to destroy our M10 on first hit, but the poor infantry lost heart in the end, faced by overwhelming automatic fire from the Germans. In short, we had our pride handed back to us again.


No matter! A new convert was made for the church of Chain of Command, I dusted off my understanding of how to play too, and everyone enjoyed themselves.

Saturday, 15 June 2024

The Eightieth Anniversary of D-Day Commemorative Game - Chain of Command.


Editors Note:
The significance of the 6th of June 1944 cannot be overemphasised in its importance as the beginning of the final chapter of the Second World War in Europe and its immeasurable contribution to the Allied powers victory over the Axis powers as a whole, leading in the wake of their defeat to the establishment of a new democratic World order that faces significant challenges today as the generation that landed on the beaches of Normandy grow fewer every year.

Our county here in the south-west of England was in the cockpit of the invasion of Europe in 1944 with the US 28th and 4th Infantry Divisions training here and sailing from its ports and harbours and with the 101st Airborne flying from its airfields on the eve of D-Day, and with US troops training for landing on Utah Beach in April 1944 off Slapton Sands suffering more casualties (749 killed and 200 wounded) during Exercise Tiger at the Battle of Lyme Bay than they would lose on D-Day itself. 

Historical wargaming has a very unique capability of vividly retelling the story of the sacrifice made by 'The Greatest Generation' and allows those of us involved in the hobby, and in this instance the Devon Wargames Group, to pay our own tribute to their sacrifice with deep respectful gratitude that, whilst enjoying the games we play, everyone gets to walk away from the table, hopefully with a deeper appreciation of their efforts that freed the world of tyranny.

JJ

SCENARIO
The Allies have left the Normandy beaches behind them and are now pressing South and East to liberate more of occupied France. An American force is approaching a village which their scouts inform them contains a not insignificant German force comprising infantry and armour. 


The village itself covers the western side of the board. To the East are fields and woods. A road runs North to South through the centre and separates the village from the woods and fields to the East. Any armour on either side must enter within six inches of this road. The Americans close in on the village, their infantry sections are supported by an armoured platoon.


ACTION
The Americans' initial approach is tentative. They manage to set up a mortar concealed in a farm yard in front of the village. An infantry section advances down their far left flank, concealed by woods and an M5 Stuart tank positions itself on the road at the north side. The Germans quickly react calling for armour support and two Stug IIIGs appear together with a Pzkpfw 35H with 32cm rockets attached to its sides. 


The Stugs open fire on the Stuart tank and successfully knock it out. At this point one of the German players rolls four sixes. Not only does this mean it is the end of the turn and he will also be able to start the next phase, but it requires a dice roll on the random events table. The result is torrential rain which reduces visibility to just 18". Far from ideal for the German defenders who want to throw everything they have at the advancing Americans as they close in.


The Germans use this opportunity to run a section out from the village to take position behind a stone wall surrounding a field on their right flank. A PaK 40 gun is set up on the crossroads where the village street meets the north south road. The Americans continue to probe and a scout team separates from the section on the Eastern side and moves up through the woods. The Germans set up their command halftrack in woods on their base line near the Eastern end of the village and two Marder IIIs position themselves to the East of these woods. Perhaps wisely, the German side decides to spend a COC dice to end the turn. As a result the torrential rain ceases and visibility immediately improves.


The Americans have brought more armour in the form of two M4 Shermans and another Stuart into the fray. They also use a COC dice to move a friendly jump off point on the Eastern edge (their left flank) 18" towards the enemy positions. It is concealed behind woods and from this they launch two more rifle sections to support the one earlier deployed. These units emerge from the woods to target the German section positioned behind the stone wall. 


As they break cover, they are hit by rifle and LMG fire from the German section they were hoping to dislodge. In addition to this a tripod mounted HMG in on the first floor of a building overlooking the woods also opens fire. All three American rifle sections start to take casualties and shock also begins to accumulate.

While this action has been taking place on the Eastern side, German and Allied armour has been engaged in a long range slugfest with the Americans losing two Shermans. The Marders are unscathed, but the two Stugs have taken some damage and shock and one is forced to pull back. The Germans now take this opportunity to fire all the rockets from the Pzkpfw 35 H and all watch in wonder as they all end up evrywhere except where they were aimed. Fortunately there was no live stock in the fields where they land.


At this point in the game with most of the American armour completely out of action or with engine damage, and the infantry assault on their left flank being robustly repulsed, it looked like the Germans would carry the day and retain control of the village. However, the Americans were not yet beaten. As their infantry units are forced back into the woods, two LMG teams are deployed from the jump-off point behind the woods together with a Bazooka team. 


From the cover of the woods the LMGs target the German infantry behind the stone wall and inflict casualties and shock. At the same time the American mortar team in the farmyard successfully targets the German tripod HMG in the building causing a casualty and some shock. The Bazooka team target the nearest Marder and hit its more vulnerable side armour. Instead of using the Marder's mounted LMG to return fire, both Marders continue in their long range duel with two newly arrived Shermans on the North edge of the board.


When the German section behind the wall is forced to retreat due to excess shock, the two American LMG teams are able to turn their attention on the tripod HMG in the building. Eventually the HMG team breaks together with a section with a senior leader who were in the same building. Meanwhile the Bazooka team, having knocked out the first Marder start to target the second one beside it. Again hitting it in its weaker side armour.


It was now clear that with most of their armour knocked out or incapacitated and with two infantry sections breaking (including a Senior Leader), the German position was no longer tenable and a victory was awarded to the Americans.

A big thank you to Jason for planning the game and letting us use his wonderful models, buildings and terrain. He got the scenario beautifully balanced and was an excellent and very patient co-umpire.

Mike

Friday, 16 February 2024

French Indo-China - Dinassaut Commando Raid on Gian Khau 1948.


Background
We tend to think of the French position in Indochina as “a losing-hand”, that wasn’t always so. Following the post war reoccupation, the French pacified most of Indochina more or less. The Viet Minh found it hard to operate outside of their strongholds, in the face of superior French firepower and aggression. Only after the fall of China to Mao’s communist forces, did the Viet Minh have a safe-havens in to train and equip. 

Dinassaut Commandos

Today’s game is set in this earlier period and is a French Dinassaut raid on a village, used by the Viet Minh for logistics and training, along the River Day (Song Day). The village of Gian Khau is deep in Ninh Binh province and in the heart of Viet Minh resistance. 

The time is 04.30 on 2nd February 1948, the weather is clear and warm.


The Dinassat - Division Navale d’ Assaut (Naval Assault Divisions) was a riverine unit employed by the French Navy in Indochina; ten units were created by General Leclerc in 1947. Each Dinassault consisted of approximately 12 craft, often American landing craft modified with armour and using tank turrets or 81 mm mortars, to be employed as riverine artillery (source Wikipedia).

Riverine Monitor

Rules
We used Chain of Command by Two Fat Lardies, with the Vietnam and French Indochina supplements by Jason Sendjirdjian, see link below:

http://carportgaming.blogspot.com.au/

French Order of Battle
Six Command dice, one of which is red and counts for 1,2,3 & 4 only. All troops are elite.

Commando HQ
  • Officer (Snr Leader), SMG and grenades. 2 i/c Snr Sergeant (Snr Leader), SMG and grenades plus Medic.
Commando Stick One
  • Sou Sargeant (Jnr Leader), SMG and grenades
  • 8 commandos with SMG’s and grenades
Fire support team
  • Inferior Jnr Leader &
  • BAR with 3 crew
Commando Stick Two
  • Sou Sargeant (Jnr Leader), SMG and grenades
  • 8 commandos with SMG’s and grenades
Fire support team
  • Inferior Jnr Leader & BAR with 3 crew
Fire Support Team Three
  • Bipod MMG with 5 crew
Sapper Demolition Engineers
  • Sou Sargeant (Jnr Leader) carbine
Two Demolition Teams
  • 3 sappers, demolition charges and carbines per team
Riverine Monitor
  • 37mm gun, 81mm mortar and two MMG’s. All fire is long range.
Notes: troops that disembark at jetty deploy and move normally, those that disembark in the river
have no deployment bonus and move as difficult terrain. French troops are motivated and well equipped, the rules limiting hand grenades to not apply. Commandos will not surrender.

French Briefing and Objectives.
Gian Khau village is identified as a Viet Minh logistic and training hub. Gian Khau cannot be attacked by land due to the poor roads and many ambush positions. A paradrop was considered and rejected because extraction will be by via same roads. The newly formed Dinassaut forces have been allocated this task.

You will attack just before first light, taking advantage of the river mist to approach (visibility is limited to 10 inches at least to start with). The village is lightly held by local defence troops but recent aerial reconnaissance has been hotly engaged by ground machine gun fire; three possible locations for these guns have been identified; two emplacements on the riverbank and one on the jetty. The best place to land is probably alongside the jetty, but the river is wadable to a certain extent (counts as heavy terrain). You can expect enemy reinforcements to arrive quite quickly, as this is an enemy training area too.


A recent photo-recon image is enclosed showing Gian Khau and jetty, possible machine gun positions and the roads leading to the nearby training camp.


Your objective is to destroy all the building and transport which are filled with supplies. Then make an expeditious exit the same way you arrived. Buildings are of light weight construction and can be easily demolished by gun, mortars or by engineers.

Viet Minh Order of Battle and Briefing
Five Command dice, most units count as regulars.

Gian Khau Village Garrison
  • Snr Leader pistol (no grenades)
  • 2 i/c Snr Leader, SMG (no grenades)
  • Commissar & two runners
  • 1 squad of 6 rifles (no grenades) Green Troops
  • Support Weapons, Regular, 2 x MMG in sand bagged positions, with crew of 6 each
Gian Khau Main Force Training Camp.
  • Company HQ
  • 1 superior Snr Ldr, pistol (no grenades).
  • 2 commissars, pistol with two runners each (no grenades).
Platoon
  • Snr Leader, SMG (no grenades).
  • 2 i/c Snr Ldr, SMG (no grenades).
4 rifle squads each consisting of:
  • 1 Jnr leader with rifle and
  • 9 riflemen (no grenades)
Viet Minh Briefing and Objectives.
The Deuxieme Bureau in Hanoi has released part of a speech by a senior commissar who visiting
Gian Khau; it is all you need to know:

“Comrades of Gian Khau village, by your efforts the day of liberation draws ever nearer. Daily you unload motivated comrades, weapons and rice, the three wants of the peoples’ struggle. After a dangerous transit, often from far away, these three wants are delivered for your safekeeping. By day you labour and by night you guard the three wants vigilantly. Even though Gian Khau is far from our beloved leader, your unceasing struggle does not pass unnoticed.”

Your objective is to defend the village buildings and lorry-park, where these important stores are kept. But first, you must mark the positions of your two machine guns and the entry route of the Main-Force reinforcements, on the aerial photograph recently acquired by one of our comrades working in the Deuxieme Bureau, Hanoi.

How the Game Played
Before the game started the Viet Minh (VM) player, had a couple of decisions to make; the location of two machine guns and where the Main Force reinforcements would enter. With his map now annotated the first set of six command dice were rolled by the elite French Commandos, commanded by Lawrence and Tom. 


The French split their forces into two almost even groups and stormed ashore from the river, rather than land at the jetty. During the first turn the range was limited to ten inches, but despite being sufficient for the two machine gun positions to see the landing, the VM held their fire. 

As the French consolidated their landing position, by bringing on more of their force, the VM deployed their village defence force, a small and poorly armed body of village folk, but well-motivated by their leader and supporting commissar. With the village force deployed the two VM machine guns opened-up, one in a sand bagged position and the other at the end of the jetty, killing two French commandos but ineffective against the monitor.


Luck now favoured the French with a double phase and they poured a huge return fire of sub machine gun, grenades all supported by the monitor’s machine guns and 37mm gun fire too; the VM gun crew were soon reduced to one. 

Lady luck now gave the VM a double turn. The VM realising that they would never out gun the French, used the tactic of “grasping the enemy by the belt buckle” and surged forward towards the nearest group of commandos and into melee. The village VM group never got to roll their second phase; the melee saw their whole force destroyed and village morale collapse to zero. In one sweep the village defence had been overrun by the French but not without cost as four more French commandos had been killed in the desperate hand to hand fighting; something the French force could ill afford.


The sound of the fighting in the village had alerted the VM main force troops at the training camp, who now started to appear at their pre-designated jump off point (B). Equally as poorly equipped and equally as highly motivated as the village defenders, the VM Main Force were determined to see off their oppressors. 

The French demolition teams wasted no time in moving though the village destroying buildings and supplies. The monitor crew joined in the process using gun and mortar fire to destroy further buildings. The commandos meanwhile spread out into the paddy fields behind the village, taking up positions behind the field bunds. And to bring their superior firepower to bear, the French used their chain of command dice to end the turn, which increased visibility to 15”.


With increased visibility some fire was exchanged but with little effect, one side or the other would have to close the range to achieve anything decisive. Knowing that their firepower was distinctly inferior to the French, the VM accepted that it would have to be them. Skilfully using the poor visibility to avoid being caught in too much cross fire, the VM entered the paddy fields making use of the bunds for cover, while concentrating their attention on the weaker of the two French groups. Awaiting the right moment a commissars leapt to his feet, grasped the flag and as the bugle sounded the charge he fell-over as he crossed the bund and splashed into the paddy (that is to say - the VM rolled a one on their movement dice!). 

Fortunately, the hail of French fire only caused one VM casualty; perhaps the commissar was not that inspiring after all? On the second attempt the VM poured over the bund and meleed the French commandos. The result was predictably a brave loss by the VM, who lost all their men, except for the commissar and the senior leader, both last seen skedaddling-back the way they had come. But the French suffered two killed and the squad Sou-Seargent wounded as well; fortunately for both sides the morale effects were not very severe. The French, realising that they need more visibility to bring their superior firepower to bear, ended the turn so increasing the range to 20 inches.


The French and VM had fought each other to a standstill on one flank but on the other the French, meeting little resistance had made good progress. All the stores and building in the village had been destroyed as they pressed deeper into VM territory to blow-up and last storage area. 


The senior sergeant had established his men and the company support machine gun, in the paddy fields where they engaged fleeting VM targets, though with little effect. He had hatched a plan whereby the engineers would outflank the VM positions through a burnt-out wood, supported by suppressive fire from his men and the mortar on the monitor; sadly things quickly went pear-shaped. There was a breakdown in walky-talky communication with the monitor as the supporting mortar fire went everywhere, except on target. 


The VM senior leader quickly deducing the French plan and used his chain of command dice to move his jump off point, so he could more effectively deploy his remaining reserves. A clash ensued between the engineer team and a squad of approaching VM riflemen. While there were no casualties to either side, the French realising they were outnumbered retreated from the hill, pausing long enough to point out the approaching VM to the senior sergeant. This was just as well because the senior-sergeant had just enough time to rearrange his defences before the VM charged down-hill to melee his men. 


As in previous melees the French superiority in fire power carried the day, killing every single VM, but not before three commandos were killed, including the senior-sergeant. This time the morale dice rolls were not so kind the VM and their steadily declining morale collapsed and the remaining VM force quitting the field.


Conclusion? While the French had carried the day and destroyed considerable amounts of VM stores, they had taken heavy casualties amongst the highly trained commandos. With the village and surrounding areas now secured, the French would demolish the reminder of the VM buildings and stores. 


For the VM, the decision to melee the French were ever possible, would always result in heavy casualties but with inferior firepower it was probably the best decision. While the precious stores were lost, both the VM main-force senior leaders and commissars had all survived; the VM could rebuild their force and the struggle continue.

Acknowledgement
Most of the information used to construct this scenario comes from “Mourier pour L’Indochine – Wargaming French Indochina 1946-54”, by Shawn Taylor. While these are not the rules used to play the game today, they are a set that I will try to use in further games at the DWG, especially as they allow for larger scale deployments than do Chain of Command.

Thanks to Tom, Paul and Lawrence for playing the game, especially as VM Paul managed to keep an inscrutable poker face throughout. Figures are Empress Miniatures alongside several Warlord Games and Rubicon Miniatures plastic sets that I have “kit-bashed”, plus US troops I purchased second-hand but don’t know the manufacturer. Apologies for some of the French riverine fleet. Perhaps, since the vessels are more representative than involved, I should get these models in 15mm so the table would be less cluttered.

Stephen Huntsman
29 1 2024

Saturday, 18 November 2023

OPERATION IRONCLAD The British Invasion of Madagascar 1942- Chain of Command

British troops wading ashore during Operation Ironclad

Introduction
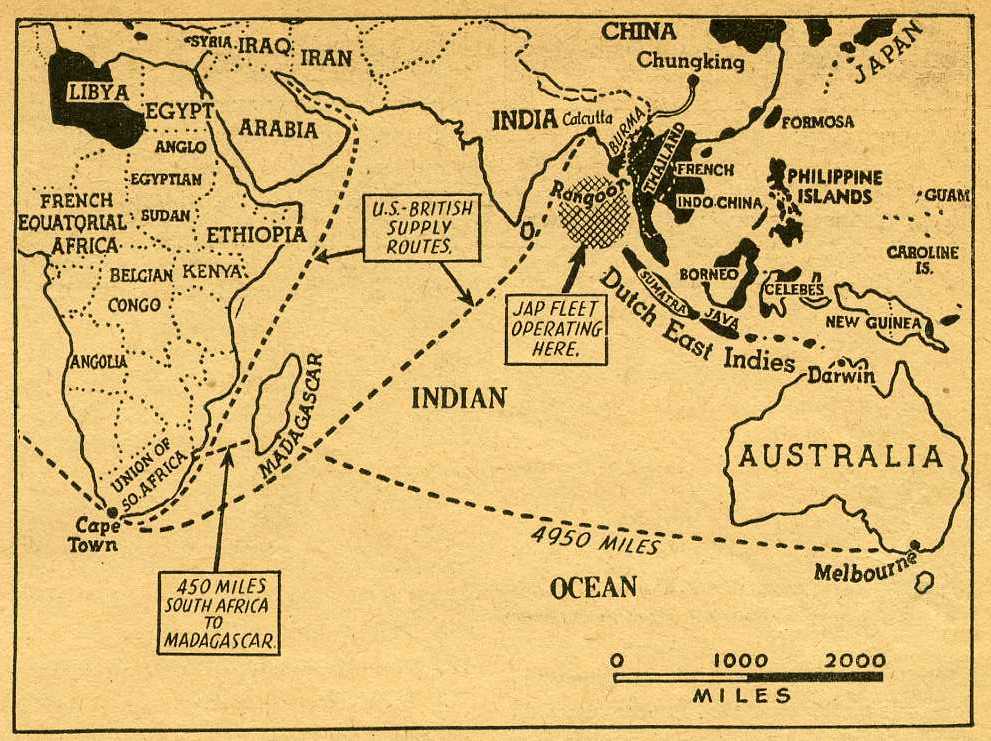
The Vichy Government oversaw France’s overseas empire, including Madagascar. The island’s proximity to vital sea routes is shown on the map. Vichy had allowed the Japanese into Indo-China, helping their invasion of Malaya and Singapore; what if this happened in Madagascar? London got to work on Operation Ironclad, the biggest landing since Gallipoli. And The Devon Wargames Group gets to visit another obscure theatre of The Second World War.


Operation Ironclad
In early 1942 a troop convoy was being assembled for transit to India. The plan was to reinforce the
convoy with more troops, commandos, capital ships and aircraft carriers and invade Madagascar.
Included were the first infantry and vehicle landing ships, that would become so familiar later in the war.

A Valentine tank being uploaded from LTS Bachaquero during a pre-invasion exercise.

Diplomatic and economic pressure was applied to persuade Madagascar to switch to De Gaulle but the anglophile governor, who had not declared for either Vichy or for De Gaul, was replaced and any Gaullists were jailed.

British naval forces assembled for Operation Ironclad off the Madagascan coast

The objective of Operation Ironside was the harbour of Diego Suarez, the size of Scapa Flow with the
adjacent naval base of Antsirane, France’s equivalent of Singapore, both on the northern peninsula of the island. 

The eastern entry to Diego Suarez harbour was heavily defended by shore batteries and the French had not neglected landward defences too - The Joffre Line. The French were confident that the western side of the peninsula could not be attacked from seaward, due to the many reefs and island; here their defences were less. 

Vice-Admiral Sir Edward Neville Syfret, pictured in his Office at the Admiralty in January 1944

An exemplary demonstration of seamanship allowed the British fleet, under the command of Rear-Admiral Syfret, to navigate and land troops on the western side of the peninsula. On 5th May 1942 commandos under the cover of darkness, seized the western shore batteries; the garrison was asleep and not a shot was fired. The main invasion landed further south without incident. To confuse the defenders further, the navy spent the night firing pyrotechnics at the entrance of the harbour and dummy paratroopers were dropped by the Fleet Air Arm.

British fleet operations during Operation Ironclad with a Fleet Air Arm Martlet preparing to land 

The lessons of the Gallipoli landings were well learned, “a gallon of sweet being better than pint of blood”; and the troops pushed on quickly from the landing areas to seize inland objectives. By the end of the first day British tanks were half way to Antsirane and the commandos well on the way to Diego Suarez town. 

A French officer, captured by the tank force, was released with a letter calling for surrender to avoid casualties, ill will etc. This inadvertently disclosed the main axis of the British attack to the French commander. The search for paratroopers was abandoned and all the small boats in Diego Suarez were withdrawn, so the commandos could not cross the harbour. The French now concentrated on defending the Joffre Line.

https://www.combinedops.com/MADAGASCAR.htm

The following day British tanks, unsupported by infantry, attacked the Joffre Line only to find it stoutly defended, incurring considerable casualties. Infantry that attempted to outflank the line though a swamp, were unsuccessful too. As further British troops reached the Joffre Line piecemeal, their uncoordinated attacks were all beaten off. The British realised that only an all-out assault would carry the Joffre Line and more troops and artillery were disembarked.

Rear Admiral Syfret then proposed an operation of Nelsonian daring-do. A destroyer, HMS Antony, was loaded with fifty Royal Marines and rounded the north of the island, sailing directly into the harbour under the cover of darkness. Undetected, HMS Antony landed the marines and attacked Antsirane from seaward. With the main assault on the Joffre Line underway and the marines landed, the French entered negotiations and surrendered on 7th May.

Report of Rear Admiral Syfret, source: HMS Ramillies Association

The game today is based on this final assault, with the table divided between the Jofre Line and Antsirane.

How the game played.
We used the Chain of Command rules by the Too Fat Lardies, with both sides deploying two platoons each; the British also had a force of Marines, making this a Big Chain of Command game. 

All the British and most French forces were regular but some of the French forces were green, conscripted Malagasy troops. The first turn of the game is played at night, so spotting and firing distances are limited to ten (10) inches.


British Forces: two regular platoons of infantry. British support options were:

Pre-game bombardment, an infantry assault tank, Adjutant and HMS Antony. Antony arrives from the second turn onward carrying two sections of marines (rifles only), an additional senior leader and two heavy guns (classed as 75mm for game purposes). The marines count as elite for purposes of employment (since it is a surprise) but in other respects are treated as regulars.


French Forces: two infantry platoons, one regular and one green. French support options were:

4 trench/gun emplacements, 2 x 75mm M1897 guns (one deployed on the Joffre Line and one in
Antsirane), 1 tripod mounted medium machine gun, 1 sniper team, an additional senior leader and 1 team of motor cyclists. The French may pre-deploy two units before the game starts, in secret, if
they wish.

French morale (bad things happen) declines normally for losses incurred on the Joffre Line, but twice
as fast for loses in the port.


At the beginning of the game the French don’t know about HMS Antony. Antony arrives any time after the second turn, at the British player’s discretion. The British don’t know that French morale is double penalised in the port area or of any pre-deployed French units in the Joffre Line.

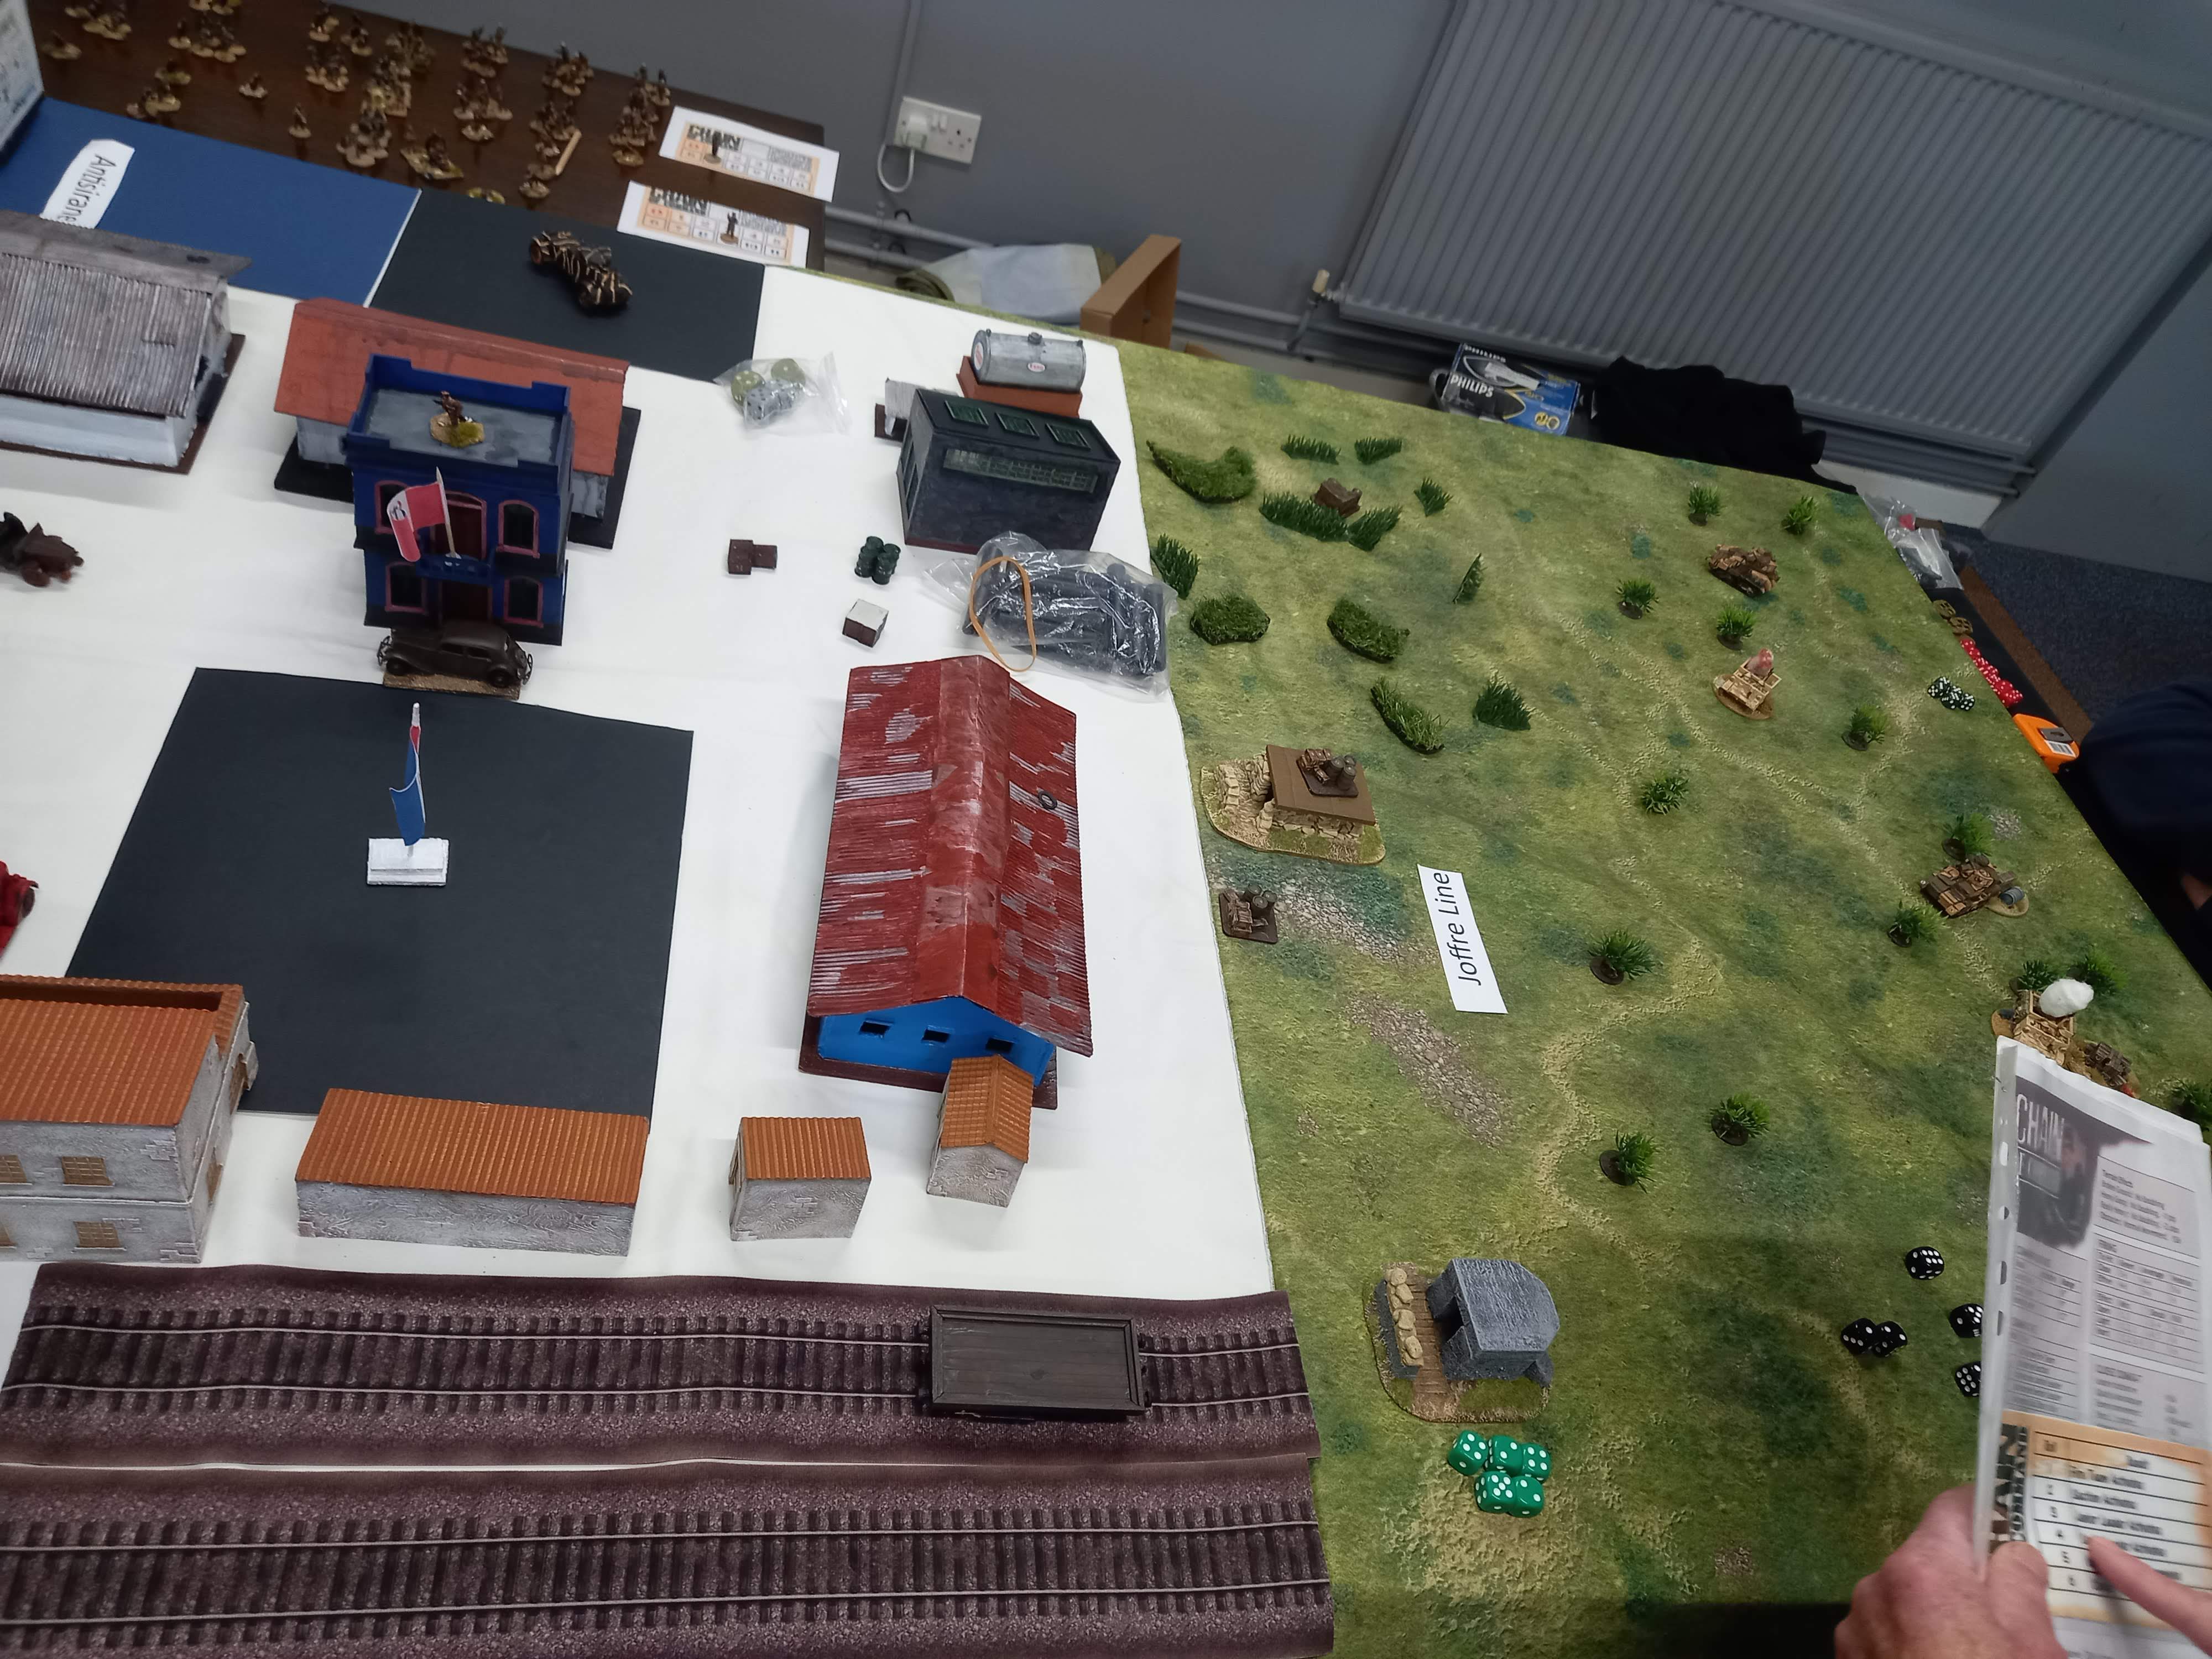
The pregame scouting phase was confined to the Joffre Line end of the table to start with. Only when HMS Antony or British units cross into the port area, will a second scouting phase take place. With the Joffre Line littered with abandoned vehicles, there were plenty of places for the British to deploy their jump-off points (JOP). The French deployed a 75mm field gun and the medium machine gun in the Joffre Line bunkers and placed their JOP’s behind the defensive line plus one in the flanking swamp.


The British proceeded to advance cautiously with just one of their two platoons, taking advantage of the darkness to keep out of sight of the defenders. Despite the pregame bombardment, that was designed to slow the French deployment, some good dice rolling by one of the French players got the Joffre Line well manned faster than expected. It was soon apparent that the French were manning the line with their better troops, as only one section of green Malagasy troops was deployed to hold the flanking swamp. 

By now the French had managed to accumulate a chain of command dice, allowing them further options. Knowing that the British were out there somewhere close to their line, they opted to end the turn, their reasoning being that they would end the night-time range restriction.

With the new turn the French now had the full layout of advancing British forces close before them; both defenders and attackers leapt into action. 

The British tank pressed forward spraying the French line but only to be hit by a 75mm shell that destroyed the tank’s machine gun. The Malagasy troops in the swamp were particularly unlucky suffering many casualties from accurate British rifle fire; the French platoon officer had to come forward to steady their nerves. 

While the Joffre Line was ablaze with gunfire, HMS Antony had successfully started to land her Marines. With the arrival of the marines a second patrol phase was carried out on the port part of the table, with the French placing three JOP’s, but the British were confined to just one at the dockside. Both sides were allocated another officer, one being Captain Price of the Royal Marines and the other representing the French higher command within the port area.


The action was thick and fast now. The French deployed the remaining of their Malagasy troops in the port, supported by one section of the French regulars, a 75mm gun and the motor bike team. With French troops now spread across the Joffre Line and the port the French players had to decide how to best use their command dice. 

The British used smoke to blind the Joffre Line as they continued to advance, but not without casualties especially as their tank was now servery impeded without the machine gun. In the port the French 75 started to fire at the marines causing some casualties but Captain Price had disembarked and started to direct all possible naval gunfire fire towards the French 75mm gun. A combination of rifle fire and ships guns took two phases to silence the 75mm. 

With their officer caught between his troops in the swamp and those in the port, the sight of the lost 75mm was enough for the green Malagasy troops, and their morale broke. With the Joffre Line now well covered with British smoke the French defenders couldn’t fire at their adversaries, so the remaining French player decided to end the turn for a second time using another Chain of Command dice – this had the effect of removing all the carefully laid British smoke screen.


As the third turn began, the British advance on the line was cruelly exposed by the dissipating smoke
and heavy French fire that caused British casualties to pile up quickly. The second British platoon was
deployed by now to bolster the attack on the line too and began to infiltrate though the swamp where the Malagasy troops had been. 

However ferocious the French defence of the Joffre Line, the real action was taking place in the port itself. A brave and determined French counter attack, which resulted in hand to hand combat, was repulsed and HMS Antony continued to fire on the port. Even the motor cyclist tried to get at the marines, but Antony’s fire proved to heavy for them and with the loss of the last effective French unit in the port, it was time to negotiate terms.


All in all the game played well to historical events, a British victory but coming with more casualties than should have been.


Post Script

London thought that the capture Antsirane would end the campaign, but the French continued to resist until November 1942. Madagascar was then returned to France, under Gaullist administration. While the Japanese never planned to occupy Madagascar, the Indian Ocean was still a scene of conflict.

Shortly after the surrender of Antsirane, a Japanese midget submarines entered Diego Suarez harbour and badly damaged HMS Ramillies and sank an oil tanker.

Japan needed German technology and Germany needed access to Japanese controlled war materials. German, Italian, and Japanese submarines all plied the long and dangerous passage between Europe and Asia. If Madagascar had become an axis submarine base it would have further complicated the war at sea. 

If you wish to know more about U Boat operations in the Indian Ocean, I recommend this podcast:


Three months after Operation Ironclad the disastrous landings a Dieppe took place; there was still much to learn.


Thanks to Dave and Paul for playing the French and Nathan for commanding all the British forces singlehandedly! Figures on both sides are mostly Perry Miniatures.