 |
| The Battle of Tory Island 1798, when the French returned to Ireland, captures the theme for my 'What If' scenario |
With our very own Clotted Lard and the Naval Wargames Society meetings looming large on the calendar and my commitment to produce a 'Kiss Me, Hardy' (KMH) game for both events, I set about planning something a bit different and to produce my first few terrain items, that have been long in the gestation, but with this project prompting me to get the high density foam and plaster out.
 |
| My headlands taking shape at Chez JJ in preparation for Bantry Bay 1796. |
With my work on building 1:700 naval models, I hadn't initially given much thought to terrain as my focus was very much on the big battle scene and still is to a certain extent with plans to press on with the Dutch fleet for Camperdown front and centre at present, but with my recent work in translating William James' many small action accounts to the table top and thoughts of doing the odd cutting-out scenario and the need to create the aspect of narrower waters confined with a bit of land has inevitably become more pressing.
So I thought I would take the opportunity of producing a game that would require a bit of coastal scenery to compliment a squadron level action based on Nick Skinner's scenario ideas from the Too Fat Lardies Christmas Special 2014, entitled 'The Irish Question'.
I say based upon, because I decided to make a few tweaks here and there as I am often want to do, given that I wanted to better able to cater for up to six players, and so slightly increased the number of ships involved and the incorporation of my own preferred house rules for fleet morale and a slightly different set-up rationale for why the ships were where they were trying to do what they were.
 |
| A French map of the Bear Haven anchorage chosen to launch their Irish expedition from, in the winter of 1796. |
The historical accounts of the French Directory's decision to take the French Revolutionary War directly to the British and Irish mainland's in 1796 reads like a ridiculous comedy of errors with the rather grandiose and complicated idea to raise Ireland up against the British occupiers by landing a Franco-Irish army in Ireland in coordination with pinning-minor invasions of the British mainland to aid in preventing any home forces coming to the Irish garrison's aid and possibly causing insurrection against the British authorities there as well.
 |
The architects of the Franco-Irish invasion of Ireland in 1796, General de Division Lazare Hoche (left) - Jean-Louis Laneuville and Theobold Wolfe Tone (right) - Artist Anonymous.
Hoche first saw action as a young lieutenant in 1792 and rose rapidly to general de brigade by September 1793, surviving the reign of terror and charges of treason with a record of achievement and success coupled with fiery energy. He defeated the British sponsored French Royalists in western France and was appointed by the Directorate to organise and lead the French Invasion of Ireland in July 1796. Wolfe Tone was a leading Irish Revolutionary figure and a founding member of the United Irishmen, a republican society determined to end British rule in Ireland. He would take part in the 1796 expedition led by Hoche and the later one in 1798 when he was captured by the Royal Navy, later committing suicide in prison, before his planned execution. |
Despite the invasion force setting out from Brest in December of 1796 in possibly some of the worst winter weather possible, bad enough on land but a whole different issue at sea, with a naval component not exactly up to its best in terms of recent encounters with the Royal Navy, and worst still, totally inadequately supplied aboard the French ships to allow for the very likely delays on arriving and disembarking the troops at their intended beach head in Bantry Bay the main landing did indeed have a faint chance of success, given the unpreparedness of the British for such a daring plan.
 |
| The French squadron of twelve ships are battling against a strong December head wind as they approach the entry to Bear Haven, with Sir Edward Pellew's Inshore Squadron seen approaching in line abreast to oppose any further progress. |
Despite the atrocious weather causing the delays to the French fleet through dispersal and battling with heavy seas, that same weather prevented the British Channel Fleet sallying forth from Portsmouth, once they were aware of French movements, and saw the bulk of the French force, all be it without their commander and architect of the plan, General Louis Lazarre Hoche, arrive off Bear Haven, Bantry Bay on 22nd December with fifteen ships carrying 6,500 men, but with the weather still preventing a landing, and the whole enterprise now under the command of a certain General Emmanuel Grouchy, yes that Grouchy!
 |
The Armee d'Irlande - Irish Officer (centre), French Infantry Officer (right)
and French Marine Private (left) |
If this was not bad enough, the British garrison, if that is what it could be called, was totally inadequate for the threat it likely faced and had the French forced the issue on land it might have not turned out well for His Majesty's forces.
 |
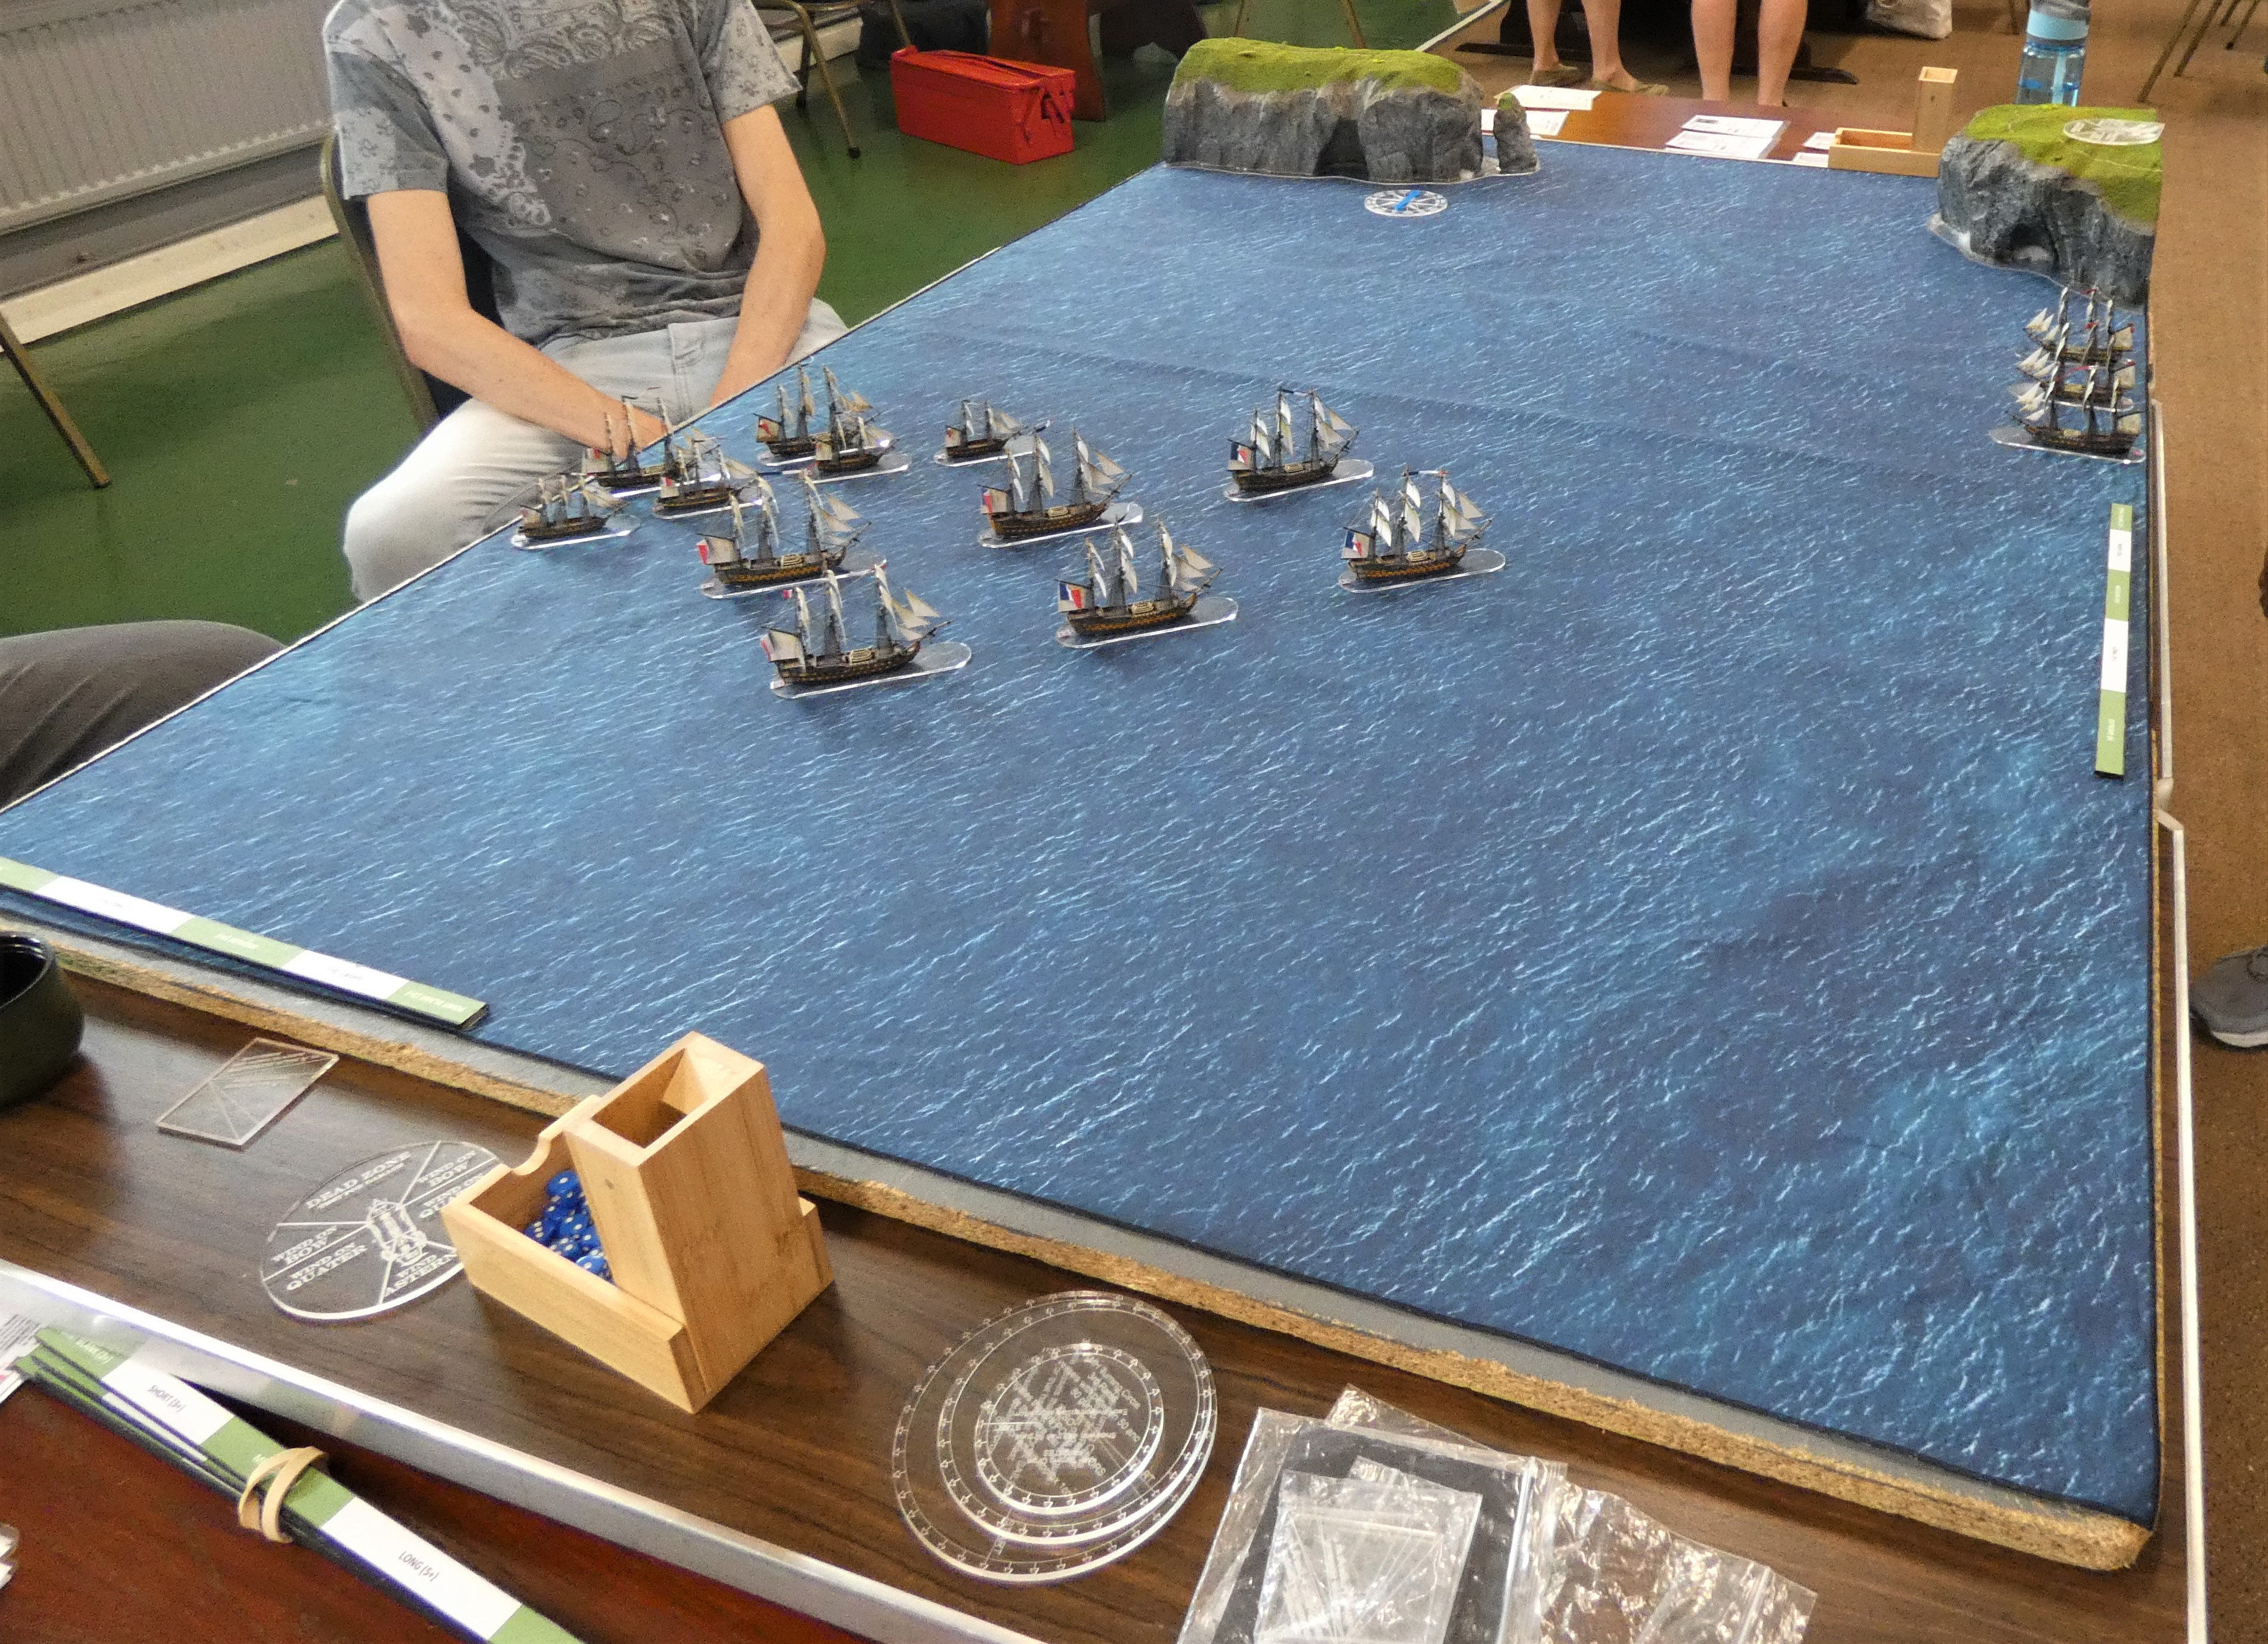
| The six French third-rates and two fifth-rates, under the command of Commodore Jaques Bedout have corralled four straggling troop transports and are shepherding them towards the French anchorage. The neat straight columns of French ships were slightly reorganised, particularly among the third-rates as poor station keeping was rolled for after this picture was taken. |
In the end it was 'General Weather' that came to the aid of His Majesty, that combined with the declining supply issue that convinced General Grouchy to call the whole thing off, seeing the French leave Bantry on December 29th homeward bound, only to now have to run the gauntlet of heavy seas and Sir Edward Pellew's pursuing Inshore Squadron of fast frigates, harrying the stragglers, with Hoche arriving at Bantry a week after his expedition had departed for home, forcing the hero of the Vendee to follow in their wake.
 |
| The approach of Pellew's Indefatigable and the frigates Amazon and Phoebe are seen from the transport column through a maze of French sails. |
This scenario and game poses a what if? What if the French had managed to get into Bear Haven a few days earlier and established a bridgehead but were still forced to wait while much needed stragglers were rounded up and guided into their new anchorage, but in turn also faced a vanguard Royal Navy ships keen to prevent such a union and in turn force a repeat of history with Grouchy losing heart and calling the whole thing off.
The British are not in sufficient strength to pull off a Nelsonian-Nile type of attack on the established French anchorage, but if they can drive off and significantly damage these much needed reinforcements then perhaps they wont need to and the rest can be left to General Weather and declining French supplies to convince them of the folly of landing.
 |
| The French opted to keep their fifth-rates close on the larboard side of the transports, but perhaps starboard side may have been a better strategy? |
This game was very much a scenario in principle test and I even changed the table layout to lengthwise rather than as I prepared it, width-wise, to see what difference it would make to the balance of the game and it confirmed my thoughts but more anon as I give a general account of this, the very first incarnation of Bantry Bay 1796.
 |
| Pellew's light squadron were the vanguard force of an approaching fast-squadron of four British third-rates detached from Rear Admiral Colpoy's Channel Squadron' to press on in the foul conditions and support Pellew's frigates, and set to arrive in four turns. |
Both sides were allowed to set up as they chose in the positions shown, as long as prescribed formations were adopted, that is line astern, line abreast, line of bearing etc and with the prescribed station keeping distances to avoid collisions.
The French then rolled for displacement from their original set up positions to account for their poorer quality crews unable to keep proper station and I advised everyone that the weather was normal conditions which meant that the first successful turn of the 'Getting Choppy' chit would cause that effect, rather than in light winds when two such turns would be required.
The victory requirements for the British to obtain a decisive victory would be to capture or destroy half the transports and three French third-rates, whilst likewise for the French getting all of their transports into Bear Haven.
Additionally Fleet Morale rules apply that would see the French testing to break off the mission should their ship losses equate to 30% of their total Point Preservation Value of 15 PPV with each third rate equating to 2PPV and the flagship 3PPV whilst frigates and transports equated to 1 and 1/2 a PVV each.
Similarly the British PPV equated to 14PPV but they could withstand the loss of 50% before being tested to break off and either of their commanders was adding one to the die, with a 5 or 6 on a D6 required to keep on fighting.
 |
| Bedout's two lead 74's Tourville followed by Trajan have successfully tacked firing bow chasers in the approach to then bring their starboard broadsides to bear as the latter lays into the Indefatigable's rigging. |
As I suspected the weather plays a key role in this game and the French found themselves forced to think about tacking their way into the approaches to the anchorage but also seeing both sides mainly operating on bow winds thus keeping movement rates low for much of the game as the forces slowly came to grips.
 |
| Bedout has signalled to his heavy squadron to tack in succession as he attempts to keep the forward momentum of his fleet going against the headwind whilst also shielding the transports from the British threat. |
Commodore Bedout was keen to keep plenty of his warships between Pellew and later Saumarez's frigates and third-rates as his transports kept close company behind with his two frigates, but as I suspected the French frigates were soon required to get starboard of the transports to help fend off the attempt by Pellew to shield the frigate Phoebe around the French warship defence to get at the transports.
 |
| Pellew likewise has signalled to attack the transports and has deployed in line of bearing looking to use Indefatigable to shield his smaller frigates as they attempt to get around to the transport columns. The wind marker on the compass rose can be seen blowing directly towards the French approach as they work their way forward on a bow wind. |
As the British manoeuvre started to develop, the wind suddenly veered a point to the south-west in turn 3 catching the bulk of the French in irons and forcing them to take individual damage checks as they attempted to drop their bows out of wind and in turn delaying the French advance as the supporting British third rates prepared to arrive on turn 4.
Our recent house rule that moderates the loss foremasts to only those times when the 'Getting Choppy' test had taken effect, limited the damage to minor speed boxes, but it never the less only added to French problems in lost movement as well as some damage to rigging.
 |
| As Indefatigable bears the brunt of French fire, the Vanguard Squadron of British third rates under Commodore Sir James Saumarez aboard HMS Orion arrives in support, just as General Weather starts to take an interest in the action. |
That said Bedout had managed to tack the two leading 74's
Tourville and
Trajan who began to expertly ply
Indefatigable's rigging with chain shot, followed up by long range broadsides as the two French third rates turned onto a parallel course with the British razee.
Pellew was of course using the Indefatigable's hull strength to soak up the French fire to help buy his other two frigates the space to dash ahead and get at the transports, but the damage to his rigging started to accrue alarmingly, however General Weather intervened just at the right time as the sea state suddenly turned choppy forcing Tourville and Trajan to close their lower ports and reducing their now partial broadsides to be halved yet again as they dismissed the opportunity to hold fire and reload in favour of keeping up the fire that they could.
 |
| Nervous transport captains edge to larboard as the gunnery ahead grows louder and more insistent. |
The change in the wind had forced the French to veer away from their original course for the anchorage entrance and now just as Saumarez led his British third-rates onto the table, the choppy seas had reduced their gunnery potential, and Pellew spotted an opportunity to take full advantage of the changed situation.
Both Indefatigable and Amazon were very close to the French Trajan and so brought their respective bows around to gently graze the enemy third-rate whilst sending over the grapples, which fortuitously took hold for both, seeing British boarding parties sally forth, with Trajan only able to defend against one attack and choosing to take on the Indefatigables, allowing the Amazons to cross the opposing bulwarks unchallenged.
 |
| As the British attack develops, the wind has veered one point putting many of the French 'in irons' as they try to avoid losing rigging whilst dropping off the wind |
Both
Trajan and
Tourville had taken the brunt of short range British gunnery from Pellew's squadron, with both having suffered rakes from the passing 36-gun
Phoebe and now
Trajan was losing the first round of boarding to
Indefatigable, whilst the
Tourville was running out of sea room and getting dangerously close to Black Ball point as
Phoebe gave the third rate another stern rake as she passed her.
 |
The French may be having problems with the wind but the British are facing a heavy wooden wall of French third rates as they try to force the issue.
|
Yet again the weather had not finished messing with this action as the wind veered a second time this time back a point to the south and again catching the French on completely the worst heading which, now the seas were choppy, meant that failed tests would result in lost foremasts.
The French Mucius 74-guns and the transport Fille Unique duly watched their front stick topple and fall overboard with a shuddering crack as the strain of the rising wind proved too much.
 |
| As the opposing third rates come to grips, General Weather takes yet more interest, as the conditions turn choppy and lower gun ports are closed. Let's hope the wind doesn't veer again as masts are more likely to topple in these heavy sea conditions. |
The French were still contesting this fight but only just, and with the British third-rates led by Samaurez's Orion closing in, Bedout closed on the stricken
Trajan to try and bring support with his mighty 80-gun
Indomptable, only to receive a punishing broadside from
Orion that ripped through the Frenchman's rigging and reduced her speed by a third when added to damage accrued from the earlier change in wind direction.
 |
| Indefatigable and Amazon get close and personal with Trajan 74-guns seeing both British fifth-rates manage to grapple and initiate boarding attacks over the Frenchman's bow and stern quarters. |
The wheels looked set to come off the French wagon train as Trajan lost her second round of boarding to Indefatigable which saw her crew driven below, forced now to defend on the main gun deck and with nowhere to go should she lose the next round.
 |
| Trajan in the centre, is hard pressed dealing with two boarding attacks and will strike as the Amazons and Indefatigables combine to drive her crew below, whilst Saumarez comes up astern and in support by engaging Bedout's Indomptable, bottom right of the picture. |
As so often happens in KMH when one side is starting to totter, the knock-out blow is often dramatically final as in the last turn of the game and with the pub beckoning, Trajan did indeed lose her struggle to Pellew's Indefatgables striking his colours in the boarding phase, soon followed by the strike test chit that saw Tourville forced to check their response to the rake received from the frigate Phoebe, needing 75% or less to pass, she rolled 83% and hauled down her colours as well, that forced Bedout to test for his PPV threshold of 3 having been passed by one with this second strike, and of course he rolled a 3 indicating he was signalling a 'General Withdrawal', which looked like it might be a tough ask given the closing position.
As always the numbers and ship record cards show the facts behind the result, although in this action a large amount of damage aloft caused by the additional hazard of changing winds in high seas adding to that caused by gunfire.
The four French ships to bear the brunt of the British attack were of course from Bedout's third-rates, so the French heavy squadron was certainly earning its pay, with the flagship above illustrating the combined effects of British gunnery and the wind on making a mess of Indomptable's rigging.
The Trajan got into quite a fight with Pellew's Indefatigable, mimicking the historic struggle between the British razee and the Droits de l'Homme that occured during the French withdrawal.
The critical hit that caused High Officer Casualties would have caused problems if forced to take a strike test but in the end Captain Le Ray surrendered his ship after a creditable fight with two British fifth-rates that proved insurmountable in the end.
The
Tourville above is only carrying light damage to her hull, and she could consider herself unfortunate to strike to a stern rake from the frigate
Phoebe, but when it occurred she was cut off from supports as the
Phoebe and the
Majestic 74-guns moved in between her and her supports thus making her test that little bit harder to pass in the end.
The
Mucius along with the
Fille Unique transport lost their foremasts in the final wind shift just as the sea state turned choppy and the card above for
Mucius shows what a mess her rigging was at the close making it very unlikely that she would have evaded capture in the inevitable British pursuit.
The two British flagships, illustrated below, bore the brunt of French fire as shown by their respective cards, and this was an intelligent tactic used by the British, as flagships, with their -15% Flagship strike benefit combined with, in this case, the Jolly Jack Tar Elite Fervently Determined Crew status giving another -25%, meant that these two ships started with an opening morale status of 135% before the firing had even got going, making them the best options to lead any close in attack with.
The Indefatigable got the break she needed just as her rigging hits from Trajan and Tourville were giving cause for concern by being able to take full advantage of the choppy conditions reducing both French 74s to effectively half fire, to close and board, and the Orion seen below shows her contribution with the damage she took in her fight with Indomptable as she came up in support, losing her mizzen mast to the French flagship.
So what did I learn from this first playtest? Well I now definitely know how not to set up this scenario.
As I suspected, the weather in the form of the headwind means the French need to be closer in to their objective and with more sea room in the form of a wider entrance to the anchorage to put more pressure on the British to get across the table quickly or risk seeing a fight with the French third rates get going only to see the transports sneaking in over the line and ending the scenario in favour of the French.
 |
| The table layout, next time this game is played |
The game should produce the intention of a close in knife-fight of a scrum, as both sides will be on each other in pretty short order, and Pellew's lighter squadron will have to fight a canny battle to still be able to stay in it when the British heavy squadron turns up; and with a closer set up for the French, they still have an opportunity of tying the British up in a close dogfight while they just push the ball over the line, in the form of their transports.
The wind change and choppy conditions are wild cards that may or may not impose their effects on one game to another, but the challenge of tacking into the anchorage is a constant challenge built into the scenario to model those imposed on the French historically, launching their invasion attempt in December and the prevailing conditions that went with that decision.
Thank you to Bob, Sam, Steve M and Liz for producing a very interesting game and allowing me to fine tune this 'What If' in good time for Clotted Lard 2023.
 |
| The battened down sixth-rate from Warlord will make a very nice model of a 4-500 ton ship-rigged transport. I love the quarterdeck guns all braced up topside. |
 |
| Likewise the brig model adapted en-flute, with her guns removed will do for a French East India merchant brig commandeered for troop transport duties. |
The final stage in this project is now underway which is to produce some purpose made French troop transports, which I will cover in a future post on JJ's, but the models went on the stocks last weekend
More anon


a.jpg)


