Showing posts with label Donnybrook. Show all posts
Friday, 14 September 2018
Donnybrook – French & Indian War
The FIW collection saw another outing this month, using The League of Augsburg’s ‘Donnybrook’
rules.
For skirmishing in the FIW, I currently use three sets of rules; Donnybrook, Muskets & Tomahawks and Sharp Practice (other sets are available!) And for me, this also equates to their level of complexity.
Donnybrook is fast, straightforward and bloody! Very little in the way of saving throws. Its also card
driven, so you will see there is a theme with the other rule sets mentioned.
The game is based on a small force of anywhere between 12-48 figures a side, using a points system,
with the average being 20-30 on a 4 x 4 table. Figures are organised into units of 3-12 figures, based
on your force make up. These are; 12 recruits or 9 mounted recruits, 8 drilled or 6 mounted drilled,
or 4 elites or 3 mounted elites. Regardless of the size of the force, each side also gets a free Hero
level Character.
Each turn follows a sequence of Rally (if necessary), Move, Shoot, Close combat. With outcomes
decided by the throw of the appropriate dice; D6 for recruits, D8 for drilled and D10 for elites. The
Hero gets a D12! Each force can also be supported by a number of special characters, which can
include additional, lower level officers, sergeants, drummers, musicians, standard bearers and
scouts. All of which bring their own attributes to the game.
As mentioned, this is a card driven game, with each unit and each character having their own card,
plus an ‘end of turn’ card, a ‘reload card’ (all guns remain unloaded until this card comes up, although the sergeant does have a special attribute) and an ‘events’ card, which can be quite fun! As the author states though, if you don’t like the fact that not all your units move every time, leave the card out!
I won’t go into any more detail for now, but the rule book has one-hundred and seven pages, of which twenty-three cover the rules character abilities etc, the remainder given up to the numerous ‘factions’ that can be built, a breakdown of weapon abilities, a random events chart, six scenarios and a brief overview of some of the conflicts covered by the era, which I forgot to mention is 1660-1760! The FIW is not covered specifically in any of the above, but I’ve easily adapted it.
In my game I used the ‘rear guard’ scenario and just upped the ratio. The British rear guard
consisting of;
Hero
1 x Elite
2 x Drilled
2 x Recruits
1 x light gun
Supported by; 1 x officer, 3 x sergeants and a musician
Opposed the French of:
Hero
2 x Elites
5 x Drilled
3 Recruits
Supported by; 1 x officer, 3 sergeants and 3 drummers
Note on supporting characters; You can have a character for each force point you field. Each faction
has its own special characters, while some are generic, but limited in number. For example, the
‘Army’ faction (as above) is allowed a max of 1 x additional officer, 3 x sergeants & 3 drummers.
The British set up first, using hidden deployment on a hastily drawn map, although I decided that the
gun must be on the table. The French then came on from the table edge, when in fact I should have
allowed them to deploy a certain depth in from the table edge. My excuse is that we got stuck in
traffic on the way in, and were running late!!
There wasn’t much for the British to do but sit and wait, and that probably went on for a move too
long due to the above! Eventually the French got within musket range (24’’) of the gun and started
taking pot shots at the crew. Fire effect was poor to start with, but eventually they got the range and
the crew started dropping. What the rules allow you to do is to replace crew with troops from other
units, along as at least one original crew member remains, which the British did to start with, but the
gun wasn’t a healthy place to be! The gun managed to reply, rolling a D8 to determine the number
of shots resolved against one enemy unit, then rolling D8’s again, requiring 6+ to score a hit. 4 hits!
But rolls of 1, 2, 3 & 4 were never going to worry the French!
As the range closed, the British started to deploy their infantry and more of a general musket duel
ensued. There are some saving throws for being in cover and soon the French, not always trying to
push forward as fast as they might, were getting the worst of it. British elites in one of the houses
were charged by a French regular unit – bad mistake!
Some of the French units were starting to require morale rolls now, and my next mistake was getting
them to use D6’s instead of their relevant ability dice, with 5+ required to carry on. I blame the
traffic!!
Eventually, what was left of one regular French unit was past the British lines and heading for the
table edge, but as the next ‘end of turn’ card was drawn and we counted up casualties, the French
were below 50%. A roll of 7+ was required, based on the highest ability of the surviving members of
the force – it wasn’t the French’s day!
Apart from being a bit rushed on set up, and forgetting a couple of things, the game ran well (in my
opinion!) and the guys seemed to like it, so thanks to Graham, Chris, Ian and Jason for an enjoyable
days gaming. Graham even said he was off to order the rules straight away, so it can’t have been
that bad!
Steve M
Saturday, 21 October 2017
Eighty Years War Skirmish in the Low Countries - Donnybrook
Onto the fun bit. An advance force of Dutch rebels had managed to gain control of a small village with an important river crossing. The Spanish garrison had been forced off in surprise and had gone to alert the local commander, who was at the time overseeing the investment of nearby Leiden. The Spanish dispatched a force consisting of three companies of shot, two squadrons of Horse arquebusier and a group of volunteer gentlemen armed with swords and bucklers.
The Dutch on the other hand had sent for reinforcements and a company of pike and another of shot, escorted by two squadrons of Reiters were on their way to support the two companies of shot and the veteran halberdiers hiding in the town.
The rebels had built barricades on the bridge and at the ford next to the mill in order to try to slow the advance of the Spanish.
We used Donnybrook for rules which gives a nice bloody game. If you haven't seen these before they are form Clarence Harrison and Barry Hilton who are also responsible for Beneath the Lilly Banners and run the League of Augsburg blog and forum. They are a card driven set of skirmish rules with each of the troop quality types given a different dice (d6,d8,d10) to use for all their actions.
The Spanish made a general advance towards the river to try and to get into range, apart from the gentleman swordsmen who seemed to have forgotten to gain their order from their colonel. The rebels revealed a cannon and fired it ineffectively at one of the Spanish companies. The crew then promptly decided they had done enough for the day and marched off home. The Horse on the left wing shot at the rebel arquebusiers and caused a fair amount of injury. The Spanish Musketeers used their longer range and their professional attitude to devastate the Rieter squadron that appeared and then destroyed a company of arquebus as they tried to move back into the town for cover. The other Reiter squadron waded across the deep river and charged the Spanish horse who had been thinned out by some of the rebel shot. The Spanish came off decidedly worse.
The rebel shot in the centre of town piled into the house nearest the bridge to try and gains some cover from the devastating fire of the Spanish shot but found the flimsy houses were no good at stopping Spanish lead. The Dutch reinforcements reached the edge of the town and one of the pike groups marched straight in to a sticky bog in-between two of the houses (Lord knows what caused that!) and spent a inordinate amount of time skulking out of range of the Spanish.
The Spanish musketeers climbed into the mill in order to give themselves an elevated firing position and the two groups of Dutch shot on the other side of the river felt the sting and their numbers quickly dwindled. Meanwhile a company of arqubusiers were attempting to dismantle the barricades at the bridge while the gentleman of the company were attempting to show the peasants how it was done by dismantling the one at the ford. Round about then the Spanish commander decided that, despite the successes across the battlefield, the Spanish couldn't possibly win and immediately ran for home, not even stopping to look back.
The right of the Spanish line was looking strong but the horse on the left had been destroyed and the centre was having a hard time crossing the bridge as they were charged again and gain by the remnants of the Rieters (one heroic officer) and the halberdiers and them finally the pikemen. Despite a unit of reinforcements coming onto the field to aid the rebels, things were looking bad for them.
The gentleman had come across the ford and were heading for the centre of the village to finish off any resistance and the few remnants of the rebel force were struggling to hold back the tide at the bridge.
The heroic rebels had given a good account of themselves but it there was little they could do in the face of the greatest army in the world and, despite giving the Spanish a bloody nose, they were destroyed without mercy by the might of the soldiers of the Tercios.
The game certainly gave me something to think about. The Dutch are in desperate need of some musketeers and the Spanish will require some pike (not that they needed them). I also want to try out the Sharply Buffed rules that were published in the Lardies summer special as they are designed exactly for this period. I hope Jason and his son had as much time playing the game as I did running it. Next time I hope to get more players at the table so we can have more arguing..sorry..strategic discussions.
Sunday, 23 April 2017
Conquistadors - Donnybrook Style
![]() |
| Chas in his 'Salad Days' - Actually a fine study of a Conquistador by Barbara Weber |
Pictures: JJ
On a huge table, Chas took us back to his salad days with the Columbian Indians in the 16th century. In those days, Chas had gone native and decided to fight with the locals against the conquistadors.
Gonzalo Jimenez de Quesada was leading a powerful column in search of Eldorado. Naturally I took the Spanish part, the first time I heard mention of GOLD!
Leaving a body of halberdiers, arquebusiers and mounted lancers to guard our supply column, our assault force sneaked up on the native village. Well, they sneaked as best a load of Europeans, wearing metal armour, in a jungle, can. Not to worry; we had God on our side and had brought bibles for the locals.
It was not long before the natives were firing arrows at our mule train guard and the lancers rode out to chastise them with a devastating charge. It certainly devastated our lancers and the supporting war dogs eating one of their horses didn't help matters. The light horse remembered they had left the gas on and headed back to Cartegena, Spain. Luckily the arquebusiers shot down enough natives to cool their ardour. The halberdiers took cover in the trees, as arrows rained down on them. The artillery piece supporting the attack on the village turned around and mowed down two Indians and a halberdier. Nice shooting boys.
Meanwhile, back at the village, Indians were pouring out of the stockade in an unfriendly fashion. Arrows were flying and musket balls went the other way. The Gentlemen heavy horse charged the natives, cutting down many, before dying to a man. More gold for the rest of us.
The mercenary sword and buckler men proceeded to charge the natives and cut a swathe through them with their nice steel weapons. A desperate struggle developed between Quesada with his retinue and a lot of Indians led by Indian head honcho, who was a bit tasty. Working on the "kill the easy naked guys first", Quesada & Co. cut down most of the Indians, but his retinue fell in the process.
Things looked rough for Quesada, facing near naked ninja guy (who sported a gold posing pouch) and three Indians, on his lonesome. At this point the gentlemen sword and buckler men arrived. They saved the day and sliced & diced the ‘injuns’ and top poser.
With the mule train guard, despite losing the halberdiers, mopping up their attackers and more sword and buckler types entering the village, Chas called for his litter bearers and made good his escape.
A varied game, exploring a wide range of small infantry tactics (including the mules round and round the mulberry bush tactic).
Donnybrook Rules
We played to Donnybrook rules, which gave a fast-paced game, which either side could have won. To be fair, Chas was unlucky and victory went more to tempered steel, than Spanish tactical superiority.
Vince
Sunday, 10 April 2016
Donnybrook - French Indian War
League of Augsburg Site - Shop for Rules
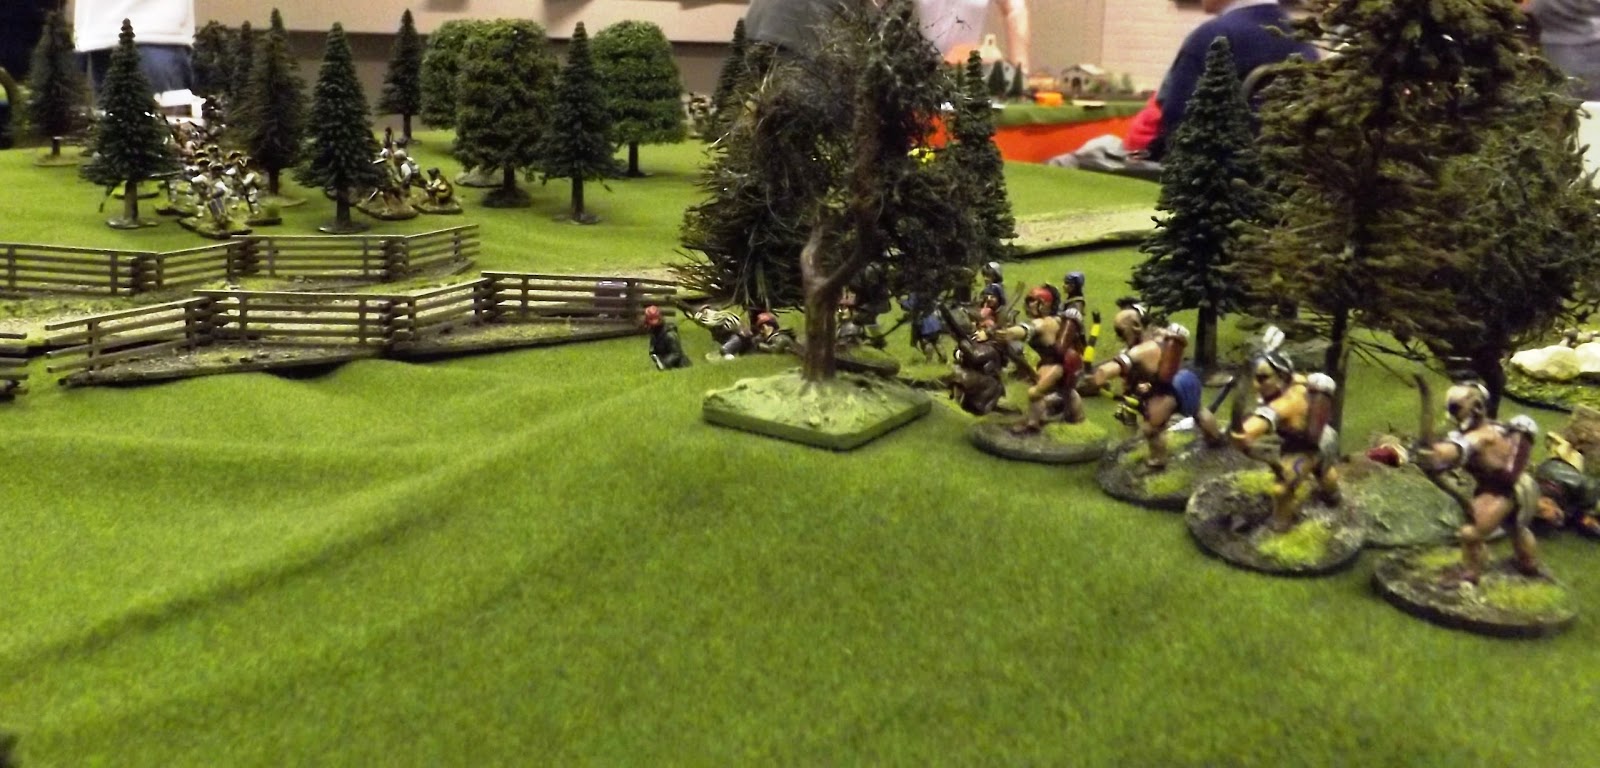
One of the three three games featured at this month's club meet was this Donnybrook meets Hawkeye and Chingachgook using Mr Steve M's growing collection of 28mm French Indian Wars figures.
I had dabbled with this set of skirmish rules back in December last year with a scenario set up in Deepest Darkest Congo during our Xmas gathering at Chez Carter.
Deepest Darkest Africa with Donnybrook - JJ's Wargames
In that game Chas had made some adaptions, as the rules encourage you to do, to cater for a large number of players. This series of games, as we managed to play three scenarios during the day, was a smaller set up and thus allowed as to play the rules in their more purest form, ie as written using reload cards and special events, plus all the main types of characters.
During the day we played three fairly standard skirmish type game scenarios starting with an Escort mission, with a British escort accompanying a party of important ladies, an ammunition and pay wagon, attacked by a French raiding party with a potential British relief force on the way.
We then had a go at a British Rear Guard mission aiming to hold the French forces from leaving the table via the British base line for a fixed number of turns and then a straight up Meeting Engagement off the march with two equal forces looking to break the other sides army morale first.
| The table set up for the 'Escort' mission |
As we changed things around through the day I grabbed some pictures of the action, principally from the Escort and Rear Guard missions, for your amusement; and with a seemingly endless supply of skirmish level rule sets hitting the market and with myself just having ordered Sharp Practice 2 this week, thought I would share my impressions of how these rules play.
| All round defence as the ladies take shelter in the main house during the "Escort" mission |
All the game activities are driven by the draw of these cards and the deck is reshuffled on the drawing of the Turn end card. All very straight forward.
| Colonel McCloud commands the regulars to help protect the wagons on the road |
There is a point system in the rules to work out the number of units you can field and their quality determined by faction (army, outlaws, civilian mob etc) and table size (4' x 4', 6' x 4') which simply determines whether you get to field a 4, 6 or 8 unit force, with units ranging from 4 elite, 8 drilled or 12 recruit infantry figures. The cavalry units, which we were not using, range from 3 elite, 6 drilled and 9 recruit troopers.
| Rangers cover the rear as the British go 'firm' in the "Escort" mission |
In addition we fielded characters such as drummers who for example would give +d3 inches on movement or sergeants who could order a unit to reload instead of waiting for the reload card and others.
| French irregular forces move in |
| French regulars block the road preventing escape and relief |
| French militia move up through the woods |
| More French regulars prepare to move in |
| The French firing line - pushing forward in the "Rear Guard" mission |
| The British rear guard defenders hold the line as the pressure grows |
| French fire increases as the British prepare to pull back |
Donnybrook definitely falls into the list of options and if you haven't played them, then keep them on the list of possible options.
| The French light forces led by the Indians feel out the flanks |
| The two lines close and swap volleys |
| Skirmish fire from the tree line |
Subscribe to:
Posts (Atom)