Labels

Showing posts with label Fistful of Lead Bigger Battles. Show all posts

Saturday, 16 November 2024

The Senussi Little War, Libya 1916 - Fistful of Lead

The little known North African Islamic sect called the Senussi (named after it’s founder Sayed Mohammed Ibn Ali el Senussi).

Stephen H. picks things up from where he left off in March, link below, with another scenario looking at the Senussi Little War in Libya 1916.

Devon Wargames Group - Sanusis Little War 1915

Introduction: 
This is the second scenario we have played based on Robert Giglio’s scenario book “The Senussi’s Little Miniature war 1915-1917”. The scenario concerns the rescue of the crew of H.M.S. Tara from Bir Hakeim, in the Libyan dessert. Until I discovered the Senussi campaign, I thought Bir Hakeim was a battle fought in 1942. I did not know about this small but consequential military action in 1916, where the role of the internal combustion engine was decisively demonstrated.


HMS Tara
SS Hibernia (Captain Gwatkin-Williams) was a ferry across the Irish sea. Requestioned as HMS Tara, she patrolled the coast from Alexandria to Sollum on the Egyptian/ Libyan boarder; for the crew it was a holiday cruise. On the 5th of November 1915, as the Tara approached Sollum, she encountered U 35, enroute to Bardia. A single torpedo sank the Tara and U35 handed over 92 survivors to the Turks. A few days later U35, returning the same way, stopping to bombard Sollum with her deck gun. Cairo decided to evacuate Sollum and news about the Tara’s crew dried-up. 


Initially, the crew were kept as Turkish POW’s in Bardia. Captain Williams was offered internment in Austria but he preferred to stay with his crew. A Turkish doctor treated the Tara’s injured crewmen, but he had neither medicine or surgical instruments. The Bedouins had looted the pharmacy at Sollum before the Turks could secure it; the seriously injured crew men succumbed.

'SS Hibernia (Captain Gwatkin-Williams) was a ferry across the Irish sea. Requestioned as HMS Tara'
Editors note - I recognised the description from Stephen's account of HMS Tara having visited the memorial to her at Holyhead Fort, Anglesey in the Remembrance Garden there, back in 2021, as mentioned in my post about our visit to Anglesey in 2021.
JJ's Wargames - North Wales Border, 2021

Bir Hakeim
As the campaign progressed the crews of the Tara and of another ship sunk by U35, HMT Moorina, were marched to the oasis of Bir Hakeim in the Libyan desert; there the prisoners suffered greatly from lack of food and illness. The war had disrupted the movement of camel caravans, so food was in very short supply. The crew were put to work cultivating crops but, in the meantime, lived on a diet of snails. This was not a deliberate act of cruelty, as the oasis farmer and the guards lived on a similar diet too.

Captain Williams had given his word to the Turkish commander of Breda, Nuri Bey, not to escape so long as he and his men were correctly treated. As the crew’s situation deteriorated Captain Williams used his celestial navigation skills to escape and tried to reach Solum, unaware that it was no longer in British hands. Captain Williams was re-captured by the Turks and returned to Bir 
Hakeim.

There seem to be two accounts of how the British came to learn of the prisoner’s whereabouts and it possible both are true. One is that Captain Williams wrote to Nuri Bey about the prisoners’ conditions, but the Arab courier delivered the note to Solum, reoccupied by the British on 14th March 1916. Another is that Captain Williams, during his escape, came across an abandoned car. Realising that it was an unusual sight in the desert and that it might attract the attention of passing British troops, he left a note in the car.

Where is Bir Hakeim?
Both Captain Williams’ notes were addressed from Ber Hikim but nobody in the Western Frontier Force (WFF) knew where Ber Hikim was. Bimbashi (Major) Leopold Royle of the Egyptian Coastguard asked amongst the Arabs. An aged Arab named Ali or Achmed (depending on the source) said there was a place called Bir Hakeim and that he had been there once when a youth. Based on Achmed’s information, Bimbashi Royle estimated Bir Hakeim was 120 miles away. The Bimbashi had once journeyed about 80 miles in the same direction and said the going should be good. The Duke and the Bimbashi now came up with a daring plan.

Bir Hakeim was the site of an abandoned Ottoman Turkish outpost; the Roman’s had an outpost there too. The best English translation I can get for Bir Hakiem is “up-standing well”, because the well was built on the top of a mound. The well had to be constantly cleared of rocks and over the millennia the well mouth was atop of a considerable spoil heap.

The Rolls Royce Armoured Car
Initially the technologically savvy Navy introduced armed cars.

Rolls Royce Royal Navy Car circa 1912.

In 1913 Rolls-Royce won the eight day, 1650 mile alpine touring-car trials hands-down, with a more powerful model of the Silver Ghost, the Alpine Eagle. In 1914 The Admiralty specified a turreted armoured car, to be built on the Alpine Eagle. Initially deployed to France, the ever more sophisticated trench works meant the need for armoured cars declined; the force was transferred to the army and sent to Egypt.

Obliging Austrian assists the Rolls-Royce team

Major Hugh Grosvenor, The Second Duke of Westminster
Hugh Grosvenor was stationed in South Africa when his grandfather died. Returning to Britain, the new Duke resigned from full-time army service, to live the life of one of the world’s richest men. The Duke pursued his many passions, one of which was automobiles. At the outbreak of The First World War Hugh Grosvenor joined the army and took his Rolls-Royces with him to France (as you do). When the armoured car force was transferred to Egypt and Libya, The Duke was put in charge where he exhibited skill and dash, being awarded the DSO and promotion to Colonel.

Initially the use of the armoured cars was limited as rain had turning the desert surface into a muddy slurry, but when the desert dried out it became favourable for motorised operations. After the Turks evacuated Sollum and the Duke got his armoured cars though Halfaya Pass (Hellfire Pass), he was able to demonstrate their potential. Authorised to pursue the retreating enemy force into Libya with “reasonable boldness” his force swiftly overtook the Turkish/Senussis forces; The Duke’s armoured cars attacked their camp and roundly defeated the enemy. Thereafter the Senussi forces retreated into the desert and the threat from Libya was eliminated. With the information about the crew of HMS Tara, another opportunity to demonstrate the potency of mechanised warfare had arisen.

Major Hugh Grosvenor DSO, Cairo March 1916

Following his earlier success, The High Command needed little persuasion when The Duke proposed a mechanised force to make a lightning strike at Bir Hakeim. The Duke proposed a strike force of six Rolls Royce armoured cars and six armed Ford Model T trucks. Following behind would be a second force of supporting vehicles, ambulances for the rescued crew etc. At a steady 30 miles an hour, the column would reach the objective in four hours, rescue the crewmen and return the same day.

Private Samuel Rolls, Army Service Corp
S.C. Rolls (not to be confused with C.S. Rolls of Rolls Royce fame and no relation) was a mechanic from Coventry. Rolls was rejected by the Yeomanry because he could not ride a horse or shoot, so he joined the Navy’s armoured car force. Initially deployed to France, Rolls drove staff officers to and from the front line. In 1914/15 the trench network was poorly developed, so it was a hairy existence as the cars were often caught in enemy fire.

Transferred to the Army Service Corp and then to Egypt, he was initially the driver for The Duke of Westminster in Libya and then to T.E. Lawrance (Lawrance of Arabia) in the Hedjaz. Lawrance wrote about him ”our strongest and most resourceful man, the ready mechanic who largely kept our cars in running order”; I don’t think there is much more to add.

I recommend Samuel Rolls book “Steel Chariots in the Desert” in which he relates his adventures in both Libya and Arabia – a cracking story of adventure and daring-do.

Raid and Rescue at Bir Hakeim
The motorised column left Solum on the 17th March 1916 at 3am, expecting a four-hour run to Bir Hakeim at a steady 30mph. Private Rolls lead the way in the armoured car “Blast”. Achmed the guide sat uncomfortably in the back, as this was his first car journey. Next came The Duke driving his own Rolls Royce “Command Car” with Bimbashi Royle and Esmi the Egyptian interpreter; the rest of the force followed on behind.

At first things were uneventfully and progress good, but then the going became rocky, shrubby and with a series of ridges; the column slowed to negotiate the obstacles. At the top of each ridge Rolls would stop and Achmed would scan the horizon, looking for the “up-standing well” before indicating to go on. After more delays it was past midday and Esmi was accusing Achmed of lying or being lost. Still the Duke persisted and the column moved forward until the next crest, where the argument between Achmed and Esmi would resume. Finally, Achmed pointed into the distance saying he could see Bir Hakeim, but straining their eyes and focus their binoculars, no one else could see anything. The Bimbashi assured the Duke that Bedouins were renowned for their acute eye-sight. The Duke ordered the support vehicles to stop, climbed into “Blast” and ordered the attacking vehicles to deploy for action.

The attack pressed forward and, on summitting the next ridge, lo and behold, the oasis of Bir Hakeim lay before them. The cars accelerated and swept into the oasis. catching everyone by surprise. The guards fled and those prisoners who could walk, gathered around their rescuers. After 135 days of captivity emotions were running high; many of the prisoners wept at their unexpected deliverance. 

Some of the rescuers, on seeing the condition of the crew and hearing of their deprivations saw red and sped off to dish-out summary justice to the captors. Despite the best efforts of the Duke and Captain Williams, the shooting did not stop until all the guards, their families and the oasis dwellers were dead. This was an undeniable stain, on what was an otherwise exemplary operation. With the arrival of the support vehicles the crewmen were fed and loaded into ambulances and trucks for the return journey to Sollom. The news of the crews’ dramatic rescue received considerable publicity in the British press, as good news was in short supply over the winter of 1915/16.

An image from ‘Prisoners of the red desert’ by Capt. Gwatkin-Williams – note the well mound from which Bir Hakiem gets its name.

How the game works and how it was played.
This is a slightly unusual game as it does not have two sides. This game puts the players in the place of the various vehicle commanders and requires them to make decisions as they rescue the prisoners. Apart from terrain obstacles that need to be negotiated, Turks, Senussi or Bedouins, are controlled by the GM, and may or may not appear. 

To complicate matters, since there are no radios, players cannot talk to each other and are limited to a six-word written message per game turn, which would have been made by semaphore in reality. Movement was determined by rolling one or two dice for normal speed, three dice for fast and one dice only for reverse. Shooting and any driving events were determined by rolling a D10 requiring less than the skill factor, after modifiers.


I had organised the game for six players and each one had two vehicles. The forces were: 

1. Duke of Westminster, two RR A/c’s2.
2. two RR A/c
3. one RR A/c and a Ford
4. one RR A/c and a Ford
5. two Fords
6. two Fords


Each force had a stats card showing the skills of the commander, driver and gunners. Mark C drew the card of the Duke of Westminster, so he was in charge. Each turn begins with the players all rolling two D6 to establish initiative and players can pass and then interrupt later. However, when the player who won the initiative moves an event dice roll is made – events can range from nothing happens, vehicle falls into a hole or some enemy troops appear nearby.


The Duke alighted from his Rolls Royce command car and took command of “Blast” with Pvt Rolls at the steering wheel. The Duke positioned himself on the extreme right wing of the attack force with the other players positioned across the long side of the table. 

All that could be seen was the next ridge along with scrub and rocks. The Duke rolled the first dice of the game to establish his initiative followed by the other five players, I can’t remember who won the initiative but being all gentlefolk, the first initiative was passed to The Duke and the advance began. 


The first event roll was nothing and the players all rolled again for initiative and their movement. This time the event was a blown tyre on one of the Rolls Royce A/c requiring three turns to change the wheel. Fortunately, a Ford truck was nearby and diverted to lend a hand so the delay was only two turns. 

As the game progressed turn by turn events stated to pop up, a Turkish machine gun and then a Turkish piece of artillery were surprised and eliminated before they managed to get off any shots, but the attackers luck was bound to fail sooner or later. Some Senussi cavalry put in an appearance and despite getting in a few shots, were soon seen off without any damage or delay to the advance.


Then John won the initiative, and he managed to drive his Ford over the edge of an unseen wadi. Fortunately the Ford managed to survive the experience but was now stuck at the bottom of the wadi.

Then John decided to get out in an equally spectacular manner; he drove to the end of the wadi and making a sharp turn managed to roll the Ford over 360 degrees. By some miracle both occupants were thrown clear but the vehicle was now pointing in the wrong direction. 


While John had discovered the way out of the wadi at one end, at the other end the wadi stretched on much further and blocked the route of Taiwo’s two A/c’s. As Taiwo was trying to find a way around the newly discovered wadi and John had decided to reverse up the next ridge, the event roll produced a sizable force of Senussi warriors in the same wadi. 

While they only had a 20% chance of a hit the volume for fire directed at Taiwo’s two A/c’s was bound to result in some hits and two were achieved by the Senussis. One hit punctured a tire and immobilised the A/c and the second caused a serious injury to the second car’s driver; Taiwo would have to sit tight and shoot it out with the two Vickers guns.


With the second crest summitted it was time to lay out the rest of the terrain, which was the oasis
itself with the camp site, guards and prisoners. Matt seemed to have difficulty understanding that the
object of the game was to rescue the prisoners and not just machine gun anybody he saw. 

Speeding down the ridge towards the oasis one of his Fords fell into an unseen hole, but luck was on his side as with nothing more than a nasty jolt the Ford bounced out. By now Matt was on the receiving end of a firm semaphore message from the Duke reminding everybody to only specifically target enemy troops and no “spray and pray”. 

More Senussi tribesmen started to appear and a previously unseen part of the oasis campsite was revealed, along with another Turkish machine gun. All the cars were closing in except for Taiwo who, with John, were finishing off the last of the tribesmen in the wadi.


The Duke ordered Private Rolls to accelerate along the top of the ridge line to put himself in a position to either machine gun the wadi or the camp. With a roar from the engine “Blast” surged forward leaving a cloud of dust chocking the second armoured car following behind. The Turkish machine gun in the camp got off a lucky shot at “Blast” and lightly wounded Private Rolls, but being the kind of fellow he is Rolls continued to drive “Blast”. 

At last, the one thing I and been trying to engineer all game might come to pass, a collision between two of the attacking vehicles; between The Duke’s and the following Rolls Royce now enveloped in a dust cloud. But the dice gods would not have it and The Duke now adopted a commanding position on the ridge line, in support of the other vehicles closing in.


By now the Senussi were running out of options and the events roll did not provide them any more reinforcements, so the game was considered over. The only thing to do was to collect up the prisoners, who were relived to be free but not happy at the loss of some of their comrades and to search the camp for any valuable intelligence. 

The search revealed nothing except a tribesman, who had been lying-doggo waiting to stab The Duke, who was despatched summerly. There was nothing further to do other than return to Sollum in time for a hot meal and a sea-bath. Everybody that is except Achmed, who was thinking about the purse of golden sovereigns that awaited him in the commander’s safe at Sollum.
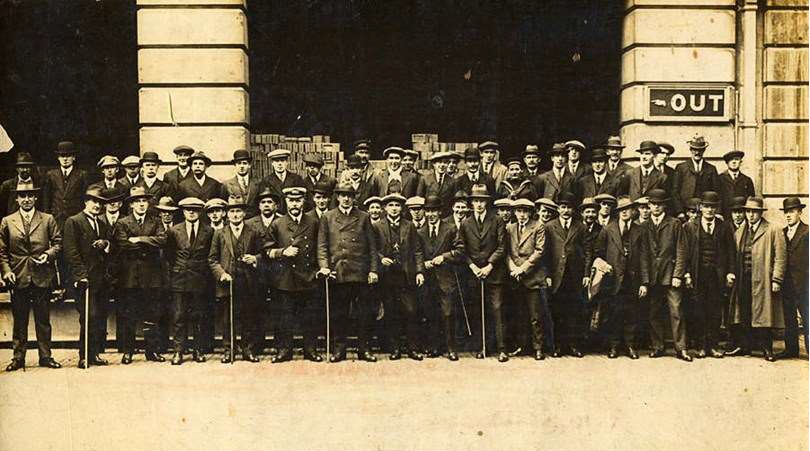
Survivors of HMS Tara after their return to Britain in 1916. Anglesey County Record Office

Thanks to the players. John R, Mark T, Tom, Taiwo, Mark C and Matt. Miniatures from various sources including Minifigs, Old Glory, QRF miniatures.

Sources:
Steel Chariots in the Desert, SC Rolls
The Sanusi’s Little War, R McGuirk
Senussi’s Little Miniature, War 1915-1917 by Robert Giglio
Various internet resources

Stephen H

Saturday, 23 March 2024

Sanusi's Little War, A Side-Show to a Side-Show - Battle of Jebel Medwa 25th December 1915.


I thought of Libya and the Western Egyptian desert as part of the Second World War, I never knew The
First World War spread there too. I soon discovered a history full of cracking-yarns, daring-do and
larger than life characters; the bread and butter of wargames scenarios!

Baron Max von Oppenheim. Wealthy, gifted-orientalist,
archaeologist, adventurer and The Kaiser’s expert
on all things Islamic and Arabic.

The Sanusiya
Muhammad al-Sanusi (or Sanussi or Sennusi), was born near Fez in 1787; he studied in Cairo and then Mecca where he became a Sufis. In Mecca his charismatic character drew him followers, upsetting the establishment. Leaving Mecca, he eventually settled in Jaghbub, an out of the way oasis settlement in eastern Cyrenaica close to the Egyptian border; the Ottoman provinces of Cyrenaica and Tripolitania make up Libya. There he started to proselytise and undertake charitable works amongst the nomadic Bedouin.

The Sanusi Brotherhood was uncomplicated, those who could read (ikhwan) recited The Koran and lead prayers. The teachings were orthodox Sunni and the Sufism was sober not ecstatic. Stimulating substances, including tobacco, were forbidden but work was encouraged. The Brotherhood built lodges (zawiyas) at the various towns and oases along the Sahara trade routes. These lodges were not just religious centres, they were staging posts for caravans, hostels for travellers, post offices and centres of agricultural improvement. Muhammad al-Sanusi was soon known as “The Grand Sanusi”.

When Muhammad al-Sanusi died in 1860, his eldest son al-Mahdi (not to be confused with The Mahdi) became The Grand Sanusi; al-Mahdi had administrative talent. Using the trans-Sahara caravan routes, the Sanusi Brotherhood became the largest and most wide spread religious organisation in North Africa. Their network of lodges stretched from The Red Sea to Senegal. Despite this expansion, the brotherhood stuck to bringing religion and better living conditions to the desert nomads; they did not seek political power.

The Grand Sanusi, Sayyid Ahmad al-Sharif al-Sanusi

At the death of al-Mahdi in 1902 his eldest son Idris, was considered too young to become The Grand Sanusi and so the title passed to Idris’s cousin, Ahmad al-Sharif. Times were changing and the Sanusiya clashed with expanding French and British imperial ambitions. An intermittent war broke out between the French and the Sanusiya in the Sahel from 1901; from now on the Sanusiya would become more political.

Egypt
Both Libya and Egypt were part of the Ottoman Empire and Egypt had its own rulers, The Khediv. Following The Mahdist Wars, Britain assumed de facto control over Egypt despite it being part of the Ottoman Empire, the Suez Canal was just too vital. The British kept an army of 30,000 men in Egypt, controlled the police, administration etc; all sections of Egyptian society smarted at this. To safeguard Egypt’s borders The Egyptian Coastguard was set up. The coastguard had two divisions, one for the seaward borders and one for the landward borders. The officers were a mixture of Egyptians and British and it was the landward coastguards who had contact with the Sanusi. From time-to-time a coastguard officer was invited to visit The Grand Sanusi but only Egyptian ones.

The Turkish-Italian War 1911-13
Italy invaded Ottoman Libya with all the paraphilia of early twentieth century warfare. The Grand Sanusi and the Bedouins rallied to the Turks and the Italians failed to consolidate their hold. The King of Italy instigated action in the Balkans, and the Turks, unable to fight both wars, ceded Libya to the Italians.

Mustafa Kemal (aka Ataturk, the founder of modern Turkey) in Libya during the Italian-Turkish War. Ikhwan wearing their characteristic white robes. Many Ottoman officers travelled to Libya via Egypt in thin disguise aided by a lot of “blind-eye” turning.

The peace treaty required the withdrawal of Ottoman troops but they left a hard core of men behind. The Grand Sanusi soon had a regular force of 5,000 Turkish trained men (muhafizia), the ikhwan were drilled, modern rifles and maxim guns were either smuggled-in or captured and obsolete artillery came out of hiding. 

A British officer was now invited to meet The Grand Sanusi; he requested that the imprecise Libya/Egypt border be formalised, so Jaghbub was in Egypt. But there were larger considerations in London; Italy was not in the Triple Alliance and leaned towards Germany.

Muhafizia and the Sanusi flag on the march.

Ikhwan on the march, a Turk can be clearly seen in this picture to.

1914/5
The Entente imperial powers all had large Muslim populations. The German plan, devised by Baron Max von Oppenheim, was to instigate these populations to rebel, using the call to jihad by the Ottoman Sultan Mehmed V. Despite the expenditure of large amounts of money and effort, the German plan failed and the Baron’s star waned in Berlin.

El Dschihad - German propaganda material aimed at Arabic speakers.

For Egypt, a co-ordinated attack across Saini, a revolt in Egypt and a tribal invasion from the west would swamp the British. German agents brought promises and weapons to The Grand Sanusi; the Turks sent Colonel Ja’far al Askari, an Ottoman Arab, to command his forces. But The Grand Sanusi was still reluctant and it was difficult to win him over. When British officers visited bearing salaams and gifts (e.g. Kodak cameras) from Cairo, they were cordially received. 

The outbreak of war in Europe and the Ottoman’s entry on the side of The Central Powers, failed to shift The Grand Sanusi because his gripe was with Italy. The Turkish attack from Sinai failed to capture the canal and the Egyptian population did not rise-up. The most deciding factor seems to have been Italy’s entry into the war, on the side of Entente powers, in 1915. The Turks persuaded their ally to cross into Western Egypt, where they seized Halfaya Pass and laid siege to the coastguard station and border town of Sollum.

Ja’far was born in Kirkuk, Iraq. Captured by the British,
he embraced Arab Nationalism and commanded the
army of Sharrif Hussain of Mecca. Subsequently, Ja’far
was twice Prime Minister of Iraq and was assassinated in 1936.

HMS Tara
SS Hibernia was a ferry across the Irish sea. Requestioned as HMS Tara, she patrolled the coast from Alexandria to Sollum; for the crew it was a holiday cruise. On the 5th of November 1915, as the Tara approached Sollum, she encountered U 35 enroute to Bardia. A single torpedo sank the Tara, twenty crewmen were lost and U35 handed over the ninety-two survivors to the Turks. Two days later, a boat was sent from Sollum to search for the Tara and debris was soon found. When rumours reached Sollum of a German submarine towing lifeboats, the fate of the Tara was obvious. 

The British demanded The Grand Sanusi release the Tara’s crew immediately but he was now between a rock and a hard place. A few days later U35, returning the same way, stopping to bombard Sollum with her deck gun. Cairo decided to evacuate Sollum; fortunately U35 had sailed away and a seaward evacuation was successful. Relations between the British and The Grand Senusi plummeted. (The rescue of the Tara’s crew is a cracking-yarn and will make a very good game).

The Western Frontier Force
The British were heavily engaged in the Middle East (Sanai, Mesopotamia and Gallipoli), and another front was unwelcome. Many in London said the war against Turkey was a side-show, the real war was in France. A campaign in Western Egypt would be a side-show to a side-show; thus “The Western Frontier Force” was born.

Map showing main area of operations, some of the spellings are different. The high ground inland behind Sollum is Halfaya Pass (aka Hell Fire Pass). The railway line to Al-Da’ba is shown too. 

Abandoning part of Western Egypt, the British concentrated at al-Da’ba, the railhead from Alexandria. Beyond al-Da’ba the rest of the way to Sollum would be on foot along “The Khadival Road”; more a large track. Logistics were horse-drawn wagons and limbers, not out of place in the Zulu wars. No longer relying on locally recruited troops, men from all over the empire became involved. Australia and New Zealand, South Africa and India and Britain too. Apart from the Indians, the rest had join-up in 1914; trained and enthusiastic but lacking experience.

British Yeomanry

Today’s Game - Battle of Gebel Medwa
As the British marched westward the Turkish/Senussi used their local knowledge and twice sprang large scale ambushes but these failed to stop the British. On Christmas day (25th December) the deciding battle of the campaign was fought. The slow speed of the march had split the British column in two parts, so there were effectively two engagements on that day. The sum of which showed The Grand Senussi that he would not defeat the world’s largest empire; there after the campaign developed a different tempo.

Sikhs guarding prisoners

Today’s game is one of these two engagements at Jebel (mount)) Medwa. The jebel is lightly held by Ja’ far Pasha’s forces as his main force is still encamped. The British knowing this, thanks to aerial reconnaissance, decides to carry the jebel with infantry while the mounted Yeomanry make a sweeping outflanking movement, before both forces attack the Senusi camp. But the Yeomen were delayed by the terrain and, not knowing this, the infantry assault went in. 

Ja’far rushed troops to the jebel and what followed was a classic infantry assault on a position. Without the Yeomanry in position, much of the Senussi force manged to escape, but their morale was now low and many tribal troops melted away. Before and after the battle it rained, so the British did not have the advantage of vehicles as the desert surface was turning into sticky clay but aircraft could still operate from the beach.

Rule Set
We used “A Fist Full of Lead – Bigger Battles” by Jaye Willey for this game. They are uncomplicated
while giving a good feel for these types of engagement; more large skirmishes that pitched battles.

In these rules each unit gets dealt a card for activation, but to better represent the command structure the unit commanders are dealt two cards. So long as subordinate units are within six inches of each other and their commander, all the commander and his units can both make actions.


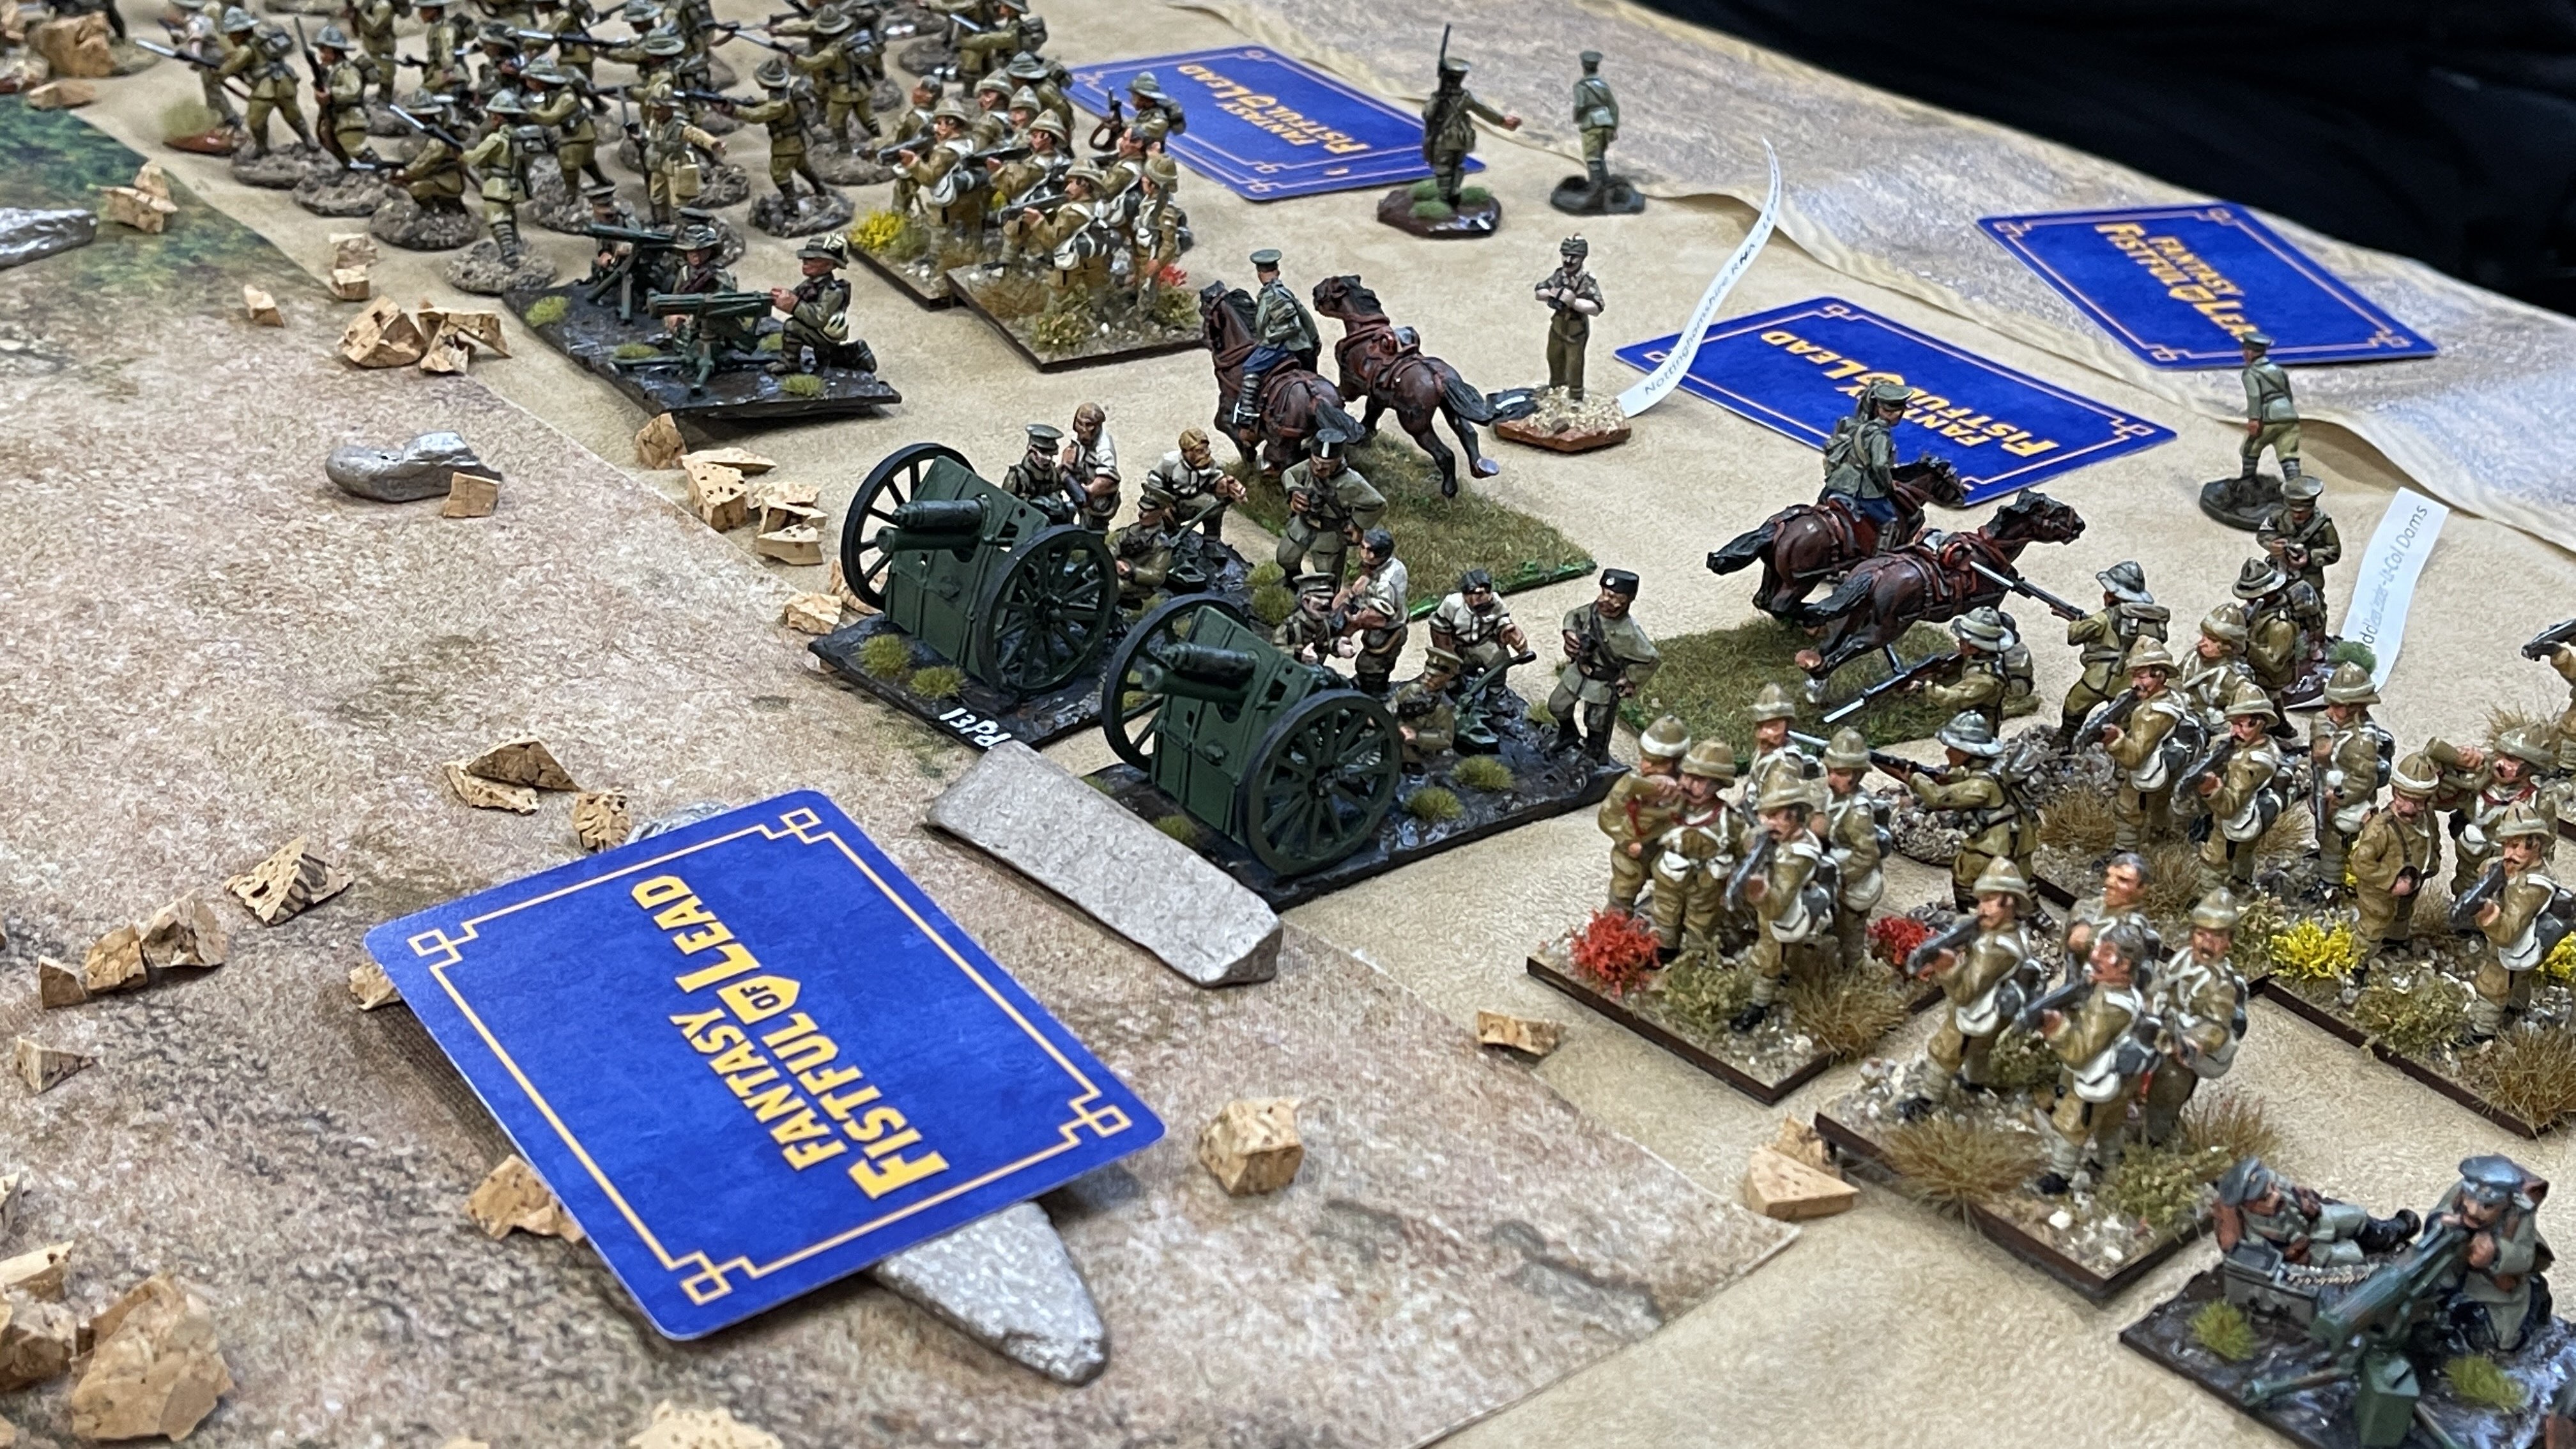
British order of battle - all British units count as regular.

Commander – Maj-Gen Wallace
HMS Clematis - 2 x 4” guns (off table)

Overall Infantry Commander – Lt-Col Gordon

Sikh Infantry Leader – Maj Pennefather
4 Companies of 10 Elite infantry and 2 MMG Sections

New Zealand Infantry Leader – Maj Austin
4 Companies of 10 Regular Infantry and 2 MMG Sections

Middlesex Infantry Leader – Lt-Col Dams
4 Companies of 10 Average Infantry and 2 MMG Sections

Yeomanry Cavalry (can dismount)
Capt Guy Cheape and 1 Sqdn. of 10 Cavalry with rifles and swords

Nottinghamshire RHA - Lt Hopkirk and 2 13-pdr guns medium guns

Australian Service Corp - Maj Francis and 2 Companies of 10 Infantry


Turkish and allies order of battle, a mixture of regular, irregular and tribal troops.

Commander – Col. Ja’far al-Askari Pasha

Artillery commander and 4 Krupp Light mountain guns (obsolete) Regular

2 Muhafizia Battalion Commanders with 3 Companies of 10 per Battalion, Regular Infantry

6 Turkish MMG’s Regular

2 Sanusi Ikhwan Battalion Leaders with 3 Companies of 10 per Battalion, Irregular Infantry

1 Sanusi Tribal Infantry Leader with 2 Warbands of 12 figures, Tribal, obsolete rifles

1 Bedouin Tribal Infantry Leader with 2 Warbands of 12 figures, Tribal, obsolete rifles and swords

1 Bedouin Tribal Cavalry Leader with 2 Warbands of 12 figures, Tribal obsolete rifles and swords


How The Game Played
The Imperial troops were all deployed along the Khedival road marching in the direction of Sollum, while up to half the Turkish/Senusi forces were deployed on the table at the beginning of the game.

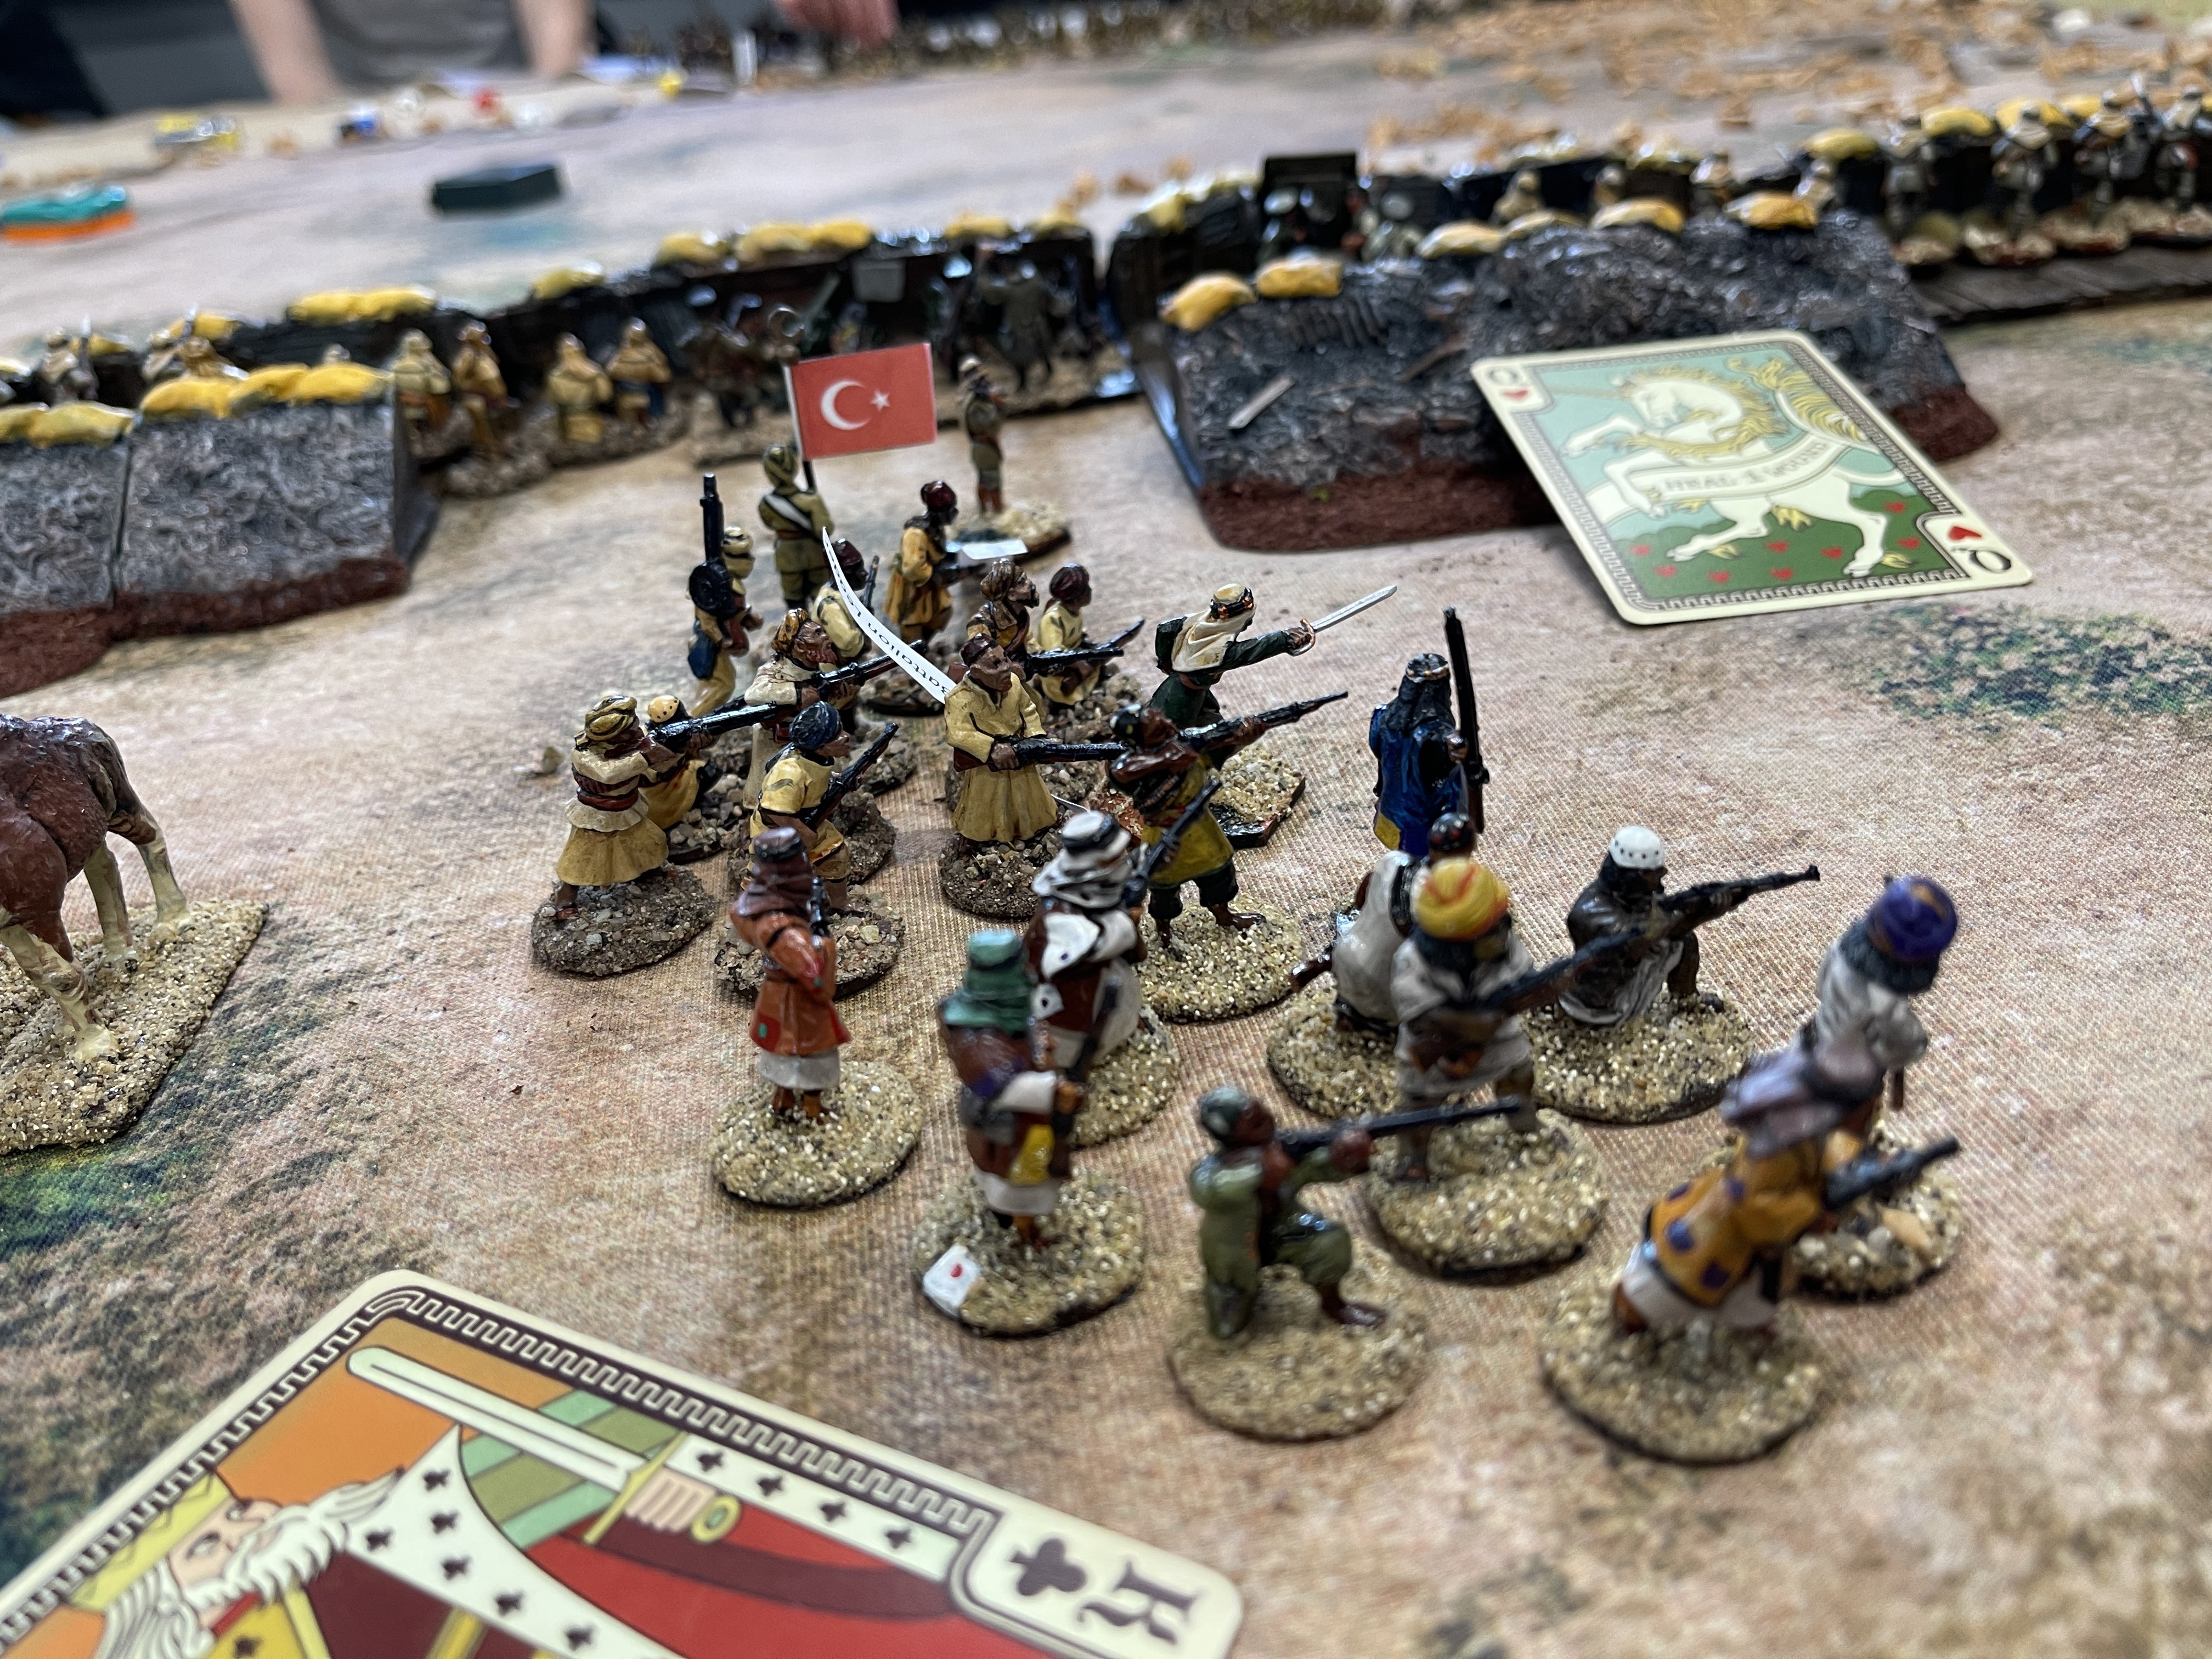
The round of cards saw the Imperial troops shake out of marching order and unlimber their artillery. The off table indirect fire from HMS Clematis got off to a good start with two hits on the Turkish defence line, but the hits were not converted to any losses. The Turkish defences were already manned by their best troops, the Muhafizia and supported by maxim guns and obsolete artillery. As their first move, the Turks started to bring on as many of their second line irregulars and tribal troops as there was space to deploy, securing their western flank; clearly the Turks were going to make a fight for the high ground.


The cards were dealt for the second move and the Imperial troops fired their artillery again, both HMS Clematis and the 13-pdrs, causing some minor casualties to the enemy artillery. The Imperial infantry continued to shake out and take up their assault positions. The Turks advanced their tribal cavalry forward to discourage further westward advance by the Imperial troops and making space to deploy the remainder of their forces.


A third round of cards was dealt and the Imperial troops were now advancing towards the Turkish lines, but accurate maxim gun fire from the Turks caused casualties amongst the Sikh troop, who were the best Imperial troops. The Beaudoin cavalry continued to demonstrate against the Yeomanry at the head of the march column.


The fourth round of cards went in the Turks favour and they used them to lay down heavy fire on the Sikhs causing more casualties before the Sikhs could react. The New Zealand brigade received its first casualty in this move to, as they pressed forward. The Imperial artillery plugged away causing some casualties and shock to the Turks. So far both sides had been able to shake off most of their shock by using their officers, especially the Imperial forces who had an extra officer.


By the time the fifth round of cards was dealt, players were getting a better handle on the subtilties of the cards. Not only do the cards determine the sequence of play, but they confer attributes to the activated unit (e.g. remove all shock, or recover one casualty back to the unit); there was much more deliberation on which card to play and where to play it from now on.


The Sikhs had deployed their supporting machine guns but were unable to get any hits on the dug in Turks. The Yeomanry dismounted to take up rifle firing positions as their weapons outranged those of the Bedouins. If the Yeomanry advanced next move they would be in range of the Bedouins and the Bedouins could fire back. By know the Imperial tactics were becoming clear to the Turks as their enemy was pressing hard against the eastern end of their entrenched firing line. The Australian Service Corp had climbed the high ground and were threatening to outflank the Turkish defences, from where their targets would no longer be in cover. Seeing this the Turks were moving troops to reinforce this threatened flank.


The sixth round of cards saw a lot of study and decision making on both sides as they tried to balance the desire to go first with the need to maximise the attributes of the lower ranked cards. The Sikh’s machine guns lost the exchange with the better dug in Turkish ones and were silenced, not wishing to incur further casualties the Sikhs were withdrawn out of maxim gun range. The Bedouin cavalry fearing the Yeomanry rifles, fell back too. The Imperial artillery plugged away causing shock and casualties as the remaining infantry pressed forward, the muhafizia and maxim guns making them pay for every yard forward.


The seventh round of cards saw the Australian Service Corp outflanking the Turkish firing line, accurate rifle fire drove off some Turkish maxim guns on eastern flank, the objective of the Imperial assault. The Sikhs spread out to create a defensive perimeter on the western and central part of the British line, freeing up other Imperial elements to join the main assault.


The eighth deal saw more accurate musketry by the Service Corp and some flank covering Ikhwan were driven off too. By now the infantry of both sides were well within rifle range and the firing became hot and deadly. The officers of both sides found themselves busy rallying and urging their men. Several Imperial officers had close shaves and Ja’far Pasha was seen encouraging the retiring maxim gunners with a lash; it was all-in now as both sides concentrated their forces on the eastern flank. The Imperial infantry obliqued and widened their frontage to maximise their rifle fire. The Yeomanry remounted and rode to the sound of the guns as the Sikhs stalwartly held the rest of the line. The defenders rapidly moved more units to the centre of the action.


The ninth and final round of cards favoured the Imperial troops greatly as the cards fell in their favour. But despite a good start the Turkish rifle and maxim gun fire was unforgiving. Realising that they were unlikely to carry the position the New Zealand and Middlesex troops were ordered to fall back.


As far as the infantry was concerned, they had more than done their job, pinning down the enemy force for the out-flanking Yeomen to carry the now poorly guarded enemy camp. We can only imagine the comments from the infantrymen, tucking into their Christmas bully-beef, when they heard that the Yeomanry manoeuvre was unsuccessful and the enemy had largely escaped. But their reaction was nothing compared to the lashing Ja’far Pasha gave his batman; in his haste to evacuate the camp, the batman thought it fit to abandon the Pasha’s personal effects and comforts.


Carrying an uphill dug in position was never going to be easy for the Imperial troops. In reality, the Imperial forces immediately concentrated all their infantry, led by the Sikhs, and artillery against the eastern flank of the Turkish line, overwhelming it. None of the members of the DWG have thirty years military experience fighting in the Hindu Kush, so they should be forgiven for this oversight. With hindsight, I should probably have designated the Turkish entrenchments as light cover, not hard, as they were not of the sophistication found elsewhere.


Post Script
At the outbreak of hostilities Idris al Sanusi was returning from Mecca. Idris arrived in Cairo and remained there for the duration of the hostilities, penning letters to the British protesting his friendship and how his cousin had been mis-lead by cunning men.


Britain’s secret weapon was the internal combustion engine. Armoured cars, trucks and aeroplanes were progressively introduced to the western desert. What would take the Sanusi several days to travel, the British could cover in a few hours. Reconnaissance flights located and monitored the movement of the Sanusi forces and camps. Motorised troops could travel into the desert and attack by surprise.


In 1917 a peace treaty was signed between The Grand Sanusi and the British. One of the stipulations was that Ahmad resign as Grand Sanusi and be replaced by Idris. The British and Italians later recognised Idris as The Emir of Cyrenaica. During the Second World War the Senusi leaned towards the British and in 1948 Idris became King of Libya, until he was overthrown by Colonel Gaddafi in 1969.

Gaddafi’s regime had little time for the Sanusi brotherhood, but after the fall of Gaddafi the Sanusiya have become more prominent in Libya’s affairs. The current Crown Prince of Libya is Mohamad El- Sennusi.

Max von Oppenheim went on to excavate Tel Halaf in north Syria, which he first saw in 1899 and it made him world-famous. This is an interesting German documentary on the Baron’s diplomatic and archaeological career, it touching on T.E. Lawrence too.


T.E. Lawrence played a tiny role in this campaign; after Sollum was recaptured he delivered new signal cypher codes there. As part of the British Intelligence Service in Cairo however, Lawrence had a ring side seat to events and these clearly influenced his thinking and later actions.

Sources
The Sanusi’s Little War by R McGuirk
The Sanussi’s Little Miniature War 1915-17 by R Giglio

Miniatures are from a variety of sources: British Imperial are a mixture of Empress Miniatures, Wargames Atlantic et al. Turks, Sanusi and Bedouin come from Woodbine Miniatures, Wargames Foundry, Perry Miniatures et al. 

Thank you to other DWG members who lent figures to make the game possible. 

The players were John Roberts, Mark Crisp, Ian Mac, Mark Thomas, and Tom, not overlooking dice rollers Luke and Mathew. Thanks for making this far flung out of the way game such good fun or atmospheric as John Roberts likes to say.

Stephen Huntsman

Saturday, 19 August 2023

North Russian Expeditionary Force, Under The Midnight Sun, Summer 1919 - Fistful of Lead, Bigger Battles


Ironically it was the Bolsheviks, fearing attack by Finns and Germans, who requested Allied troops land at Murmansk, in March 1918. A separate peace, that same month, between the Bolsheviks and the Central Powers followed by an anti-Bolshevik coup in Arkangel, allowed Allied forces to extend their support to the White faction, who promised to keep Russia at war with Germany. The November 1918 Armistice made this all largely irrelevant and The Western Allies were now openly intervening against the Bolsheviks. 

https://commons.wikimedia.org/wiki/File:Russian_civil_war_west.svg

The Allied/White forces advanced south and east from Arkangel, aiming for a junction with Admiral Kolehek’s forces advancing from Siberia but this never happened. The morale and motivation of allied troops became increasingly flaky as they wanted to go home. Efforts to recruit volunteers for the NREF met with little enthusiasm in a war weary Britain. By October 1919 the NREF was withdrawn from Arkangel and Murmansk and the remaining White Russian forces soon collapsed.


Today’s game, using Fistful of Lead, Bigger Battles, sees an attack by a combined British/White Russian force against a Bolshevik held position at a railway halt, somewhere south of Arkangel in summer 1919. The decision to withdraw from Arkangel this summer, before the port becomes ice-bound, is High Commands main concern. North Russia is now just a side-show with enough aggression shown to keep the Bolsheviks at bay.


The Terrain: 
What was once a frozen land has melted into bogs and swamps under the mid-summer sun. At least The North Dvina River is flowing freely now, so vessels can move up and down at will; but the forests are just as impenetrable as ever before. To simulate this, every time a unit attempts to move, outside of an area of good ground, a roll of 1 on a D6 means the unit cannot move this turn. The unit can do any other action it chooses. The North Dvina River is also represented on the table, not to the same scale, to allow for riverine actions and support.


North Russian Expeditionary Force
Officer IC
British Infantry officer
3 units of 10 British infantry, with rifles.
Russian Infantry officer
3 units of Russian infantry with rifles
Priest
1 unit unarmed peasants
3 MMG’s
3 medium field guns
Gunboat HMS Fox armed with two medium guns


Bolsheviks
Snr Officer IC
Snr Komisar
Junior Officer
Jnr Komisar
6 units of 10 infantry
1 squad of Red Finns
4 MMG’s
2 River patrol boats, armed with MMG and light gun
Unarmed tug and two barges
2 medium field guns


Deployment: 
Units may come on anywhere on the friendly short side without penalty. Units cannot normally deploy off the riverside, unless transported by vessel. Units can attempt to outflank and come on the landward long side, but going is either boggy or deep dark dense forest and hard to navigate. To enter on the landward long side, roll a D6 for each unit attempting to enter requiring 4 or more for success. There is no limit to the number of times a unit can attempt to come on in this way.


How the game played:
The shabby village next to the railway halt, had been defended with some simple earthworks, but the Bolsheviks left them unmanned, preferring an all-round defence against attack from the forest or the river. The Bolshevik joint commanders, asleep in a railway carriage which they had turned into a comfortable mobile headquarters, were awakened by the sound of erratic machine gun fire and enemy artillery. Franticly cranking the field-telephone, they spoke to the main concentration of Bolshevik forces, further down the line. An unperturbed voice reminded them that they were part of Military Commissar Trotsky’s New Red Army and that reinforcement would be dispatched.


A thick column on the Dniva river heralded the arrival of HMS Fox and fire from her two medium guns forced the Bolshevik artillery to retire pronto. Looking out of their carriage window, what looked like Interventionist infantry and support weapons were exiting the forest line and splashing their way towards the village. Grabbing whatever clothing came to hand the Bolshevik commanders rushed over to inspire and steady the garrison troops. A unit of off-duty Red Army men were roused and sent to bolster the defences, only to walk into a hail of Interventionist fire. At least the small group of Red Finns, deeply suspected by the Commissar, turned out quickly to join the fight.


A large cloud of smoke south of the village heralded the arrival of Bolshevik reinforcements. Leading
the way, was a modern river patrol boats armed with a machine gun and light gun; the experienced sailors knew to immediately put down a heavy fire on the Interventionists nearest to the river bank.

Then followed the tug “October Revolution” (previously known as “Rusty Oleg”) towing two barges
and crammed to the gunwales with fresh Bolshevik infantry. Heavier equipment was being unloaded from an improvised armoured train.. All this settled the nerves of the defenders and their leaders took a more prepared approach toward defence. 

None of this stopped the Interventionist’s infantry making it to the village earthworks, or their gunfire further depleting the defenders. Not to be out done by the Russian sailors, gun-crews of HMS Fox laid down more fire on the Bolshevik artillery forcing it to retire yet again. Only for the inspiring words of a Bolshevik leader to intervene, that steadied the depleted gun crew's nerves. In all the euphoria, the movement of the Red Finns in the direction of Finland passed largely unnoticed.


The Skipper of “Rusty Oleg”, I mean “October Revolution”, wasn’t that committed to the cause and seeing HMS Fox his first thought was to land his passengers quickly and not too close to danger. With this considerable infantry force now landed, the Bolsheviks took up a strong position in the railway siding. The sailors on the river patrol boat were more game and though out gunned engaged the Fox, causing some damage. If they had hoped their superior speed and manoeuvrability would protect them, that was a mistake. A near miss caused sufficient damage and the patrol boat was left drifting in the river.

The battle was now in full swing. Bolshevik heavier weapons, unloaded from the train, and started to appear. A medium gun and a two machine guns commenced their deadly trade. But, unknown to the Bolsheviks a considerable force of newly recruited Whiter Russian troops had concealed themselves in the woods, right next to the artillery’s firing position. “Forward with the bayonet” cried their officer, but not one White solder would budge. The same officer then appealed to another unit of Russian troops, who followed his call and charged the gun position. Caught unawares, the artillerists fell or fled. 

The Bolshevik infantry were consolidating and expanding their position in the railway siding awaiting any attack from Interventionist forces. But the Interventionist troops were still clearing the remainder of the village as they awaited their heavier weapons to move to new positions. While all this was going on, nobody hardly noticed that the Finns had disappeared in the direction of Finland, without so much as “a how’d you do or a by your leave.


The brave Russians who captured the Bolshevik gun were now subjected to the withering fire from three nearby Bolshevik units; inevitably they turned and fled. But their example had inspired the previously hesitant White unit to now over-run a Bolshevik Maxim gun position. And this was not the only example of counter-Bolshevik bravery today; Father Egor had rallied his congregation who now attacked some Bolsheviks hiding in one of the village buildings. Alas for Father Egor, after some initial success the icon of Saint Erasmus seemed to lose its power and the now depleted defenders lost their position. 

Bravery was not just confined to the White Russian side, for on the Dvina a second motor patrol boat burst though the smoke of battle and engaged the Fox with all guns. The same result was inevitable as shot from the Fox cleaved the patrol boat into two parts and it sank quickly. But the patrol boat’s efforts were not all in vain, as further damage was inflicted on the Fox. The Fox’s captain, knowing that he would soon be required to sail his gun-boat across the White Sea to Murmansk, before towing to Rosyth, did not want any further damage to his vessel so contented himself with shelling the railway siding, which was already the main target of the other Interventionist guns.


By now it was clear that superior weight of Interventionist artillery fire would settle the day in their favour. The Bolsheviks contented themselves with the knowledge that the Interventionists and their allies would find it difficult to progress further south down either the River Dvina or the railway line. Rumours were already circulating that British Major General “Tiny” Ironside had ordered the evacuation of Interventionist forces from Arkangel, now it was ice free. As for everybody else in the North Russian Expeditionary Force, they were just happy to be going home in one piece.


Figures are mostly Copplestone Castings, British troops from Woodbine Miniatures, the two large vessels by Sarissa and the patrol boats are 3D printed. Thanks to the players, Vince, Chas, Si and Mark for getting into the spirit of the era. Now, where shall we go next in the less ventured backwaters of the twentieth century?