Friday 14 October 2022

The siege of Antioch and the Twenty-Five Genoese Martyrs, 1097-1098 - Lion Rampant Second Edition


The game was played using the new Lion Rampant second edition rules together with The Crusader States supplement. It is based on the events described in scenario 1 on page 93 of the supplement, but instead of the game covering the last stand and massacre of the Genoese infantry by the Turks we take up the narrative at the point where Bohemond of Taranto intercepts the Turkish force responsible for the massacre to exact his revenge.


Background
A Genoese fleet lands at the harbour of St Symeon about ten miles from Antioch. Bohemond of Taranto meets the fleet and persuades a force of Genoese to accompany him to Antioch to assist in the fight against the Turks. On the road to Antioch Bohemond and the Genoese are attacked by a larger Turkish force. Bohemond and his men are mounted as are some of the Genoese who ride and escape making their way to Antioch.


The remaining Genoese foot put up a brave defence, but are so out numbered they are killed to a man.
Bohemond returns from Antioch with reinforcements and intercepts the Turkish force and here begins our game:


Victory conditions
Turkish players
One Victory Point for each unit (even those having taken casualties) they manage to exit from the opposite end of the board.


Frankish players
One Victory Point for each unit they rout or wipe out.


Special Rules
Failed activations do not pass play to the opposite side. Activations continue until all units have had attempted activation. The warlord can give a re-role to any unit within 12” of his figure once per turn. Due to the number of units on the board the 3” distance rule for friendly troops is reduced to 2”.


As the Turks are the defender they set up first on the southern edge of the board and the Franks on the north end. The Turks deploy a unit of archers on their left flank with two units of light infantry in the centre supported by a unit of elite foot and a unit of heavy cavalry with bows who are blood thirsty (all sixes rolled by them in a melee count as two hits). On their right flank are two more units of blood thirsty mounted bows and another unit of elite foot with the warlord.


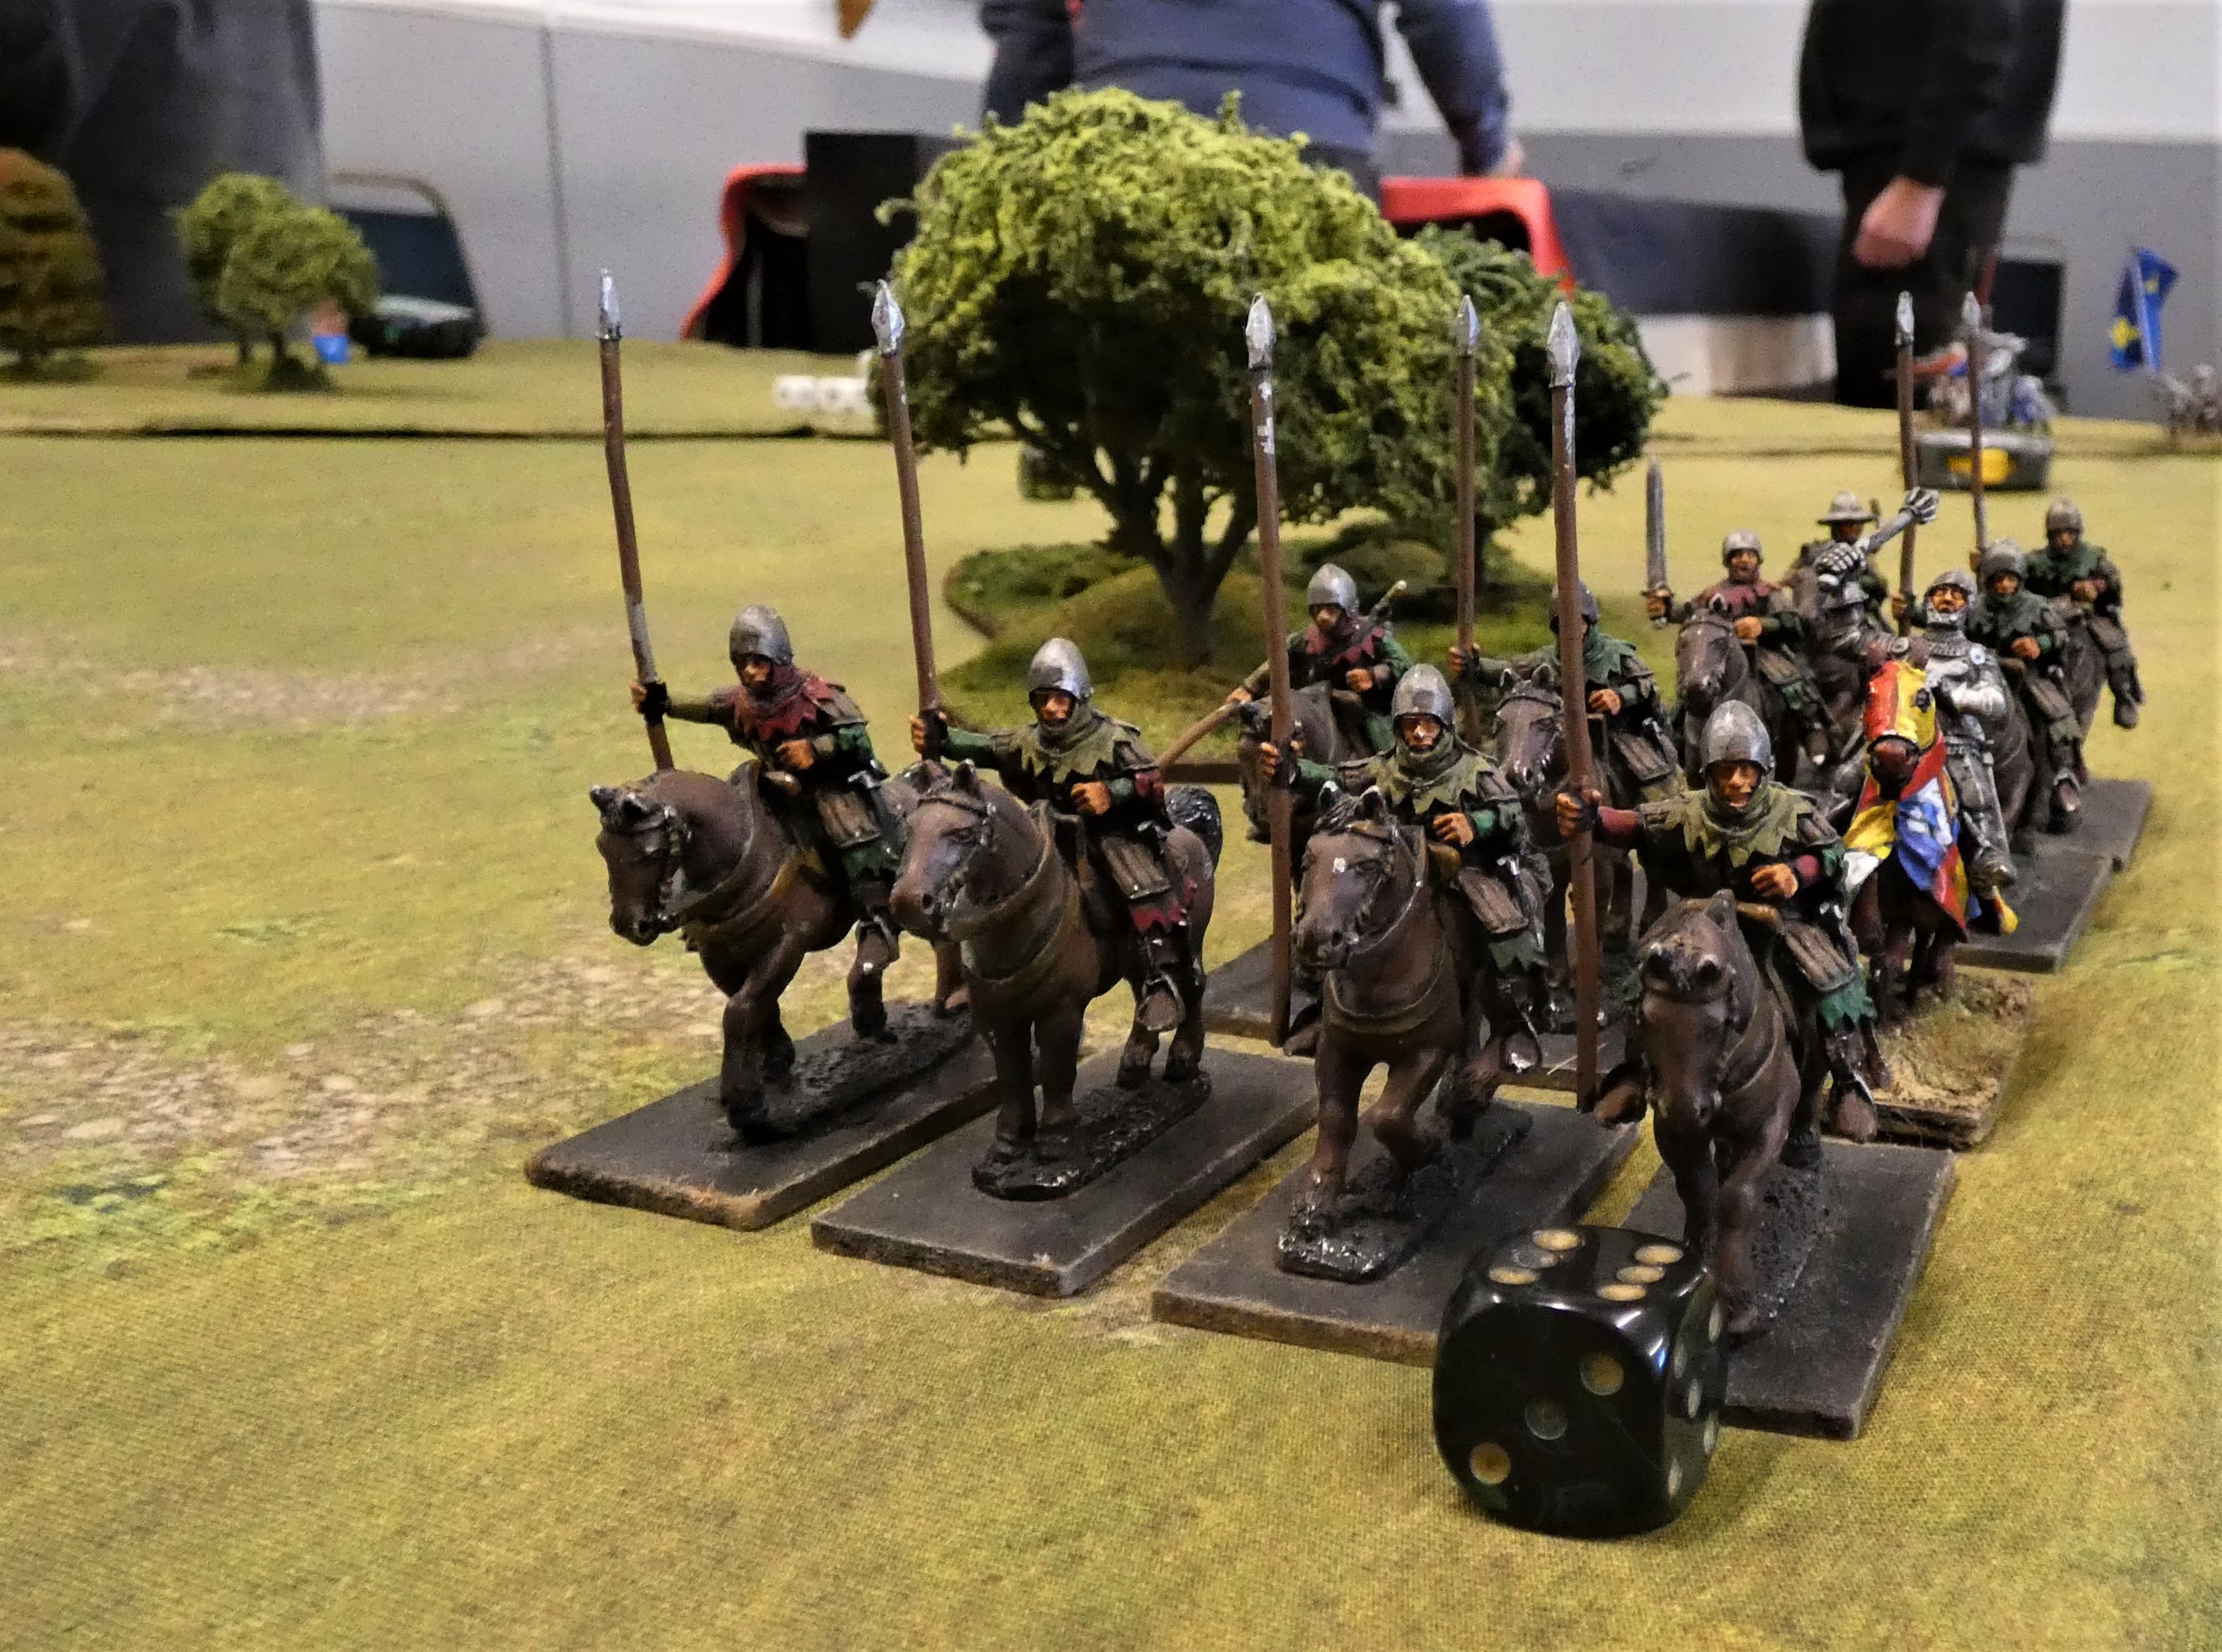
The Franks set up next putting two units of Genoese heavy cavalry on their right flank supported by two groups of skirmishers taking cover in rough terrain with a unit of heavy foot behind them. Bohemond is in the centre with two units of elite foot who are effectively blocking the road. On the Frankish left flank are two units of mounted blood thirsty knights (elite cavalry) supported by a unit of crossbows.


The Franks quickly get their mounted knights moving up on their left flank and the crossbows move into rough terrain to make use of what cover they can in support of the knights. Bohemond and the two units of elite foot maintain their position blocking the road. On the Frankish right flank the Genoese heavy cavalry remain static seemingly content to wait their moment and watch the battle unfold.


The Turkish force are quick to respond to the threat of the Frankish knights and the two units of mounted bows surge forward to intercept them while a swift unit of their light infantry move towards the Frankish crossbows supported by the warlord and his elite infantry. The Turkish mounted bows fire on the Frankish knights and have some success but the knights’ resolve remains firm and they charge home inflicting casualties on the mounted Turks who pull back staying within bow range but out of charge range of the knights.


In the centre a unit of Turkish light infantry moves over to support the Turkish archers who have taken cover behind rocks on their left flank and have started to target the Genoese heavy cavalry. Because of the distance they are shooting, their arrows have no real effect on the Genoese who remain passively looking on. In fact the whole Frankish right flank remains static while the battle continues on their left flank where the first unit of knights has been reduced by the constant rain of arrows from the Turkish mounted bows who eventually charge them and wipe them out. Seeing this the second unit of Frankish knights hesitates.


All is not going so well for the Turkish light infantry moving in on the Frankish crossbows who deliver devastating volleys and reduce their number to half in a very short time. Buoyed up by the proximity of their warlord, they stand their ground. However when a third volley hits them they rout and quit the battlefield. Soon after the unit of mounted Turks are also hit by the crossbows and die to a man. Things are not looking good for the Turkish side.


It is at this point, that scenting blood, the Genoese heavy cavalry make their move and ride towards a unit of Turkish light foot who are braced in a shieldwall next to their archers who are taking cover in the rocks. The first unit of cavalry hits the shield wall causing and receiving casualties. The shieldwall stands firm and now the Genoese cavalry are much closer, the Turkish archers fire on them removing one unit from the field of battle and causing the second to become battered. The Frankish skirmishers in the rocks on the Frankish right flank see the unite of Turkish elite foot containing the warlord coming towards them and they target the unit eventually reducing it by half, but with the Turkish warlord present, the units courage holds and they enter the rough terrain attacking the skirmishers killing some and driving both units back and out of their cover.


Bohemond now realises that his right flank is crumbling. The heavy infantry move forward to intercept the Turks and Bohemond and his elite foot move forward to try to intercept a unit of Turkish mounted bows who manage to ride around him and make their escape off of the board edge.


With their left flank now wide open, the Turkish force uses a unit of their mounted bows on their right flank to fight a delaying action against the remaining unit of Frankish knights and elite infantry, while the rest of their force make good their escape on their left flank.


Conclusion
The Turkish force took substantial casualties, however the Franks only succeeded in killing and routing two of their units. With such a high casualty toll, in a usual game the Turks would have simply fled the field as their numbers were so depleted. In this scenario however, they did not have that luxury, as simply turning back would have seen them hunted down to receive the same treatment as they gave the Genoese infantry. 


The Turkish force managed to get five units off of the board and so they won 5 Victory points to 2.

AAR courtesy of Mike C.

Sunday 9 October 2022

Écorchers - Skirmish Wargaming in the Hundred Years War (A Meeting Engagement or the Noble Art of Pig Wrestling)


This month, I and a few of the chaps got together to playtest a set of rules being developed by Dr Rob Jones for playing medieval skirmishes in the Hundred Years War, called Écorchers.


I've featured Rob's presentations at Crusade Wargames Show on JJ's Wargames together with his rule adaptation for A Coat of Steel, links below

http://jjwargames.blogspot.com/2021/06/blood-horse-droppings-wotr-rules-from.html


The two English retinues of twenty figures each with a commander and banner and with the Lord accompanied by a musician

So in a combined effort to pull together terrain, figures and playing materials, we laid out the table seen above and below, all set to play the Meeting Engagement scenario, with a typical French hamlet, together with pigs in the pigsty ready to receive our roving forces from the French and English armies in the area, keen on securing provisions at the expense of the locals.
 
The two French retinues are assembled at opposite table corners, with two mounted groups, facilitated by the splitting of the Lord's retinue by allocating a junior leader to the hobilar force, supported by some foot sergeants and crossbowmen in a separate retinue.

The combat system relies on a set of opposed combat dice being rolled to assess the outcome, that can be replaced with ordinary d6 should you prefer, but we played with half a dozen prepared dice, with each face displaying  from left to right, the shield, to counter the strike and stun, the sword, usually a killing result; the cross swords a feint, giving the wild option of a reroll or strike, stun or shield to be played and called out prior to rolling; the compass or Fortune's Wheel, gaining a coin for the purse and used to pay for actions taken or die roll modifying; a soldier, indicating a shove back in melee, and a mace indicating a stunning blow, leaving the opponent stunned and only able to defend himself and, until rallied, liable to death should a second stun be inflicted to the first.


In addition to the combat dice, I pulled together some status markers to show when crossbowmen were reloading. 


In addition I printed off a few stun markers to register such hits.


With our forces arrayed we set about getting our collective heads around the sequence of play and specifically how to move and have combat.
 

The forces themselves were based on Rob's recommended retinues, numbering some twenty figures each, for this period, with as many types as we could include to test the rules thoroughly, as well as a random mix of commanders and command ability.


As we had five players we adopted the multiple player rule sequence as opposed to those when playing one to one, with each commander following a die roll off for initiative, able to select one of five different basic actions for his command, namely to move, to break off combat, to opportunity shoot, to shoot normally, to reload (crossbows) or to rally.

The first initiative and attempts to grab it from opposing commanders was resolved with each player rolling their respective command die, a d8, d10 or d12, which could be moderated by the spending of coins from the Lord's purse, adding one to the score for each, but requiring a commander to score at least 4 or higher and to beat the opposing commanders score, with a 1 always failing.


With multiple players we used the rule that each command could perform four activations, before the initiative was passed to a comrade, or was grabbed by the opposition.

The activation limits are controlled by the number of coins in a Lord's purse at any given time (for coins, we used a pile of old penny pieces), needing to spend a coin to activate, by passing it to the opposing player and with each commander getting half the combat die type in coins at the start of play.

Plus any failed activation attempt automatically passed the initiative to the opponents.


The objective of the game was to grab a pig, actuated by engaging it in hand to hand combat to establish getting hold of it and then keeping hold of it whilst withdrawing.

Of course both sides had to also keep the other at bay whilst doing so.


Movement was quite straight forward with multiple d6's rolled, two for infantry and three for cavalry to get a score indicating the number of inches to travel and with die roll deductions included for different terrain types or special movements such as climbing.

Both sides attempted to close on the hamlet with a force early on and seeing the French detach their hobilars to deal with a similarly detached group of English archers and sergeants, taking shelter by a nearby wood ready to provide overwatch archery to their comrades in the village.


As wargamers are want to do, both sides were keen to see how the combat process worked and the hobilars managed to close on their opponents, but not sufficiently fast enough to turn their contact into a full blown charge, as the wood took its inevitable effect on their movement rate.


Both sides set at it with spear and sword as men were killed outright, driven back and 
/or stunned, with the advantage swinging to the English in the early exchanges as their numbers made up for the additional combat dice rolled by their opponents for being mounted.


The rules allow for opposing lord's to call for quarter, which if the opposing commander is within four inches, it is expected to be honoured, with the captured leader escorted to the rear by a detailed man, leaving nearby survivors of the affected retinue to take a stun test.


Our French hobilar commander found himself so taken, but it seems he had little affection from his men who didn't even blink as he was escorted away, with not one of them succumbing to a stun result, but being cut down in the following melee round having failed to break off the fight.


Meanwhile in the village the French mounted knights were getting an equally hard time facing the other English retinue that, having come off lightly in the first contact, with both sides suffering push backs and stuns, proceeded to shoot the French out of their saddles at close range, preventing the follow up men from closing and making full use of their heavy swords, armour and big horses.


With their mounted comrades getting a seeing too from the English, and having only managed to loose off a couple of desultory rounds of crossbow shots, the French foot wisely decided to withdraw.


Thank you to Colin, David, Ian, Bob and Tom for applying their undoubted gaming experience to what was a totally new set of rules for all of us and I'm sure we made some mistakes on our interpretation of them, but that will come out in the feedback for Rob.

Thanks chaps 

JJ