Sunday 25 June 2017

The Wild Geese, a Tribute Game - Winter of 79, Living on the Front Line

The Late, Great Sir Roger Moore as Lieutenant Shawn Fynn in the 1978 British adventure film 'The Wild Geese'
Thanks to Chas for running an entertaining game based on the movie "Wild Geese", to "Wild Geese -
Life on the Front Line Rules". Any resemblance to the real life activities of "Mad" Mike Hoare was
entirely intentional.

The scenario covered the final act of the Wild Geese movie, with Burton, Moore and Harris racing to
the jungle airstrip, in order to get the injured president Limbani onto the waiting Dakota and thence
to a safe country. Needless to say, they and their mercenaries had to fight the pursuing Simba rebels
every step of the way.


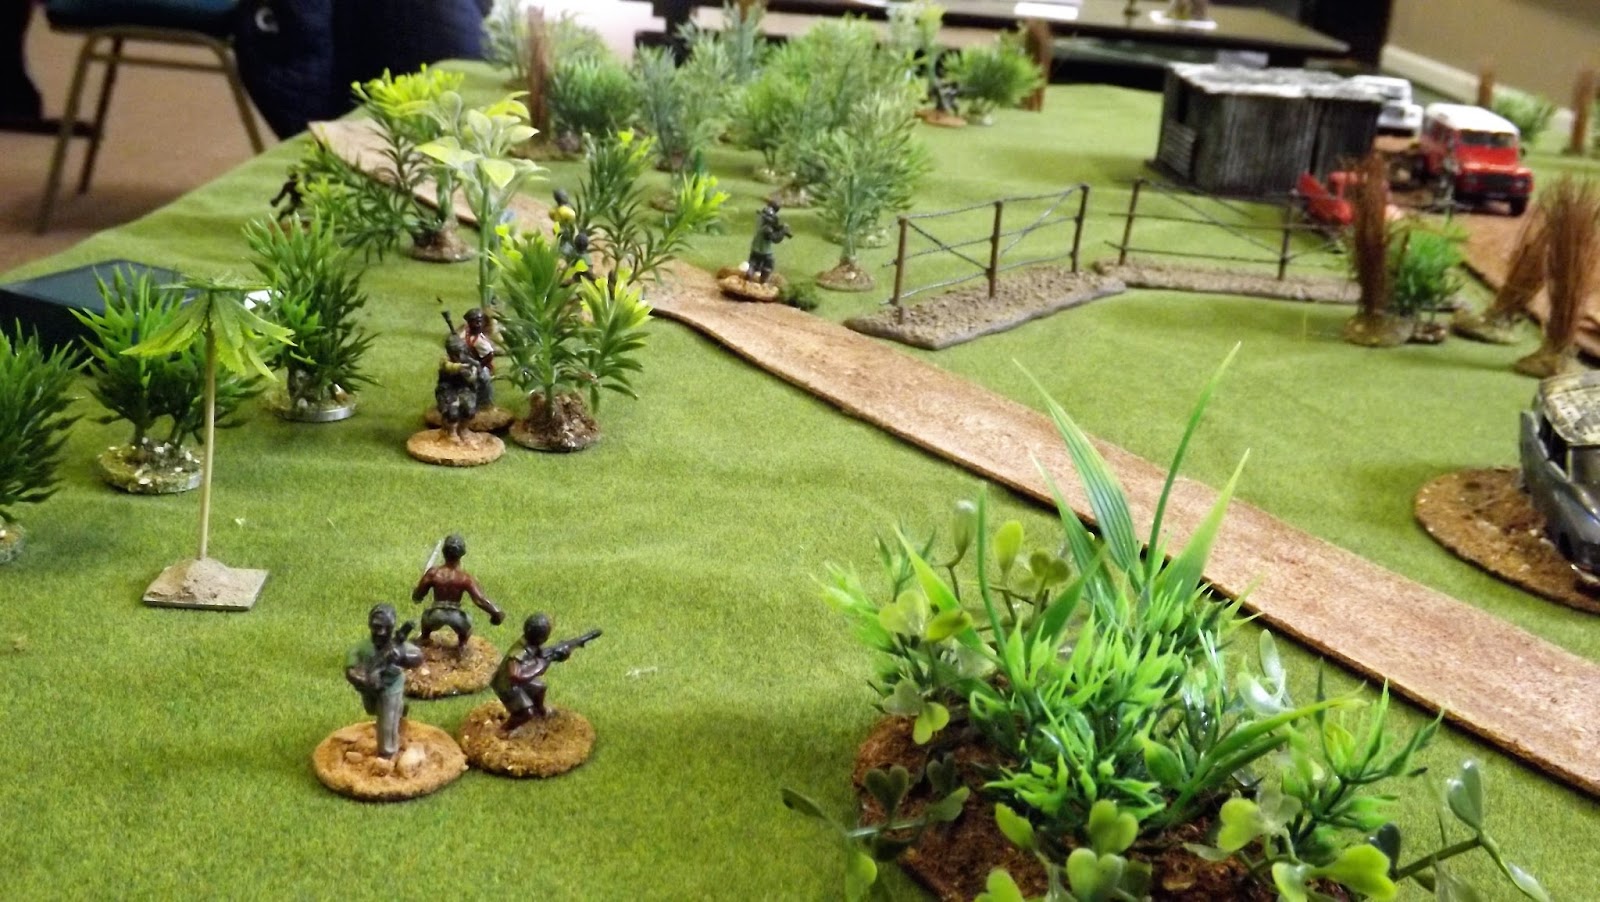
Scene One saw the Wild Geese in three vehicles racing down the jungle road, whilst rebels fought their way through the jungle to intercept them. As Richard Burton's force neared the airfield, a Simba
checkpoint and attendant blockhouse came into view. Richard Harris's squad in the lead truck raced
to crash the barrier and were brought to a shuddering stop by an rpg shot that injured one of the team. The squad debussed and brought the blockhouse under fire.

With Simba troops closing on the road near the rear Landrover, Richard Burton ordered his 4x4 to
halt and deployed his squad and their mmg to provide covering fire. This took the pressure off the
vehicle with Roger Moore and President Limbani in it and they were able to race on down the road.


A desperate struggle developed round the checkpoint and two mercenaries were killed, before Richard Harris could storm the entrance. His Uzi spoke, killing the men in his way and he lobbed a grenade into the guard room, with devastating results (you could tell he was no bit part player).

Burton's squad and the mmg were cutting swathes through the rebels behind the column, but the
jungle near the road block was alive with Simba militia and the men in the blockhouse managed to
stop Richard Harris in his tracks, with an injured rebel forcing him back (I don't think that scene
made the final cut).


As the blockhouse was finally taken, Roger Moore raced past the checkpoint toward the bridge over
the river. One Simba rebel had a line of sight and a lucky shot took out a tyre on the Landrover,
bringing it to a halt. Chaos ensued as mercenaries scrambled out of the vehicle, dragging the injured
Limbani into cover.

Having star billing, Richard Burton was alive to the situation and ordered his men back into their
vehicle, before driving to the president's aid.


Burton's Landrover arrived at the blockhouse, screeched to a halt and stalled. Burton, his squad and
the mmg debussed to provide covering fire. Roger Moore jumped into the vehicle and desperately
tried to start it. As he cranked the engine, the mmg and the FN's of Burton's men cut down a newly
arrived Simba squad.

Rebels appeared in the jungle on the other side of the river and a fire fight with Harris's men developed.


As Limbani was loaded into the remaining Landrover, Harris used his "Tactical Insight" special ability to keep his squad firing, as he rushed over open ground to a parked Simba truck. Once there he
dived on board, started the engine and drove to the blockhouse (At this point Richard Burton was
seen on the phone to his agent, shouting about who had the bigger part).


Reckless driving by Roger Moore, saw him cross the bridge and avoid the hail of fire from the rebels.
He screamed to a standstill by the Dakota and ran up the steps to to take his place in the pilot's seat,
as his men stretchered the president on-board.


Seeing Limbani had made it to the plane and with Simba militia closing in from all sides, Burton
ordered the rearguard to retreat by squads, with the mmg crew abandoning their gun and climbing
on Harris's waiting truck.One soldier was killed as he ran from the blockhouse and another covering
the retreat was also felled.


Harris and his remaining men on the truck raced over the bridge and onto the runway. Now there was only Burton and his men left to cover the rear.


Harris and his men boarded the plane, as a rebel tank (a 10+ event on 2D6) tried to smash its way to
the road through the jungle. Also a "technical" mounting a DSHK came into view of the men in the
blockhouse. Burton didn't remember this from the script, but quickly recovered his senses and ordered his men over the rear wall of the fortified position.


A brace of shots from one of Burton's men saw the technical's engine shot out, but a mercenary fell
to Simba fire as he crossed the river.


Meanwhile, back at the plane, Roger Moore sent his bazooka team (who had done nadda so far) to lie in ambush, waiting for the clanking monster currently making its way onto the road.


As the tank turned onto the airstrip the bazooka fired, hitting it. The smoke cleared, but the tank was untouched. Raising an eyebrow, Roger Moore gunned the Dakota's engines and took off.


Cut to scene of Richard Burton and his men staring up at the plane, as it climbed into the clouds, the
word "RAFER !" frozen on Burton's lips.


Postscript:

Her Majesty's Government wishes it to be known that, whilst it had no part in recent events in Zembala, it is pleased to hear that that President Limbani is safe and well in a third country, following a rebel attack on his motorcade.


Through the offices of the United Nations, the British government will continue to press for the
release of a number of British citizens employed by President Limbani, who are currently unlawfully
detained by Simba rebels.


Many thanks to Chas, Si and Steve H, who played the game in the spirit it deserved.

Vince

Tuesday 13 June 2017

Seven Years War - Koenig Kreig


It was a while back, in 2013 that Mr Steve graced the club with his 15mm Seven Years War collection using Koenig Krieg (KK).

http://devonwargames.blogspot.co.uk/2013/09/seven-years-war-koenig-krieg.html

Since that game he has been adding to his collection of French/Saxon/Swiss and British/Hanoverians with Russians and Ottomans.

At this months meeting we got to play with the larger former collection and threw together a meeting engagement using KK.


As you can see we had quite a few toys on the table, numbering eleven brigades on each side, with the Anglo/Hanoverians lined up either side of the small village to the right of picture.

The view along the French lines with dragoons, heavy cavalry and elite 'Maison du Roi' troopers anchoring their right flank
The game was very much a throw down 'play from where you start affair' as the terrain was quickly laid out with undulating ground, a central road and small hamlet in amongst light woods.

Each side took it in turns to set up a brigade and the French planned to refuse their left, with the stronger units set up on the right and opposite the village.

The Allied cavalry deployed against the French right flank
Both sides went very traditional in placing their cavalry on the flanks and in true wargaming fashion nobody kept a brigade or two in reserve.

The cavalry clash first as the French right closes on the Allied line
The first forces to clash were the cavalry opposite each other on the French right flank, and after some early initial success the Allies gradually got the upper hand in the struggle that lasted the whole game and left victor and vanquished well and truly beaten up.

The Swiss brigade advances on the Hanoverians supporting the troops garrisoning the village
As the cavalry got stuck in the French refusal of their left meant that the first infantry fighting flared up close to the village and in the centre leaving the British and allied troops to do all the marching out on their right flank.

The Saxon brigade advances towards the Allied line

As the cavalry tussle starts in the background the two lines close around the village
The fighting around the village involved the elites from both sides as Swiss line, French and British grenadiers got up close and personal, plus the bayonet work became even busier as the French stormed into the village and started a remorseless push into the centre.

Allied cavalry forced back in the initial exchanges

Both sides make gains in the first cavalry combats opening gaps in each others line
As the fighting around the village grew in intensity, the first Allied units started to retreat which was only just held in check, with the rallied units returned back into the fray to resist the French onslaught.

The French and Swiss prepare to assault the village
The Allied force had the quality but the French made up for that in numbers and as the saying goes, numbers have a quality of their own.

The cavalry oblivious to the infantry battle away to gain superiority
The Franco-Swiss forces fighting around the village were forced to keep an eye on both flanks as the cavalry battle swung back and forth on the right and the British marched closer to the left eager to get to grips and force the issue elsewhere along the line.

The infantry close in and the volley fire commences closely followed by the steel

The British brigade advances on the the refused French centre left
British fire-power in line can be formidable but not on this occasion and time and again the French were able to force the issue in close combat.

British cavalry supported the Allied attack on the refused French left flank

And still the cavalry on the right flank went at it with the fighting lasting all day

The French force their way into town amid bitter street fighting
Suddenly a crack appeared in the centre of the Allied line as several battalions broke and fled leaving a yawning gap between the remaining Allied units.

The opposing lines go toe to toe supported where possible by light guns

The Swiss infantry push their way forward in support of the French troops fighting in the village
If the break in the line wasn't bad enough, the village was close to falling to the French and the Swiss on the other side of it had repulsed the attack of the British grenadiers.

Suddenly the Allied line around the village looked vulnerable

The British threw in their Grenadier brigade in an attempt to stem the advance of the Swiss

Meanwhile the British and their allies take the fight to the French left flank
Apart from some sharp fighting by the British cavalry versus their French counterparts out on the Allied right their was little combat affected before the collapse of the centre and as our game closed with the Allied line in some disorder there would have been little else for these British troops to achieve except to act as a rear guard to the other forces now in full retreat.

The vulnerabilities exposed in the Allied line suddenly turned into a gap as a brigade broke and fled in the centre

The Allied troops attacking on the French refused flank were now separated from their comrades around the village 

French and Swiss infantry maintain their grip on the Allied left flank as the British grenadiers are forced back

However the French did not have it all their own way as the Allied cavalry finally broke the opposition, but leaving themselves badly battered

The Allied line is broken in the centre and the village looks likely to fall into French control

The Allied line continues to lose battalions 
As you can see we had a lot of toys on the table and the rules performed reasonably well with the numbers involved, although there are some frustrations with their layout that does nothing to make a quick finding of various rules easy, this despite two of us overseeing the rule looking up process whilst the others pressed on with other parts of the game.

The British on the French left press on regardless
That said I think we all enjoyed the game they created and we whistled along with them quite well considering we hadn't played them for a while and Mr Steve's eye candy collection made the experience better.

The Allied right flank is starting to look a bit messed up

The French left flank resists the Allied assault

French troops start to clear the village

The Allied centre is defeated as French troops occupy the vacated ground
I think at a later stage we will give the collection a go with Carnage & Glory and see what we can do with them.

With their centre and left flank defeated the British and their remaining allies can only look to make a fighting withdrawal
Thanks to Greg, Steve M, Nick, Ian and Mr Steve for providing the fun.