This was a fictional battle set in the Sudan utilising my 28mm collection, playing with the
Two Fat Lardies rules TDLIUE "They Don't Like It Up Em'" - held at the
Devon Wargames Club, where we had a record turn out of over 20 players, I was hosting for 8 players with me Umpiring the game...
Chaos was bound to ensue...
Advance the Columns...
The scenario was set during the Relief of Gordon at Khartoum, the British forces had sent a column to the city but had been fought to a standstill, and was retiring in good order but "low on ammo" towards the Nile to meet up with the main Imperial force, having 3 columns landed and advancing to the city, and to meet number one column, who were being pursued by a large Mahdist force...
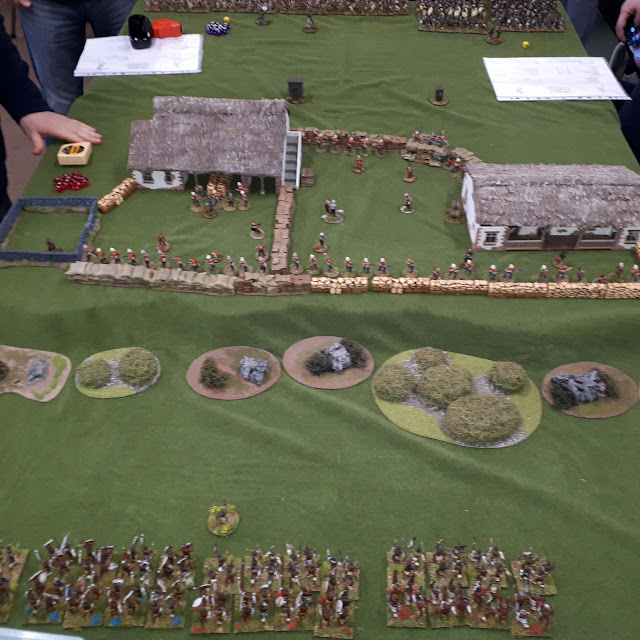
View of the map from bottom left of the Empire deployment area, with the Heliograph section on the hill...
The TDLIUE rules are from the Too Fat Lardies Christmas special, working on the basis of card driven initiative system, each Brigade/Rub have their own card, but each player, whether Damn Fine Chap or Mullah, have their own card as well, which adds extra initiative, on a die roll they command that many units. the combat shooting and moving is quite simplistic with each unit having four action dice to be divided into firing or movement, camels and horse having bonus' to their movement, Fuzzy's ignoring first level of movement cover effect, as this is their home. Fighting is simplistic but very bloody... I like these rules for this period and find them quite effective and realistic for the period...
Sir Chas "Mad Dog" Carter was leading the Imperial forces, with Steve, Jack and Vince as his loyal subordinates.
The Empire forces...
Each Imperial player had a force under his control and a Damn Fine Chap, which had a small sub plot to try and accomplish in the game as well as surviving.
First Brigade.
Brigadier General. Steve
Coldstream Guards (Elite)
Cameroon Highlanders (Aggressive)
49th Infantry Batt. (Regular)
The Post Office Rifles (Elite)
Mountain Gun
Your column is “low on ammo” and returning to base to resupply, you may come on in any top corner, you need to get to the far end of the table and rejoin your forces and resupply, but as first Brigade and the superior commander you must do this in good order and fight your way back and give a good account of yourselves.
Your DFC 1 has an outstanding feud with DFC 2, as he stole your beloved child hood sweetheart, who happens to be the generals daughter and your way of aspiring to the top ranks, if you can leave him out to dry or kill him if you have the chance, honourably if the opportunity arises.
Second Brigade
Brigadier General. Vince
Naval Infantry - HMS Lion (Regular)
Naval Infantry - HMS King Edward (Regular)
Indian Infantry (Regular)
Indian Infantry (Regular)
Gatling Gun
Gardiner Gun
Your brigade has just landed off of the Nile Gunboat HMS Lion, you have been commanded to go and rescue the first brigade as their commander needs all the help he can get to pull his men back from the debacle falling upon him.
Your DFC must attempt to rescue his beloved wife to be who has been left stranded by the retreating forces, she will be with a young officer leading the Heliograph group, but beware there may be enemies about. She is the generals daughter and also your way to the top ranks...
Third Brigade
Brigadier General. Chas
Camel Corps Batt. (Regular)
Camel Corps Batt. (Regular)
RA Field Gun
21st Lancers (Elite - Aggressive)
Bengal Lancers
The Third Brigade falls to your command of course, as the most dashing hansom fellow in the army, it was only right that you were chosen to lead this cavalry brigade, then they attached some of those dreadful camel boys onto your brigade, and a damn cannon just to slow you down, at least the camels will be of some help if things get sticky!!
Your DFC 3 has his younger brother on the field somewhere, he is out scouting for the general and has one of those heliograph contraptions with him, mummy has asked that you keep him safe at all costs, if not daddy will be cutting of your allowances, and you do not want that!!!
Fourth BrigadeCavalry
Brigadier General.(Extra kudos for commanding these damn fuzzy chaps) Jack
Egyptian Infantry (Regular/Hesitant)
Egyptian Infantry (Regular/Hesitant)
Egyptian Infantry (Regular/Hesitant)
Sudanese Infantry (Regular - Aggressive)
Egyptian Cavalry (Regular-Hesitant)
That damn incompetent general has given you command of a damn bunch of fuzzy chaps, they can’t even march let alone fight, to top it off he has given you the command of the munitions and supplies, do you look like a damn quarter master!!!!
You have to decide who gets what within the brigade, your troops have landed and are marching to the aid of all the brigades as they are facing an ever increasing enemy, looks like this could be the big one.
Prove yourself here DFC and you will be the next brigade commander of decent troops.
with that they deployed on the table...
Damn Fine Chaps Sir Steve, Viscount Vince, Sir "Mad Dog" Carter, and Pasha Jack.
The Mahdist's forces was led by Everett, his loyal followers being Andy, Andy and new boy Phil...
They had forces hidden on blinds, that they moved around the table until the empire troops spotted them or the Fuzzy chaps decided to spring forth...
The Fuzzy's Mass for the Mahdi...
They had the tough job of Killing all the Imperial troops...
Let battle commence...
"Oh Bearded Leader, show us the righteous path to victory..."
Damn Fine Mullah's Andy, Andy, Everett, and Phil...
Chas and the DFC's deployed their troops on the board, Steve with column No1 on the board retiring back to the main column, and the other chaps deploying across the bottom of the board...
The Heliograph section and skirmisher escort up in the hills spotting for Sir Chas "Mad Dog" Carter.
Everett "Oh Bearded One" and his loyal Mullah followers deployed their blind markers coming on the top end of the board chasing No1 Column and swarming towards the others Columns advancing into the fold...
The Mullah forces deploying on blinds initially, with No1 column in the far distance...
Early few turns saw the Empire forces advance forward, sending out the cavalry forward to spot, antagonising the Fuzzies to break cover, and No1 Column hastily forming square as the Fuzzies swarm in to attack, Everett forms his Nile arabs up to attack, and Phil's Fuzzy Wuzzy's come in from the flank...
Steve's No1 Column on their leisurely stroll back to the Nile...
Never fear relief is on the way...
"Form Brigade Square!!! incoming Fuzzy's..."
"Advance the cavalry..."
Early stages with the blinds advancing towards the square and the relief columns...
Heliograph Section up in the hills with views of the Empire forces advancing across the plains...
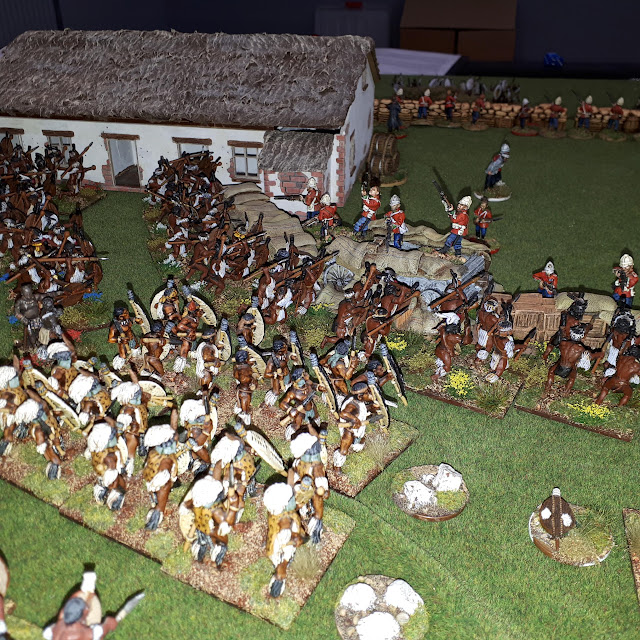
There is a multitude of fighting at No1 Column, thousands of Fuzzies and Arabs swarming around the square, the square holds, fighting off numerous attacks, but taking severe casualties, but inflicting even more...
Hold Them...
But, after much firing and fighting, the square of No1 Column falls into chaos, the two sides die to a man, but stunts the advance, the Highlanders and 49th form battalion squares trying to fall back on the relief slowly coming forward.
Fuzzies swarm over the dead of what remains of the square...
and advances on the remaining British units...
The square breaks...
Meanwhile the Blinds of Andy and Andy surge forward in the centre and on the their right, trying to take the Heliograph section out, and sweep around the Egyptian flanks, the Generals daughter is in peril, and luckily for her the card is drawn from the pile for the gallant leftenant to act, he mounts his steed and pulls her up and rides off, telling his men to hold he is off to get help and rescue the lady...
"Ah Sir, Fuzzies, and there seems to be rather a lot of them sir?!!"
Trotting off with the lady in tow to get help...
The Egyptians forming battalion squares in the distances...
Fuzzies attacking the hill...
Meanwhile in the centre the Mahdist Camels and Fuzzies formed up preparing to attack, readying themselves, whilst the Empire cavalry surged forward with the Bengal Lancers and the 21st, being led by Mad Dog Carter, they get the drop with the cards favouring them, so Mad Dog, dismounts his camel troops in line behind his camels as cover and charges forward with his Lancers, causing severe casualties and confusion in the Mahdist centre... the turn ends with the second Tiffin card being drawn, and low and behold the cavalry get the drop again and in he goes again with gallant charges again and again stalling the centre for a while...
Lancers, Charge!!!!
Action in the centre...
The fighting on the flanks becomes more and more desperate, with the 49th and Cameroons holding off successive attacks, the Naval Brigade of Vsc.Vince advances forward in line and deploys the Gatling and Gardeners to the front mowing down the gallant fuzzies whom come within arc of fire....
The remains of No1 Column battalion squares fighting off yet another attack from Phil's Fuzzies...
On the Empire left flank Pasha Jack decides to put his Egyptian's and Sudanese Battalions into square to try and fight off the growing Fuzzies advancing towards him, with his artillery on the back hill, they will support them, surely? The Heliograph detachment successfully hold the rocky high ground and push Andy's Fuzzy's back once more, however there are always more of them forming up to attack...
Corporal Jones card
"Move along nothing to see..."
The TDLIUE system operates with card system, in there are two tiffin cards, when both drawn ends the turn, but there is also a Corporal Jones card, which then indicates a special event card is drawn, this can effect various events good and bad for both sides...
The cards are pulled, and a special event of the Heat effecting the ammo, reduces the Empire firing by -1 effect, until the fresh ammo is distributed, in the subsequent turn another special event occurs with the Empire forces being affected with Water shortages, this reduces their movement by -1 on each die rolled, luck of the cards... or not as the case may be...
Form the men into square if you would...
The heat starts to takes its Toll...
The situation on the left flank...
After several charges with both the Lancer units Mad Dog Carter leads the remnants back behind the firing lines of the Camel Corps, as the Fuzzy Camel units mass forming up after being thrown into chaos by the Lancers, and their infantry mass beside them slowly advancing out of the cover they formed up in.
With that the Camels advance forward toward the Egyptian squares and the Camel Corp lines, they pour in round after round at the advancing masses...
"Allah Akbar..."
Camel Corp firing line, and the firm Naval brigade firing line in the background...
Fuzzies forming up, Fousands of em...
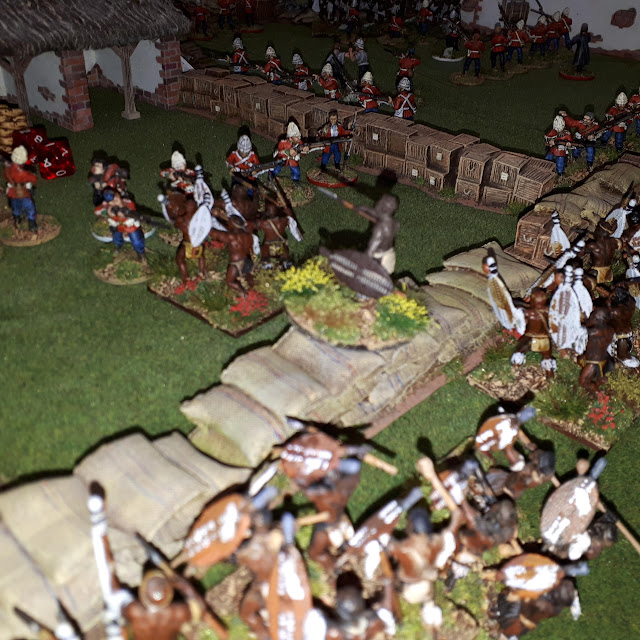
As the game started to draw to its final stages, the Cameroons were the last of No1 Column, being led by gallant Sir "Ladyboy" Steve, the square fought like demons holing off thousands of Fuzzies, as they drew closer to the firing line of Viscount Vince's Naval brigade, and the deadly machine guns, however Everett and Phil's final cavalry charges managed to break the line in one charge only restored by yet another charge by the lancers, and superior fire power, they were surprised by the vast distance the cavalry could cover...
Andy's fuzzies manage to overwhelm the Heliograph section on the hill, massing towards the Egyptian squares... but under artillery fire of the Egyptian guns, the other Andy's Fuzzies advanced towards the squares but was taking volumes of fire...
The final turns saw the fire power dwindle the fighting effectiveness of the Fuzzies, and the level of casualties on the Mahdist units was effecting their movement and overall morale, at this point I decided the Mahdi would draw his troops back to fight another day...
Steve's square holding to the last man!!!
DFC Sir Steve with his square...
View along the line in the last turn...
The Mahdi draws his Mullahs back to fight another day...
My thanks to all the guys that played the game, and put up with my whimsical umpiring throughout...