

"A Dacian army raided the Roman province of Moesia during the winter of 86 AD. This attack proved the catalyst for a major Roman counteroffensive the next year that was personally led by the Emperor Domitianus. That summer a Roman expeditionary army commanded by Praetorian prefect Cornelius Fuscus crossed the Ister (Danube) River and entered Dacia, intent on reaching the enemy capital of Sarmizegetusa. The Dacians ambushed the Romans at a narrow mountain pass called Tapae (Iron Gate Pass), inflicting heavy casualties on the unsuspecting legions. The defeat resulted in the loss of arms and catapults, the destruction of a legion (the loss of a legionary standard) and the death of Fuscus.
Dio Cassius, Roman History, 67.6.5; 68.9.3; Eutropius, Abridgement of Roman History, 7.23.
From Roman Empire at War - Don Taylor.
So the April meeting saw us off with another (the third) game using Augustus to Aurelian rules by Phil Hendry, as we develop our experience with this rule set, with Mr Steve providing his 15mm collection of figures incorporating a few Marion Roman stand-ins and some ancient Britons reworked into some rather good Dacian look alikes.

Augustus to Aurelian
I (JJ) provided the terrain and my newly minted stat-cards and tokens to set the stage and run our game, which was taking the process on by allowing us to see how well the Dacians will perform with these rules.
Followers of my personal blog, 'JJ's Wargames', will know that I have started a collection of 28mm figures to model the Romano-Dacian wars and this was an opportunity to see how well the rules capture the essence of those campaigns.
JJ's Dacian Wars
So below you can see Fuscus' Roman column on the march through the Iron Gate Pass with the Dacians on either side ready to spring their ambush.
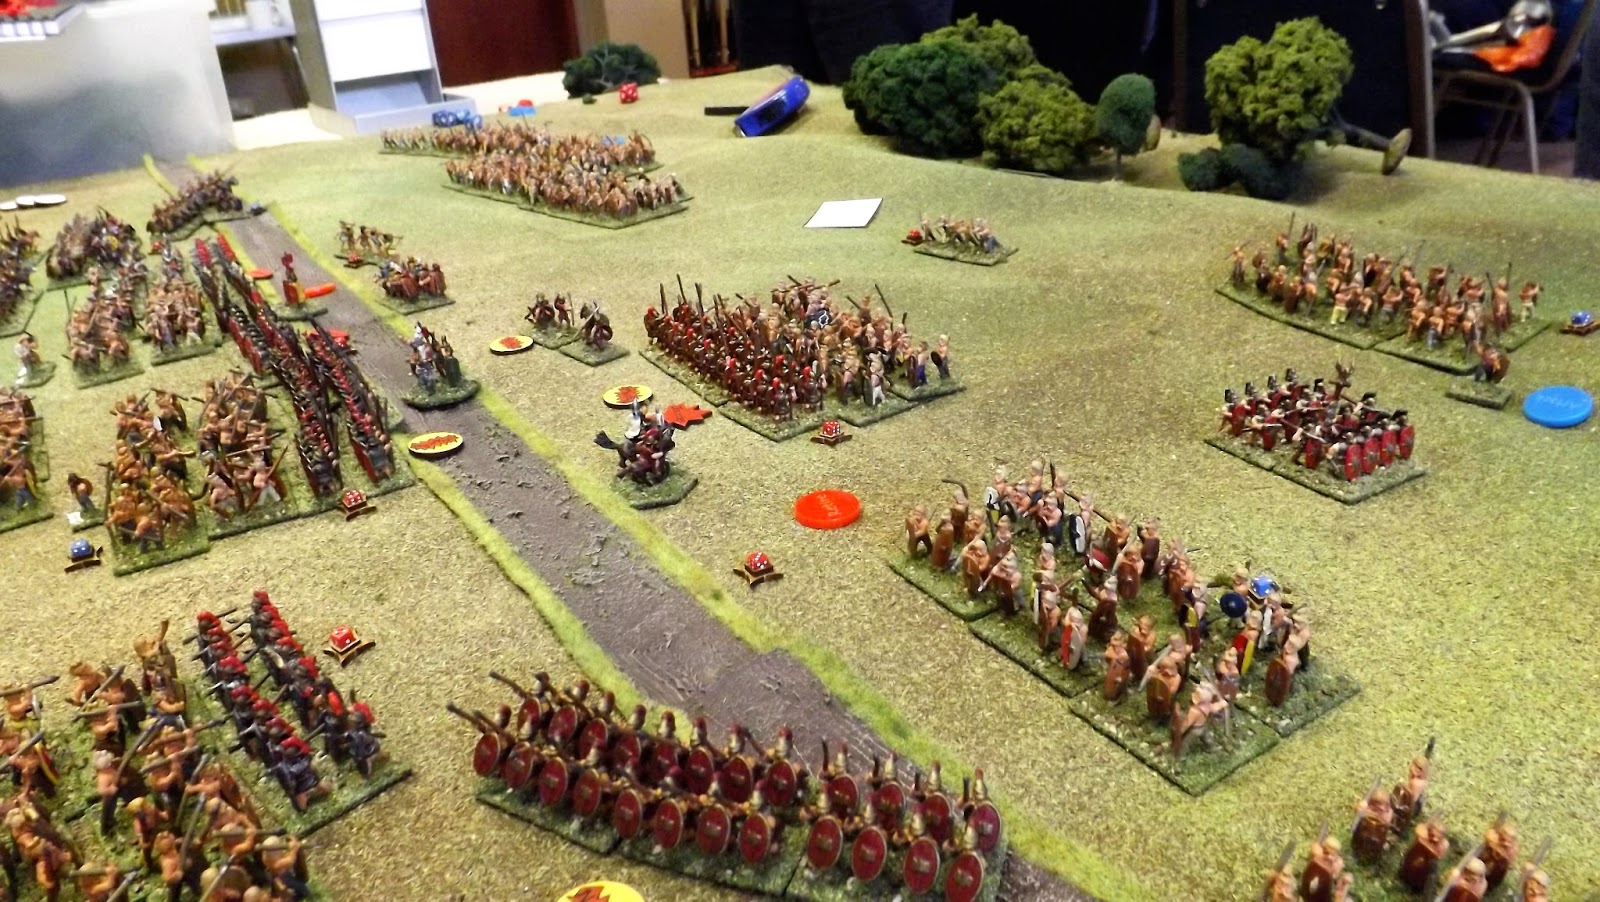
The forces fielded were roughly composed of;
Romans, 4 x Legionary & 4 x Auxiliary cohorts, 1 x Auxiliary Archer cohort, 2 x units of slingers, 1 x Auxiliary Ala cavalry, 1 x Auxiliary Light cavalry and 1 x Scorpio. Four Carpe Diem Counters.
Dacians with 12 x warband including 2 x Hardened warband, 1 x Falx warband, 3 x units of skirmishers, 2 x Sarmatian Cataphracts and 2 x Light cavalry. Two Carpe Diem counters.
 |
| Dacians, fouzands of em! I always think of this period of Roman Imperialism similar to 19th century Colonial Warfare |
This was going to be a test for the Dacians as their army was split and thus the two warband divisions on the left of the picture above were outside command and control of the Dacian army commander and so were limited to working under their attack orders with little opportunity for those to change during the game and little opportunity for giving 'Carpe Diem' activations with the two counters held centrally by the Dacian commander.
For the Roman commander the issue would be the problem of sorting the column out into a fighting formation before the warbands closed in on the road from two directions with little opportunity to shake out into the classic duplex/triplex acies formation that would allow the cohorts to provide mutual support in depth. Not only that but the Roman divisions were on advance orders and new orders would need to be issued whilst reacting to the surprise attack.
 |
| The Roman line braces itself as the warbands charge down the slope |
With Dacian warbands emerging from the tree-line either side of the narrow valley the leading Roman division of four cohorts coolly formed line to their left and advanced off the road to meet the Dacian division now fast approaching their line.
Behind them Fuscus personally brought up his second division to move up and behind his first along the road with his cavalry covering the front and rear of the column along with the artillery.
 |
| The rearward Roman division moves up to cover their comrades rear as Dacian warbands move in towards the road |
The position was not ideal, he thought, and this was a large Dacian army but the Roman army had faced worst situations and still come out on top so with Fortuna's blessing there was no reason that this would yet be a good day.
 |
| The Sarmatian and Dacian cavalry division moves against the rear of the Roman column, taking hits from Scorpio fire. |
The lead Dacian division seemed to cover the ground in no time and the front of the Roman column was drawn up in line ready to face off when with a roar three of the four warbands launched a fierce charge into the Roman line (Dacian warbands take an impetuosity test at the start of a new round if in charge range of the enemy normally requiring a 6 or less on 2d6 to maintain their control, and getting a plus one if they see one of their number charge forward).
The leading Roman cohorts reeled back towards the road in disorder as the ferocity of the charge hit their line.
 |
| Roman Scorpio crew calmly load their bolts as Sarmatian Cataphracts trot down the nearby slope |
 |
| Fierce fighting erupts as the lead Roman division struggles to hold the first Dacian attack |
 |
| Suddenly the lead Roman cohort is overrun and the Roman line looks vulnerable |
As this assault caused the Roman line to reel yet again the leading division reached break point with, over half the cohorts shaken or destroyed, the formation reverting to 'Retire' orders forcing the units remaining to attempt to break contact which only encouraged the Dacian warbands to make further impetuous attacks as their battle rage grew.
 |
| One Dacian commander (Ian you are touched by the Devil) was unstoppable here rolling four d10 needing 5's or less to hit |
 |
| Shaken (yellow and red) and Disordered (red) markers together with red mini dice showing hits flourish along the length of the Roman column |
His formations were a mess along the line of the road and the battle had broken up into huddles of resisters grimly hanging on as elements around them broke and tried to escape the carnage.
 |
| Cornelius Fuscus, like a true Roman General goes down fighting with his men as the falxes reap their gory harvest |
 |
| Bitter fighting as the Sarmatians close with the rear of the column |
Much fun with Augustus to Aurelian, I feel they really capture the essence of a particular period of Roman history and benefit from the focus they bring. Dacian warbands are quite different from their German cousins, who featured in the first two games, and the terrain and layout really influences how the armies fight.
If you are a Roman you want a straight up fight in your favoured Acies formation and ideally with open ground and protected flanks. You don't want to be marching through German forests or caught in an ambush in column on a valley road. Thus these rules reward the effort to create scenarios rather than just two battle lines going toe to toe which they will also facilitate just as well.
The draw chits that replaced the cards seen in the earlier games worked like a dream with no dropped card decks as they were being shuffled. The chits were simply gathered up at the end of a turn and returned to the 'bag of doom' as the Romans saw it.
I can't wait to get started putting the 28mm collection together and found myself yesterday visualising the look of it based on our game yesterday.
For more information about the game markers and chits used, just follow the link to JJ's seen above which covers off all the posts too date about Augustus to Aurelian and the Dacian Wars project.
Thanks to Mr Steve, Ian , Steve M, Nick and Charlie for a thoroughly fun day topped off with a pleasant beer or two enjoying the spot of great April weather we are having at the moment.
JJ
No comments:
Post a Comment