

This month the club was treated to a 15mm re-fight of the Battle of Asculum 279BC fought between the emerging power in Italy, the Roman republic and the Hellenistic mercenary army led by King Pyrrhus, invited into southern Italy by the Greek city of Tarentum in their struggle with the Romans to remain independent.
This period is very interesting in the development of Rome and its army as it is the first time that its forces went up against an Hellenistic army using tactics and forces that had enabled Alexander the Great to dominate the preceding era and would test the Roman system, coming up against massed pike phalanxes and elephants.
Pyrrhic War
Battle of Asculum
The rule set used for the game was an interesting choice as well, as followers of our club blog and JJ's Wargames will know that we have been play-testing Augustus to Aurelian (AtoA) rules by Phil Hendry for use with battles set in its intended era, the Roman Principate.
Fellow DWG member Nick was interested in trying the set out for this much earlier period in Rome's history where the formations and tactics can be somewhat different but the attraction of the core rules were enough to see if, with appropriate modification, they could be made to work with elephants and pikes.
The basic rules were, in our opinion, ripe for adaptation, with Phil already having included Phalanx rules into his original set to allow for Emperor Caracalla's pseudo-phalangites, to this Nick added a few other ideas including rules for Elephants and some modifications to the command system, which were only small changes to the core system. After a test game away from club between Nick and Steve L to test the new rule additions we present the game played yesterday at this months club meeting.

http://toofatlardies.co.uk/product-category/avgvstvs-to-avrelian/
http://wargamesbuildings.co.uk/Augustus-to-Aurelian-Roman-Token-Set
Nick spent a bit of time producing and sending out the necessary briefings and positional maps so we could speed up the process of game set up once we got to club.
The map below shows the part of the battle of Asculum we were representing with the main Roman and Pyrrhic lines facing off against each other, whilst to the Pyrrhic rear right flank lay the Roman III Legion situated on a woody hill and threatened by large forces of Greek style hoplites supported by Pyrrhic cavalry.

The Roman battle plan assumed the Pyrrhic line would be keen to close and attempt to overturn the Italian foot on the Roman right flank with their effective Samnite infantry supported by massed pikes to their right to help crush the Roman IV Legion and roll up the line.
To prevent any such manoeuvre the Roman command opted to attack in echelon bringing the Campanian hoplites supported by the IV legion in against the Pyrrhic right flank to turn and roll up the Epirote phalanx whilst using our secret weapon, the war wagons to fend off the Pyrrhic elephants as the cavalry attacked forward to link up with the III Legion as it attempted to break out off the hill and add to the pressure of the Pyrrhic right flank. The Roman right flank and the Italian foot would refuse the flank aiming to cause the Samnites to do a lot of marching that would see them hanging out in the wind as their line was rolled up by Romans and Campanians - what could possibly go wrong?
Below are the forces listed together with pictures of our initial set ups:
Battle Asculum Day Two
Roman List
Roman Army Commander : Publius Decius Mus Level 4
·
2 x Medium Roman Cavalry
Roman Infantry Right Wing : Italian foot
·
Commander
Level 2 (C&C Rating 6)
·
2 x Leves Javelins
·
2 x Italian Medium Infantry Hoplite Long Spear
·
2 x Italian Infantry
Roman Infantry Centre : Roman IV Legion
·
Commander Level 3
·
1 x Leves Javelins
·
2 x Velites
·
2 x Hastati
·
2 x Principes
·
1 x Triarri
Roman Infantry Left Wing : Campanians
·
Commander
Level 2 (C&C Rating 6)
·
2 x Leves Javelins
·
2 x Campanian Medium Infantry Phalanx Long Spear
·
2 x Campanian Infantry
Roman Left wing : Roman Cavalry
·
Commander Level 2 (C&C rating 7)
·
1 x Medium Roman Cavalry
·
2 x Roman Cavalry
·
1 x Medium Campanian Cavalry
·
1 x Campanian Cavalry
·
2 x Light Cavalry
In Support Anti Elephant
·
2 x War Wagons
·
2 x Velites
III Legion
·
Commander Level 3
·
1 x Leves Javelins
·
2 x Velites
·
2 x Hastati
·
2 x Principes
 |
| View of the two lines looking from behind the Roman left flank with the III Legion out on the hill top left |
Battle Asculum Day Two
Pyrrhic List
Pyrrhic Army Commander : Pyrhus
of Epirus Level 4
·
2 x Royal Guard Cavalry
Holding force.
·
Commander Level 3
·
2 x Medium Epirote Cavalry
·
2 x Macedonian Cavalry
·
2 x Light Cavalry
In Support Elephant
Force
·
2 x Elephants
·
2 x Light Infantry
Pyrrhic Epirote (Facing IV Legion)
·
Commander Level 2 (C&C rating 7)
·
2 x Medium Phalangites Infantry Pike Phalanx
Drilled
·
2 x Phalangites Infantry Pike Phalanx
·
2 x Skirmishers Slings
Pyrrhic Greek (Facing
Campanians )
·
Commander Level 2 (C&C rating 6)
·
2 x Medium Hoplite Infantry Phalanx Long Spear
·
2 x Hoplite Infantry Phalanx Long Spear
·
2 x Skirmishers Javelins
Samnite Division (Italian
foot )
·
Commander Level 2
(C&C rating 7)
·
2 x Medium Linen Infantry Long Spear (Small Unit)
·
1 x Linen Infantry Long Spear (Small Unit)
·
3 x Linen Infantry Pila (Small Unit)
·
2 x Light Infantry
·
1 x Leves Bows (Small
Unit)
Supporting Force
·
Commander Level 3
·
2 x Athamanians
Hoplite
·
1 x Acarnanians
Hoplite
·
3 x Samnites Infantry
 |
| View from the Roman right flank with the white shielded Samnite infantry to right of picture with plenty of marching to do to get at the Italians on the left of picture |
So with both armies set up we were off and the first chits were being pulled from the bag. AtoA uses a chit or card driven activation system common to many 'Lardy' style games and a favourite activation mechanism in the DWG club.
Better formations and leaders get more chits to make it more likely for them to activate first and with AtoA this is incorporated with 'Carpe Diem' chits which start the game in the players hand representing better command and control before the armies come to grips when the commanders influence on matters starts to decline.
 |
| Pyrrhic cavalry face back and to the front with elephants in close support |
The Roman command was keen to bring on the battle in the order they had planned for and so early play of these chits was needed to make this happen.
We had a large number of chits in play so to balance the game back towards that declining control, the chits would be returned to players but with only a 33% chance of getting them back.
 |
| The Epirote line of hoplites and Pikes |
As the game progressed this lack of chits would become all too apparent for the Romans, but by then it was down to the soldiers to do their stuff.
 |
| Those elephants would be a problem as they were a new weapon to the Roman forces |
The Roman plan started with mixed success as the cavalry came to grips first with the Pyrrhic horse getting the best of the first exchanges causing a few nervous glances from the legate commanding the IV Legion.
 |
| The III Legion prepares to break out |
However, soon after, the Campanian hoplites struck at their Epirote opposition and after stiff fighting, that left both side shaken, the Epirote division was forced to retire from the line as its general rode about attempting to rally his men.
 |
| The Epirote hopiltes supported by cavalry prepare to attack the Romans on the hill |
As the Campanians got stuck in, they were joined soon after by the first line of the Roman IV Legion as it closed on the Epirote phalanx in duplex acies formation.
However despite the volley of pila that struck the phalangites the Roman attack was held as the pikes refused to give ground.
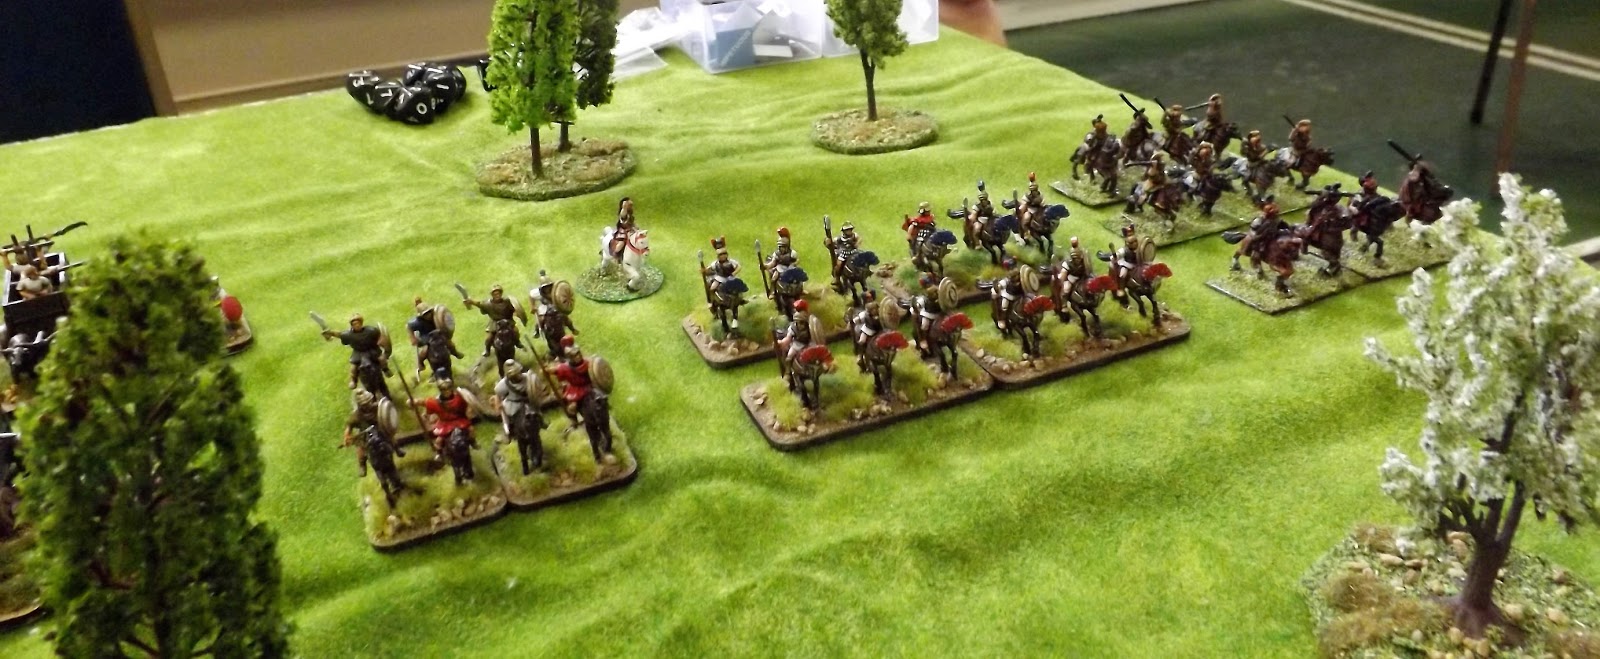 |
| Roman cavalry ready to attack towards the III Legion |
With the infantry lines on the Epirote right going toe to toe, the Roman III Legion attempted to break out off the hill but a combination of poor chit draws and a lack of Carpe Diem meant that the Epirote holplites with support from copious amounts of cavalry were able to quickly amass on the Roman left forcing them to turn and fight.
 |
| The Roman line with Campanian hoplites closest to camera, then the IV Legion in the centre and the Italian foot top left |
The cavalry battle out on the Roman left degenerated into a typical to and fro affair until the Campanian mediums started to get the upper hand and driving in their Epirote opposition. But by this time events elsewhere had already started to make their efforts irrelevant.
 |
| The principle attack formation was the Roman IV Legion in the centre |
 |
| The powerful Epirote phalanx |
The Campanian infantry had done sterling work in initiating the Roman attack and taking their end of the line but the battle had left them vulnerable to counter-attack and that was when they were hit by the elephants.
 |
| The Samnite infantry on the Epirote left flank |
 |
| King Pyrrhus leads his companion cavalry along the rear of the Epirote line |
 |
| The Roman attack begins with the echelon approach starting to take shape as the III Legion moves off the hill |
The attack proved irresistible and the Campanians were forced to retire which left both the III and IV Legions exposed to attack in detail with little chance of any support soon.
 |
| The Roman right flank is refused with the Italians hanging back to cover the flank of the IV Legion |
 |
| Battle is joined as the Roman and Pyrrhic cavalry joust on the flank nearest to camera |
 |
| As the Campanian infantry celebrate success at driving in the Epirote hoplites they are hit by an elephant counter-attack. Where are those war-wagons when you need them? |
The Roman war-wagons were further back than intended due to the laborious movement rates of ox drawn wagons and thus despite the best efforts of the velites to shower the elephants in javelins the Roman left was forced back.
 |
| Pyrrhus leads his elite cavalry over to his threatened right flank |
 |
| The III Legion is thwarted in its attempt to get off the hill and link up with the Roman cavalry |
 |
| Those Samnites are looking tired marching around on hot day like this |
Meanwhile the Roman IV Legion was locked in mortal combat with the Pike phalanx as the Samnite hoplites closed on the Italian infantry with the threat of surrounding the Roman infantry unless they sought to break contact soon.
 |
| The Italians turn to face the Samnites as the Roman IV Legion hits the Epirote line |
The Pyrrhic line had held firm and resisted the Roman attempt to turn it and thus we determined that with the Roman cavalry achieving a level of ascendancy of the Roman left, now would be the time for the Romans to start to break off and we ended the game there with a Pyrrhic victory.
 |
| Epirote hoplites mass against the Roman III Legion as it comes off the hill |
The game had run along quite smoothly despite half the players not having played AtoA and the other half not having played for a while whilst also getting to grips with a few rule adaptations.
Nick and Steve are to be congratulated with coming up with some suitable additions to allow the rules to handle this period of Roman warfare and with my own collection of 28mm Roman EIR's and Dacian's about to be worked on I found myself eager to play more games with these rules together with thoughts about doing this period in 28mm Victrix plastics - now there is a thought!
Thanks to Nick for organising the game and all the DWG players for a very entertaining and fun afternoon of play.
Very nice report and useful Army lists, thanks and keep up the good work
ReplyDeleteWhat a great looking game, beautiful report with fantastic armies...it makes me want to play antic again, thanks!
ReplyDeleteThanks for your comments chaps, glad you enjoyed the read and much appreciated
ReplyDeleteJJ
VERY NICE REPORT AND WONDERFULLY PAINTED MINIATURES.
ReplyDelete