Labels

Showing posts with label 'O'Group. Show all posts

Saturday, 15 November 2025

O Group - Arras 1940 Scenario updated to 1944.

 
Because the Club had it’s AGM this month I decided that it would be easier to use a scenario that did not require huge amounts of terrain. I looked at this one and remembered the fun we had playing in it’s correct format. However, all my toys are 1944 onwards. So, using my spreadsheet skills, I updated the equipment to what I have. As it is 1944, I had to give the British a few extra toys (aircraft) and both sides had unrestricted mortars, and the artillery was more balanced for the period.

O-Group has become a firm favourite battalion-level game with
several members of the club and Steve has developed his 15mm collection around them. 
https://toofatlardies.co.uk/product/o-group-rule-set/

The British launch a surprise attack which catches the Germans with their trousers around their ankles, so to speak.


The games started in the usual manner with combat patrols (CP’s)being deployed all over the place by both sides. After a couple of turns the British decided to convert their CP’s, to physical platoons on the table. The reason being to shoot away the German CP’s thus preventing them from deploying. Pretty sound you would think, but the victory conditions were to inflict three FUBARS (12 Sections) on the Germans. This was all in the briefing handed to the players.


From turn 4, the Germans were able to dice to reinforcements. So there appeared on the German left
flank a pair of StuGs. Now this had the effect of forcing the British to bring on their armour. Consequently, there appeared on each flank a pair of Cromwell’s. This caused the Germans to attempt an artillery strike. No luck. Those damned radios!!


Eventually the Germans managed to deploy on CP’s and infantry actions took place with exchanges of killed sections. The Germans kept trying for their artillery strike and eventually it happened, with a vengeance. Rocket attack that incorporated two Cromwell’s and an infantry section. The first Cromwell was damaged, the second, after some great saving throws only had shock. As did the infantry platoon.


This carnage upset the British so they called in an airstrike. From the cab rank in the sky a Typhoon appeared and attacked the two StuGs. As with the German artillery the result was mixed. One Stug was destroyed whilst the other only received one shock. 


From their reinforcements the Germans the received two PzIV’s and a Flak 36 88mm. Eventually the British managed to inflict a FUBAR on the Germans. There followed a series of exchanges between the remaining StuG, plus the 88mm and the British remaining armour. This then forced the British to bring on the Churchill’s they had kept back. They pushed forward on the right flank. On the German right flank there appeared the two PZIV’s 


Time was running because of the AGM. The battle was called as a German victory as they prevented the British victory conditions.


We then retired to the pub, as all good wargamers should. There was an exchanged of emails later when all the things we had missed were highlighted.. As we hadn’t played for nearly 12 months, we didn’t do too bad. We do have a couple of games planned so hopefully they will be better. Any omissions or errors were down to me. It was my game.

My thanks to Bob and Vince, our Germans, and Steve M and Matt, our British. The game was played without fisticuffs or handbags being wielded, and I enjoyed the power of the umpire despite the errors.

Steve L

Saturday, 2 September 2023

O Group. An Introductory Game - Counter Attack at Grainville


Our game for August 2023 is my take on a scenario from the 1944 Battle for Normandy scenario book by David Brown. 

https://toofatlardies.co.uk/product/1944-normandy/

Along with a couple of other scenario books by David Brown these were designed specifically for O Group.


This counter-attack was typical of the Germans at this period, attack piecemeal, instead of building up
their forces and attacking with a larger force. Battalion forces instead of brigade or division or even larger. Thank goodness for Hitler's orders I say.


This game was played by three people who had limited experience of O-Group. One had never played and two had played twice. Unfortunately, our fourth was ill so couldn’t play so I stepped in. Our game started with the British deploying and noting their ambush units and the German forces deploying behind their start lines. From the first move the Germans pushed forward mainly on the left and into the church. The British also moved towards the church and there ensued a firefight. The British were pushed back and the church was occupied.


The next move the British managed to use one of their artillery missions. This was a Divisional Mission
and Heavy artillery hit the church. As the Church and Yard was a three section BUA the mission hit all three units. Two were forced to move out or risk losing sections. The 3rd only had one suppression so could afford to take the extra suppression to stay in place.


The Germans next deployed a platoon of Panzer IV’s on the right and engaged British infantry with HE.
These in turn were engaged by a Churchill 75mm and knock out on of the PzIV’s.


The Germans next deployed a platoon on Panthers on the left and advanced and engaged British infantry with HE supported by two platoons of infantry. The Panthers moved ahead of the infantry and triggered an ambush. A 17pdr tried to fire at the Panthers. Now, despite it being close range which gives a +1, a double 1 throw is always going to be a miss.


The Panthers withdrew a long way with their infantry support. The Germans next used one of their artillery missions which was particularly effective suppressing two units. These suppressed were then close assaulted by German infantry. The results were that the British went from not having 1 FUBAR into being into their third. The Germans just required three more sections to inflict a defeat on the British.

The Germans, meanwhile, were not having it all their own way and were into their second FUBAR.

After one final push on the Germans inflict the final casualties for the third Fubar and win the game.


I hope that the game played will encourage others to take up the rule set. I have had many games with
a group of friends having just finished the Barbarossa to Citadel scenario book. 

Our consensus was that these books gave a balanced game with both sides in the game all the time. We are moving on to the other two scenario books. As in all rules I don’t always agree with everything in them, but I do like these a lot. I also like many other sets of David Brown's rules. His scenarios always give a balanced and enjoyable game.


I would like to thank the relative newbie Brits, Mark and John and the never played before German Rob, I just did as I was told.

The terrain cloth is from Tiny Wargames. The figures and vehicles came from all over the place, and I can’t remember where now. Building by Hovels and a company which is no longer in being. Trees mainly from Buffers of Axminster and the walls and hedges from eBay. Roads by Fat Frank. The BUA’s I made from bits and bobs I had lying around. I made them generic so they can be used for other eras.  

Saturday, 24 June 2023

O-Group in the Desert III - Beda Fomm 1941

Beda Fomm - Brian Sanders

My third foray into the desert again saw three out of the four players with limited/to no knowledge 
of  O-Group. Putting on three games in the first half of the year is a bit of a first for me, but there’s no better way to get to know the rules.

Map illustrating the retreat of Italian forces along the coast route in the Western Desert and the inland route of the Empire blocking force that would cut off their retreat at Beda Fomm

This time I used the desert scenario from the author, Dave Brown, based on the battle of Beda Fomm in 1941, published in the latest Lardy Magazine. 

https://toofatlardies.co.uk/product/lard-magazine-2022/

This pitted a large, retreating Italian force from their 10th Army, trying to force its way through a smaller, British blocking force, called Combeforce, named after its commander Lt Col John Combe.


The map was mistakenly left out of the magazine article and subsequently published on the Lardy Forum and reproduced here should you wish to give the scenario a go.

Stephen & Tom took the attacking Italians, leaving Colin and brand new wargamer Ben with the defending British.


The British battalion is ‘worn’, having only two companies available. This does mean they take no further casualties from any 1’s rolled during the attacker’s initial dice roll (p18 in the rulebook). 

They are supported by two sections of 2-pdr anti-tank guns and A13 & A10 tanks.


The Italians have one regular company of three platoons and two 2nd line companies of two platoons
each, with two tank platoons on table and a further two arriving on turns 4 & 6.


In this scenario the Italians must either get the British to take three FURBARS or capture and hold the BUA at the end of turn 12. The game is extended to 14 turns if the British take their reserves.

The limited ammunition rule is used in this scenario, requiring a roll of 8 to achieve a ‘zeroed in’ result for the mortars.


The British gain a minimum of two ambush sections from their deployment roll, regardless of dice rolls.

All reserves arrive automatically on the turn stated.


Initial dice rolls saw the British gain a number of Combat patrols (CP’s), with one further ambush unit, so the 2-pdr anti-tank guns were indicated to me as being in ambush, one on each low rise. With an infantry platoon in the rough on the left flank The Italian roll also saw a number of CP’s available, plus three platoons deployed on table.


Stephen & Tom took a company on each side of road, holding the regular company and antitank rifle off table. The first two tank platoons arrived on the road.


The Italians advanced, with no indication of where the British were, apart from a few CP’s. The speed of their advanced hampered by rolling three consecutive ‘hesitant’ companies!


As the Italians pushed their infantry forward on their right, a multiple platoon target presented itself to the British FOO, who had some success causing shock on both platoons and tying up that Italian flank for a number of turns as they struggled to rally off shock and/or move, while also prioritising their attacking options.


As the Italian armour advanced down the middle, both antitank guns deployed from ambush, hitting absolutely nothing! They then became ‘bullet magnets’ next turn and subsequently vanished, having contributed little to the British defence!


Numerous infantry fire fights were going on at this time, with shock being applied and ‘rally’ actions
attempting to recover.

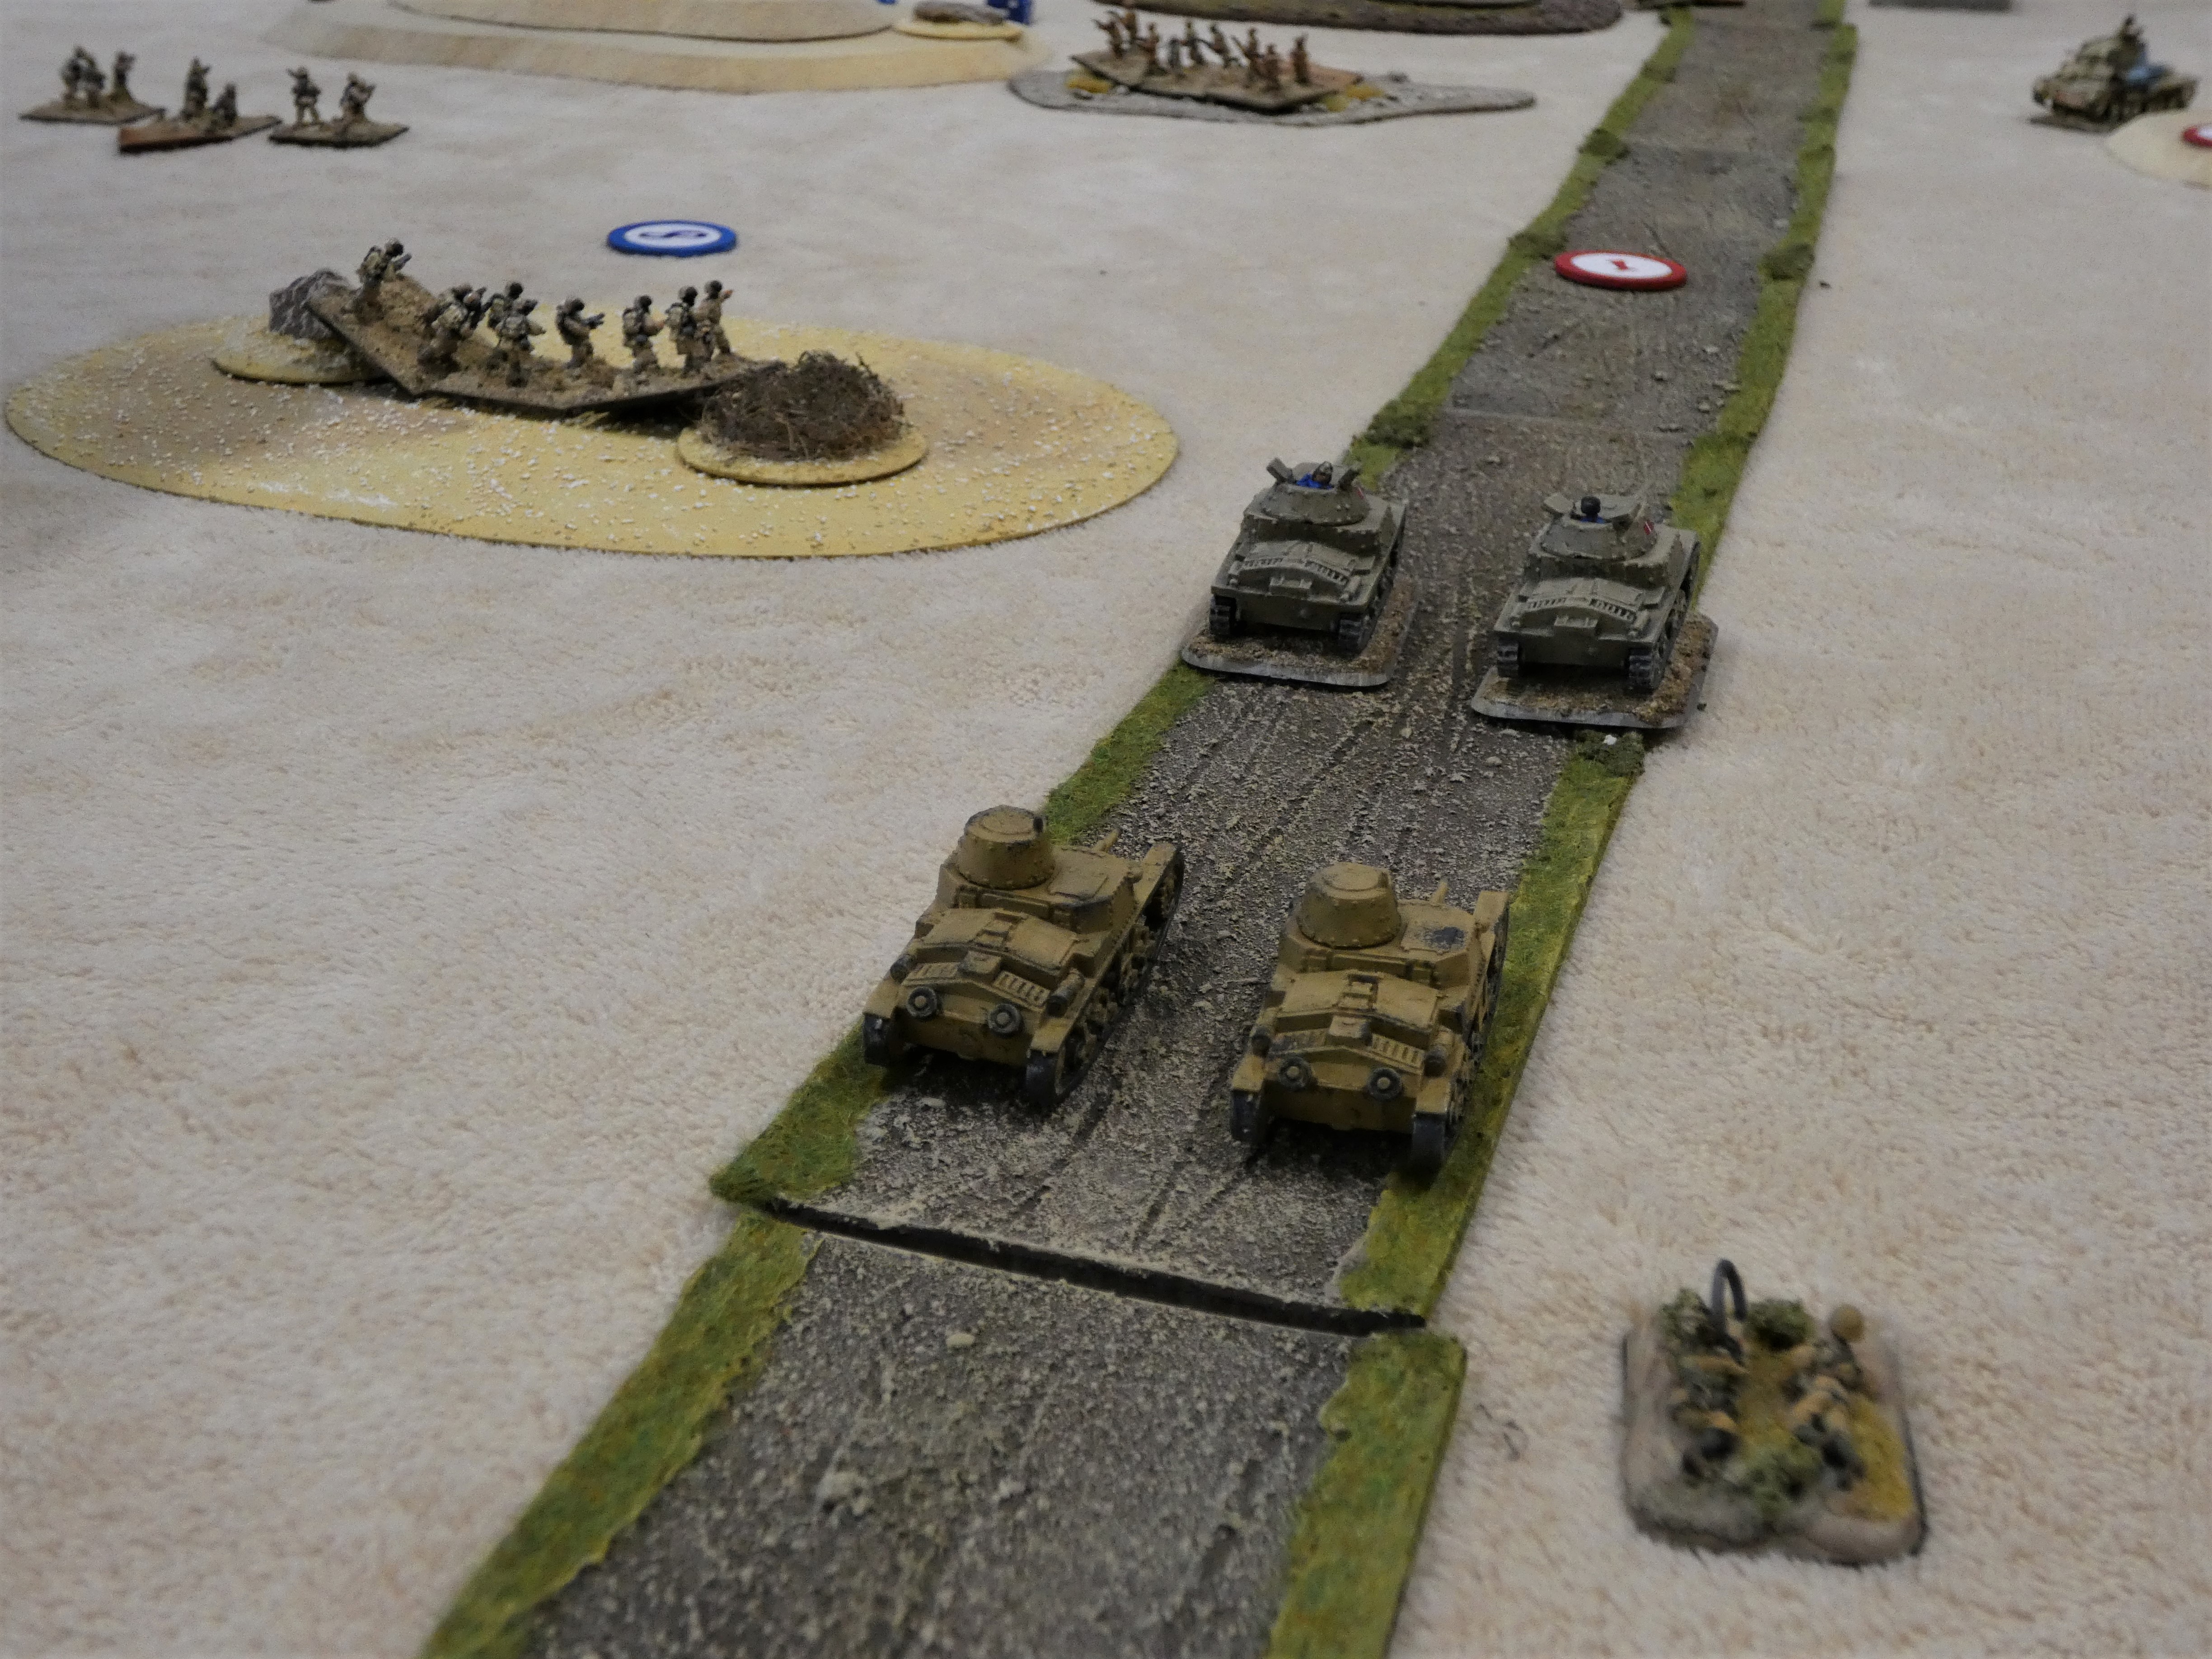
With the British armour appearing on their left flank and a further Italian armour platoon arriving on the road, the scene was now set for a long-range armour battle, which dominated the centre of the table for a number of turns.

The A13/A10’s are fairly evenly matched, with both having an AT of 5 with the M11/39 on 4 Front armour is 4 & 5 for the A13/A10 respectively and 5 & 4 for the M13/40 – M11/19.


The British had also deployed their reserves on turn 5, choosing to take a 37mm portee (I know, it’s a 2pdr portee!) over a Vickers Mark V1, thus extending the game to 14 turns.

As both sides banged away, first blood went to the British, as an M13/40 brewed up and another took shock, both M11/39’s were also taking some damage.

On the Italian left flank, the other M13/40 squadron was fighting back, with the A13 soon destroyed and one of the A10’s taking damage. The portee continued to chip in with further damage to the M11/39’s but was unable to find that killer blow.


The tank battle was only likely to end one way, with the anti-tank guns not in play and not helped by Ben’s shooting dice! With 7’s required to hit and 2 tanks firing, Ben managed to roll double 1, double 2 in the British turn, followed by exactly the same roll in the react phase!! The writing was on the wall for the British Armour!

In between the ongoing armour battle, the Italian infantry and been slowly pushing forward, forcing the British to deploy theirs to counter. And although the Italians were starting to make progress, they were approaching two FUBARS, with the British on one.

As we approached turn 12, with two turns to go and the Italians on two FUBARS due to ongoing infantry losses adding to the armour, Stephen was heard to say, ‘let’s call it a day, I don’t think we can win’.


With time still left in the day and a possible outcome either way, we decided to play on. The Italians launched an infantry assault on their left and a British platoon evaporated. The British then counterattacked and pushed the victorious Italians back. The Italians counter attacked again! the game hang in the balance!

With a final devastating round of fire, the Italians inflicted two further FUBARS on the British, victory
to the Italians!!


Historically, the Italians were unable to break through and surrendered en mass, once elements of 7th Armoured Division started to appear.

I felt the scenario played well, with the outcome in the balance right to the end. The map for the scenario appears to suggest playing width ways, but we played length ways on a 6 x 4. I think the game would have been over quite early otherwise, with more of a predicted win for the Italians. I’d certainly like to play it again length ways to test my theory.


Mistakes? As per usual there were a couple. I treated soft skins as being able to hold shock, when, in reality, for each hit, a KIA roll is made, with a 5+ knocking out a section (p60) so the portee may not have hung around as long as it did!

I didn’t penalise the ‘2nd line’ companies by deducting 1D6 if they fired and moved, or make the rout test 5+ (p14).

Finally, and this could have been a game changer, re reading the scenario as I wrote this, I’m not sure I made the two 2nd line companies only two platoons each!! Oh well, it made for a good game. 

Thanks to Stephen, Tom, Colin and Ben for playing in a good spirit and waiting while I looked up the rules, or while Stephen and me had a lengthy discussion on interpretation!!


It wouldn’t be a wargame otherwise!

Next up, either a refight of the scenario, or I’d like to do more of a tank company battle.

Infantry figures are a mixture of Flames of War, Peter Pig & Skytrex. Armour mainly Flames of War, with the M11/39’s from Butlers printed models.

Steve M

Monday, 30 January 2023

O Group - In the Desert


O’ Group in the desert

Having been introduced to O group around 18 months ago, curtsey of Steve L and really enjoying the first foray, I’d been keen to bring out the 15mm desert collection, which hadn’t see the light of day for some time.